


Conversation List and Details
The conversation workspace consists of the left-side navigation, conversation list, message details, and right-side information panel. It is used to centrally handle customer messages from various channels. Here, you can find and assign conversations, reply to customers or record internal notes, change statuses, and maintain associated customer and conversation information.
The menus and actions displayed on the page are affected by project permissions, channel type, and enabled features.
Browse the Conversation List
Use Fixed Views
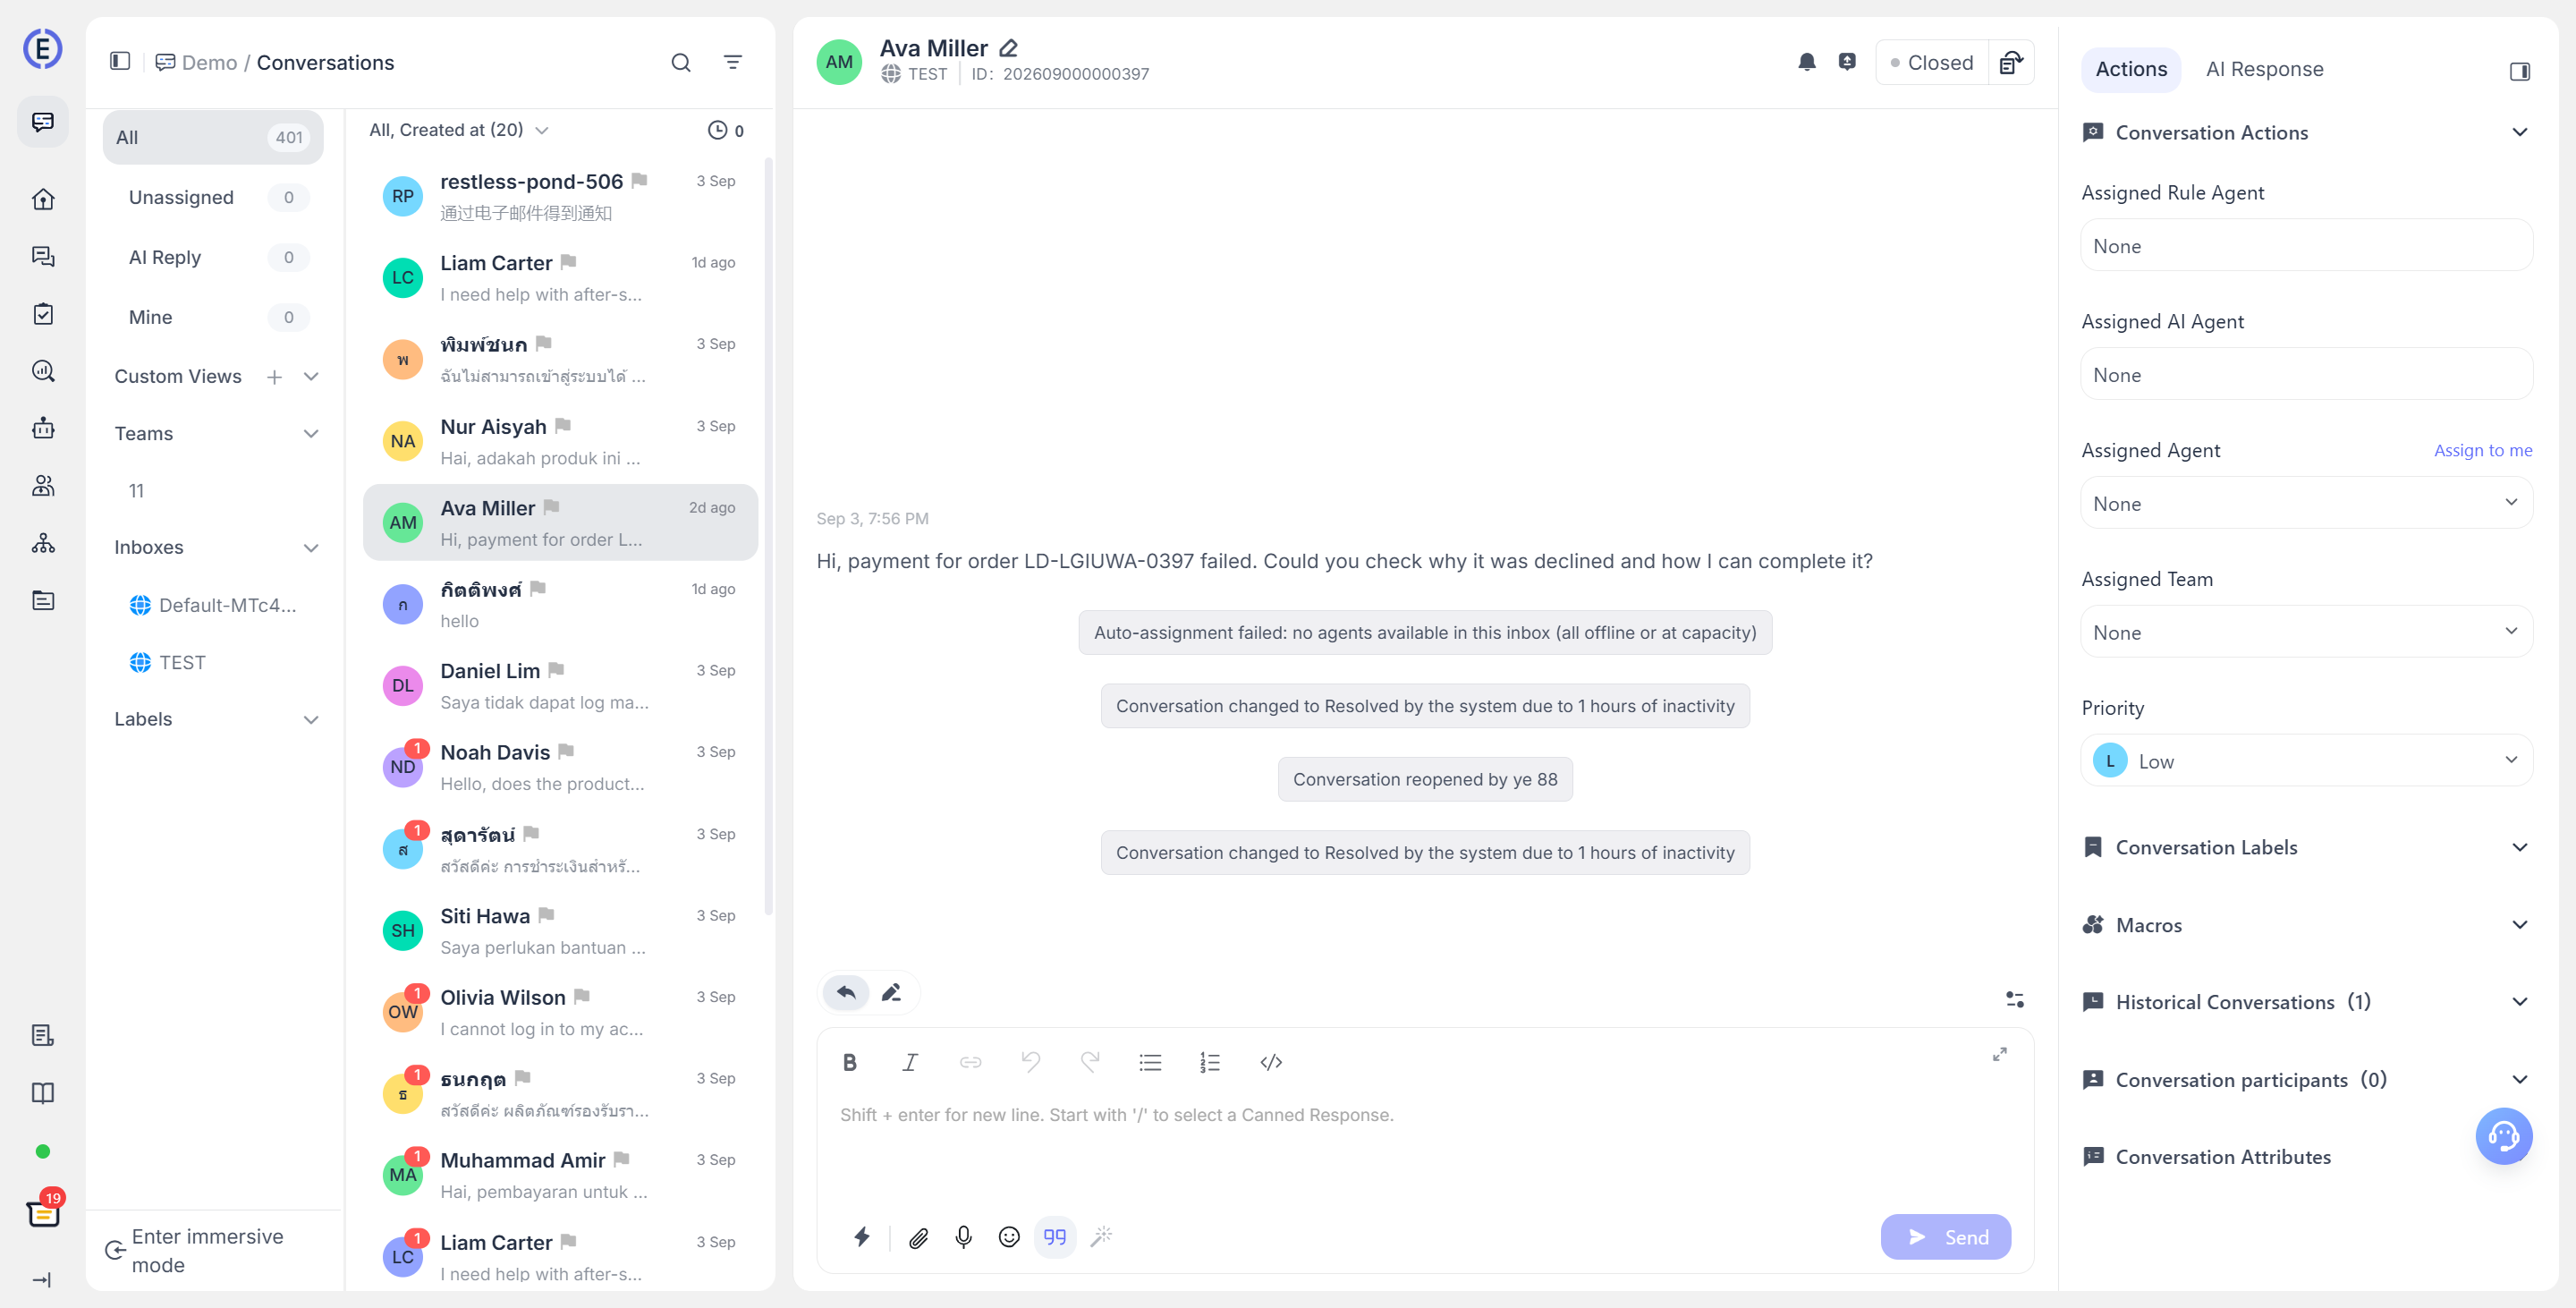
Under Conversations on the left, you can switch the list using the following built-in views:
| View | Purpose |
|---|---|
| All | View all conversations you currently have permission to access. |
| AI Response | View conversations currently being handled by the AI Agent. |
| Unassigned | View conversations that have not yet been assigned to an agent. |
| Mine | View conversations handled by the currently logged-in member. |
On the left, you can also browse conversations by Team, Channel, and Tags. These categories and their content are displayed only when you have the corresponding viewing permissions.
The list cards display summary information such as the contact, most recent message, time, channel, tags, and priority. In the All view or filtered views, the assignee is also displayed. Click a card to open the corresponding conversation.
Search, Sort, and Filter
The search box at the top right of the list lets you search by message content. After you enter at least two characters or enter numbers directly, the system starts searching conversations within the current scope. Search currently supports exact matching for the conversation ID and contact identifier fields, and fuzzy matching for contact names and message content.
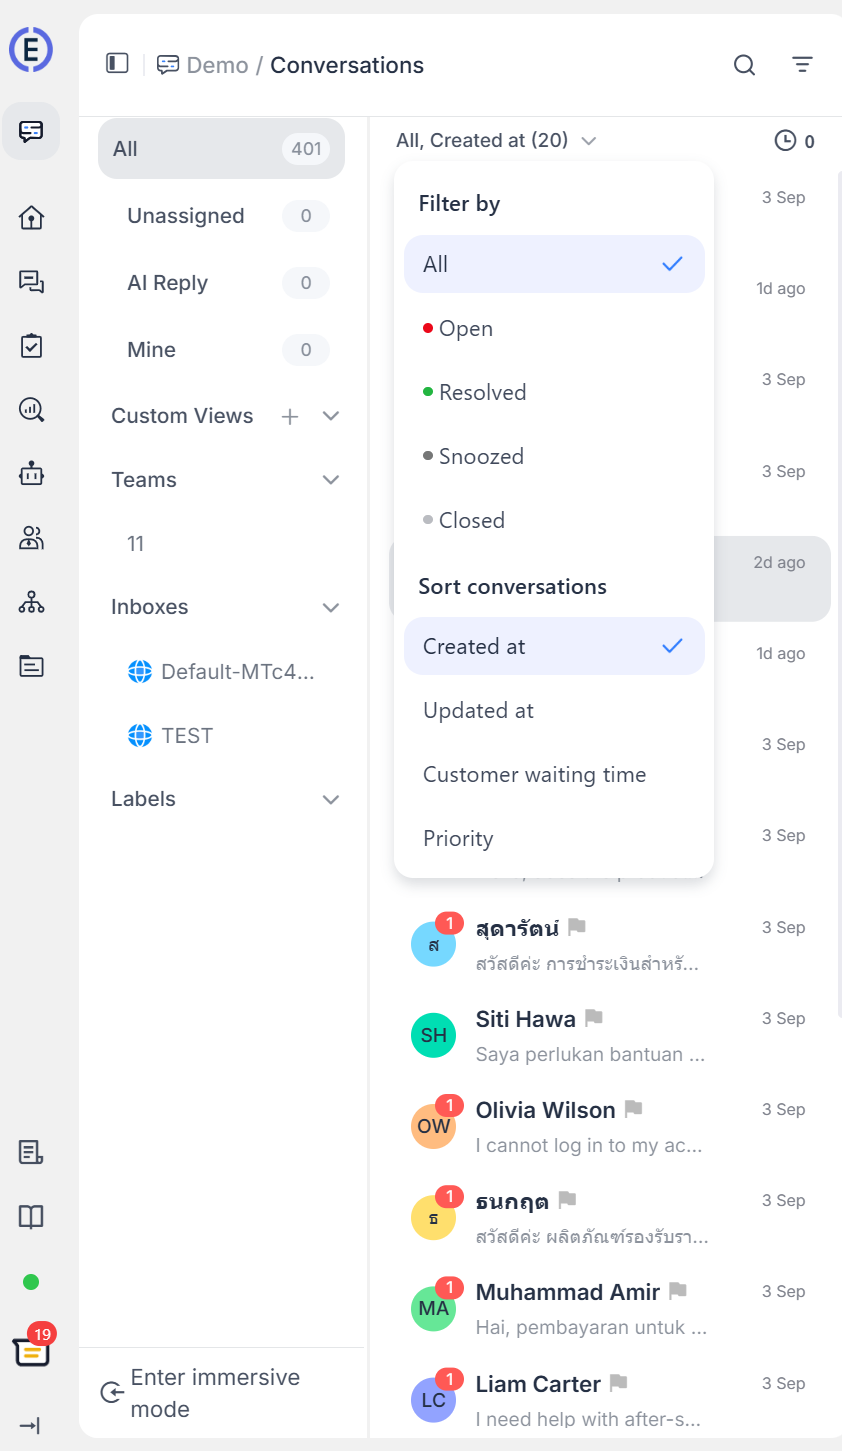
The dropdown menus at the top of the list can be used to combine the following conditions:
- Status: All, Open, Resolved, Snoozed, or Closed.
- Sort by: Created time, Updated, Customer waiting time, or Priority.
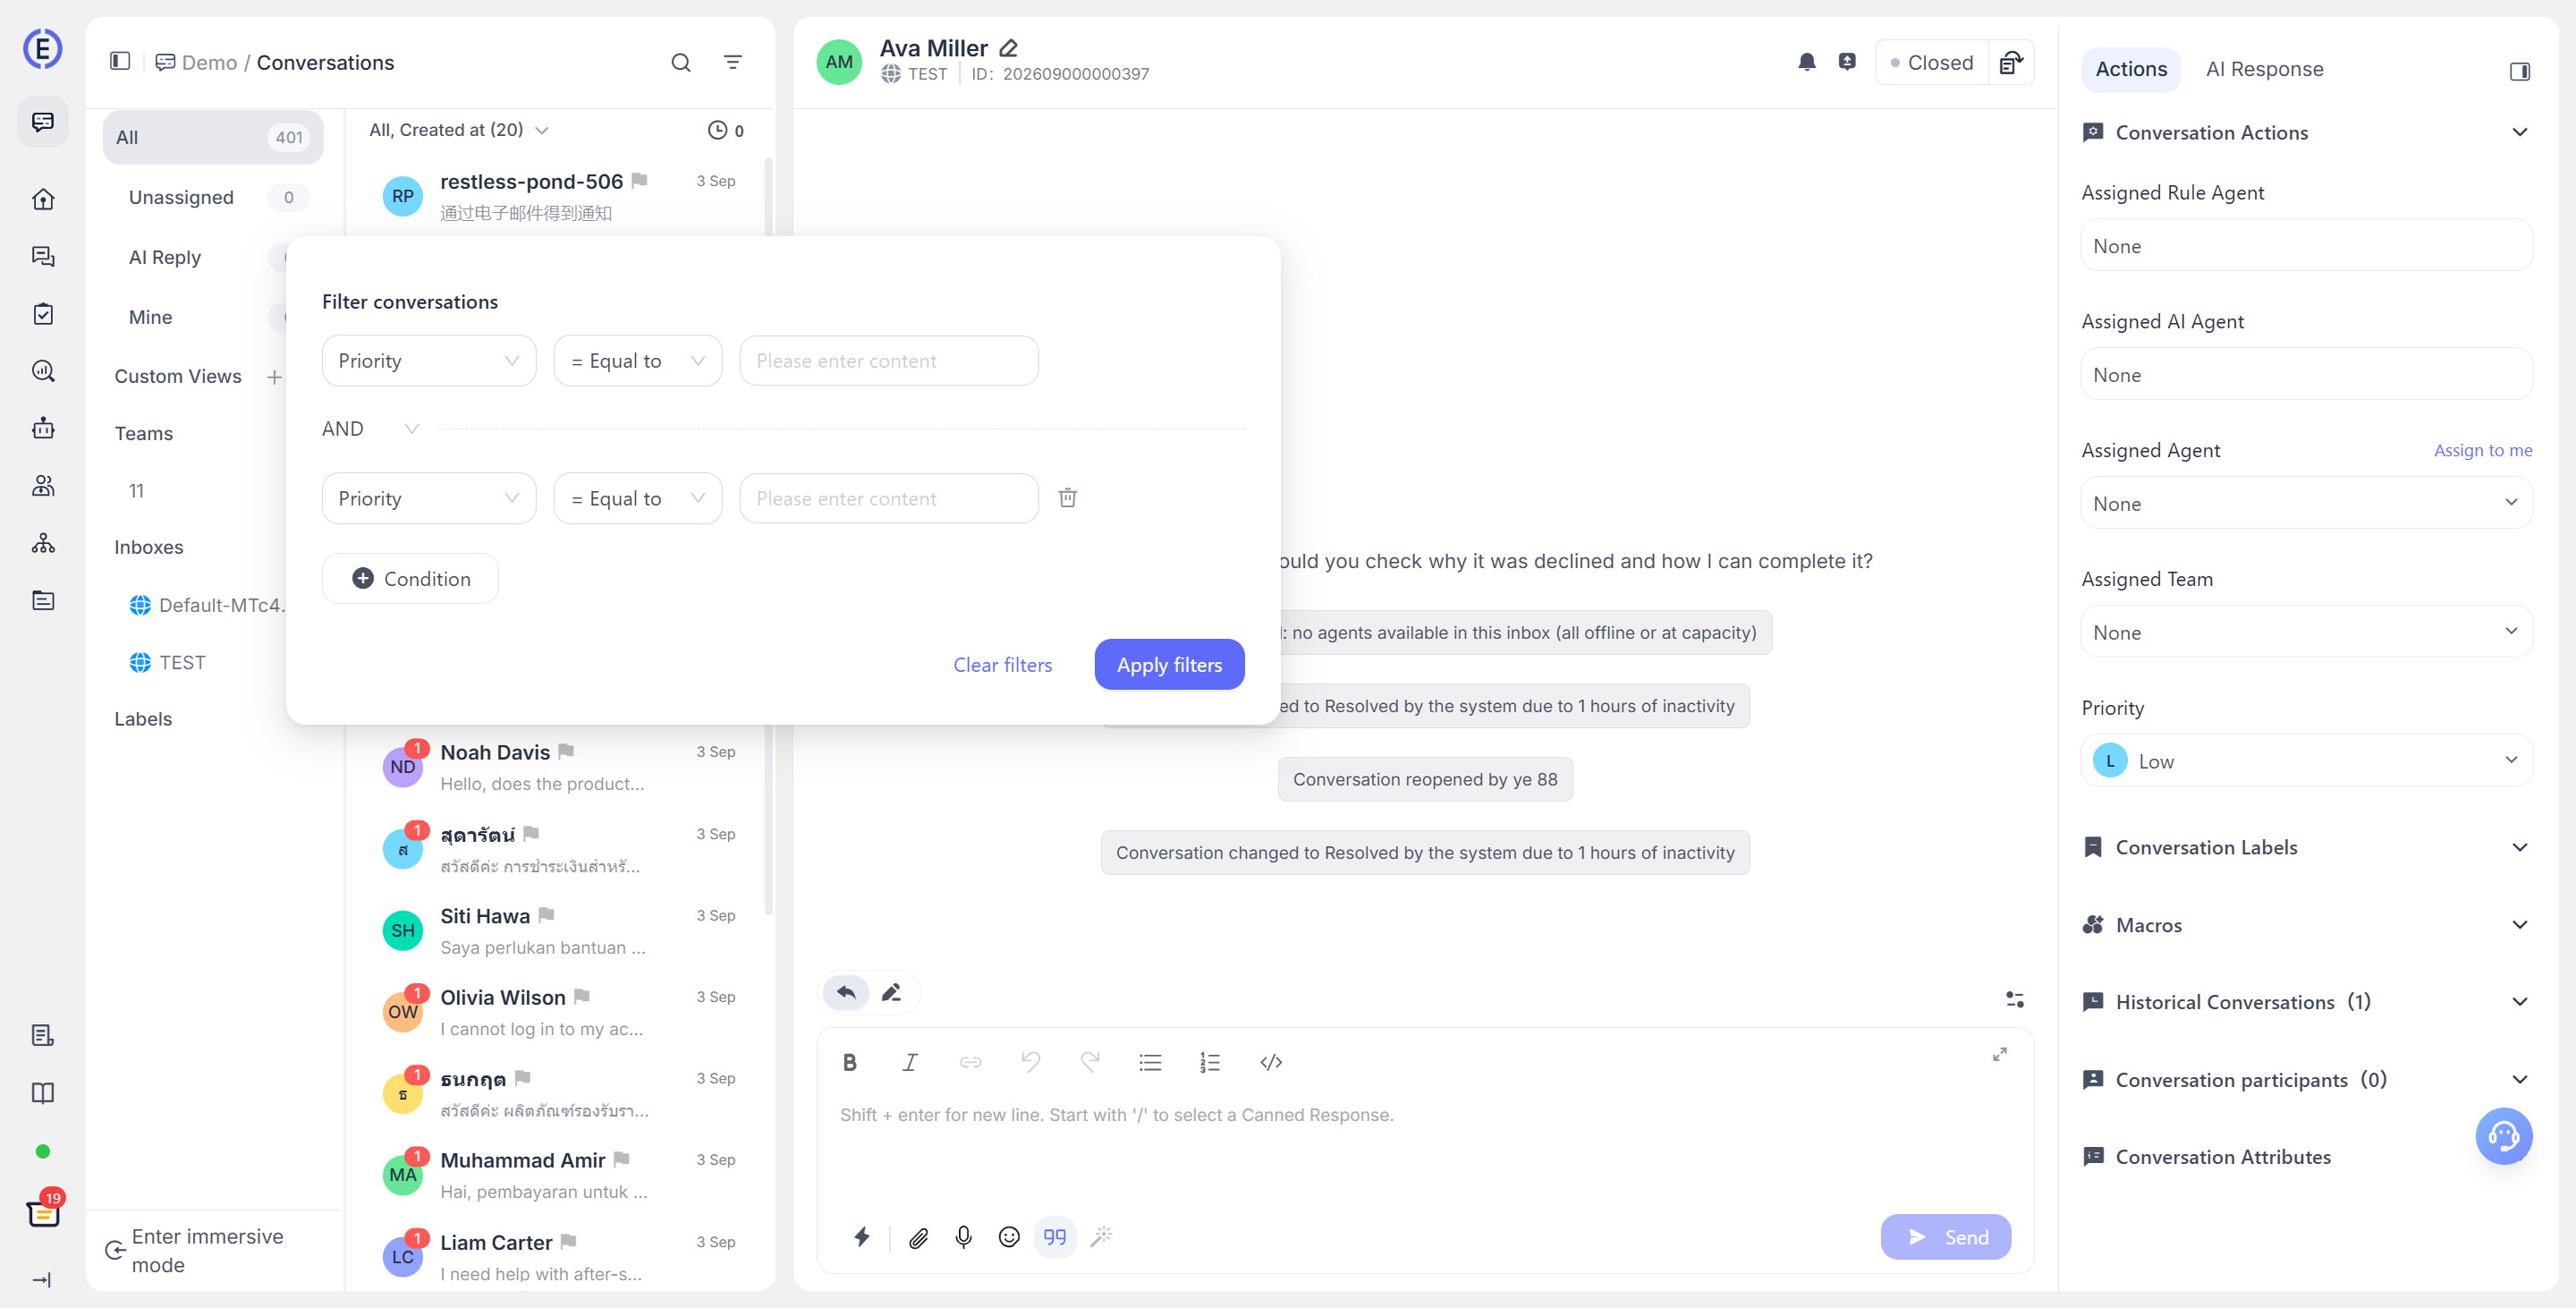
Advanced filters include Priority, Conversation ID, Assignee, Channel, Team, Activity, Tags, Browser language, Country/Region, Source page, Created time, Last activity time, and custom conversation attributes.
Advanced filters support multiple conditions combined with AND / OR. Filters apply only to the current list. After you clear the filters, the default results of the selected view are restored.
Create and Manage Custom Views
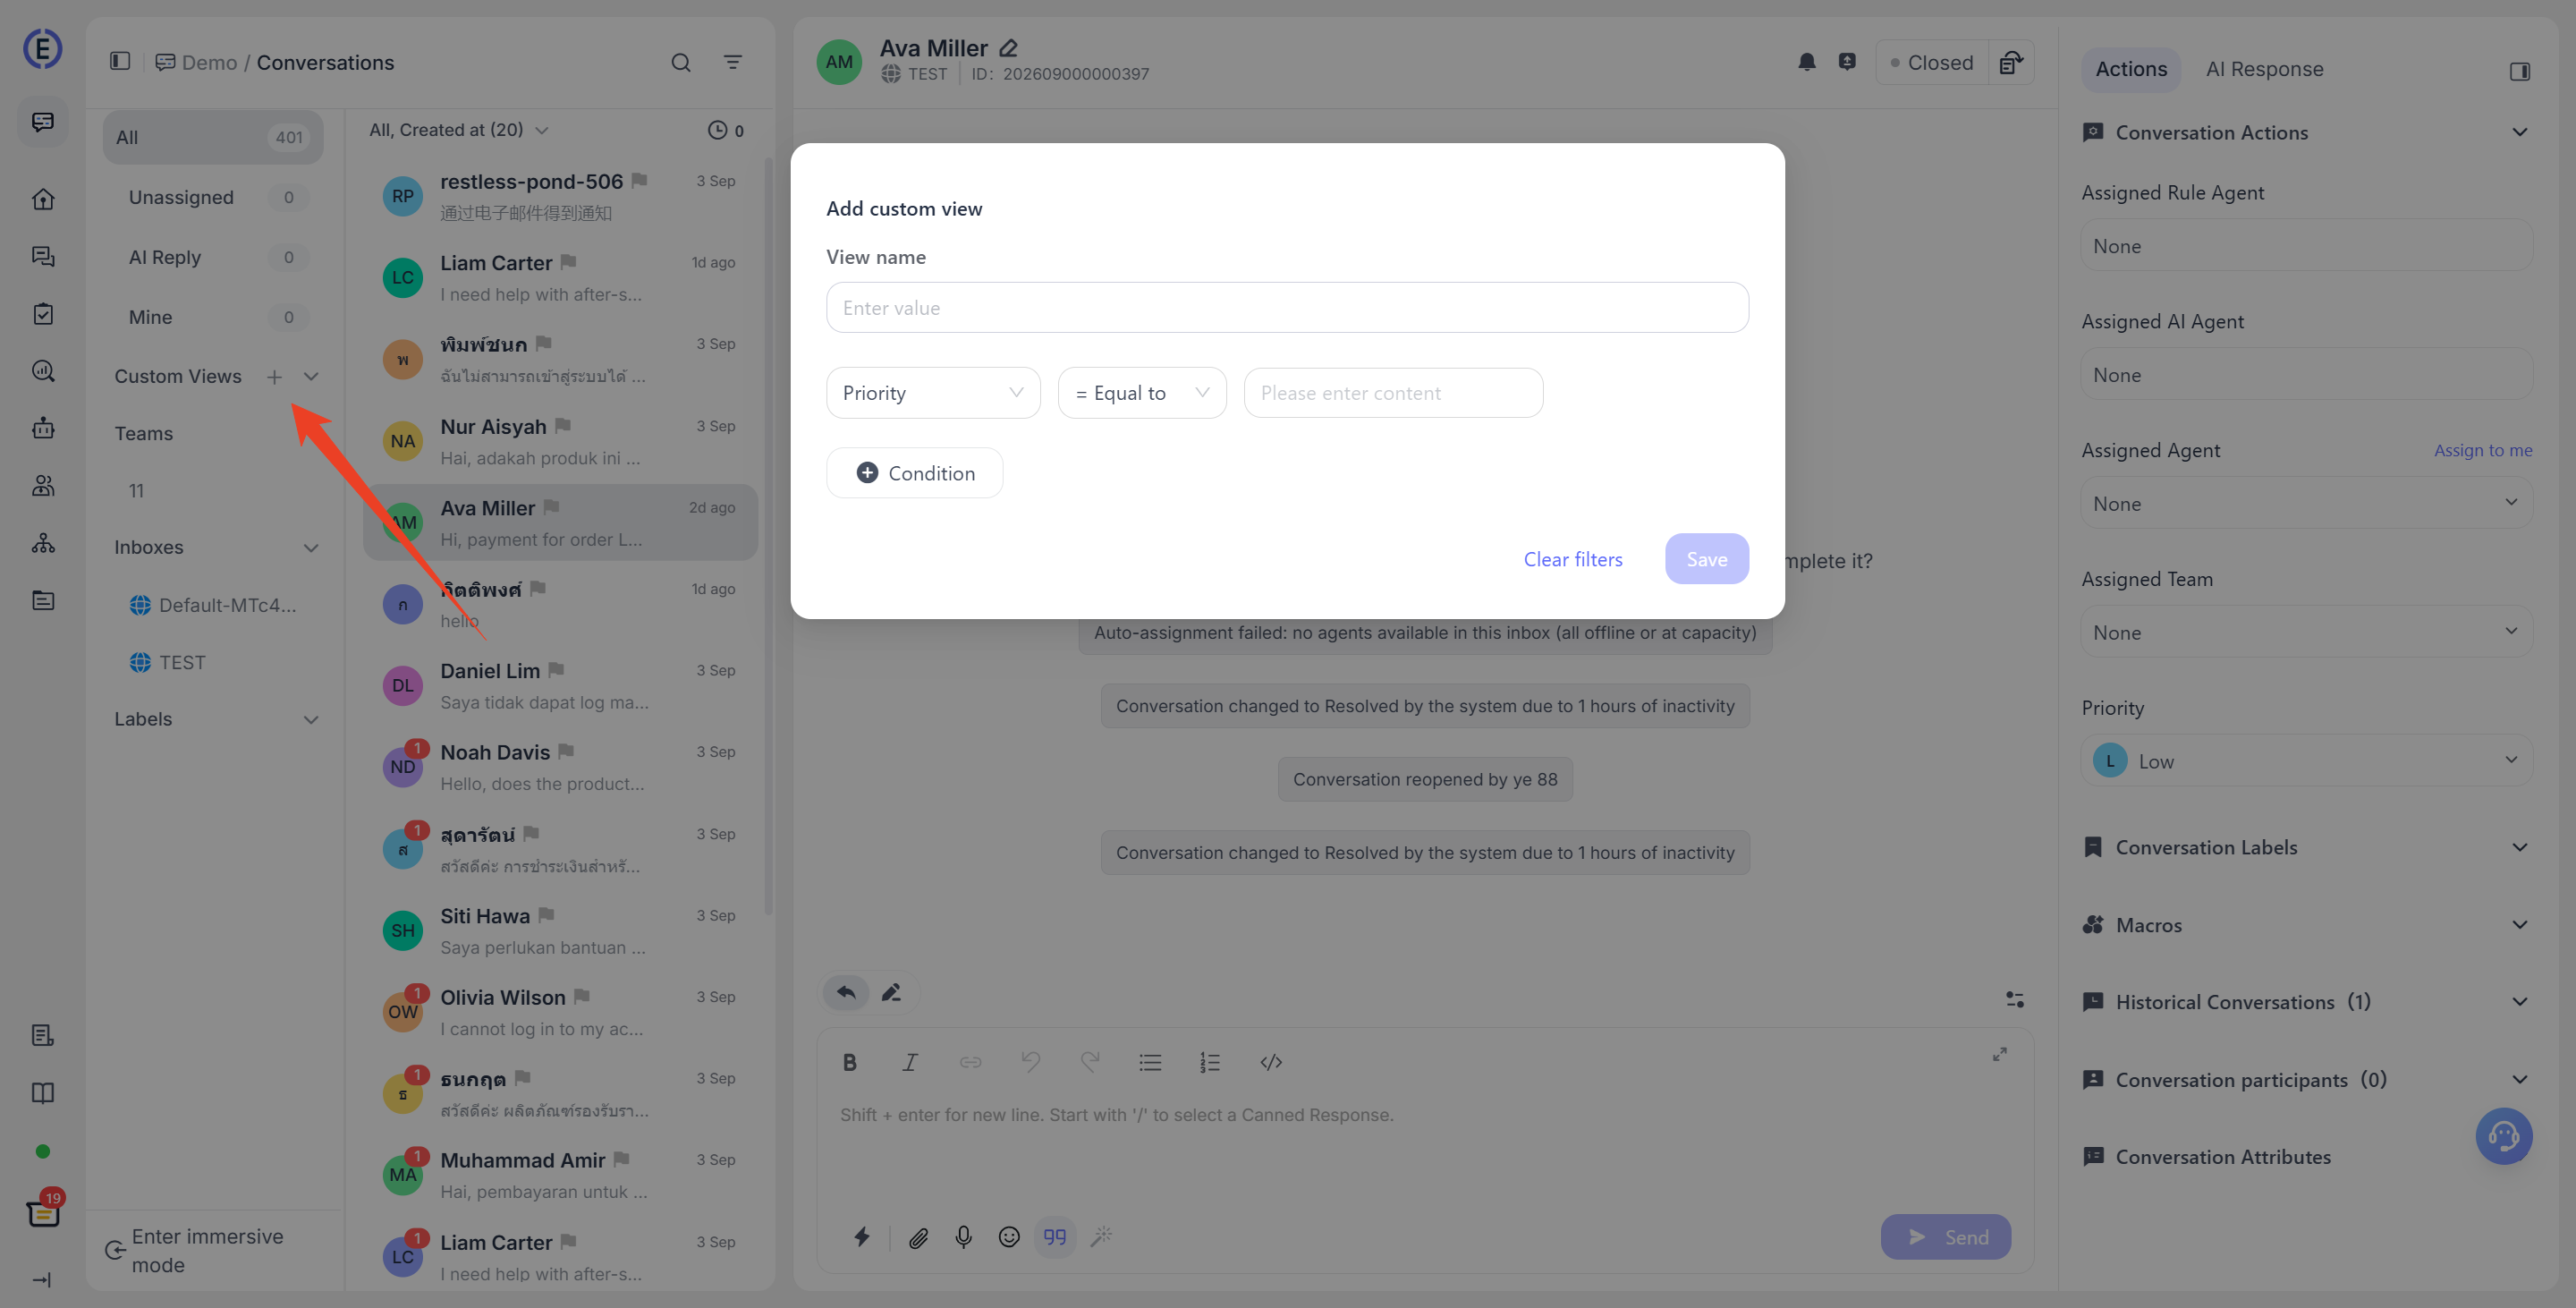
Custom views save a set of filter conditions and are suitable for fixed work queues such as "High-priority follow-up" or "Unassigned conversations in a certain region."
- Click + next to the Custom Views title on the left.
- Enter a view name and add one or more filter conditions.
- Click Save. The new view appears in the custom views list on the left.
After you enter a custom view, the list loads according to the saved conditions. Hover over the view name on the left and click the delete button to remove the view. Deleting a custom view does not delete the conversations in it.
Bulk and Single-Item Actions
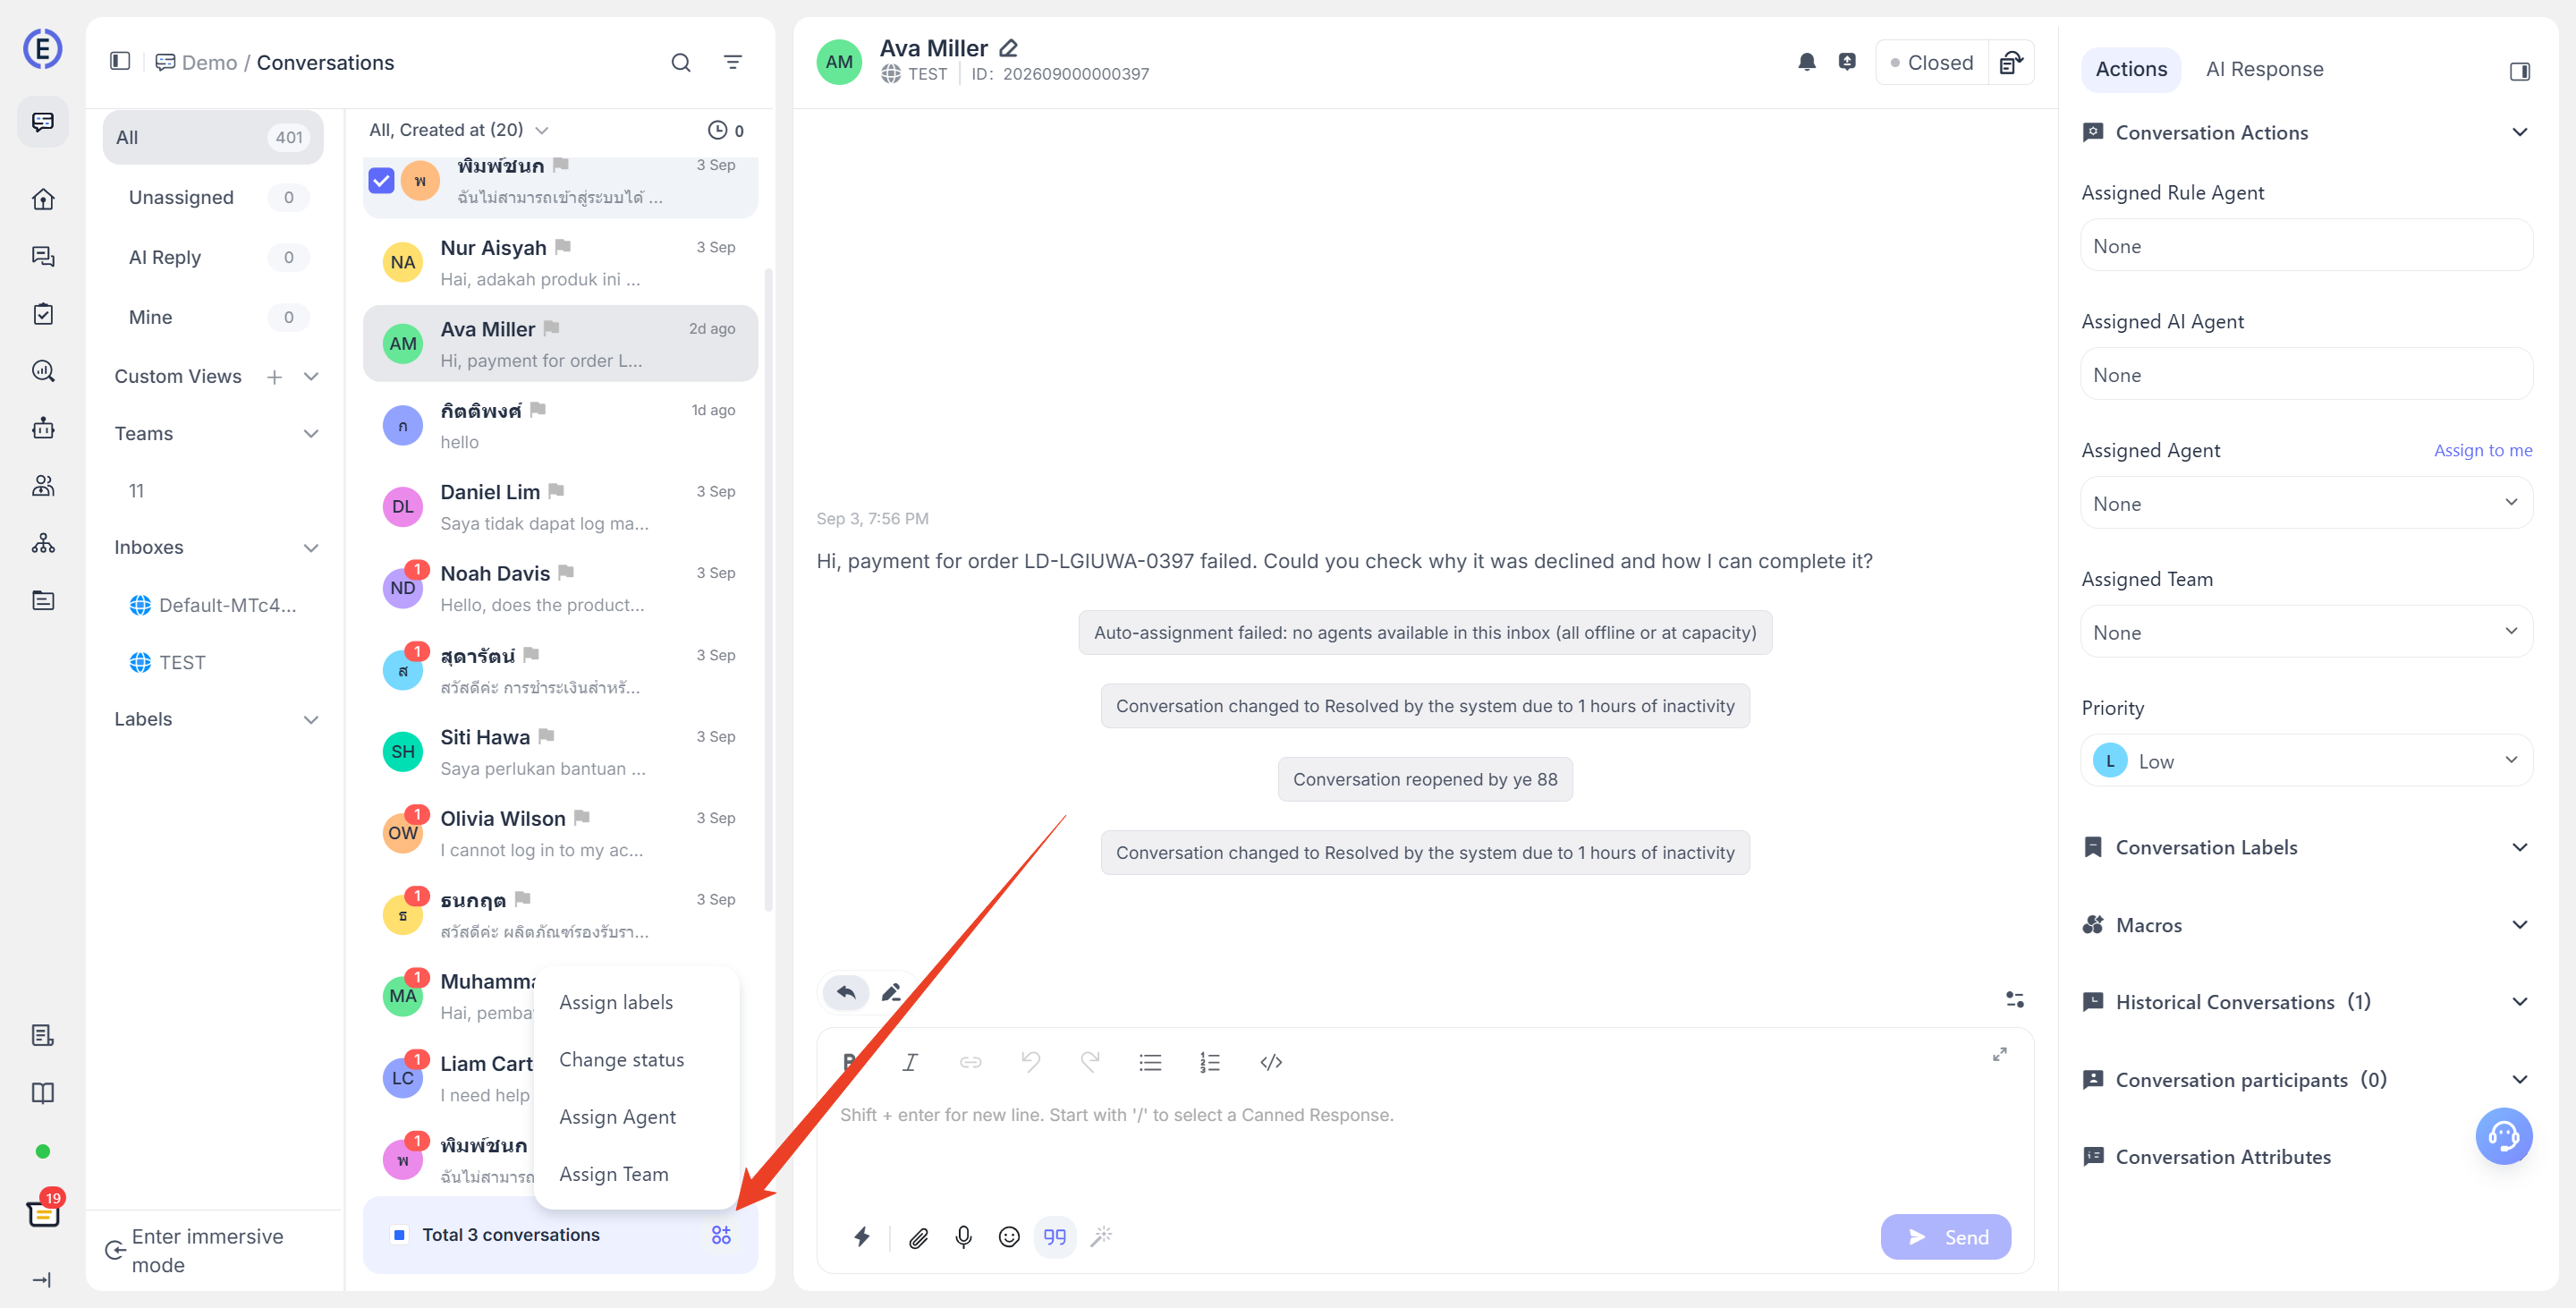
After you select one or more list cards, a bulk action bar appears at the bottom, allowing you to:
- Change the status, including snoozing until a preset or custom time;
- Assign an agent or team;
- Assign tags.
In the More actions menu for a single conversation card, you can also adjust the priority, reassign the agent or team, modify tags, mark the conversation as read or unread, and change its status.
Handle Conversation Details
Reply, Internal Notes, and Message Actions
The center area displays the full message history. Use the input box at the bottom to send replies to customers, or switch to Private Notes to record internal information visible only to customer service agents. The reply box supports commonly used emojis, attachments, audio recordings, and canned replies/macros. Some channels also provide specialized capabilities such as template messages, email recipients, rich text, or AI assistance.
Hover over a message or right-click it to open the message menu. Depending on the message source and channel, you can use the following actions:
- Copy the message content;
- Reply after quoting a customer message;
- Save sent text as a canned reply;
- Record a QA result for messages sent by the AI Agent;
- Create a ticket based on a received customer message;
- Recall a sent message that supports recall (currently supported only on some channels);
- Delete a message.
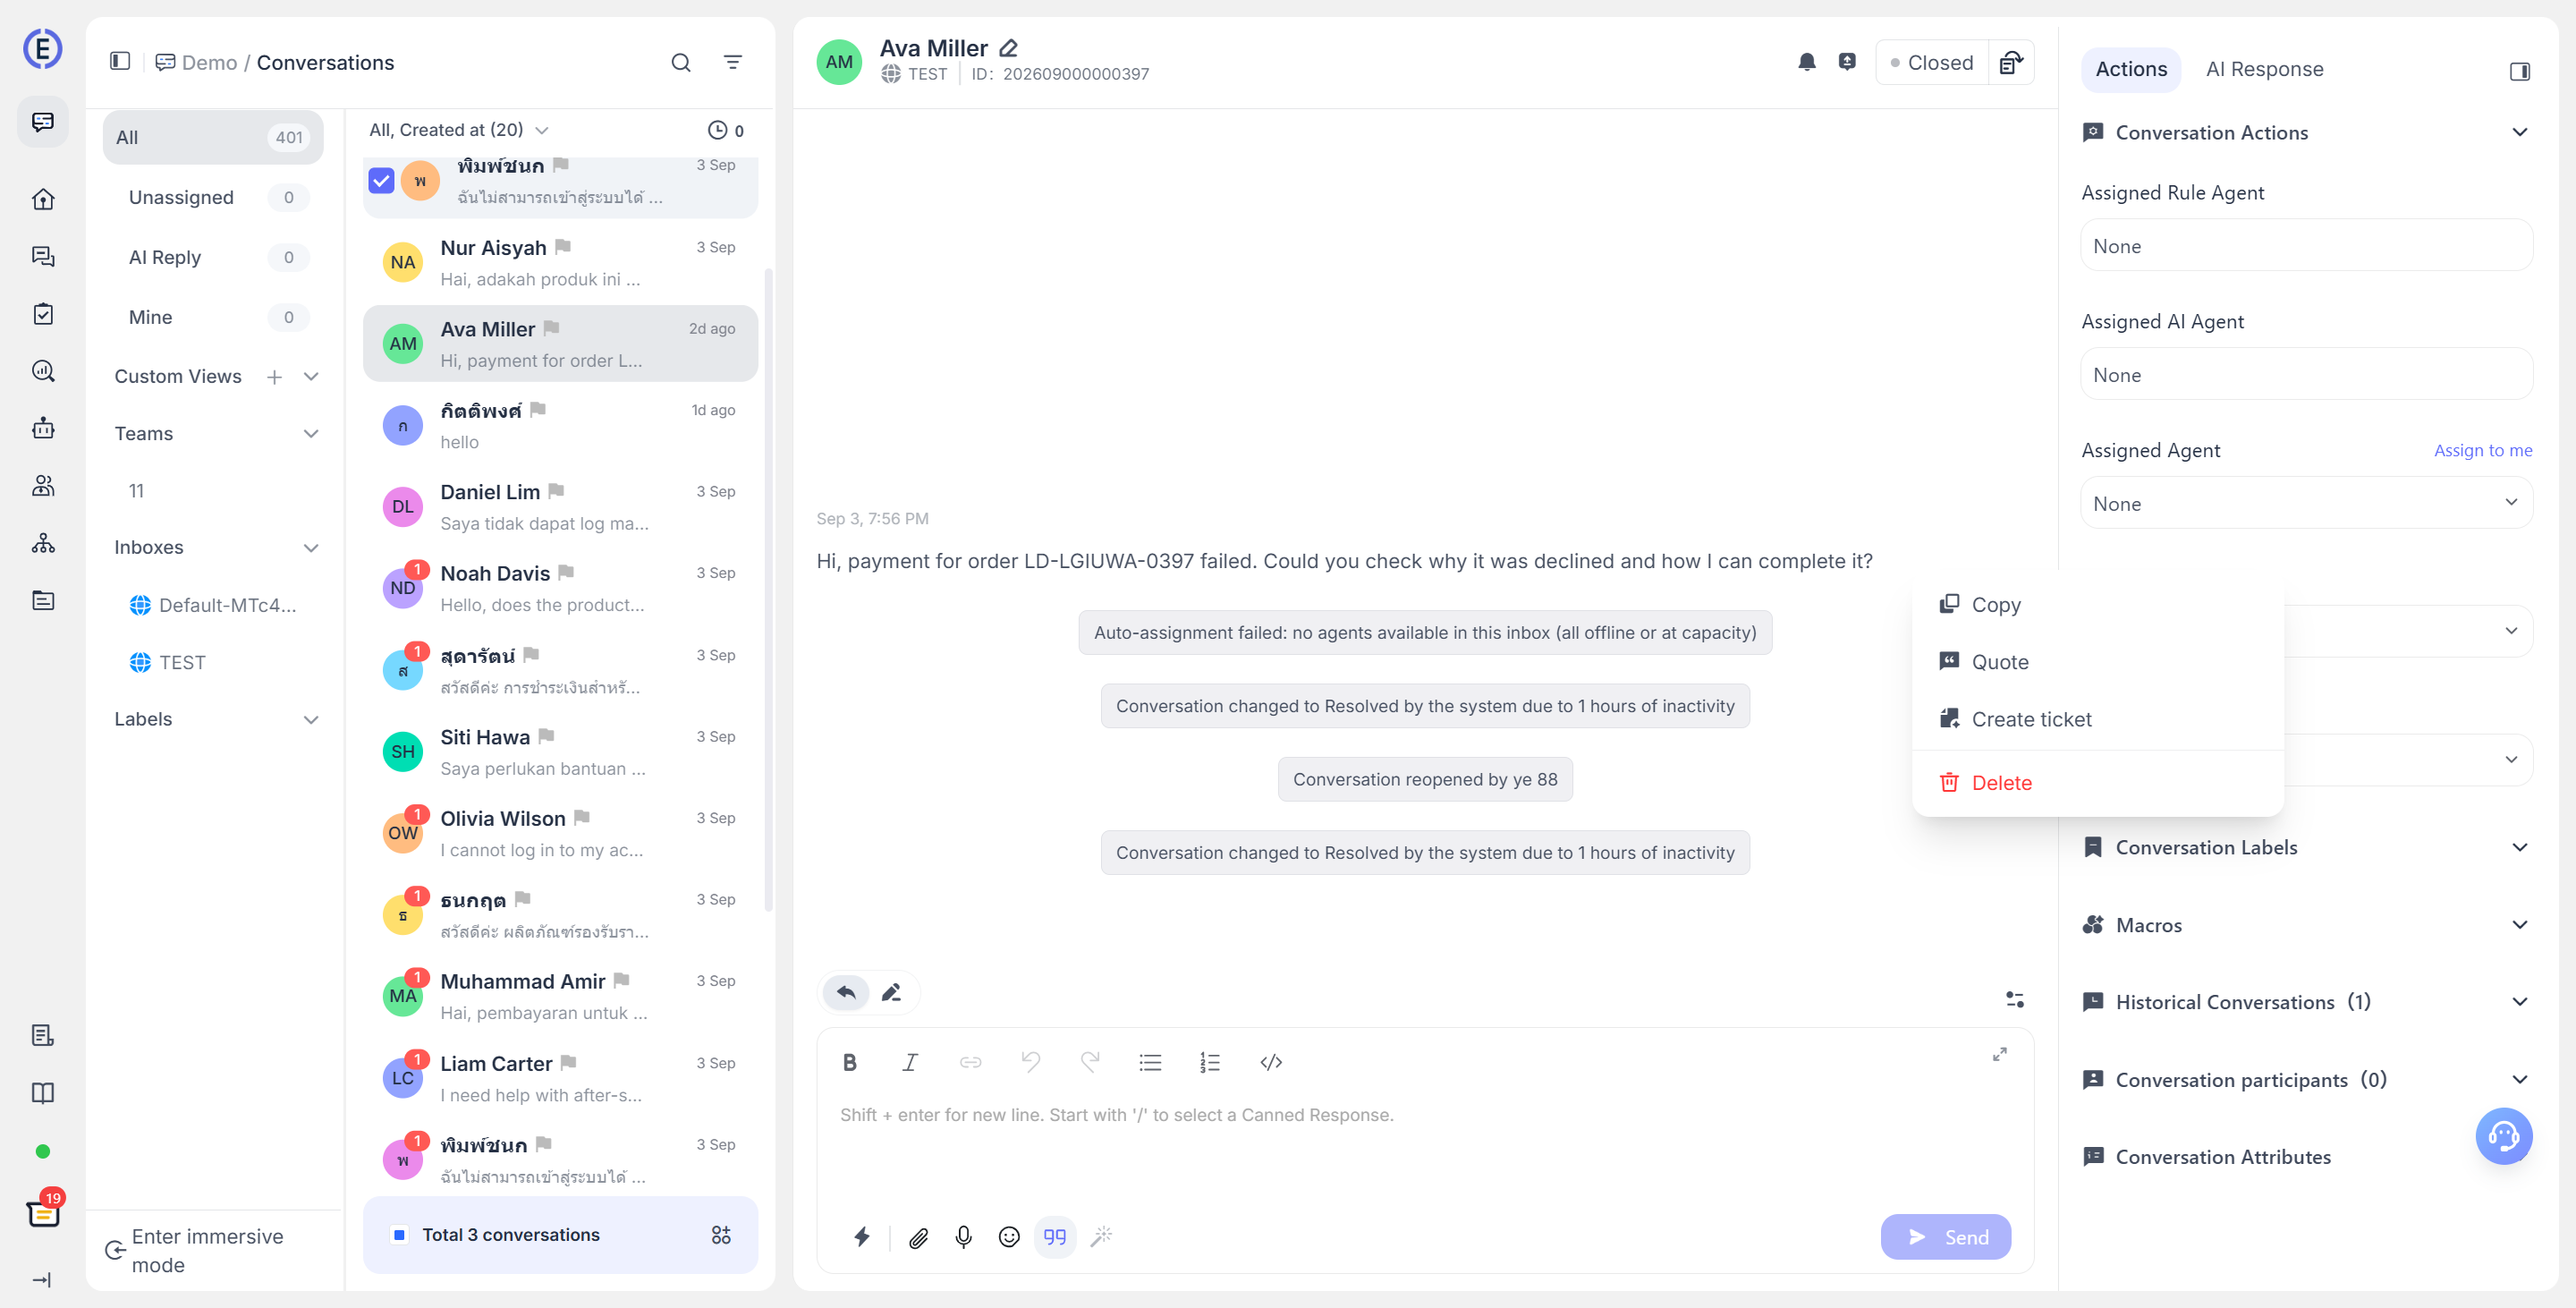
The available menu changes depending on the message type. For example, Create Ticket appears only for received customer messages. The quote feature appears only when the channel supports quoting and the message is not a private note. For canned replies and macros, see Use Canned Replies and Macros.
![private.png]private.png)
View Contact
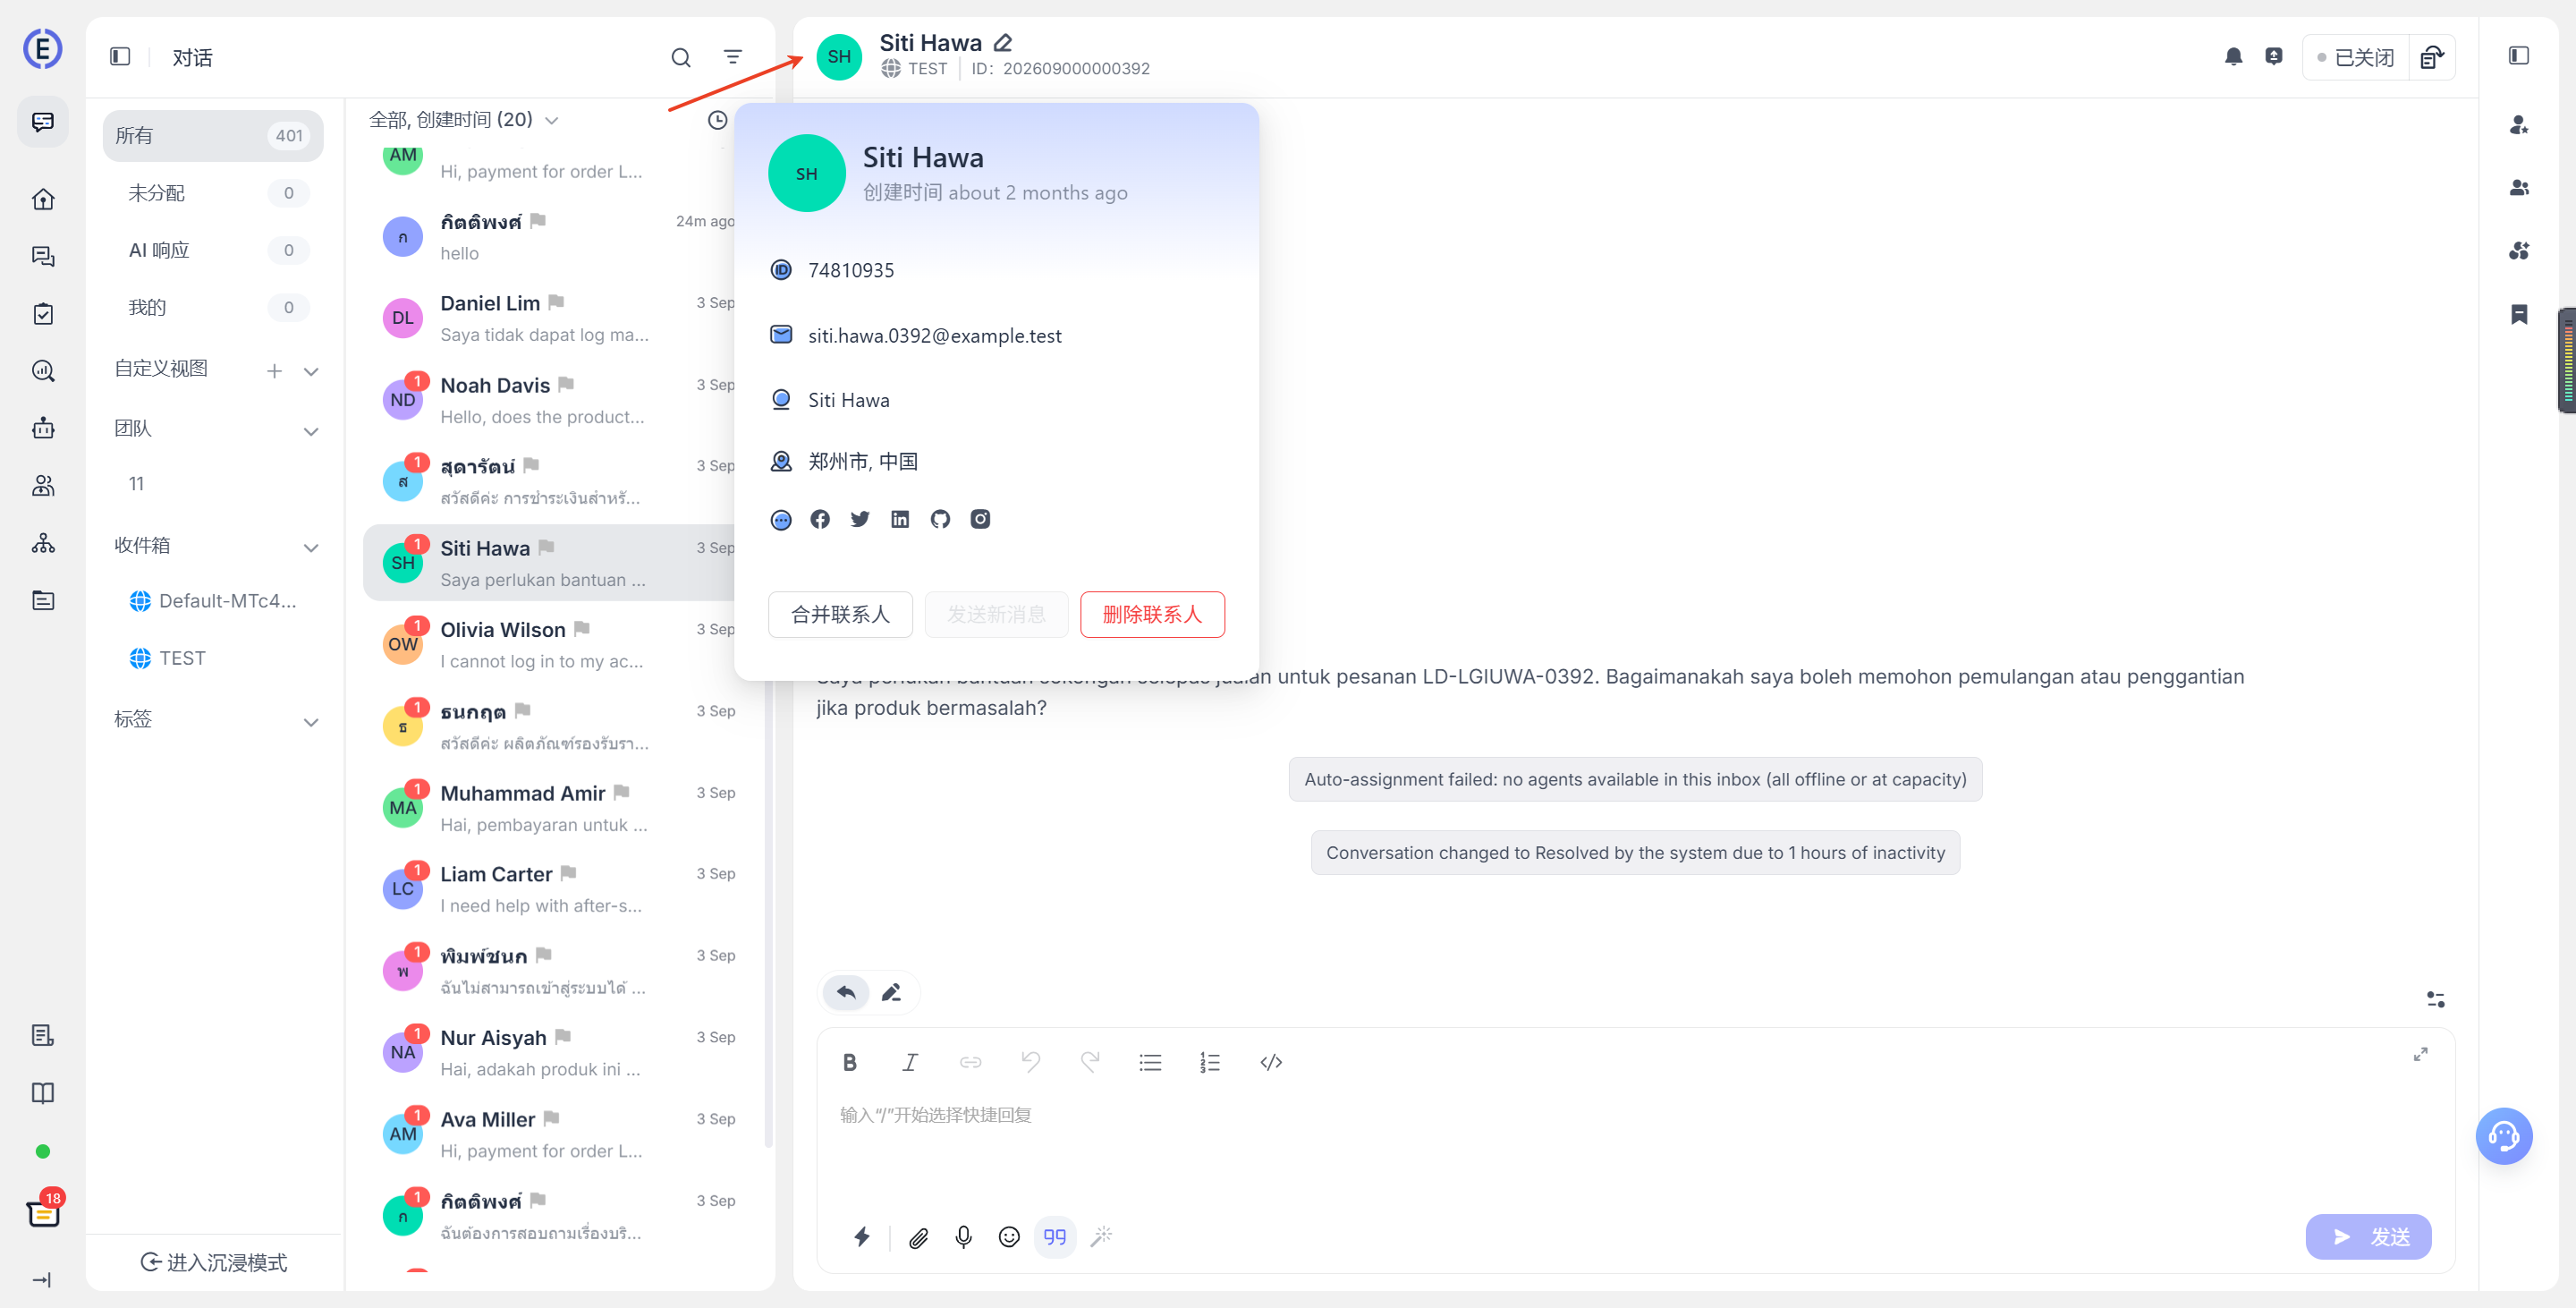
At the top of the conversation, the contact's avatar and name are displayed, along with an edit button that lets users modify the contact's attributes.
Top Conversation Actions
At the top of the details panel, the contact, source channel, and conversation number are displayed. You can copy the number and open the contact editing page using the edit button next to the contact name.
The top right provides the following actions:
- Mute/Unmute: Control notifications for subsequent messages in the current conversation;
- Send Conversation Transcript: Send the current conversation history to the specified email address;
- Status Switch: Update the handling status of the current conversation.
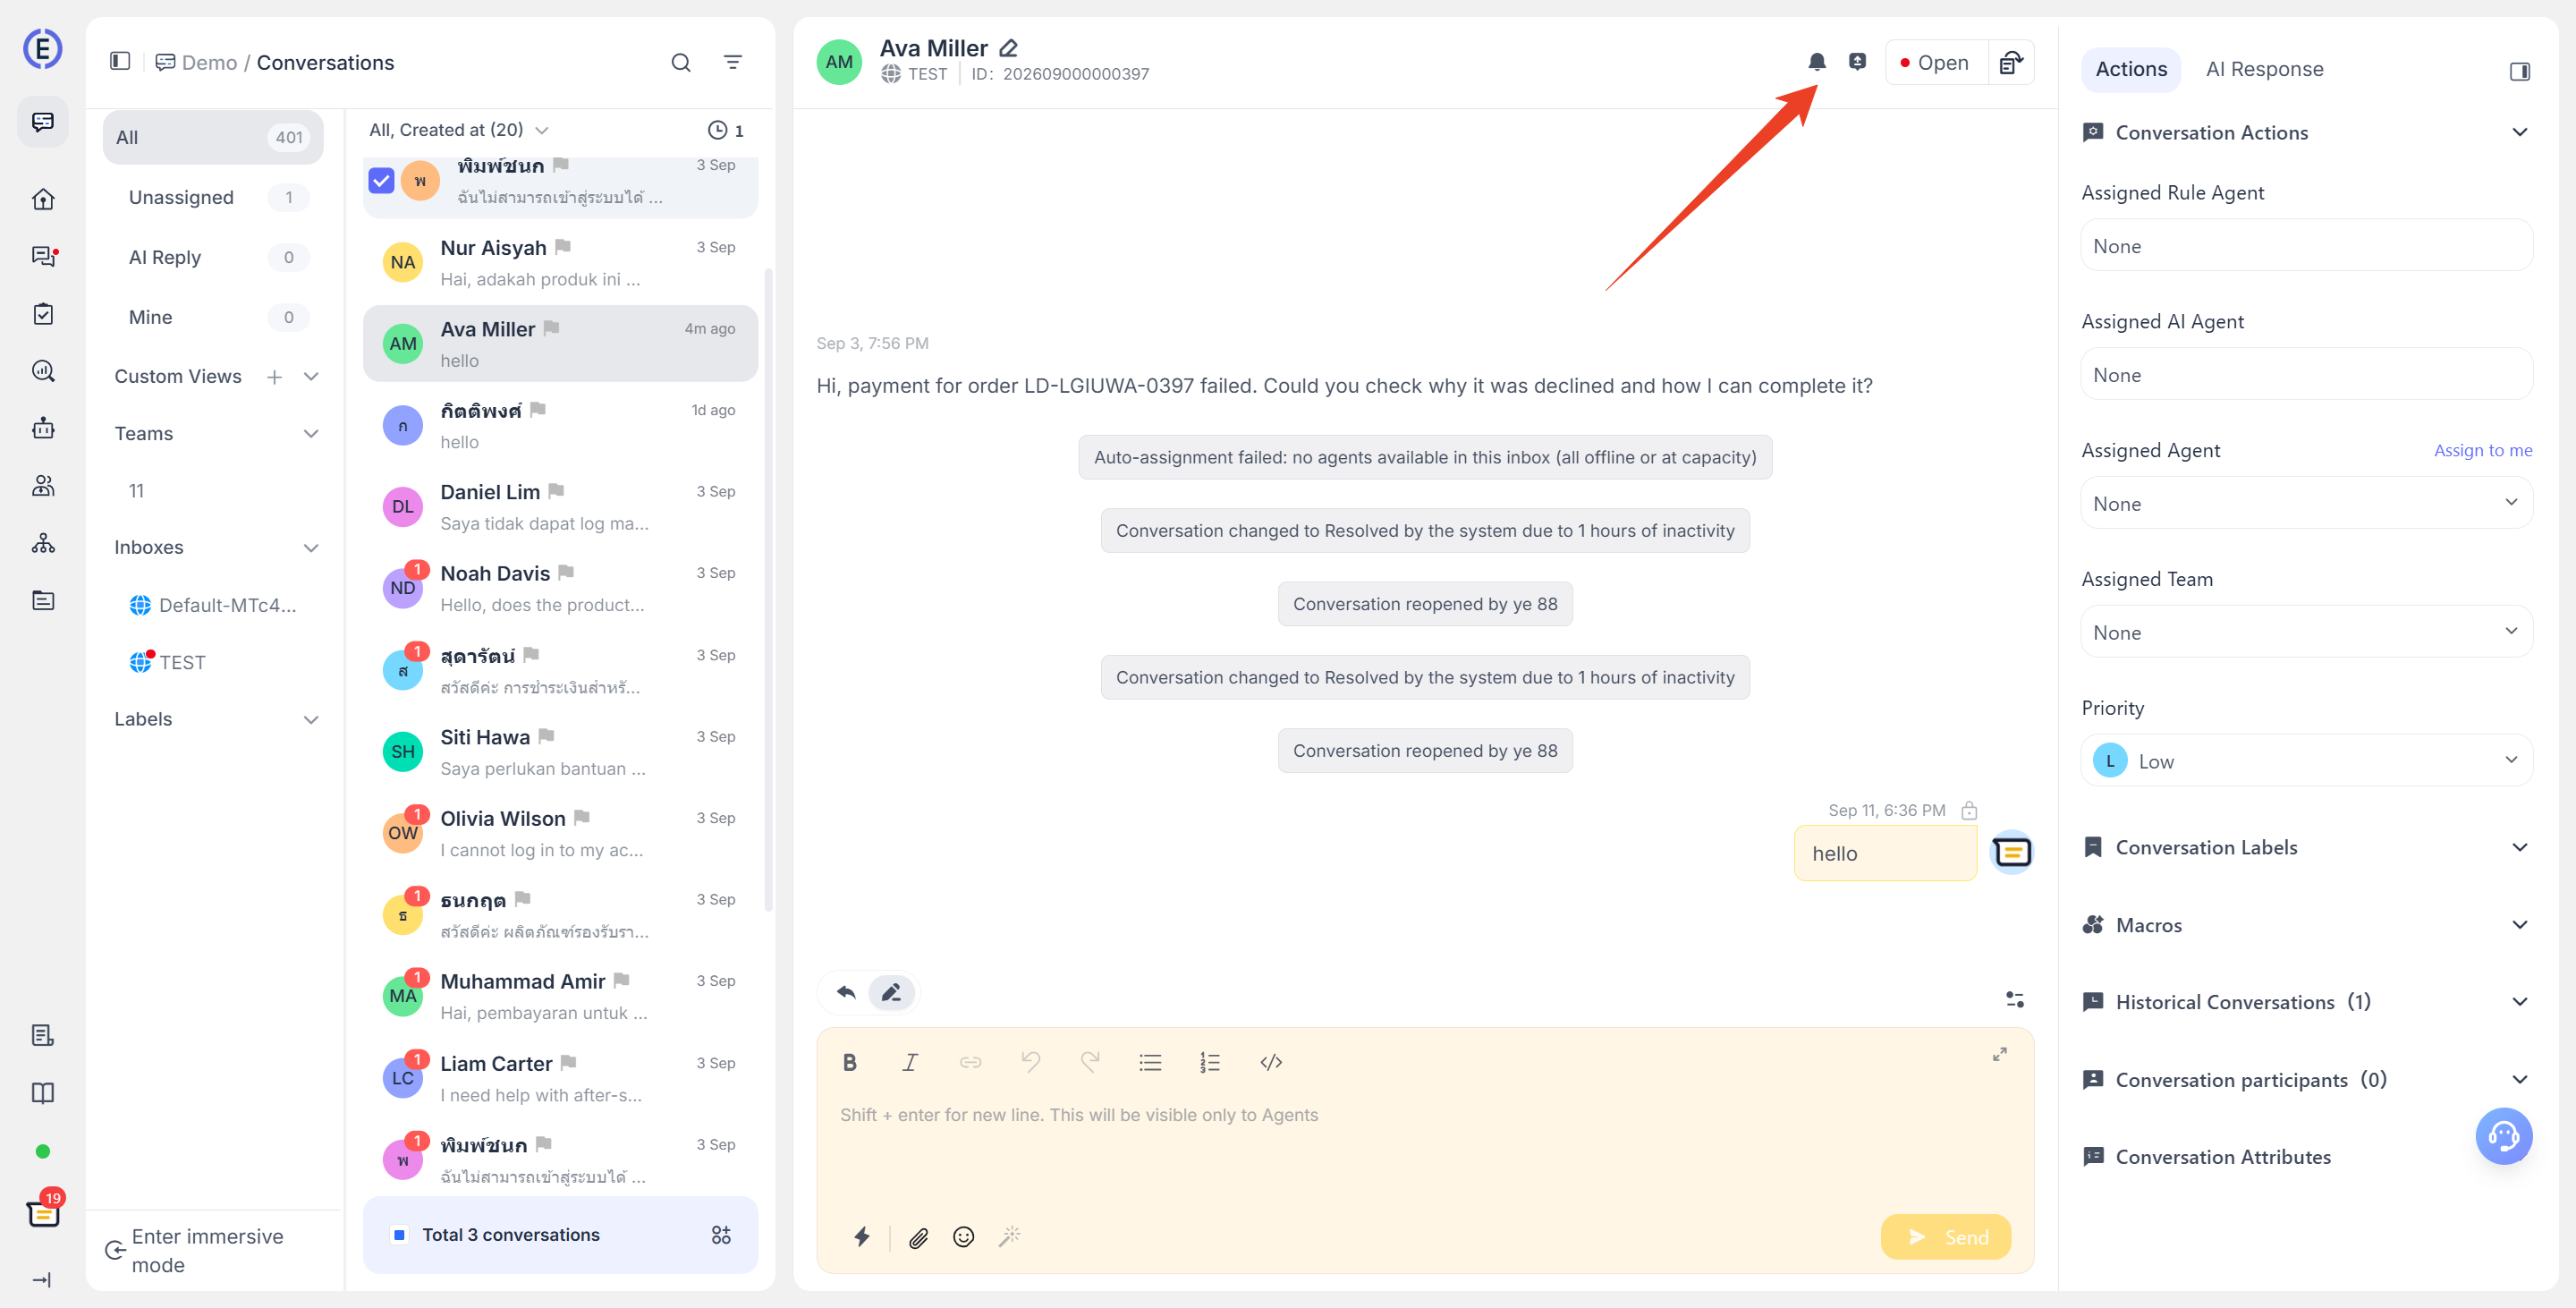
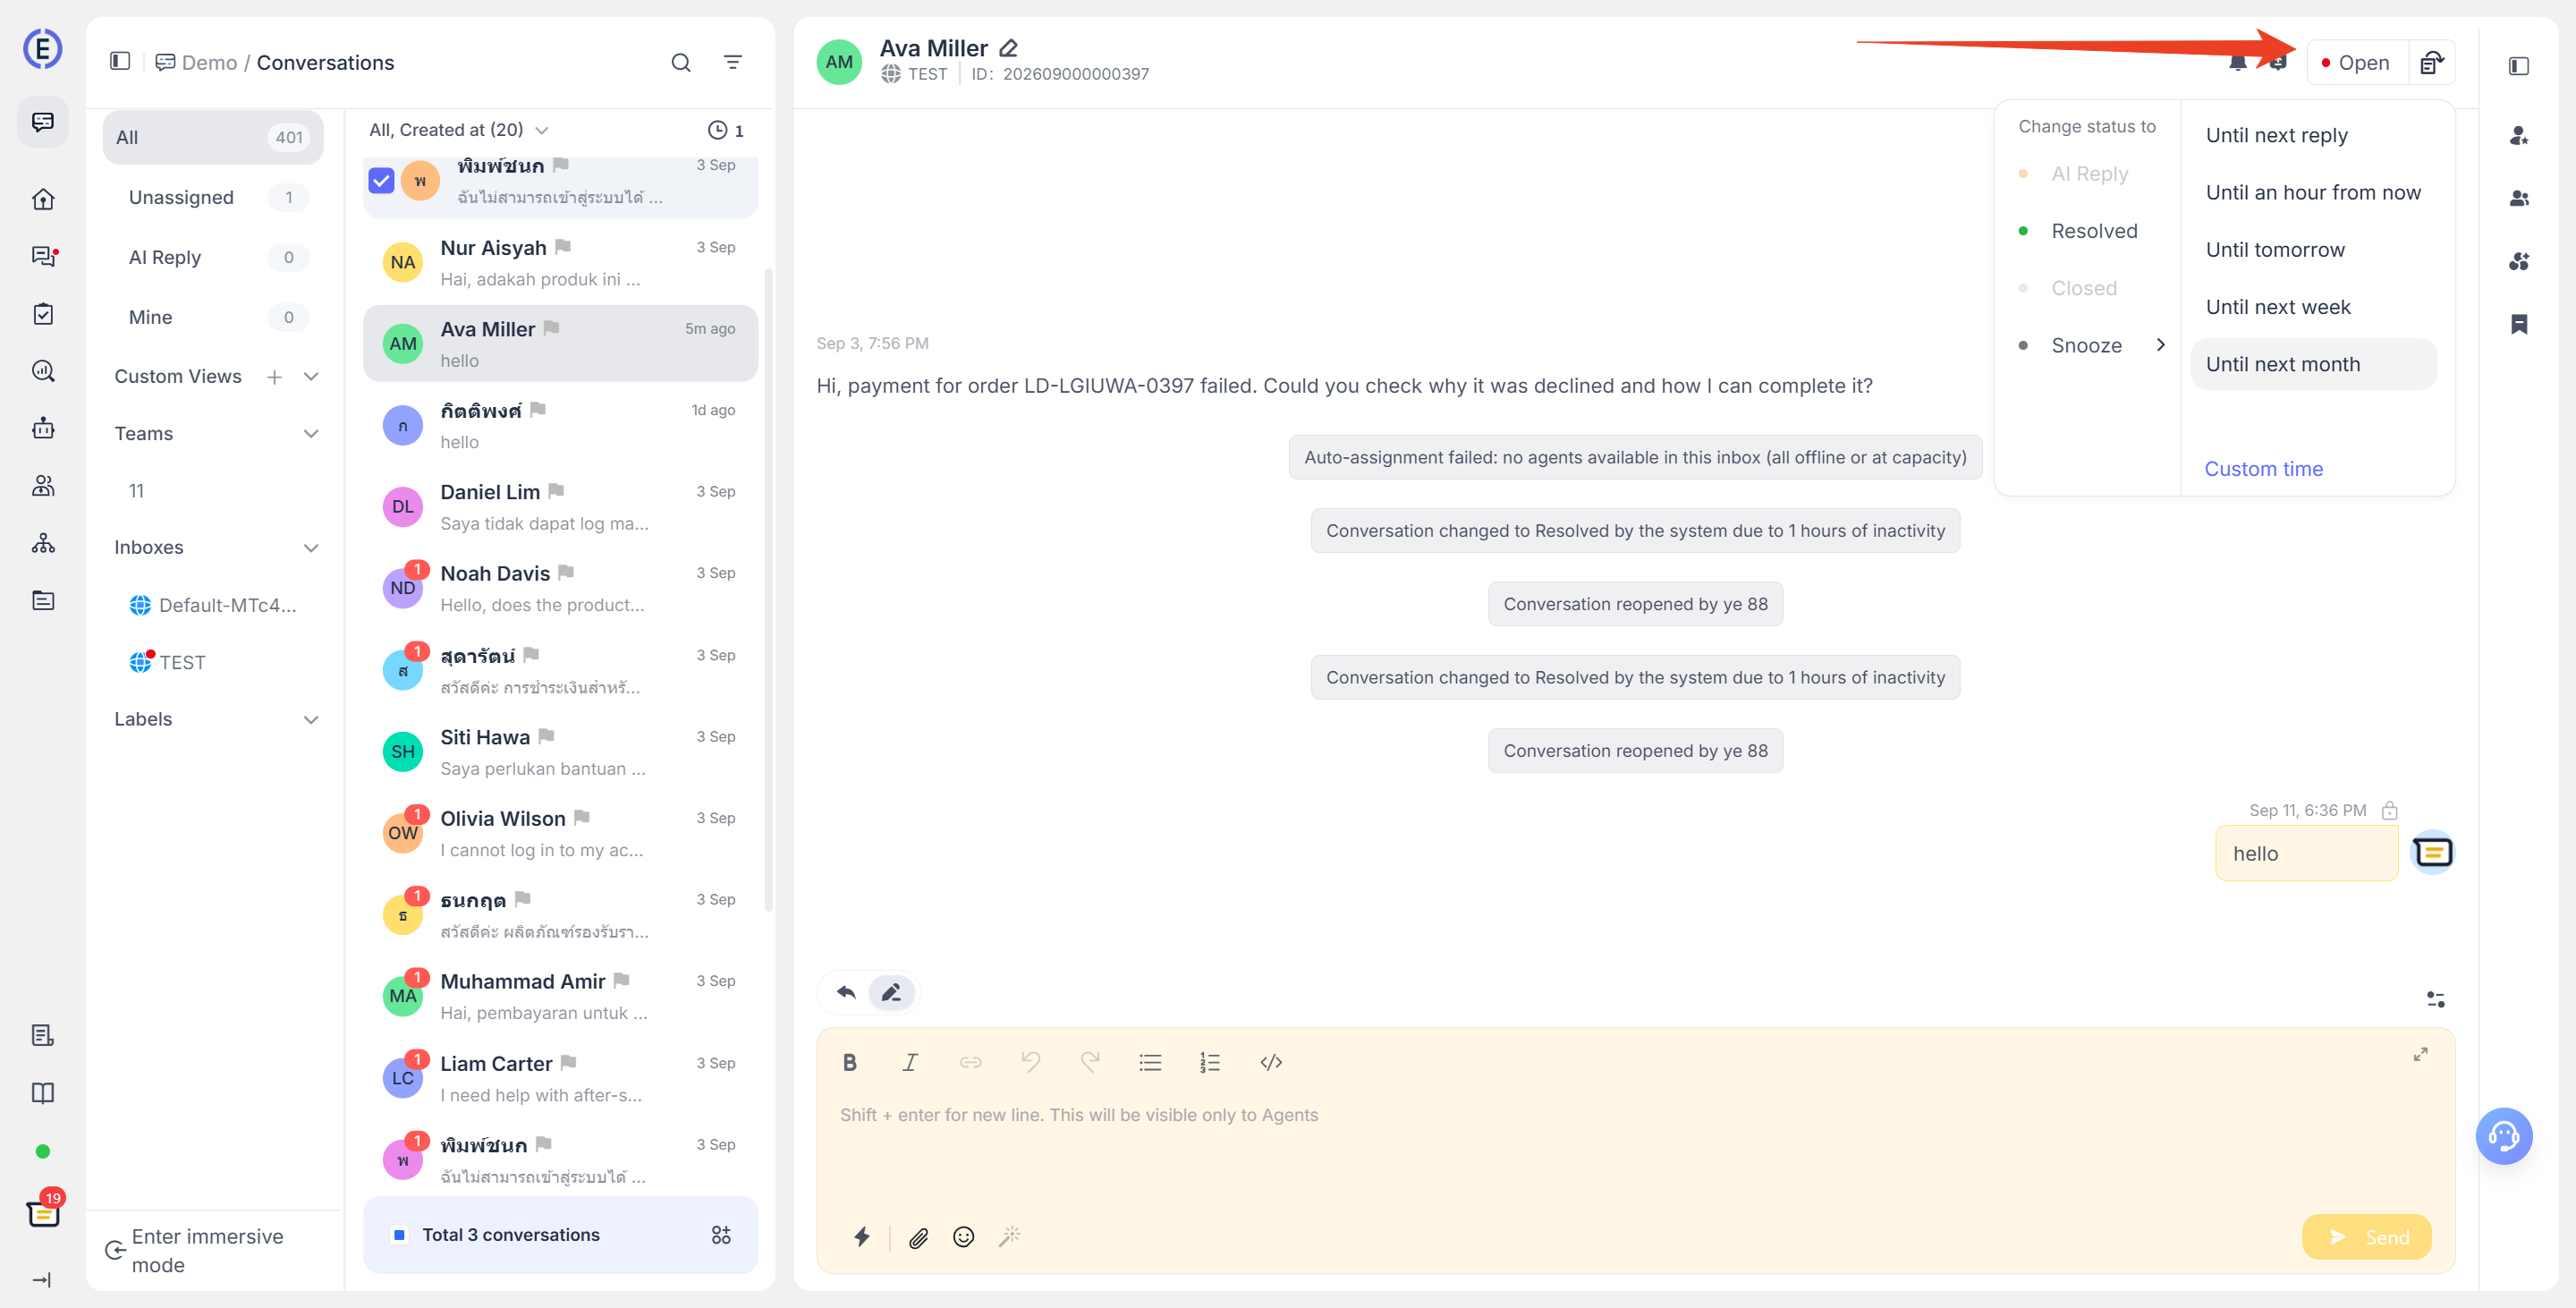
Click the status button at the top right of the details panel and select the target status. When snoozing, you can choose a preset time or a custom resume time.
| Status | Description |
|---|---|
| Open | Waiting for or currently being handled by a human agent. |
| AI-Replying | Taken over and replied to by the AI Agent. |
| Resolved | The current issue has been handled, but the conversation can still be reopened or handed back to the AI Agent for processing. |
| Closed | The conversation has ended and is no longer counted as an ongoing conversation. This status can only be switched to from "Resolved." |
| Snoozed | Temporarily not being processed. It will automatically reopen when the set time is reached, and it can also be resumed manually. |
Closed conversations can only be reopened; they cannot be switched directly to other statuses. For the complete status flow, see Conversation Status Flow.
Use the Right-Side Conversation Information Panel
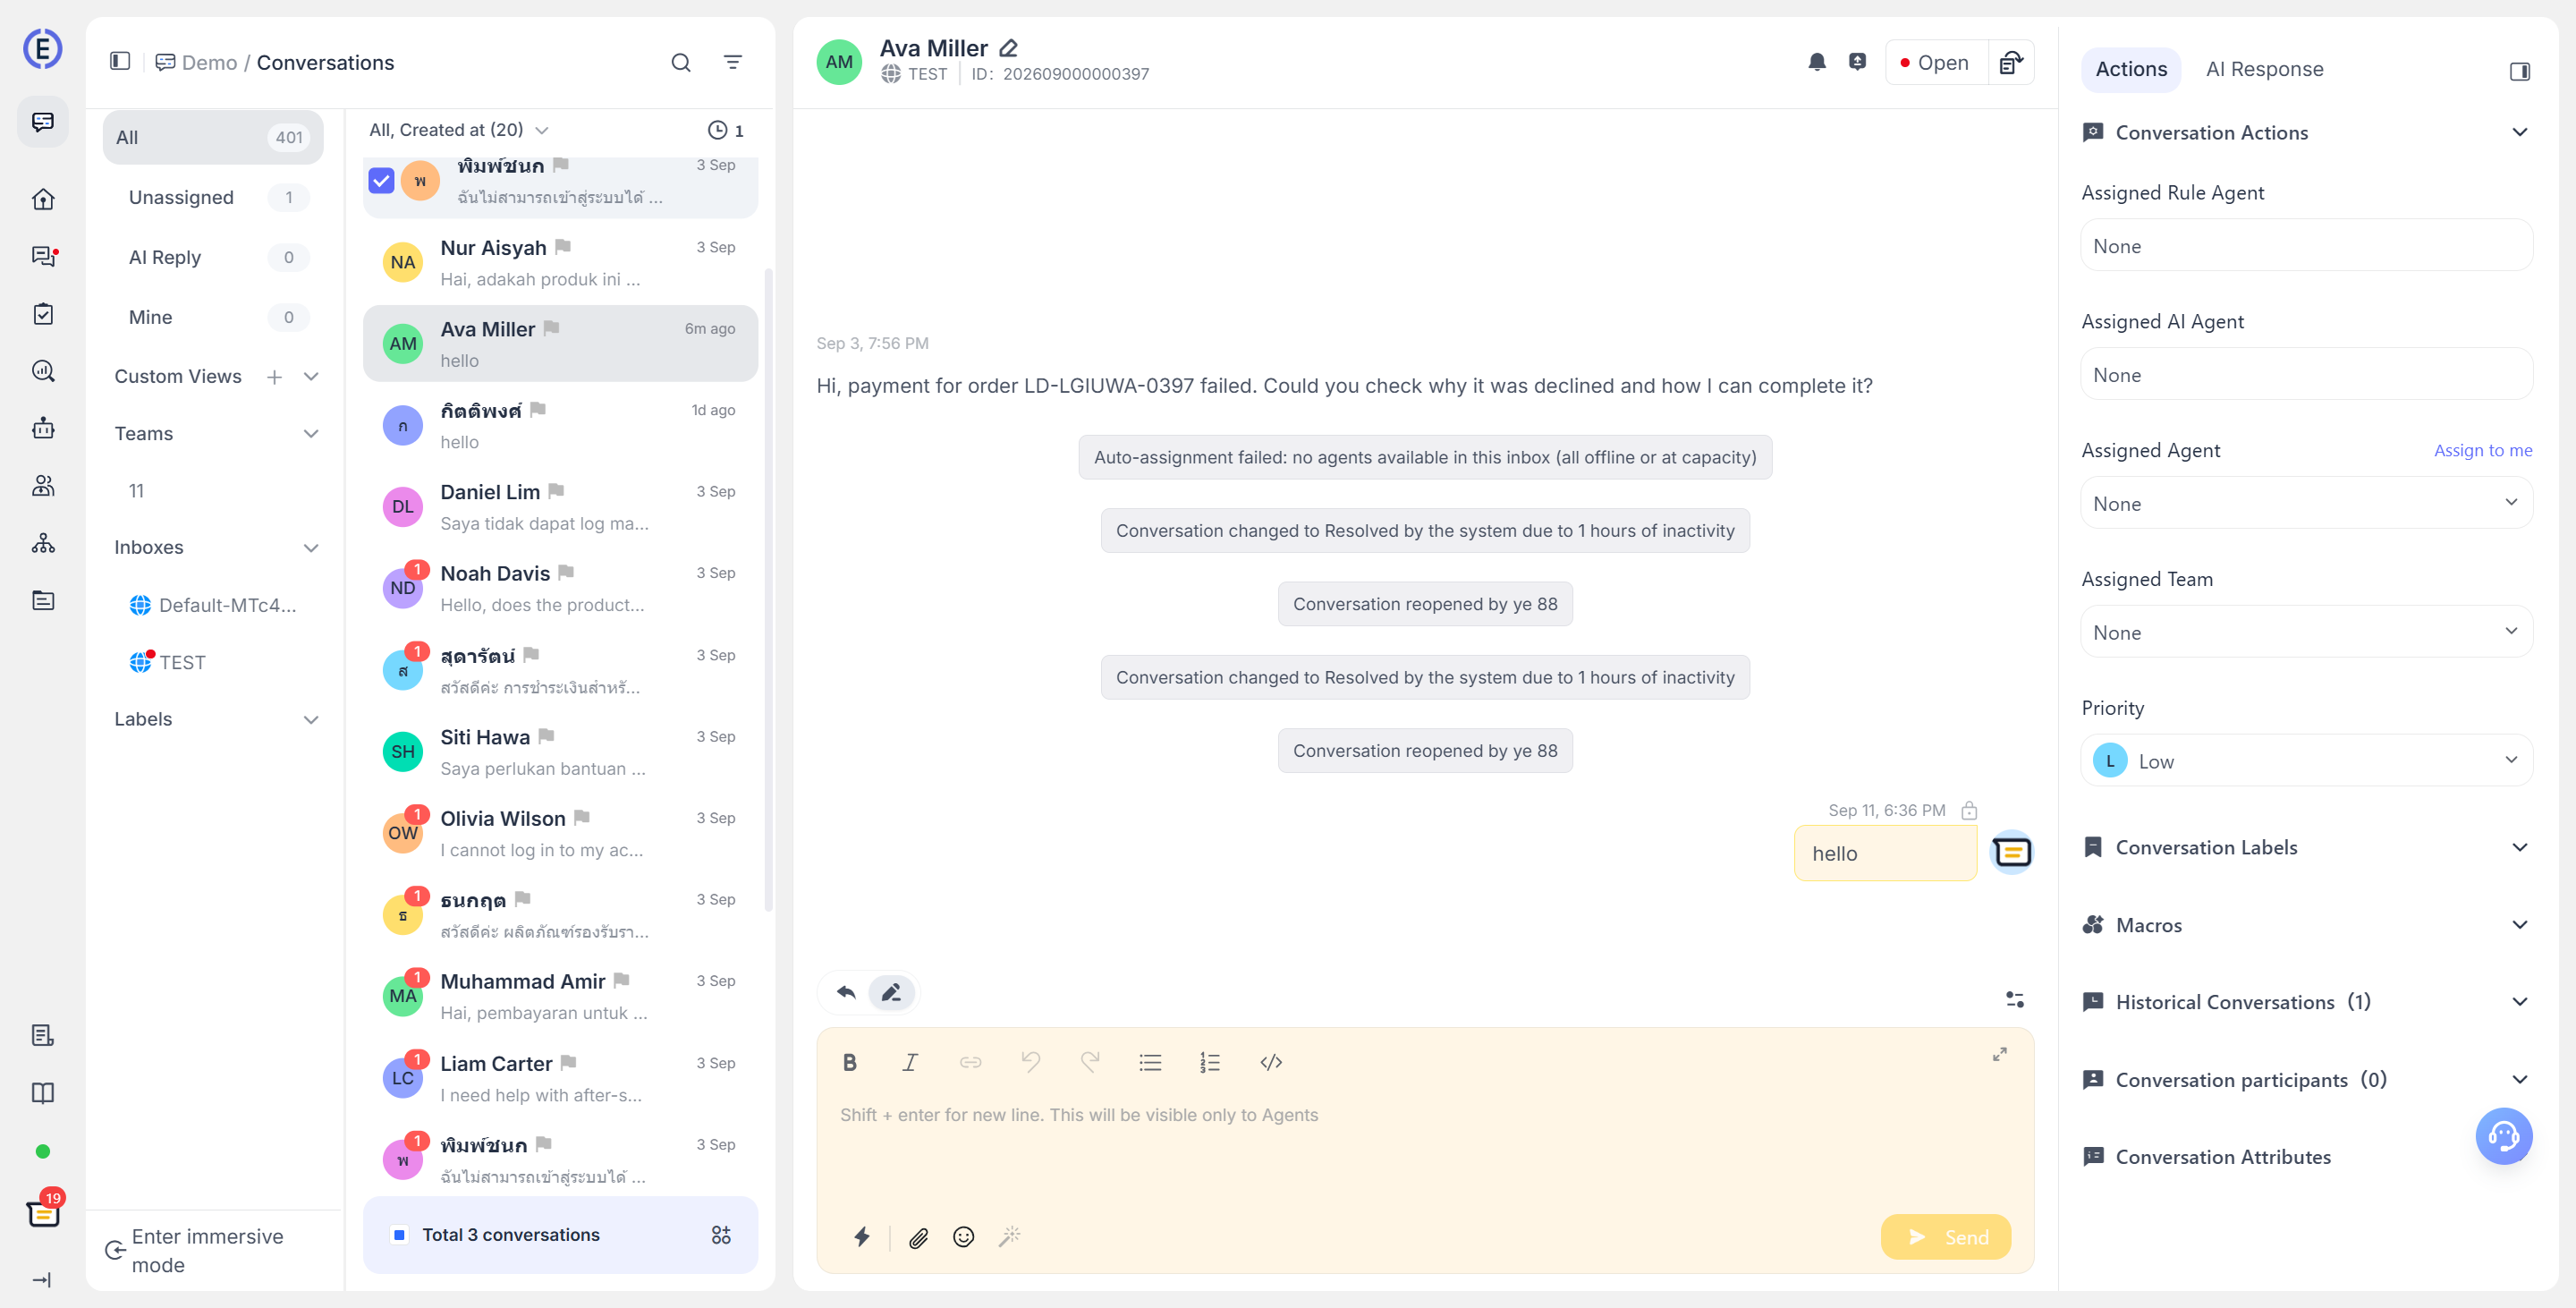
Click the expand button on the right side of the details panel to open the information panel. After collapsing it, you can still quickly select an agent, team, macro, or tags using the icons.
The right-side information panel includes the following:
| Section | Available Actions |
|---|---|
| Conversation Actions | Assign or unassign an agent, assign a team, assign the conversation to yourself, and set the priority to Urgent, High, Medium, Low, or None. |
| Conversation Participants | Add customer service members who follow this conversation, or choose to follow it yourself. Participants can receive the information needed for collaboration. |
| Conversation Information and Attributes | View system information such as the source page, start time, browser and operating system, browser language, country/region, and IP address. You can also view and maintain custom conversation attributes. |
| Last Conversation | View previous conversations for the current contact and jump to the corresponding record. |
| Macros | Find and insert configured macros. |
Use Immersive Mode
Immersive mode reduces visual distractions from workspace navigation so that you can focus on handling conversations. This setting is saved as the current member's interface preference, but it takes effect only on pages related to Conversations or Tickets. When you enter other pages, such as Overview or Settings, LiveDesk restores the normal navigation layout.
Enter and Exit Immersive Mode
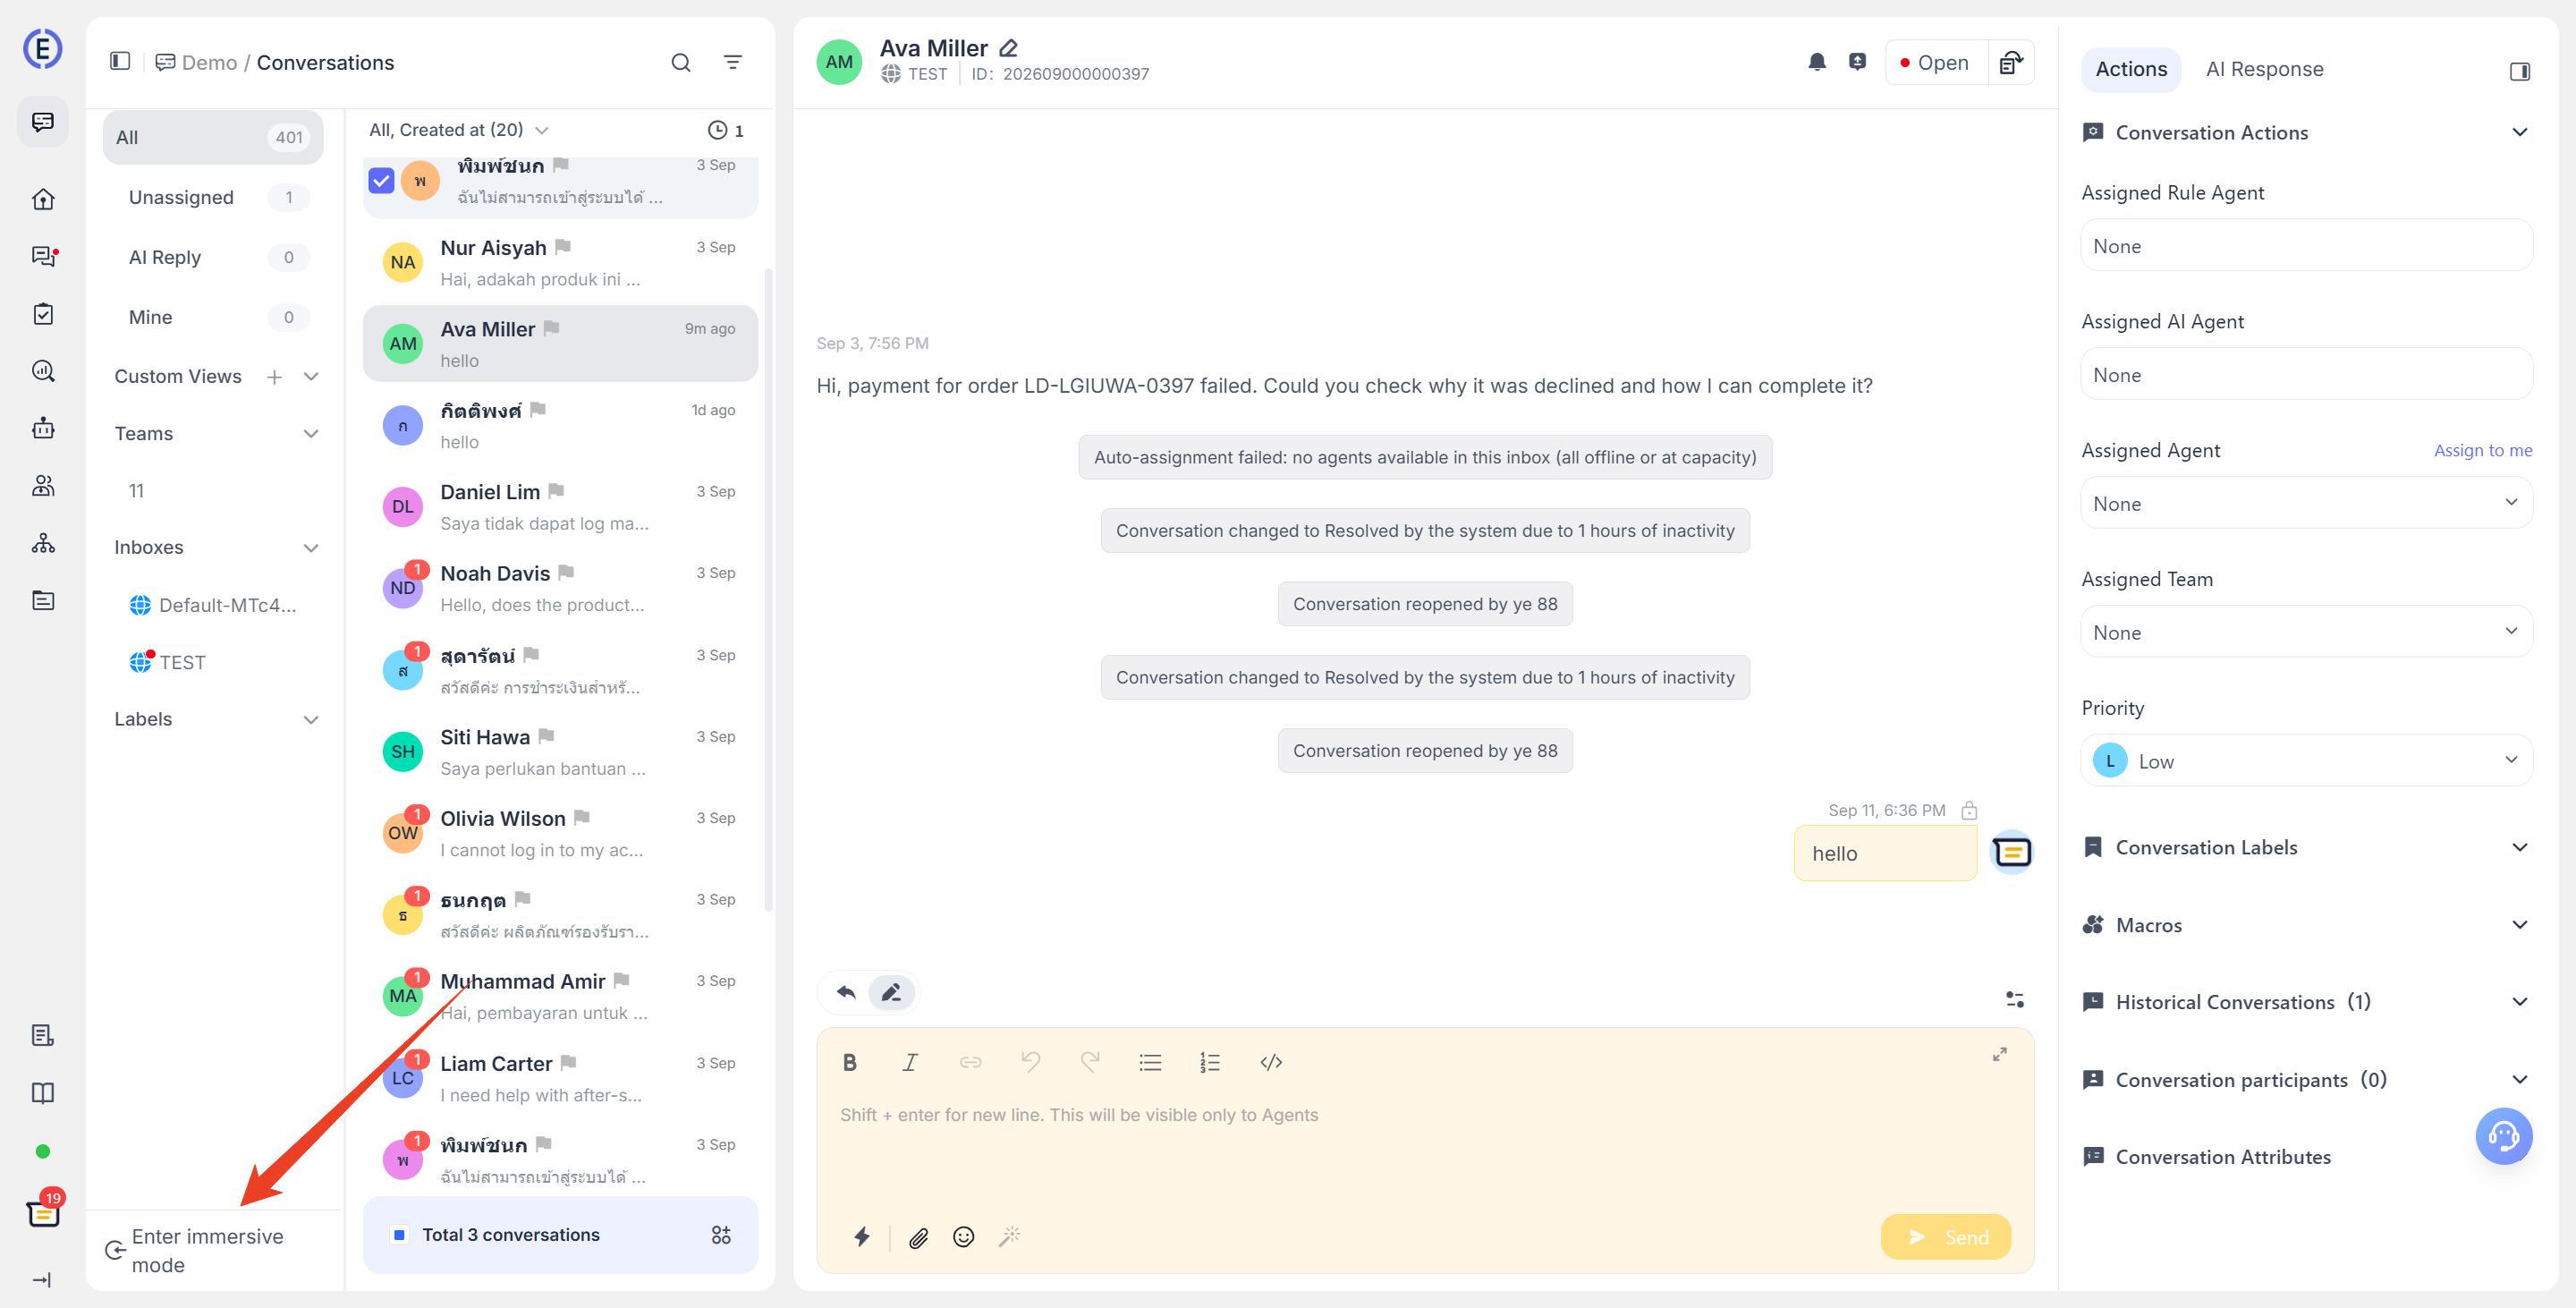
Click Enter Immersive Mode at the bottom of the left-side navigation to enable it. Click Exit Immersive Mode again to restore the normal view. After immersive mode is enabled, the menu icon at the top left opens a temporary navigation panel where you can switch teams, channels, tags, and custom views, or exit immersive mode directly.
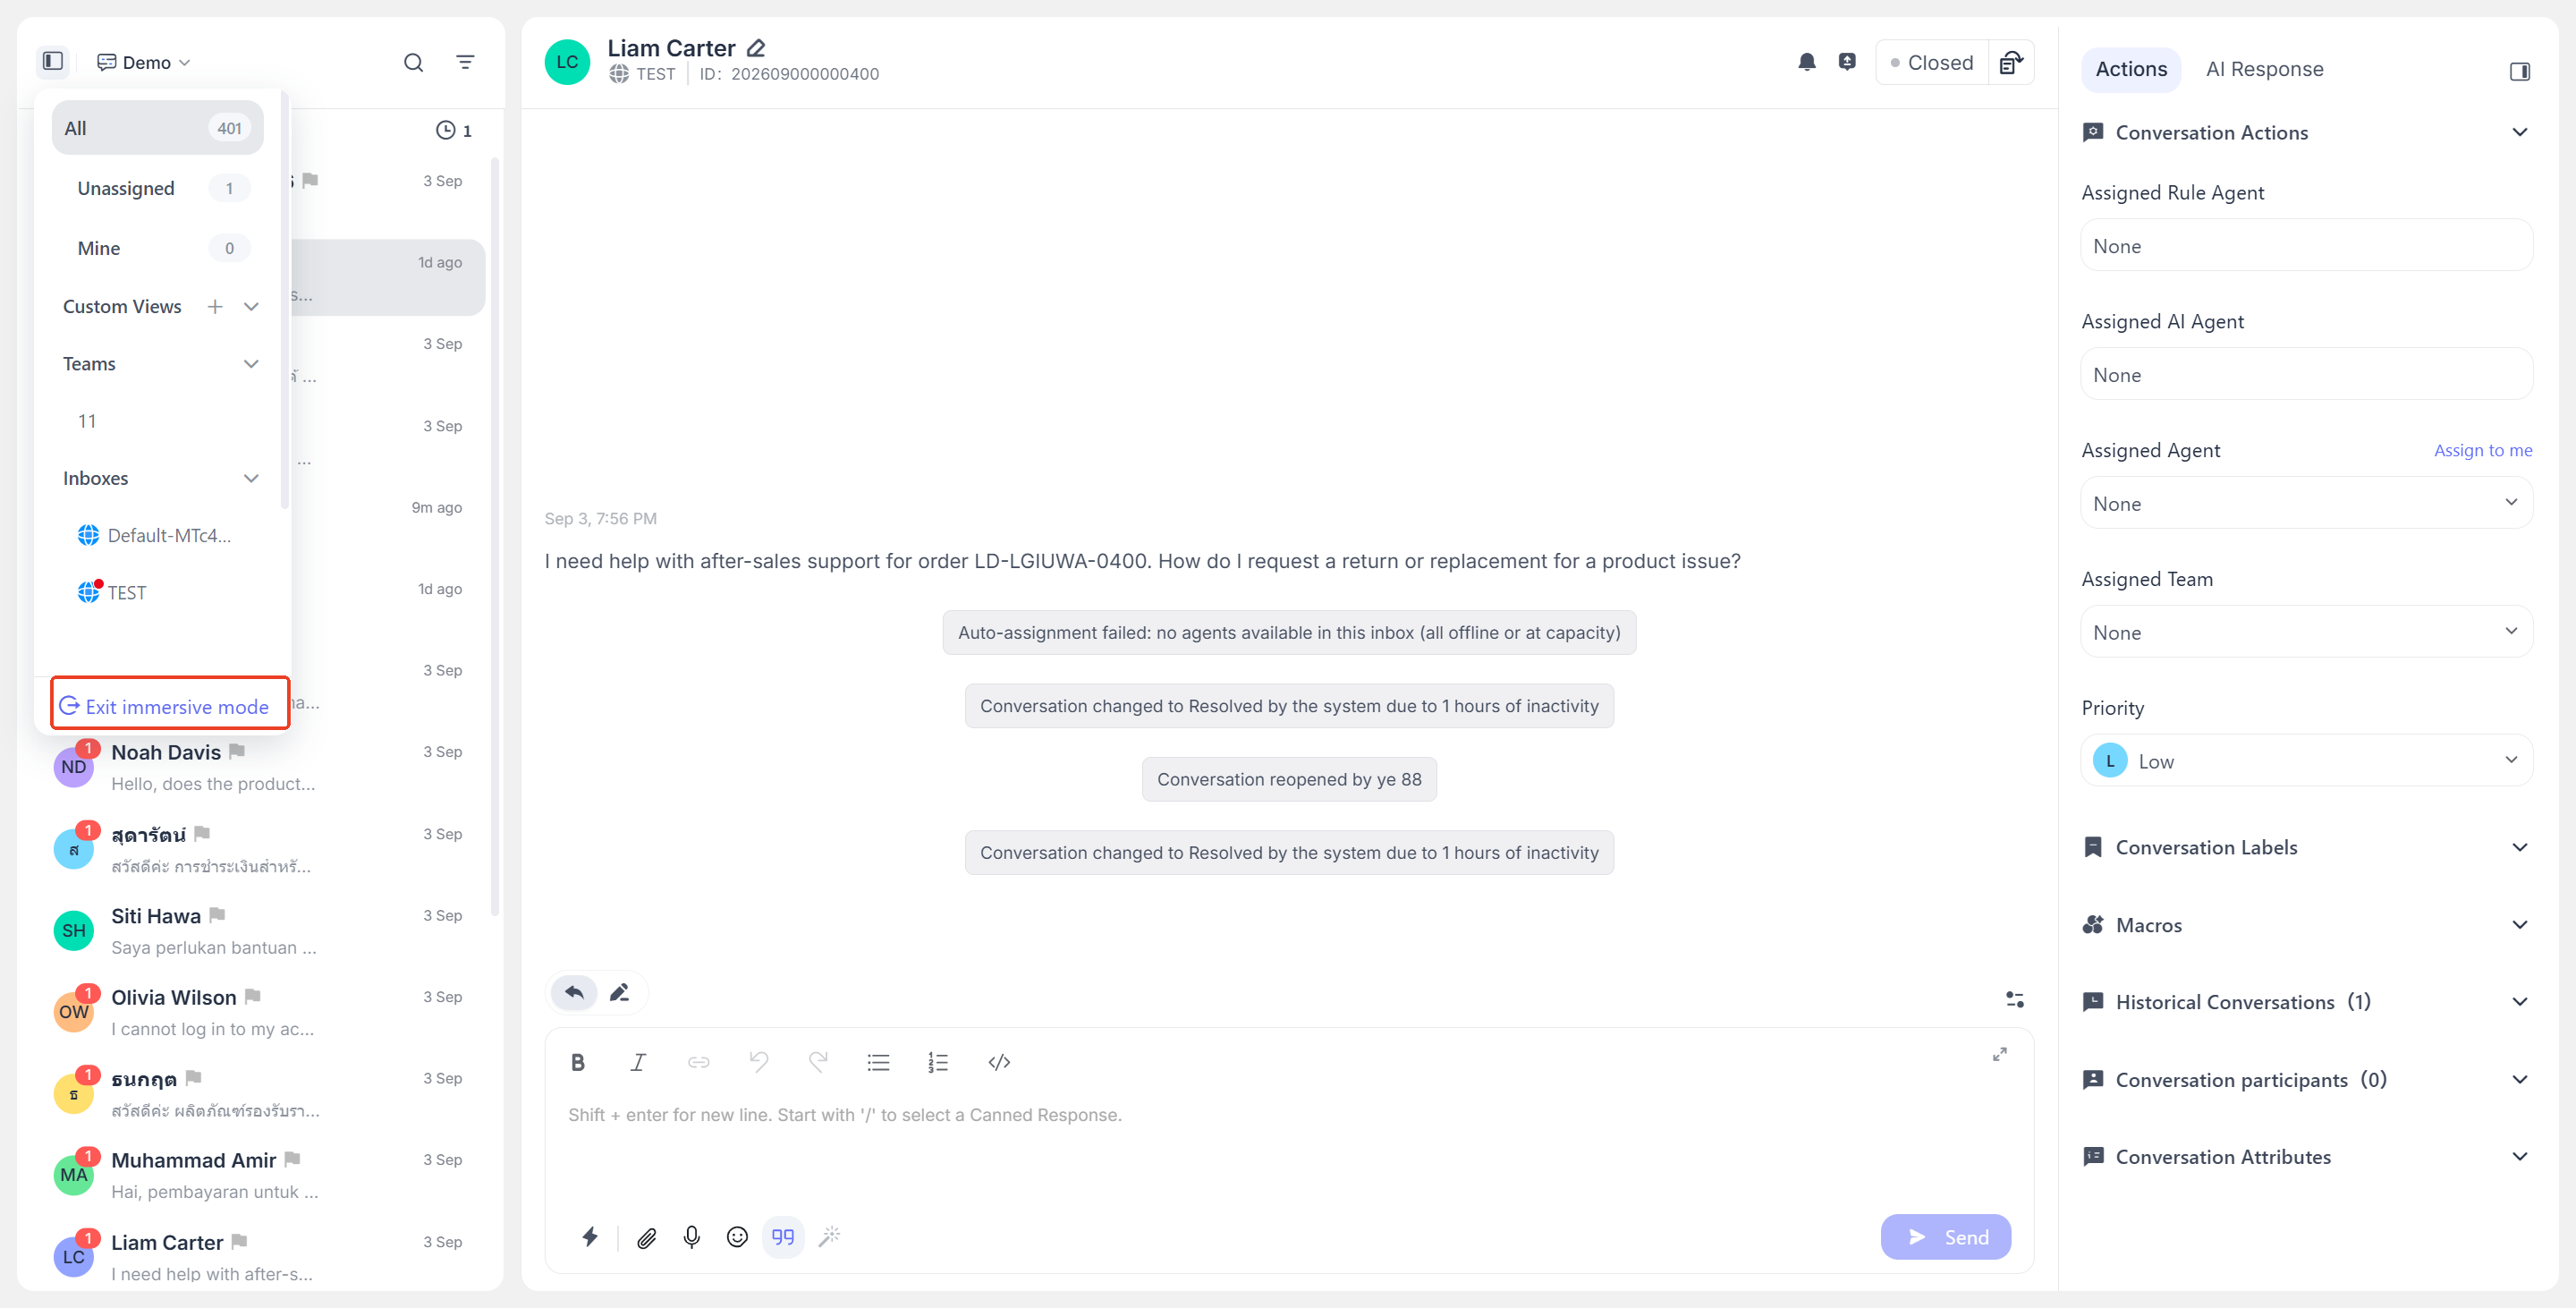
Page Changes in Immersive Mode
- The left-side main navigation and persistent secondary navigation are hidden, leaving more horizontal space for the conversation list and message details.
- The conversation list is retained, and you can continue switching between queues such as "All," "AI Response," "Unassigned," and "Mine" through the view tabs at the top of the list.
- Search, filtering, sorting, custom views, bulk actions, replies, status switching, and the right-side conversation information panel are all unaffected.
- Some nonessential helper prompts are hidden to avoid blocking the conversation handling area.
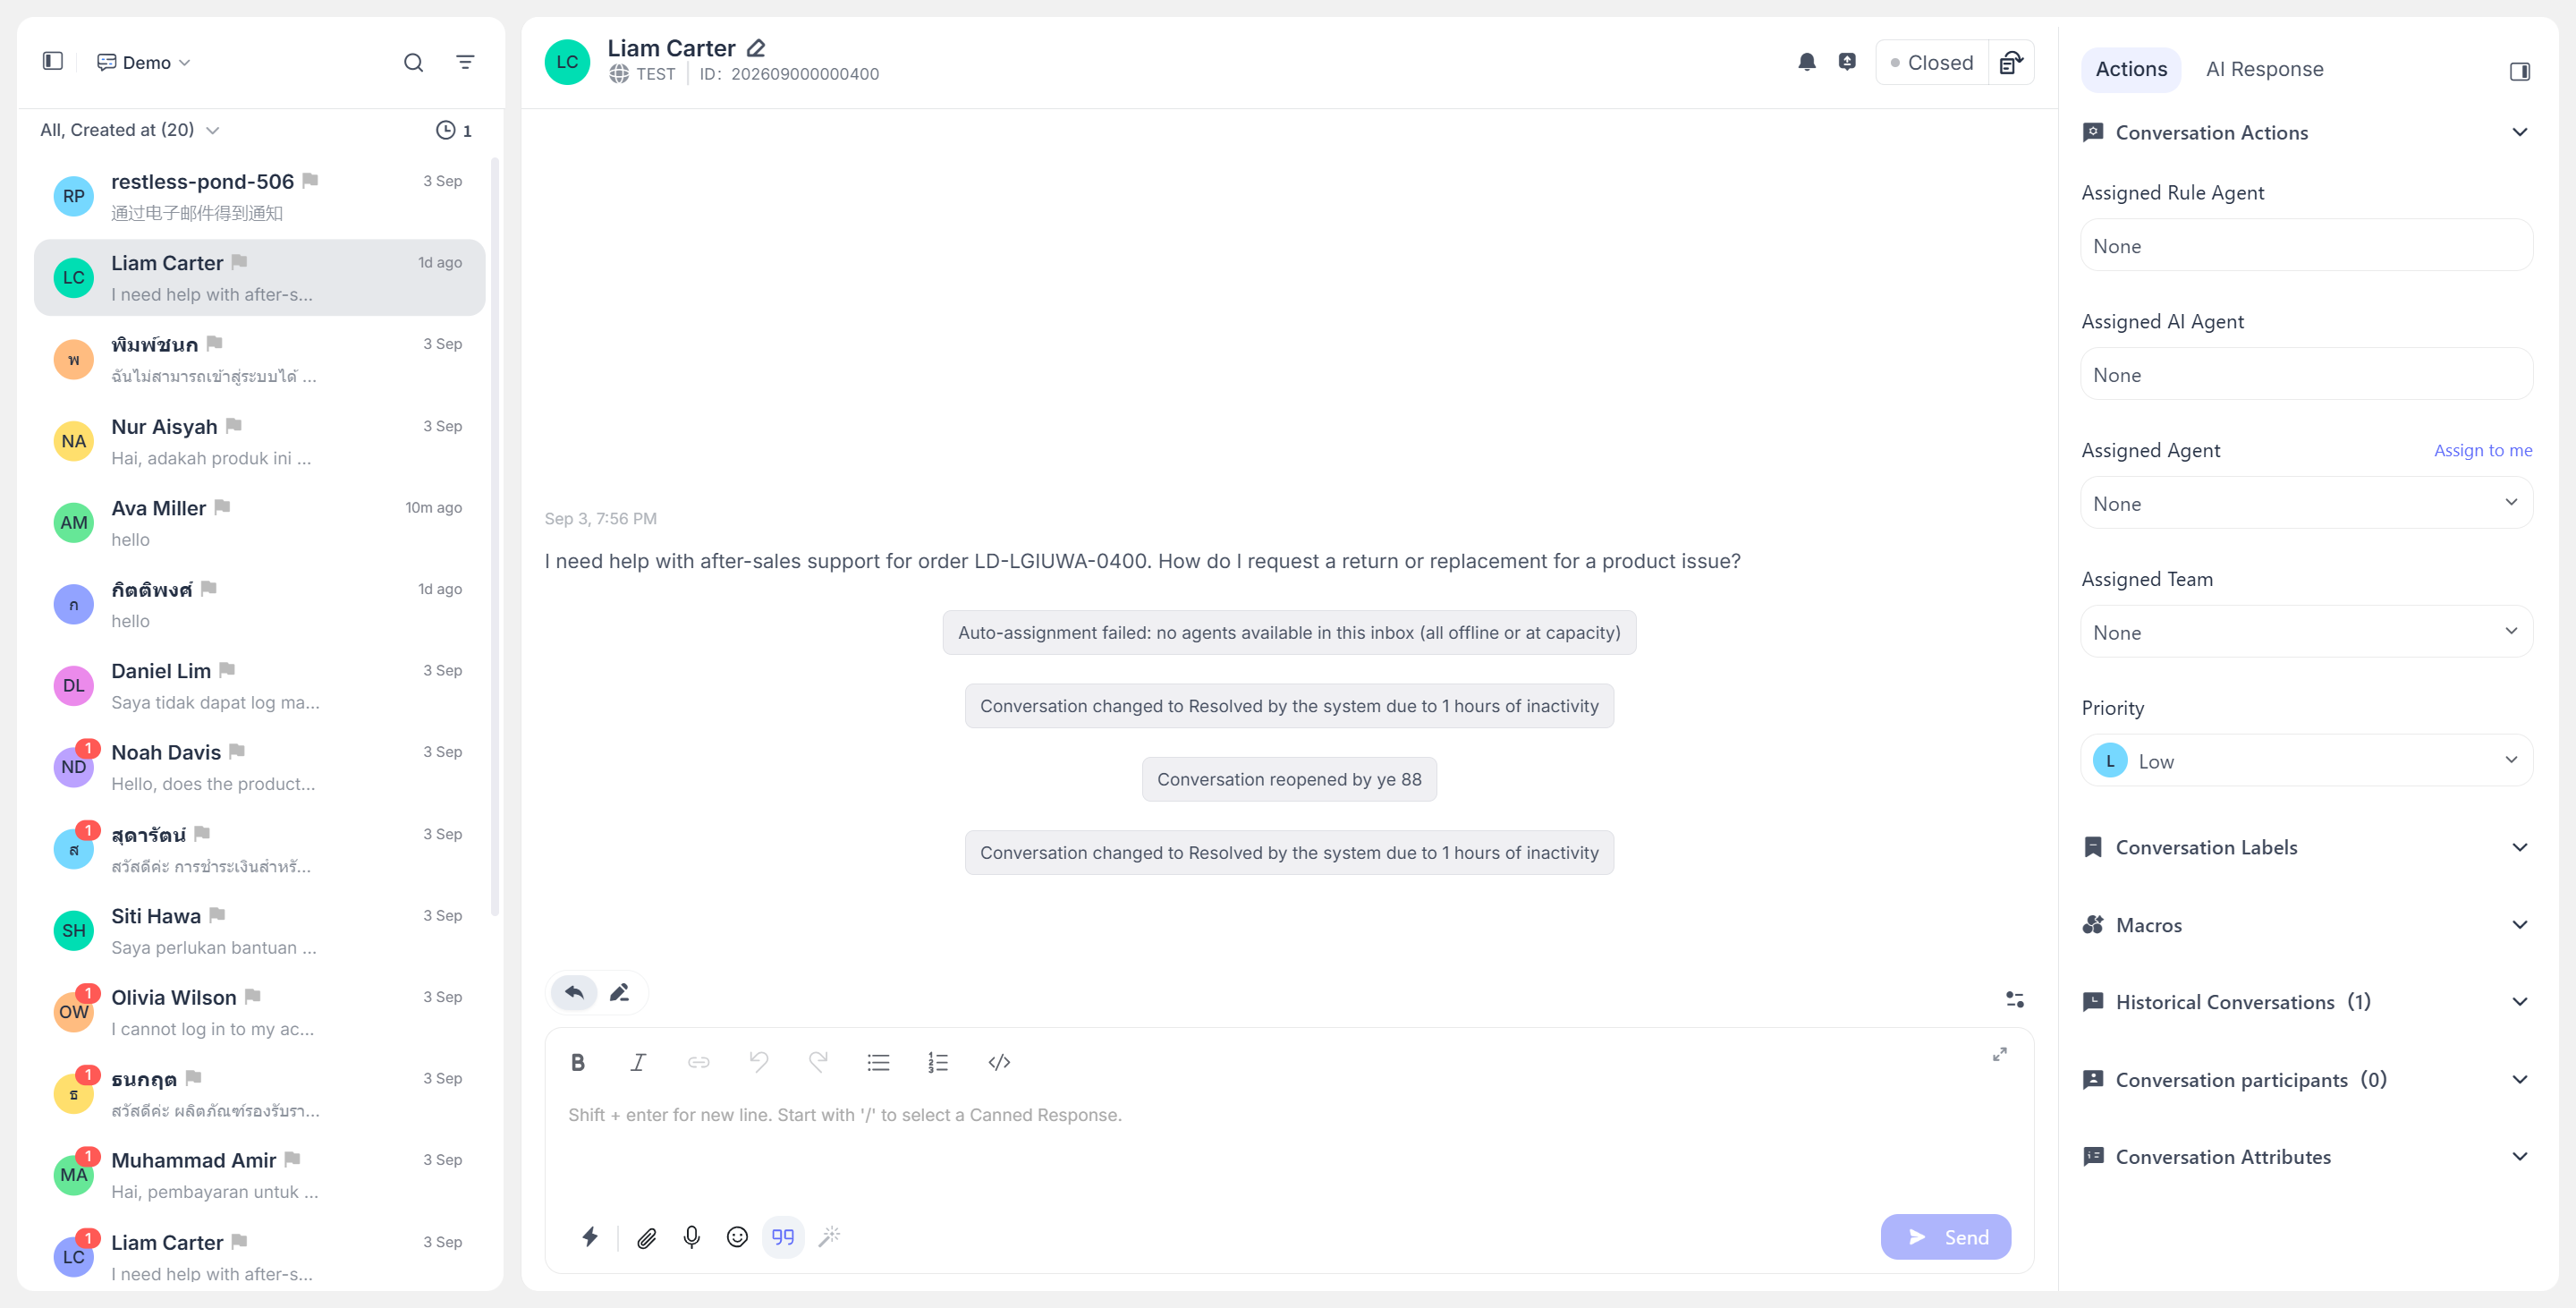
Recommendations
- Assign the conversation to a specific agent or team before replying and updating the status to facilitate follow-up statistics and collaboration.
- Use "Snooze" for inquiries that cannot be handled immediately; do not close them directly. When the resume time is reached, the system will reopen them.
- Save frequently used filter conditions as custom views to avoid repeated configuration.
- When handling complex inquiries that require follow-up from multiple people, add the relevant agents as conversation participants and use private notes to preserve internal context.
