How to Use the Action Trigger Component for Path Segmentation Based on User Actions?
Steps to Use the Action Trigger Component
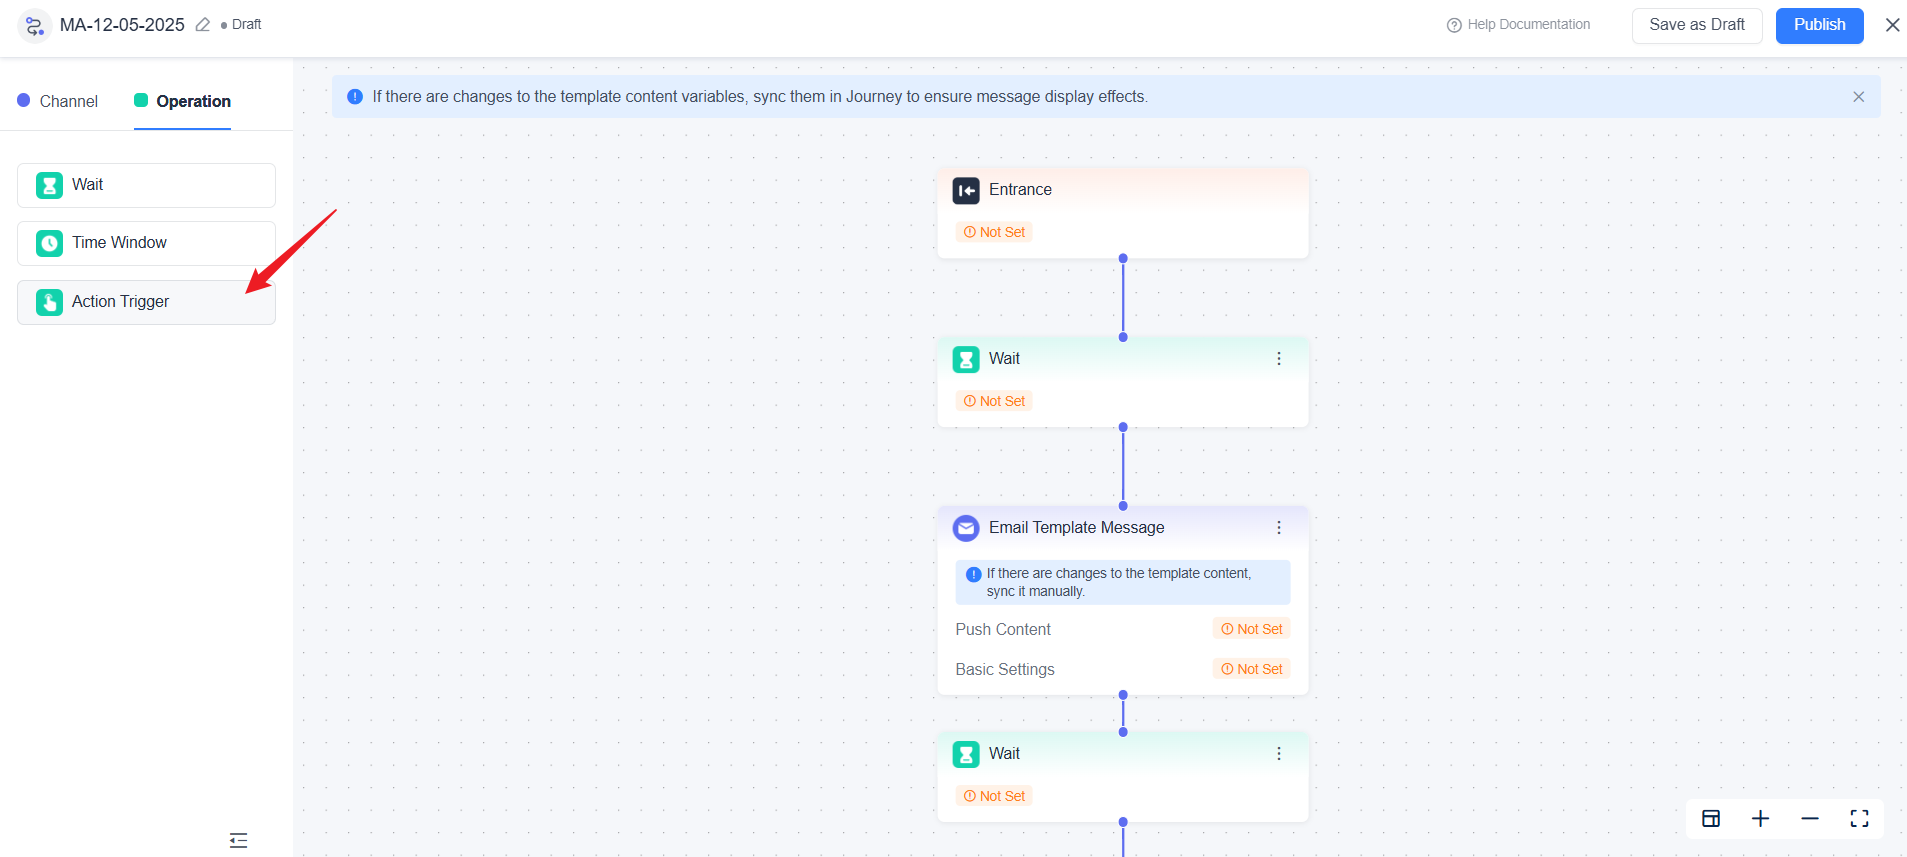
Add the Component
Drag and drop the Action Trigger component from the Operation category on the left side of the journey canvas.
Configure Trigger Logic
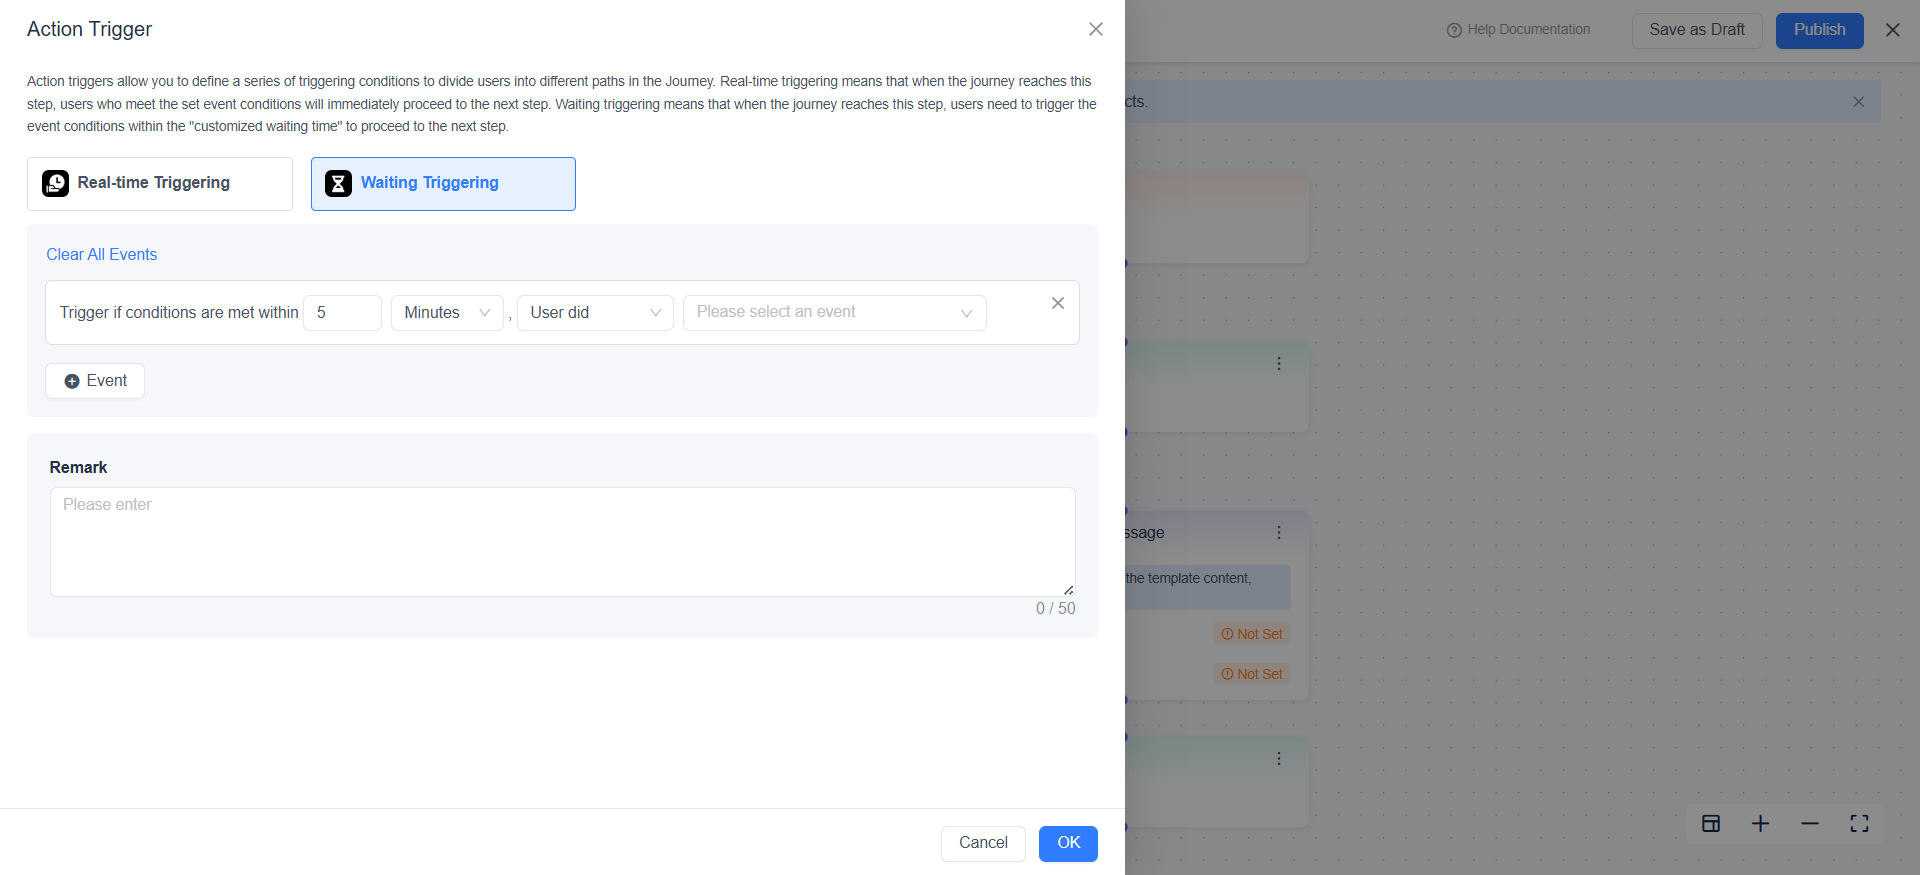
Select Target Event: Choose the event to monitor (e.g., opening the app, registration, placing an order).
Set Trigger Conditions: Define specific conditions (e.g., "payment completed" or "added to cart but not paid").
Choose Trigger Method
- Real-time Triggering:
When a user reaches this step, the system immediately checks whether the preset event conditions are met. If met, the user proceeds to the next step. If not met, the user remains in the current step or follows an alternative path.
Applicable to scenarios requiring instant responses, such as sending a welcome message immediately after user registration.
- Waiting Triggering:
When a user reaches this step, the system starts a customizable monitoring period. If the specified event occurs within the waiting time, the user proceeds to the next step. If the event does not occur within the waiting time, the user continues along the default path.
Applicable to scenarios requiring observation of subsequent behaviors, such as waiting 24 hours after sending a coupon to see if the user completes payment.
- Set Branching Paths:
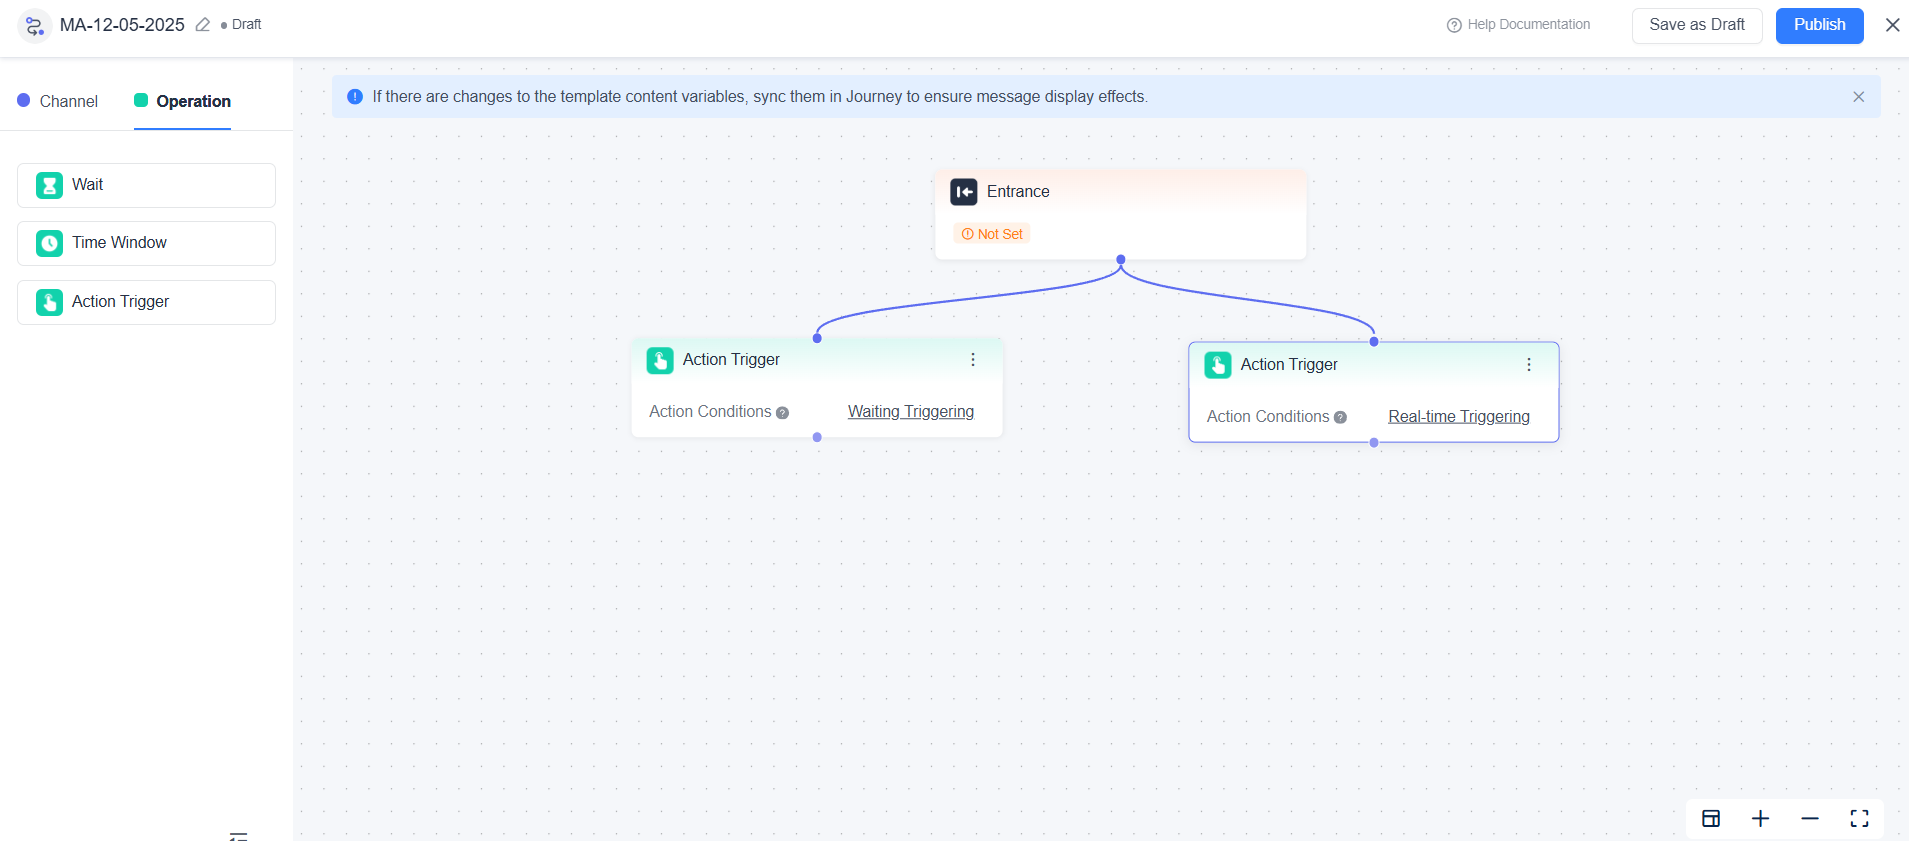
Connect subsequent branches based on different conditions to implement differentiated operations.
Application Examples
When a target user Payment Completed, automatically guide them to the thank-you message path.
When a target user Adds to cart but does not pay within 1 hour, guide them to the discount reminder path.
With this component, you can dynamically adjust operational strategies based on real-time user behavior, thereby improving conversion efficiency.