Jacob Morrow
Updated: 2026-01-15
User engagement is of significant importance to businesses today. Engaged users bring more revenue and sales compared to disengaged users. There are many ways to engage users now, but push notification is found to be an effective tactic. Almost 90% of push notifications are opened by users. Therefore, if you also have an iOS app and want to engage users with iOS push notifications, then this guide is for you.
In this guide, we will first clarify the basics of push notifications and Apple Push Notification Service (APNs) and then discuss in detail how to set up iOS push notifications for your app. So, let's head right to it!
Part 1. What is Push Notification and APNs?
What is Push Notification?
A push notification is a short message/alert sent by the app to the user's device. For example, a newsstand app can send push notifications about breaking news, or a services app can send push notifications about discounts or the latest updates.
Push notifications are essential for enhancing user engagement and retention in mobile applications. They serve as a direct communication channel between your app and its users. When your app isn't active, push notifications can deliver timely updates, alerts, reminders, or personalized content to keep users informed and encourage them to re-engage.
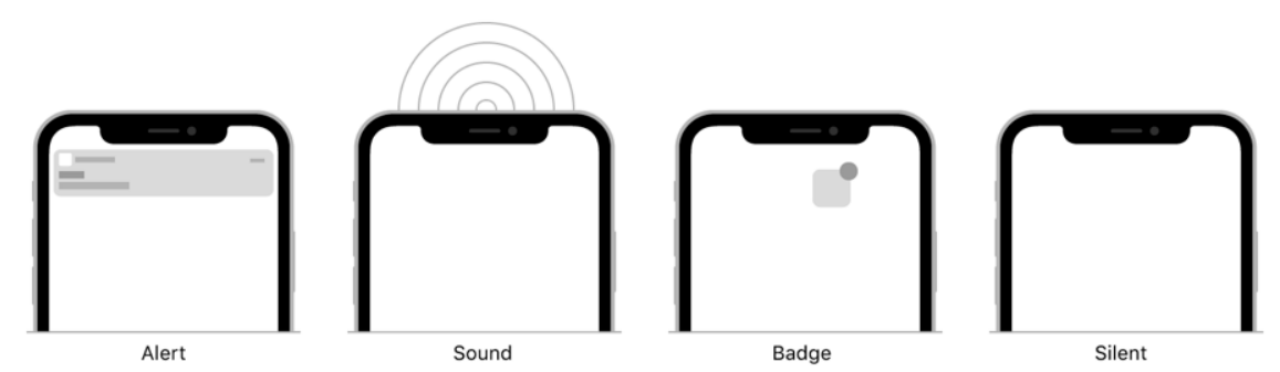
Apple Push Notification Service (APNs) is an Apple cloud service that allows iOS apps to send push notifications to users who have installed their apps. Simply put, it is an intermediary between the app's server and the user's device. The app server sends the message (device token + payload) to APNs, which then routes the message to the targeted device. It can display the message, play a distinctive sound, update a badge, or alert silently on the app. In short, APNs play a key role in communicating iOS push notifications.
APNs Workflow
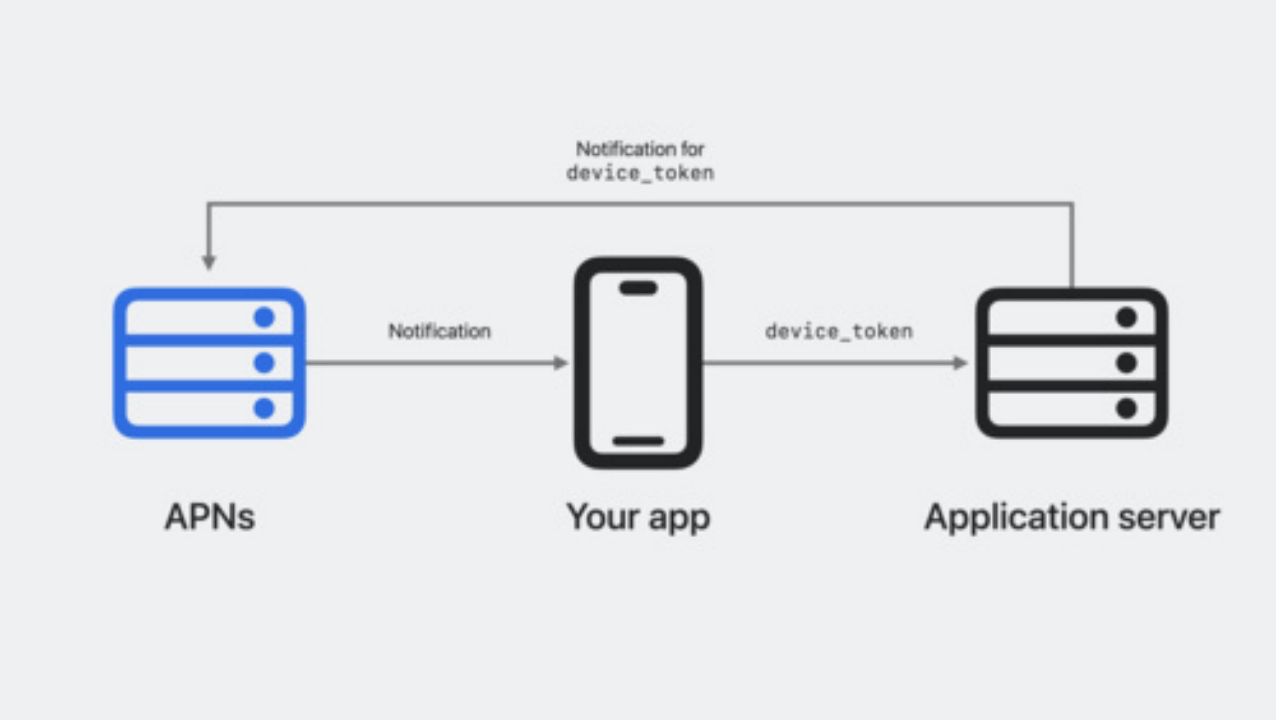
The workflow of how the APNs push notification iOS works is as follows:
- Device Registration:When a user installs your app, it registers with APNs. The app receives a unique device token that serves as the address for notifications.
- Provider Server Interaction:Your app's provider server (usually hosted by you) needs this device token to send notifications. The server constructs a POST request and sends it to APNs.
- Authentication and Validation:APNs validates the request either through your server's certificate or an authentication token.
- Delivery to Devices:Upon successful validation, APNs delivers the notification to the user's device.
This is the typical workflow of APNs push notification on iOS devices. Now, let's discuss in detail how to set up iOS push notifications on your own.
Part 2. How to Setup iOS Push Notification on Your Own
To set up iOS push notifications on your own requires a series of steps. You have to enable push notifications in Xcode and Apple Developer Portal, create and download certificates from Apple, and do other similar activities.
Before we discuss the steps, make sure you fulfill the below prerequisites:
- You have a macOS computer with installed Xcode.
- You have an Apple Developer account.
- You have an iOS device to test push notifications.
Once you fulfill the above prerequisites, follow the below steps to learn how to setup iOS push notifications on your own:
Step 1. Set Up Push Notifications in Xcode
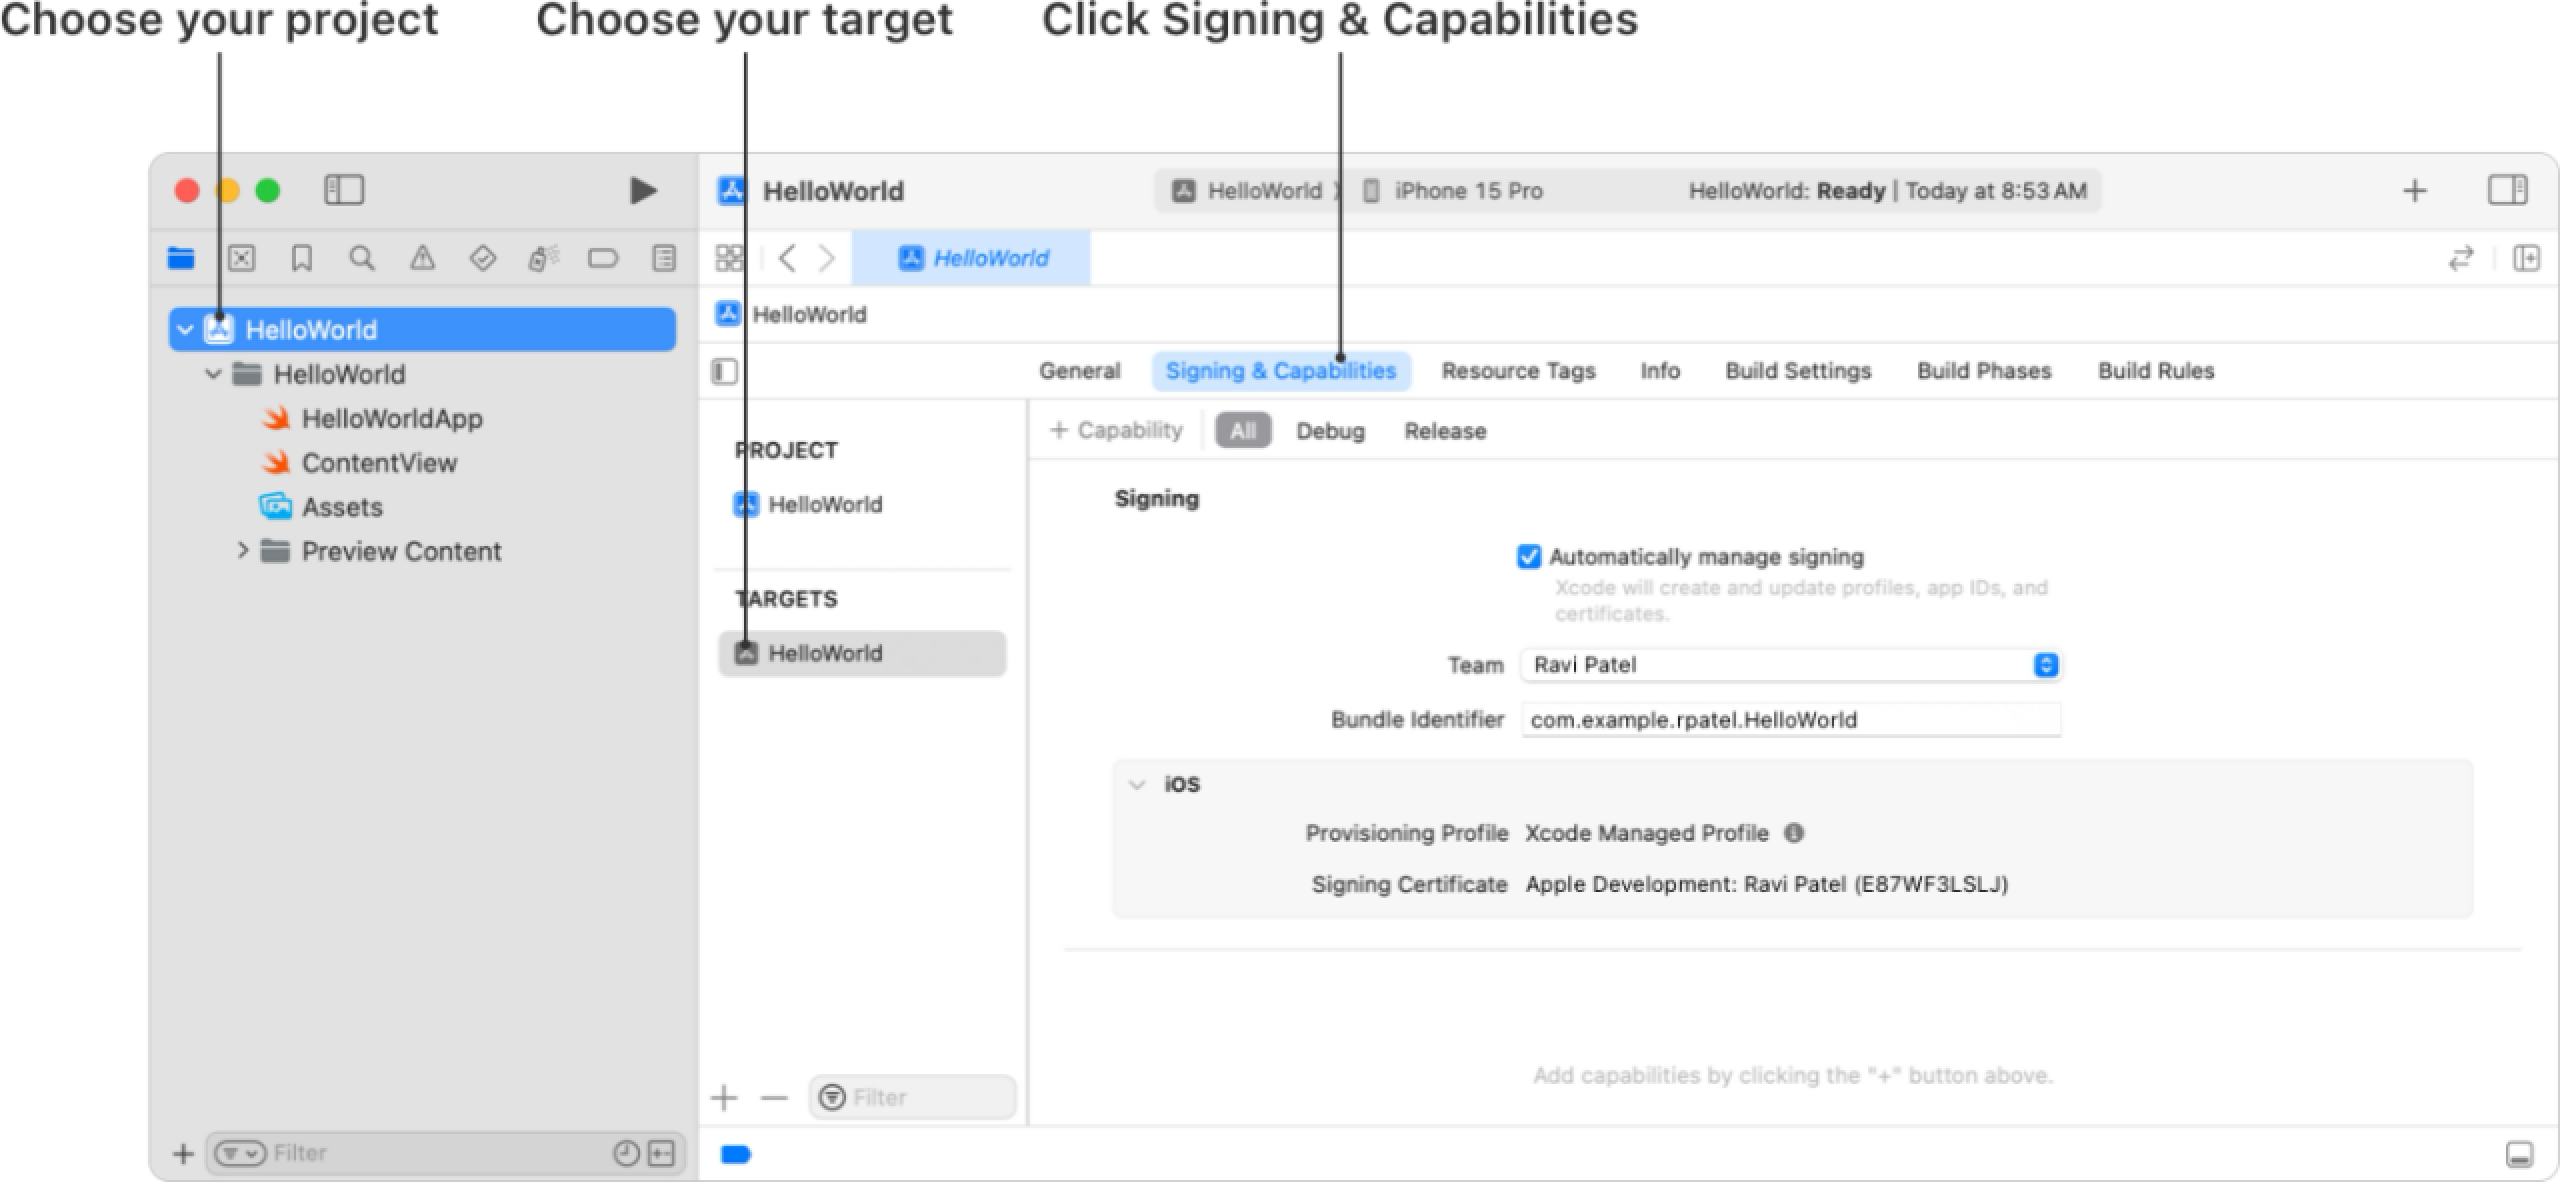
The first step is to set up push notifications on your app's Xcode project. For that:
- 1. Open your Xcode project.
- 2. Click the Signing & Capabilities tab of the targeted app.
- 3. Enable Push Notifications.。
Step 2. Activate Push Notifications in the Apple Developer Portal
Now you have to activate push notifications in the Apple Developer Portal for your App ID. For that:
-
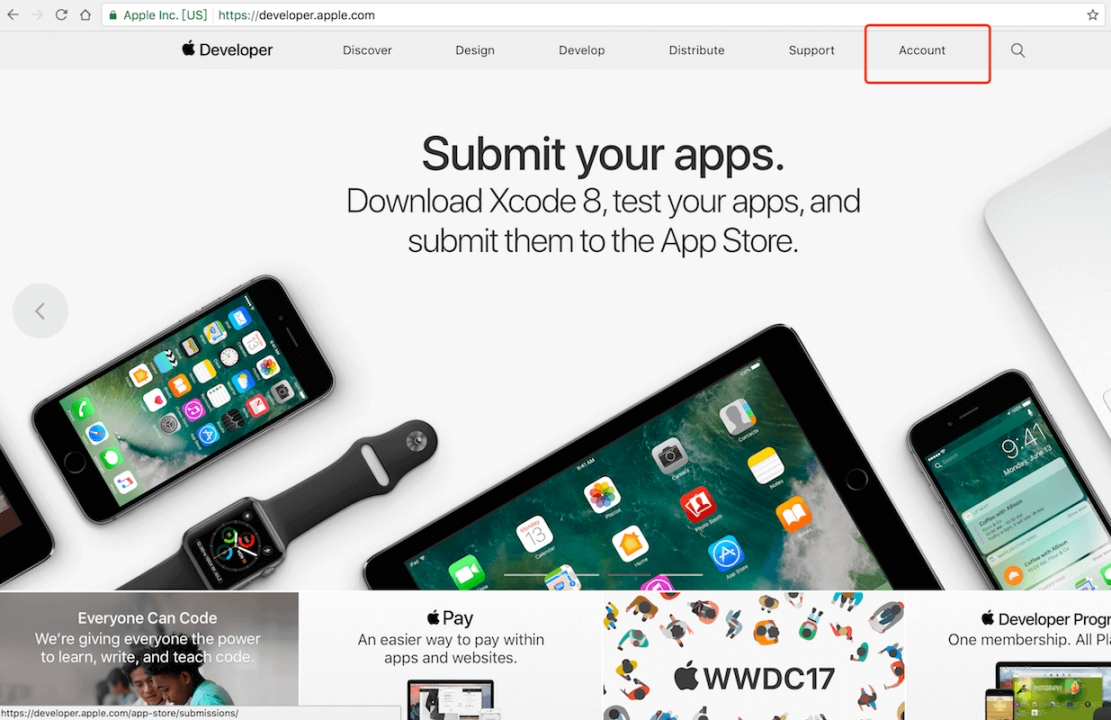
1. Go to the
Apple Developer website
and log in to your developer account.
-
2. From the left sidebar, select
Certificates, IDs & Profiles.
-
3. Click Identifiers from the left side and view your app's
details under App ID.
-
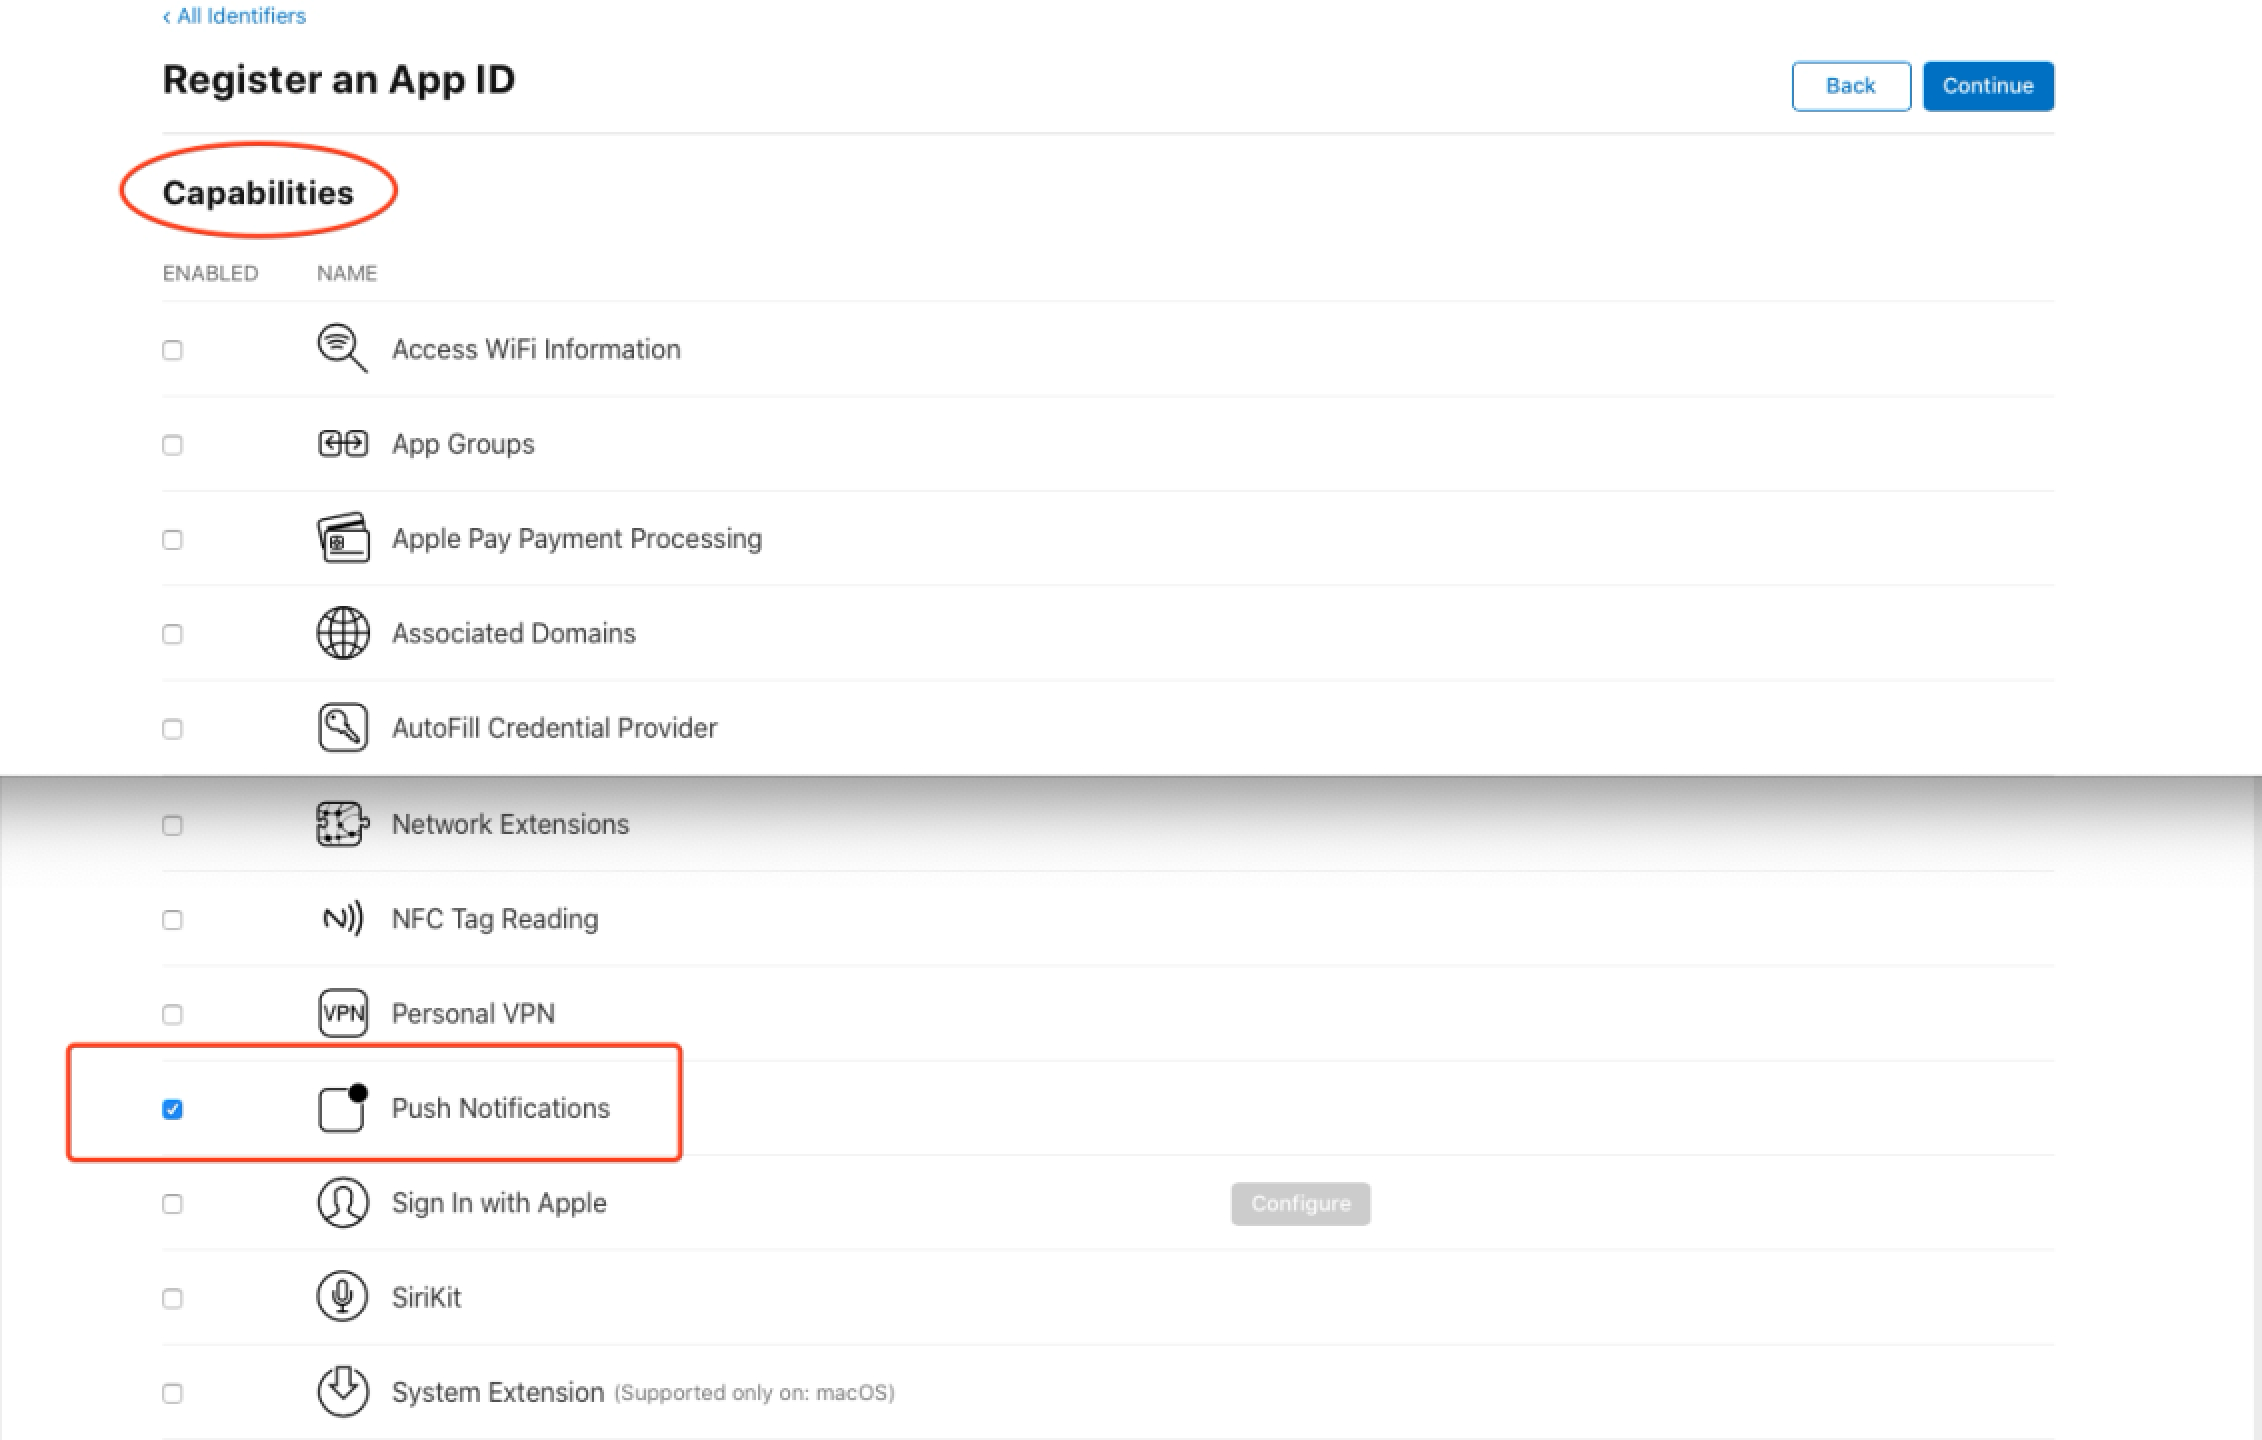
4. Go to the Capabilities tab and tick the
Push Notifications.
- 5. Save the changes.


Step 3. Create/Download an Authentication Token or Certificate from Apple
Your app server has to communicate with APNs to inform what push notification to send and to whom. Apple provides two ways to authenticate with APNs, i.e., token-based authentication (.p8 file) and certificate-based authentication (.p12 or PEM file).
1 Token-based Authentication (.p8 file)
This approach involves using the non-expiring, same authentication token to send notifications to all apps. It is recommended by Apple and considered the fastest approach for APNs authentication. In order to configure token-based authentication:
- 1. Follow Apple's instructions related to Establishing a Token-Based Connection to APNs
- 2. Download the .p8 file.
2 Certificate-based Authentication (.p12 or PEM file)
This approach is per-environment and per-app certificates for sending notifications. Furthermore, you have to keep them up-to-date because they expire each year. To configure certificate-based authentication:
- 1. Follow Apple's instructions related to Establishing a Certificate-Based Connection to APNs
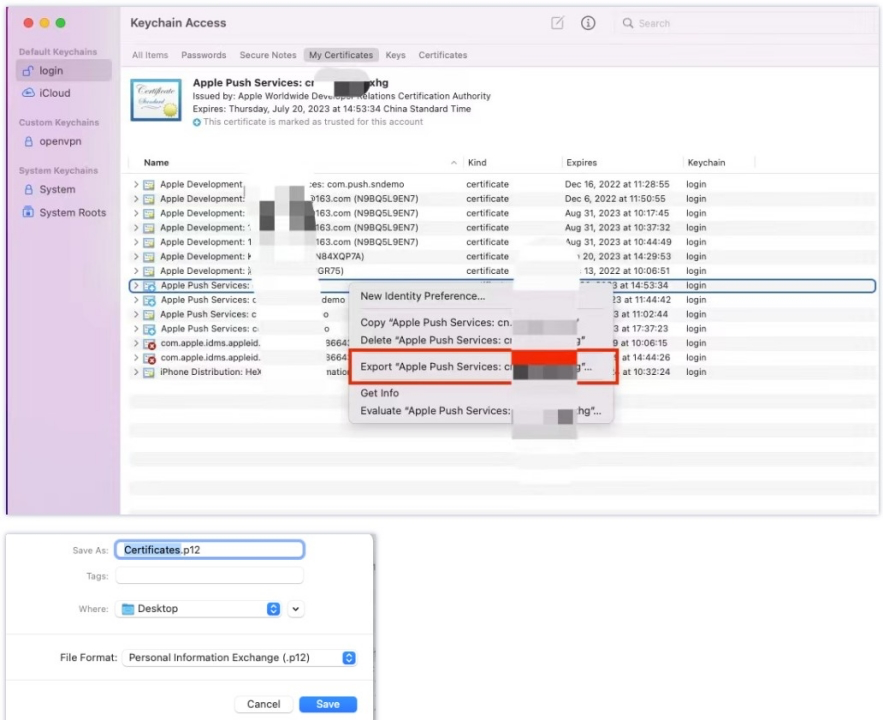
- 2. Download the certificate. Double-click it to install it in KeyChain Access and select to install it in the login keychain.
- 3. Launch KeyChain Access and navigate to the login.
- 4. Select the certificate, right-click the mouse, and tap Export.
- 5. Type the name under the Save as Select the .p12 file format and Save.
Step 4. Authentic the iOS App using the Token or Certificate
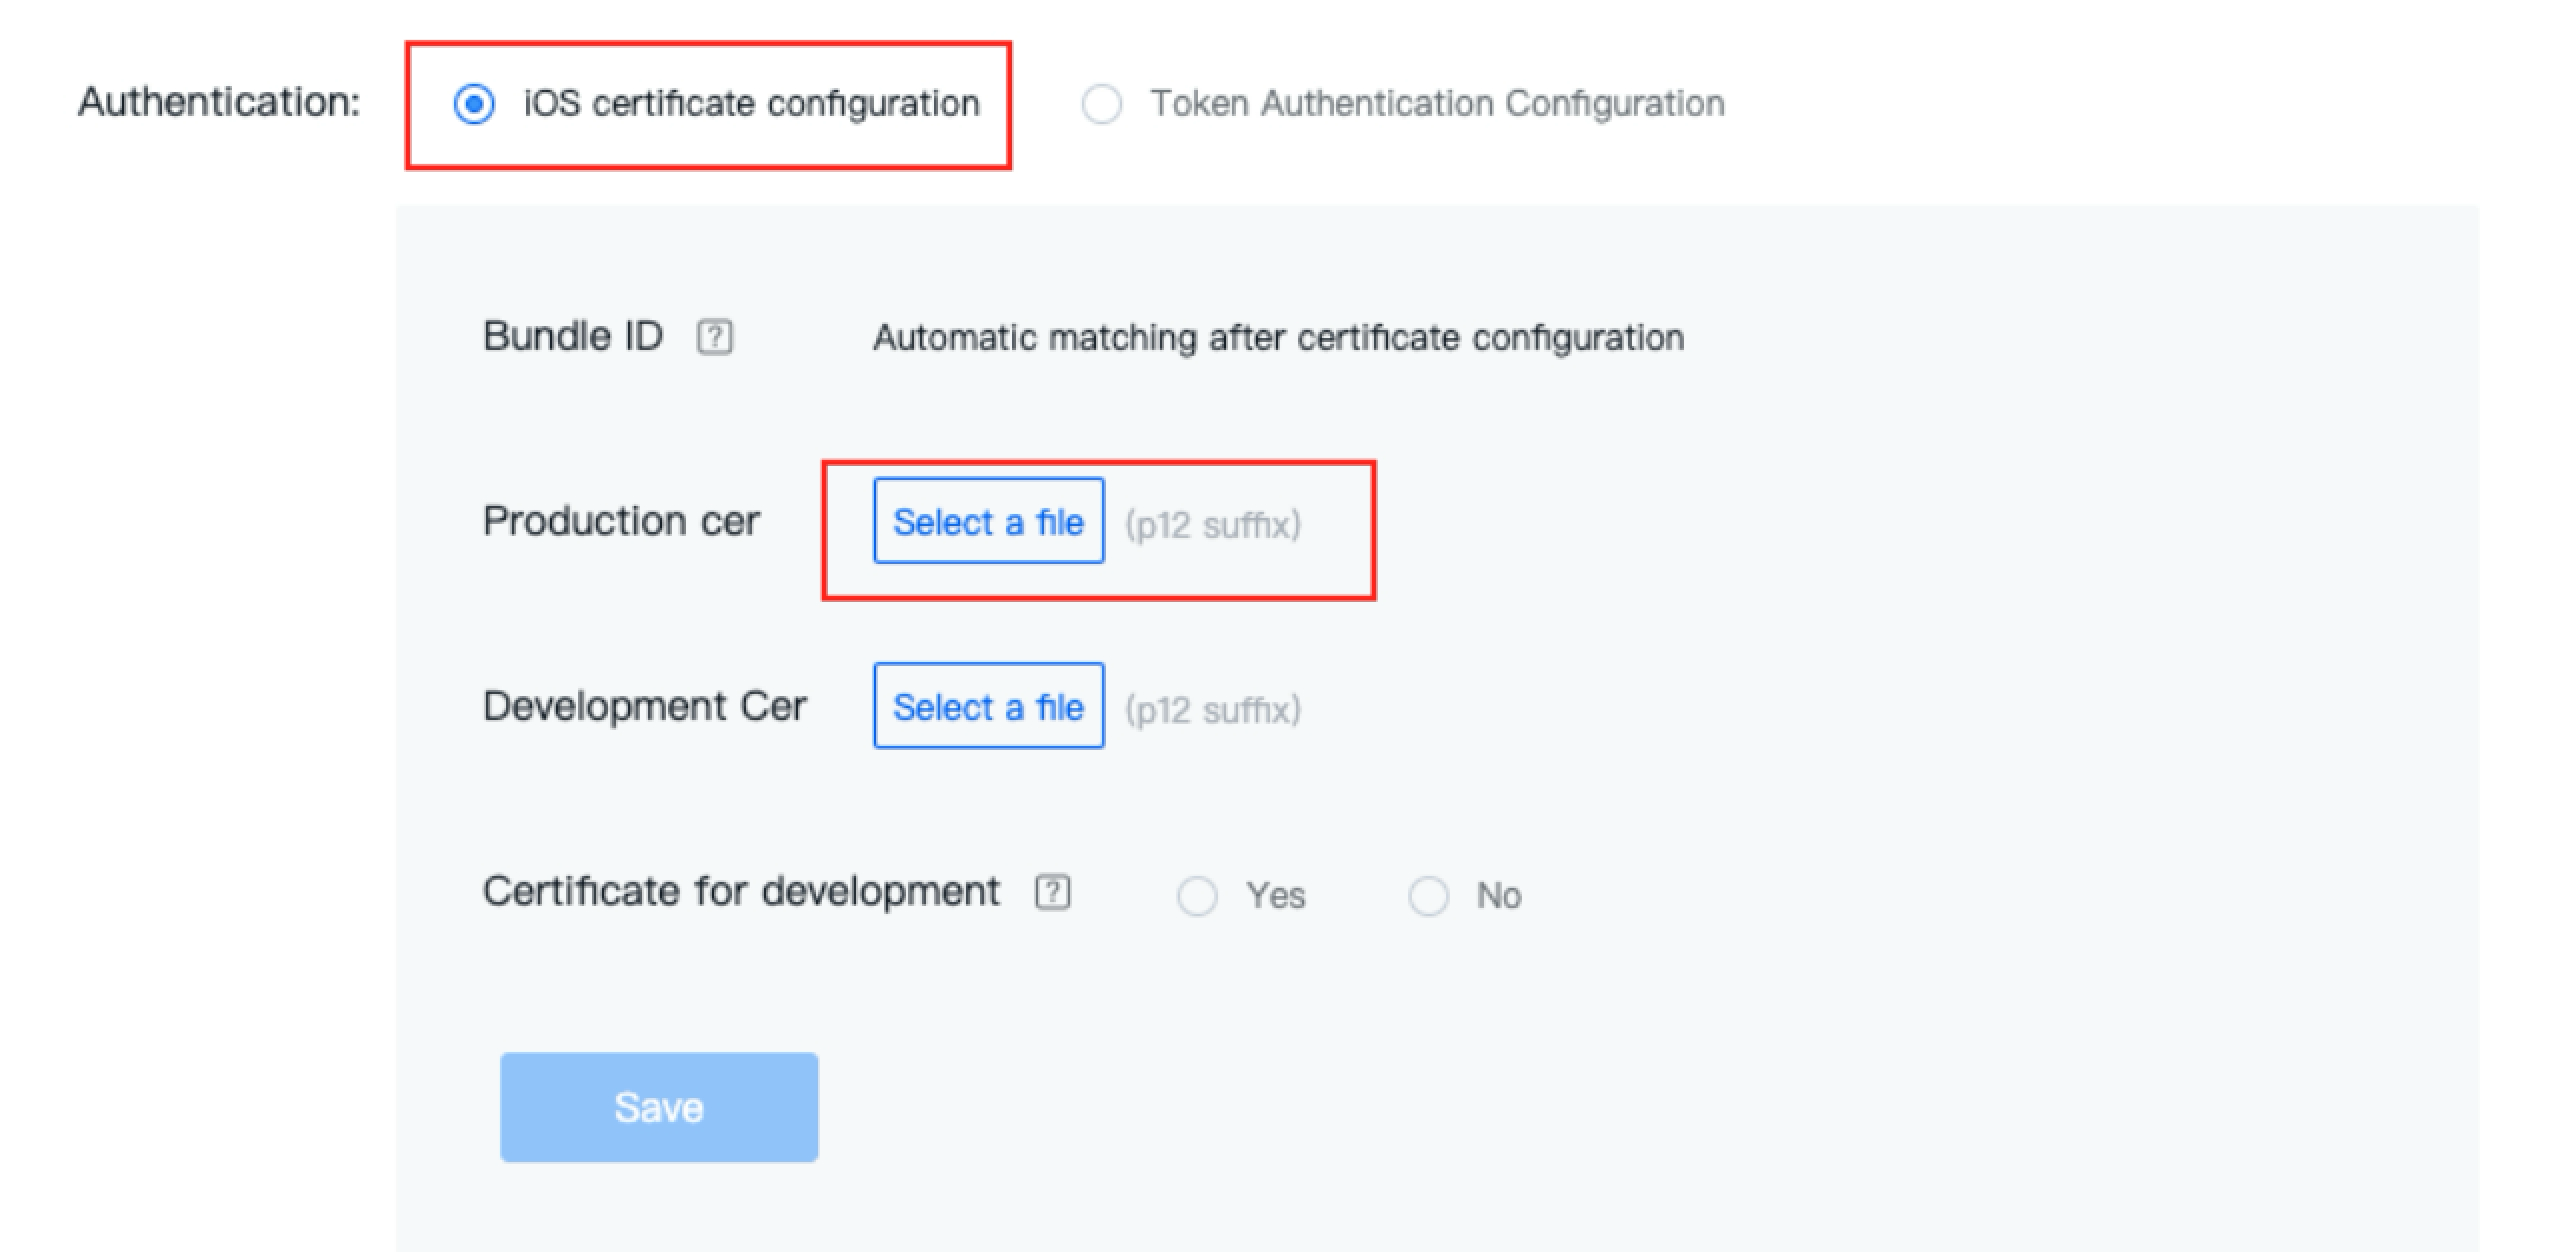
Next, you have to use the above download .p8 or .p12 file to authenticate the iOS app. For that, create or update the app in any customer engagement platform, like EngageLab, Iterable, etc.
Once done, navigate to the iOS Authentication in your app Settings. From there, select iOS Certificate Configuration or Token Authentication Configuration and upload the file. Afterward, the platform will authenticate the app in the background.
Step 5. Install and Configure iOS SDK
Depending on the platform you used in step 4, you now have to install the configure that platform's iOS SDK to simplify working with iOS push notifications. To do that, read the platform's guide on how to install and configure iOS SDK, such as EngageLab iOS SDK or Iterable iOS SDK
Step 6. Test Push Notification
The last step is to send a test push notification. So, configure the message and send it to the targeted device and see if it is received successfully.
Part 3. How to Setup iOS Push Notification Without Hassle All-in-One Solution
Part 2 discussed in detail how you can set up APNs push notification on iOS on your own. It is clearly evident that it is a complicated process that requires extensive configuration and technicalities. However, what if we tell you that you can skip all the steps and set up iOS push notifications without hassle? Yes, that is made possible with EngageLab.
EngageLab is a well-known omnichannel messaging solution and a powerful customer engagement platform. It provides an intuitive and click-based approach to set up and send iOS push notifications. Here's how to use EngageLab to configure push notifications effortlessly:
-
1
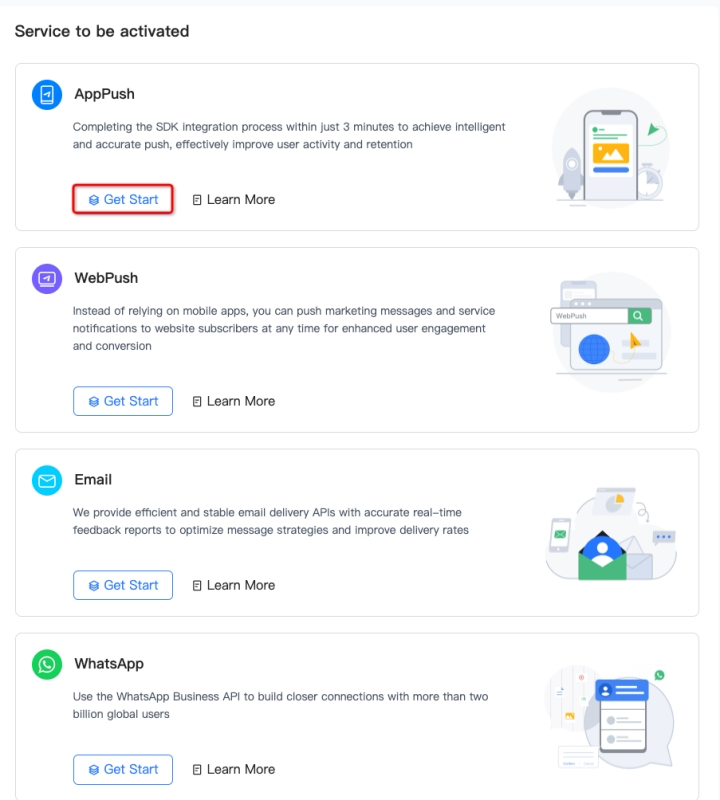
Step 1: Get Started
Go to the EngageLab web page and set up an account following the on-screen instructions. Under the AppPush section, click Get Started.
-
2
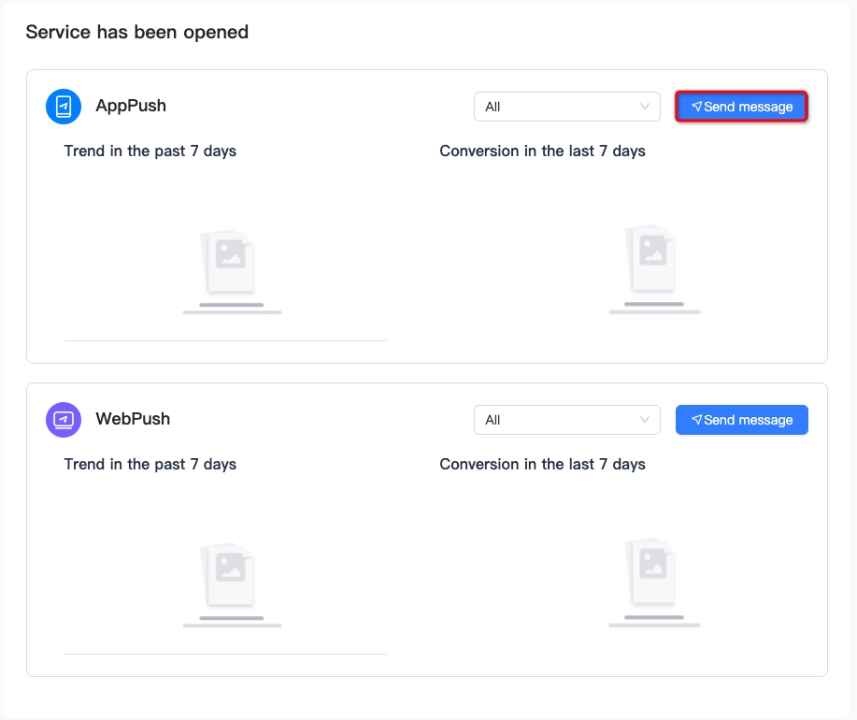
Step 2: Create AppPush App
In the next window, click Send message next to AppPush. Enter the app's name and upload its icon. -
3
Step 3: Access the App
Click Enter to access the app. -
4
Step 4: Create a Notification Message
To create the push notification, click Push Create a Push Create a Notification Message. Fill in the required details, such as target platform, title, content, sending time, etc. -
5
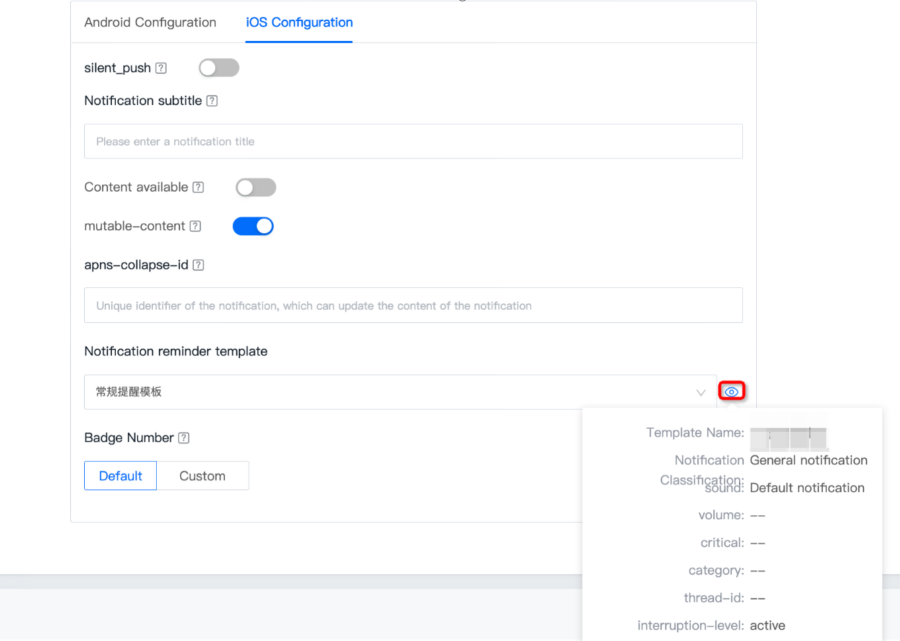
Step 5: Advanced Options
Under theAdvanced Options, you can configure further settings. -
6
Step 6: Preview
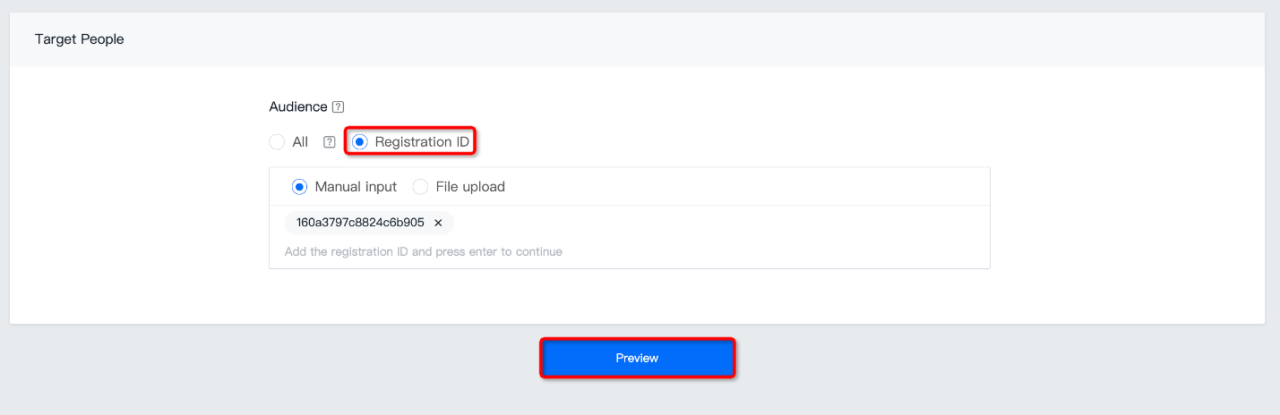
Specify the target people. You can either select all users or selective ones. Once done, click Preview. -
7
Step 7: Finish
If everything is correct in the Preview, click Confirm.


That's it! This way, EngageLab provides an all-in-one platform to quickly configure and send push notifications without any hassle.
Part 4. Why Choose EngageLab as the Best Push Notifications Service
Considering the growing use of push notifications and the overly complex process of configuring APNs push notifications for iOS, EngageLab dominates as an alternative and best service.
EngageLab is a modernized and intuitive iOS push notification service that offers many top-notch features iOS app developers need to elevate their push notification game. Some of the key features of EngageLab include:
-
1
Wide Application Scenarios
It can send push notifications for different application scenarios, such as user behavior-triggered notification, service change-based notification, location-based notification, and user characteristic-based notification. -
2
Support All iOS Notification Types
It supports all iOS notification types with in-built rich media and delivery confirmation in real-time. -
3
Diverse Notification Formats
It offers diverse notification formats, including large text, notification bar, large picture, full-screen notification, pop-up, notification drawer, and more. -
4
Push Analytics
It provides a comprehensive dashboard of push analytics with multi-dimensional data metrics, push query statistical data, push callbacks, and more. -
5
Push API
It offers rich user segmentation, end-user time zone delivery capabilities, timed tasks, multiple-language code samples, and more. -
6
Minimal Learning Curve
It offers an intuitive interface and click-based steps, which require a minimal learning curve. -
7
Free Solution
It offers a 30-day free trial of push notification service with access to all features. Once the trial ends, you get charged only for the actual usage. -
8
Technical Support
It offers 24/7 customer service and thorough documentation in multiple languages.
Overall, EngageLab ticks all the checkboxes to be the best iOS push notification service you need for hassle-free and strategic push notification campaigns.
Conclusion
iOS push notifications are the perfect way to engage with users and encourage them to get more involved with the app. In this guide, we have discussed in detail how to set up APNs push notifications for iOS on your own and through an all-in-one solution by EngageLab. Now, the final choice is yours. However, if you want to save time and need an easy way to create and send push notifications, then EngageLab is the ideal pick. Therefore, we will wrap up by recommending you begin with the free trial of the EngageLab app push service and uplift your iOS push notification game.