EngageLab MA Email Configuration Guide
I. Overview
The Email channel is a reach method within the EngageLab MA platform, used to contact users via email within a Journey. Once the channel is configured and enabled, users can directly select this channel in a journey node to send emails. This channel needs to be bound to the EngageLab Email through the creation of an API user to enable message delivery.
II. Configuration Steps
Step 1: Create an Email API User
- Log in to the EngageLab Console → Access the Email Platform.
- Create an
API_USER. - After creation, the system will generate an Access Key / Secret Key pair. Please store them securely.

Note: The Email channel configuration will be authorized and implemented through this API user.
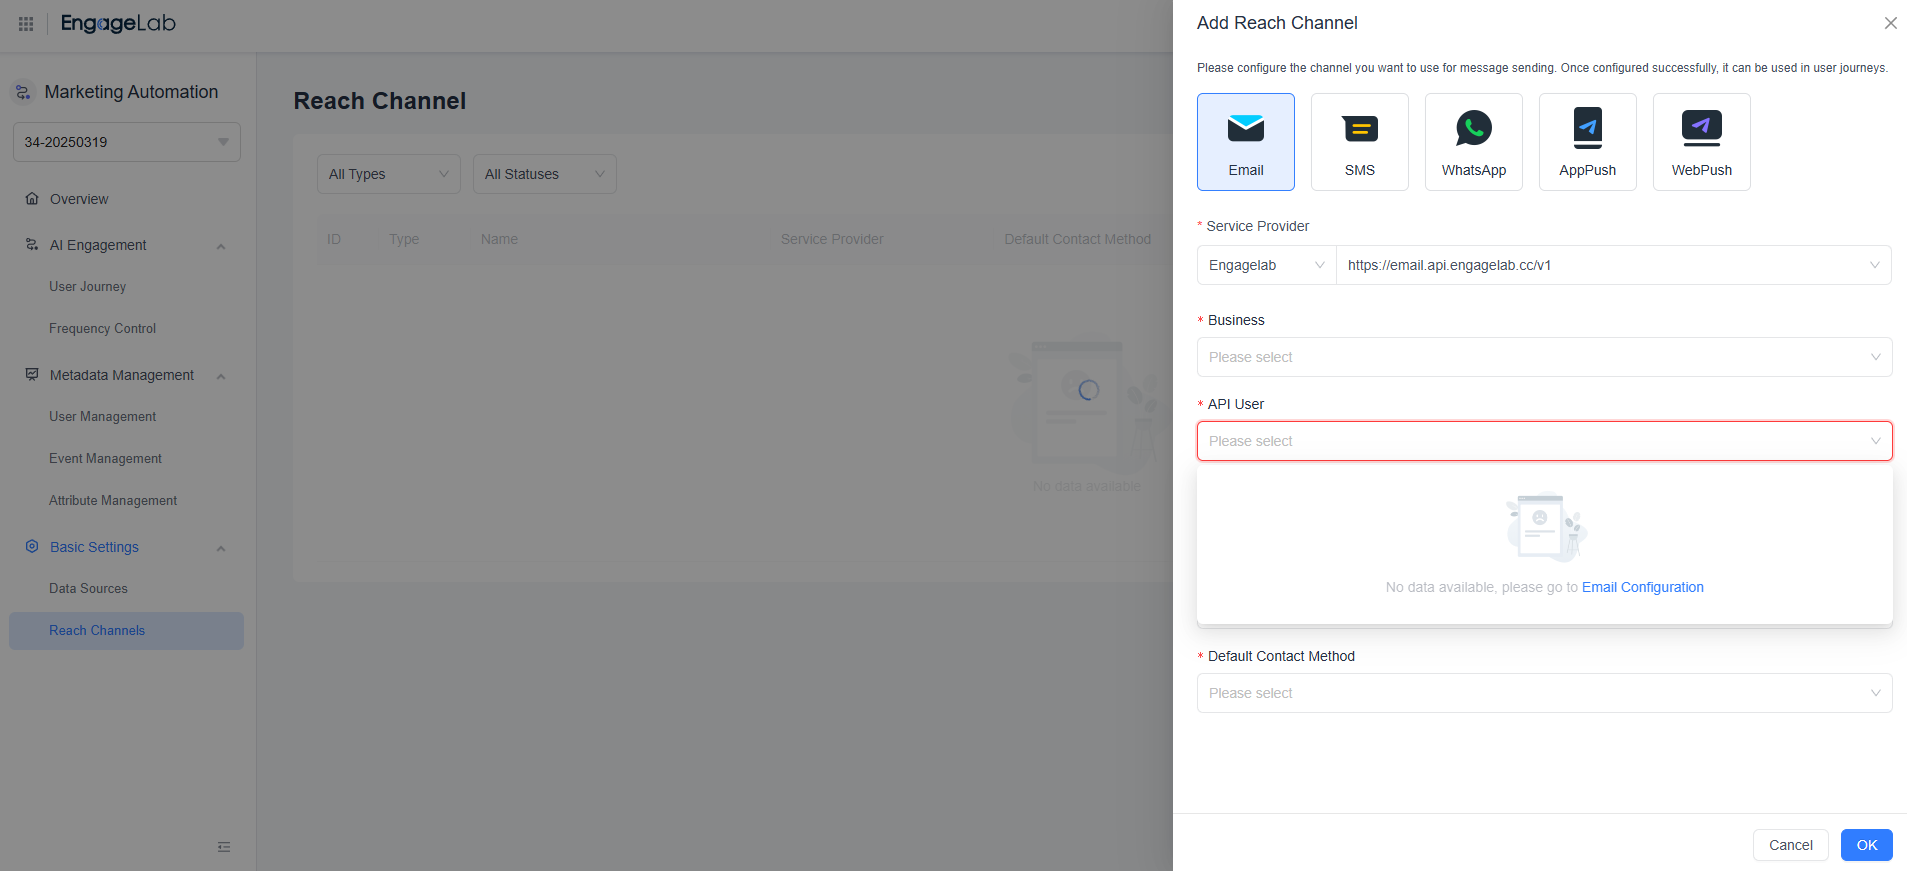
Step 2: Add the Email Channel
- In the EngageLab Console, go to Marketing Automation → Basic Settings → Reach Channels.
- Click "Add Channel".
- Select the channel type as Email.
- Fill in the following information:
- Service Provider: Currently only EngageLab is supported.
- API User: Select the newly created email API user from the dropdown.
- Sender Name (From Name): The name displayed to recipients as the sender.
- Sender Email Address (From Address): The email address used to send emails.
- Default Contact Field: The field used to match the email address in user data (typically
email_address).
Tips:
- The sender address must match a verified domain in the platform; emails may bounce or be blocked.
- After saving, only the sender address, sender name, and default contact field can be modified.
Step 3: Verify Channel Status
After saving, return to the Reach Channels list.
Confirm that the newly created Email channel status is Enabled.
If the status shows "Abnormal" or "Disabled", check the following:
- Whether the API user is valid.
- Whether the sender's email address has been verified.
- Whether the domain configuration is active.

Step 4: Use the Email Channel in a Journey
- Open Marketing Automation → Journey.
- Add a "Send Message" node in the editor.
- Select Email as the reach channel.
- Design the email content.
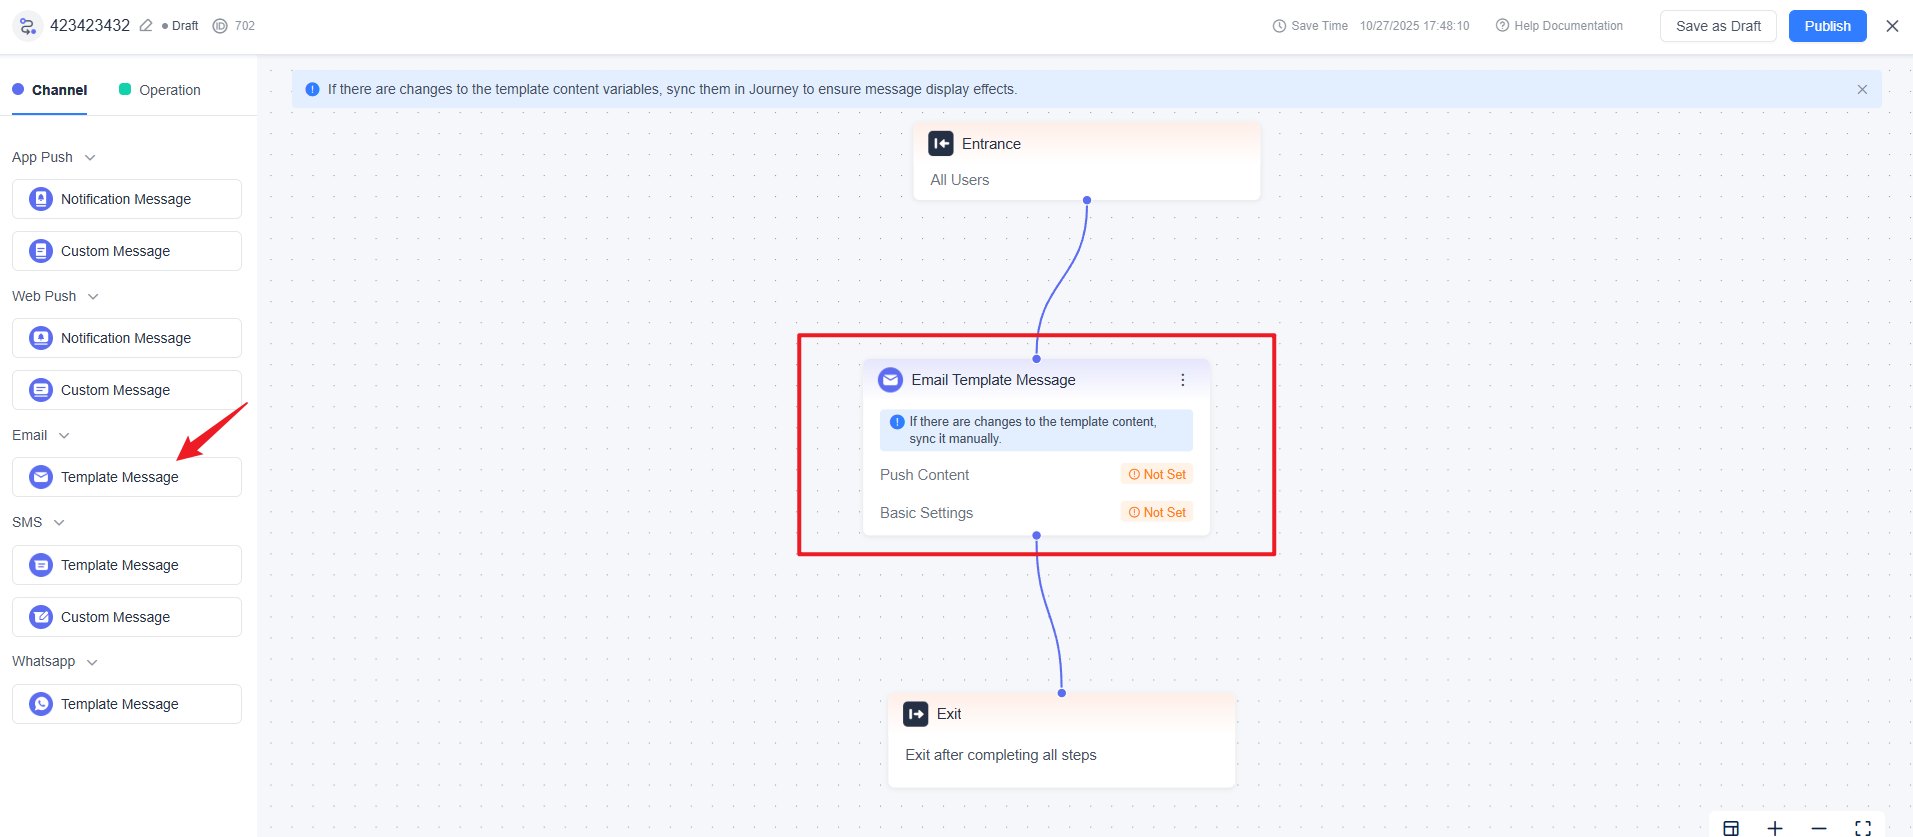
- Save and Publish the journey.
III. Additional Information
The Email channel only supports the EngageLab Email System. If you need to use external SMTP or third-party email services, please contact business support for confirmation. Each channel corresponds to a unique sender email address. If the brand or domain differs, separate channels should be created. If you need to adjust sender information within a journey, you can temporarily override it in the journey node, but this will not affect the channel configuration itself.
