Basic Guide: How to Create a User Journey from Scratch?
1. Step-by-Step Instructions
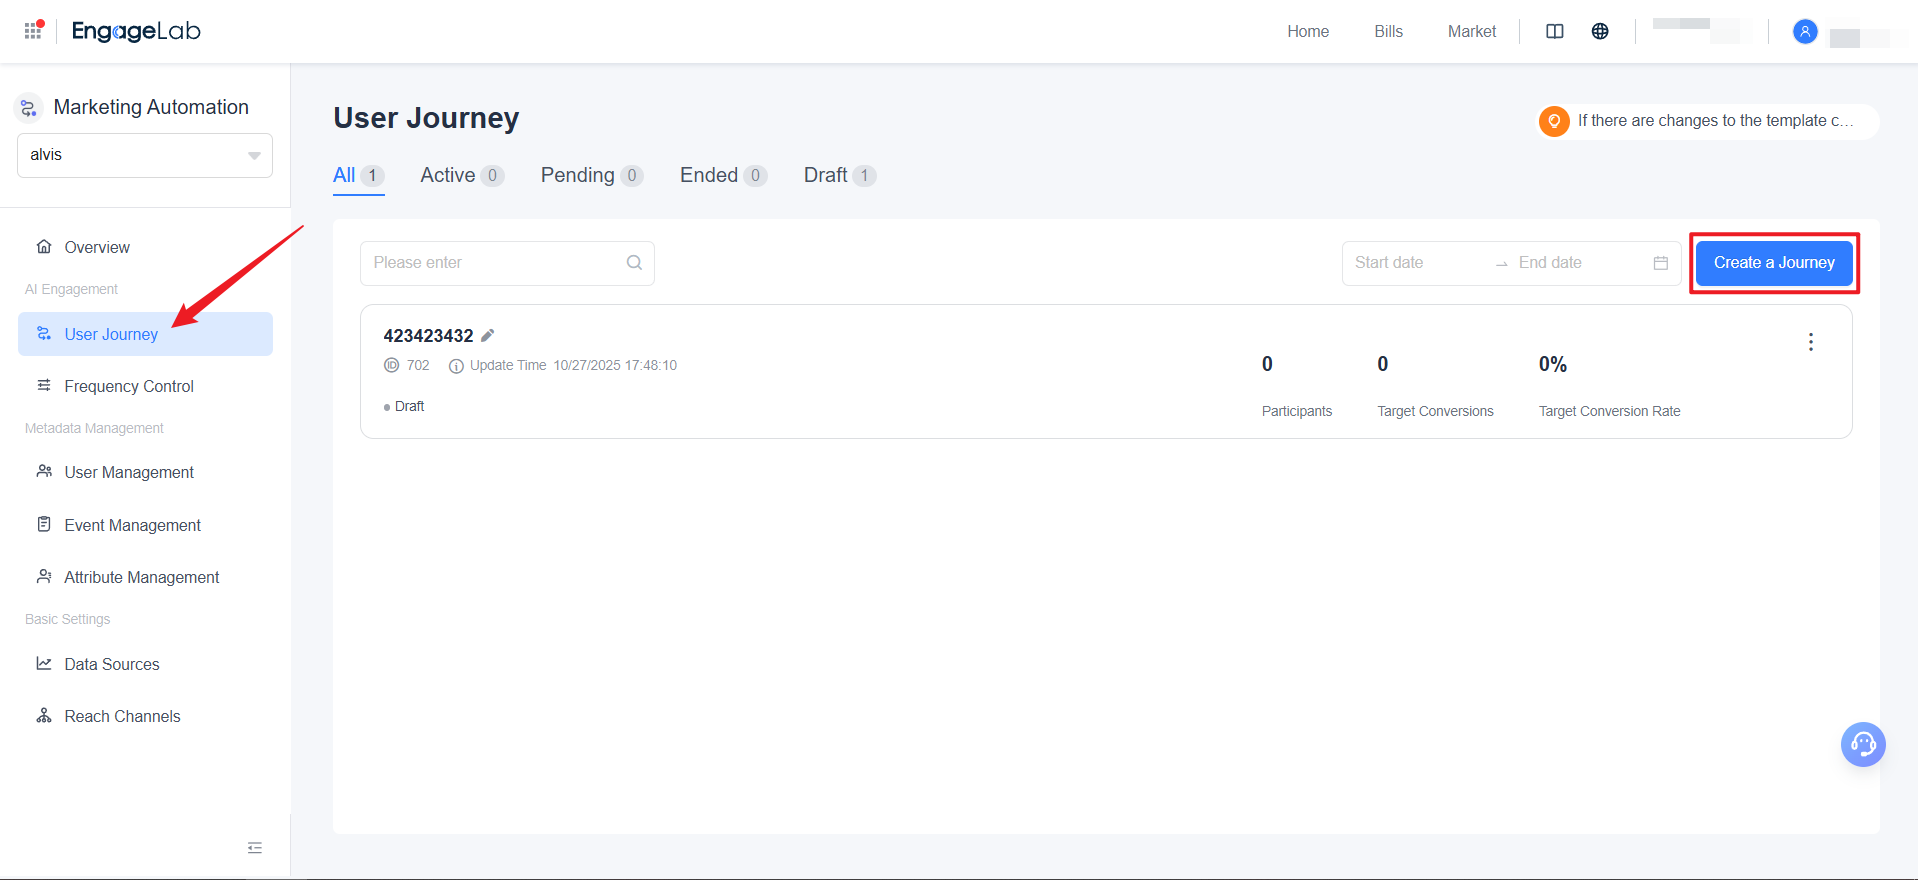
Access the Journey Canvas
- Log in to the MA console
- Click AI Operations → User Journeys in the left-hand panel
- Click Create Journey
- Choose to create a blank user journey or select a built-in template to get started quickly
Design the Journey Flow
- Drag and drop required components from the left-hand panel library onto the canvas
- Connect nodes according to your business logic
- Important Requirements:
- Each journey must include exactly one ""Entrance"" and one ""Exit"" component
- At least one message-sending component must be configured to ensure a messaging channel is available
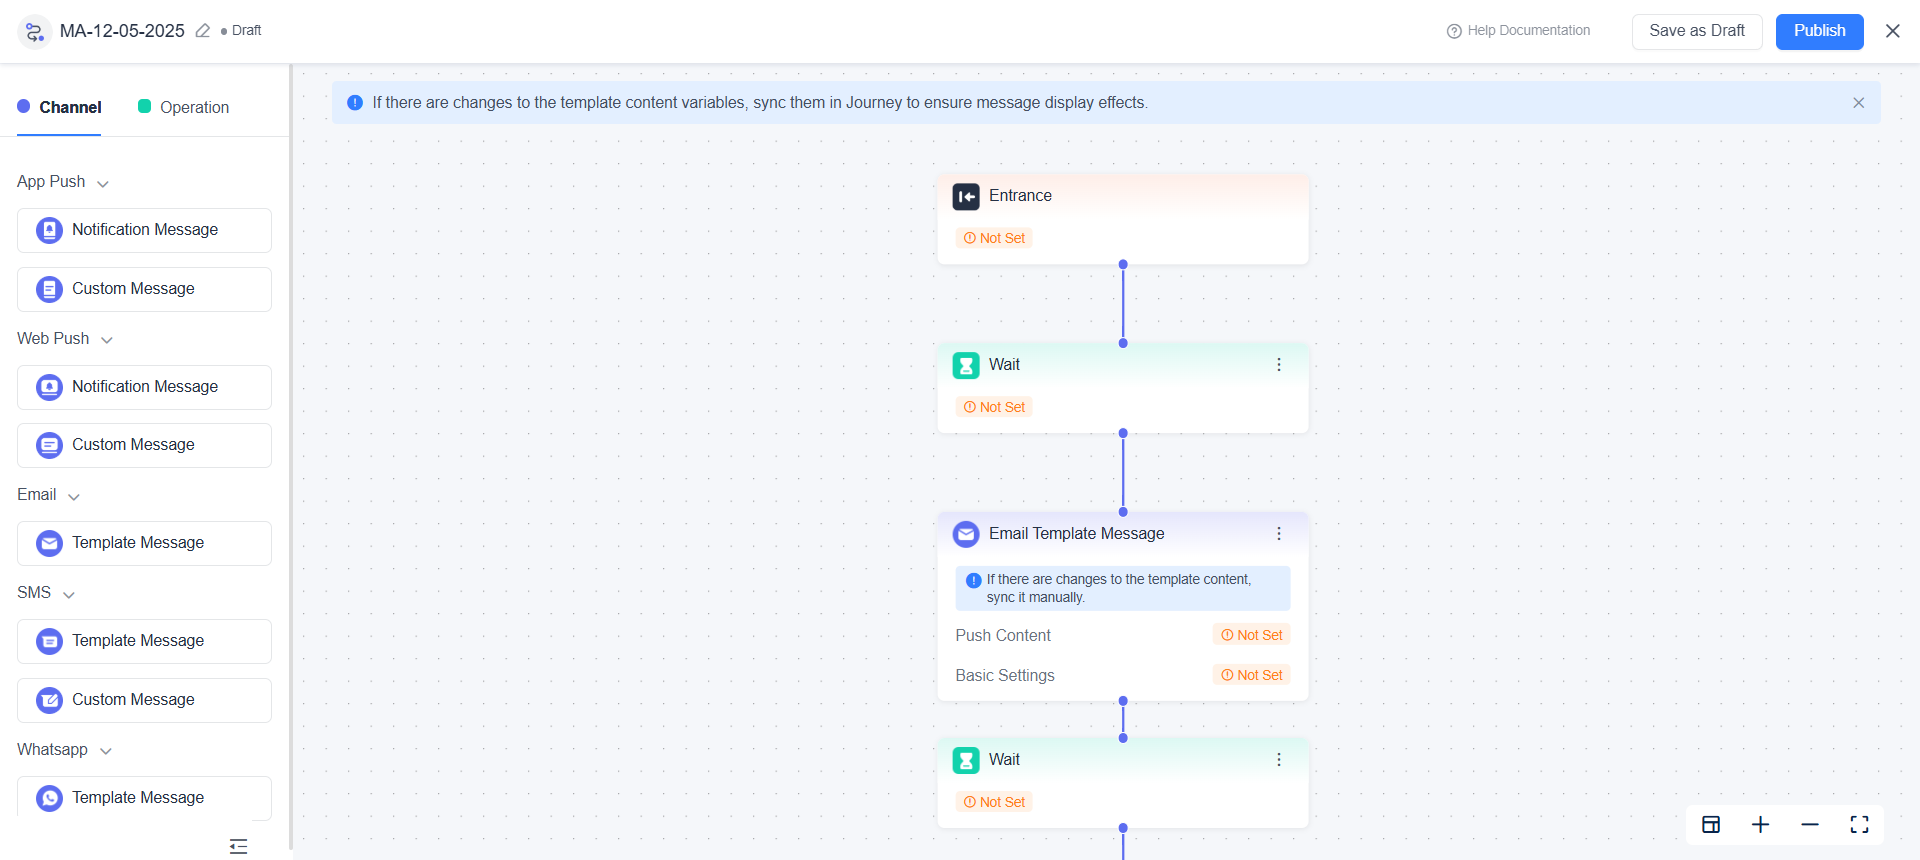
Configure Core Parameters
Define Entry Users
Use user attributes, event triggers, or segmentation conditions to select your target audience.
Set Reach Channels
Configure sending channels such as Email, SMS, and Push within message components.
Review and Publish
- Verify all component connections are complete
- Ensure a clear path from Entrance to Exit
- Save as a draft
- Click Publish to go live (once confirmed)
Note: Once a journey is active, it cannot be edited directly. Published or terminated journeys are also non-editable. To make changes, duplicate the journey as a new version.
2. Design Recommendations
- Planning Phase: Clearly define your target users, desired conversion actions, and reach channels
- Naming Conventions: Assign clear, readable names to components and connections to simplify future maintenance and reuse
- Pre-Publish Check: Conduct a structural check before publishing to avoid isolated components or missing connections

Still Have Questions?
Can't find what you're looking for? Our experts are here to provide personalized assistance. Ask your question now and get a timely response.