Create a Push
This article guides users on how to create notification messages in the Engagelab console.
Create Notification Message
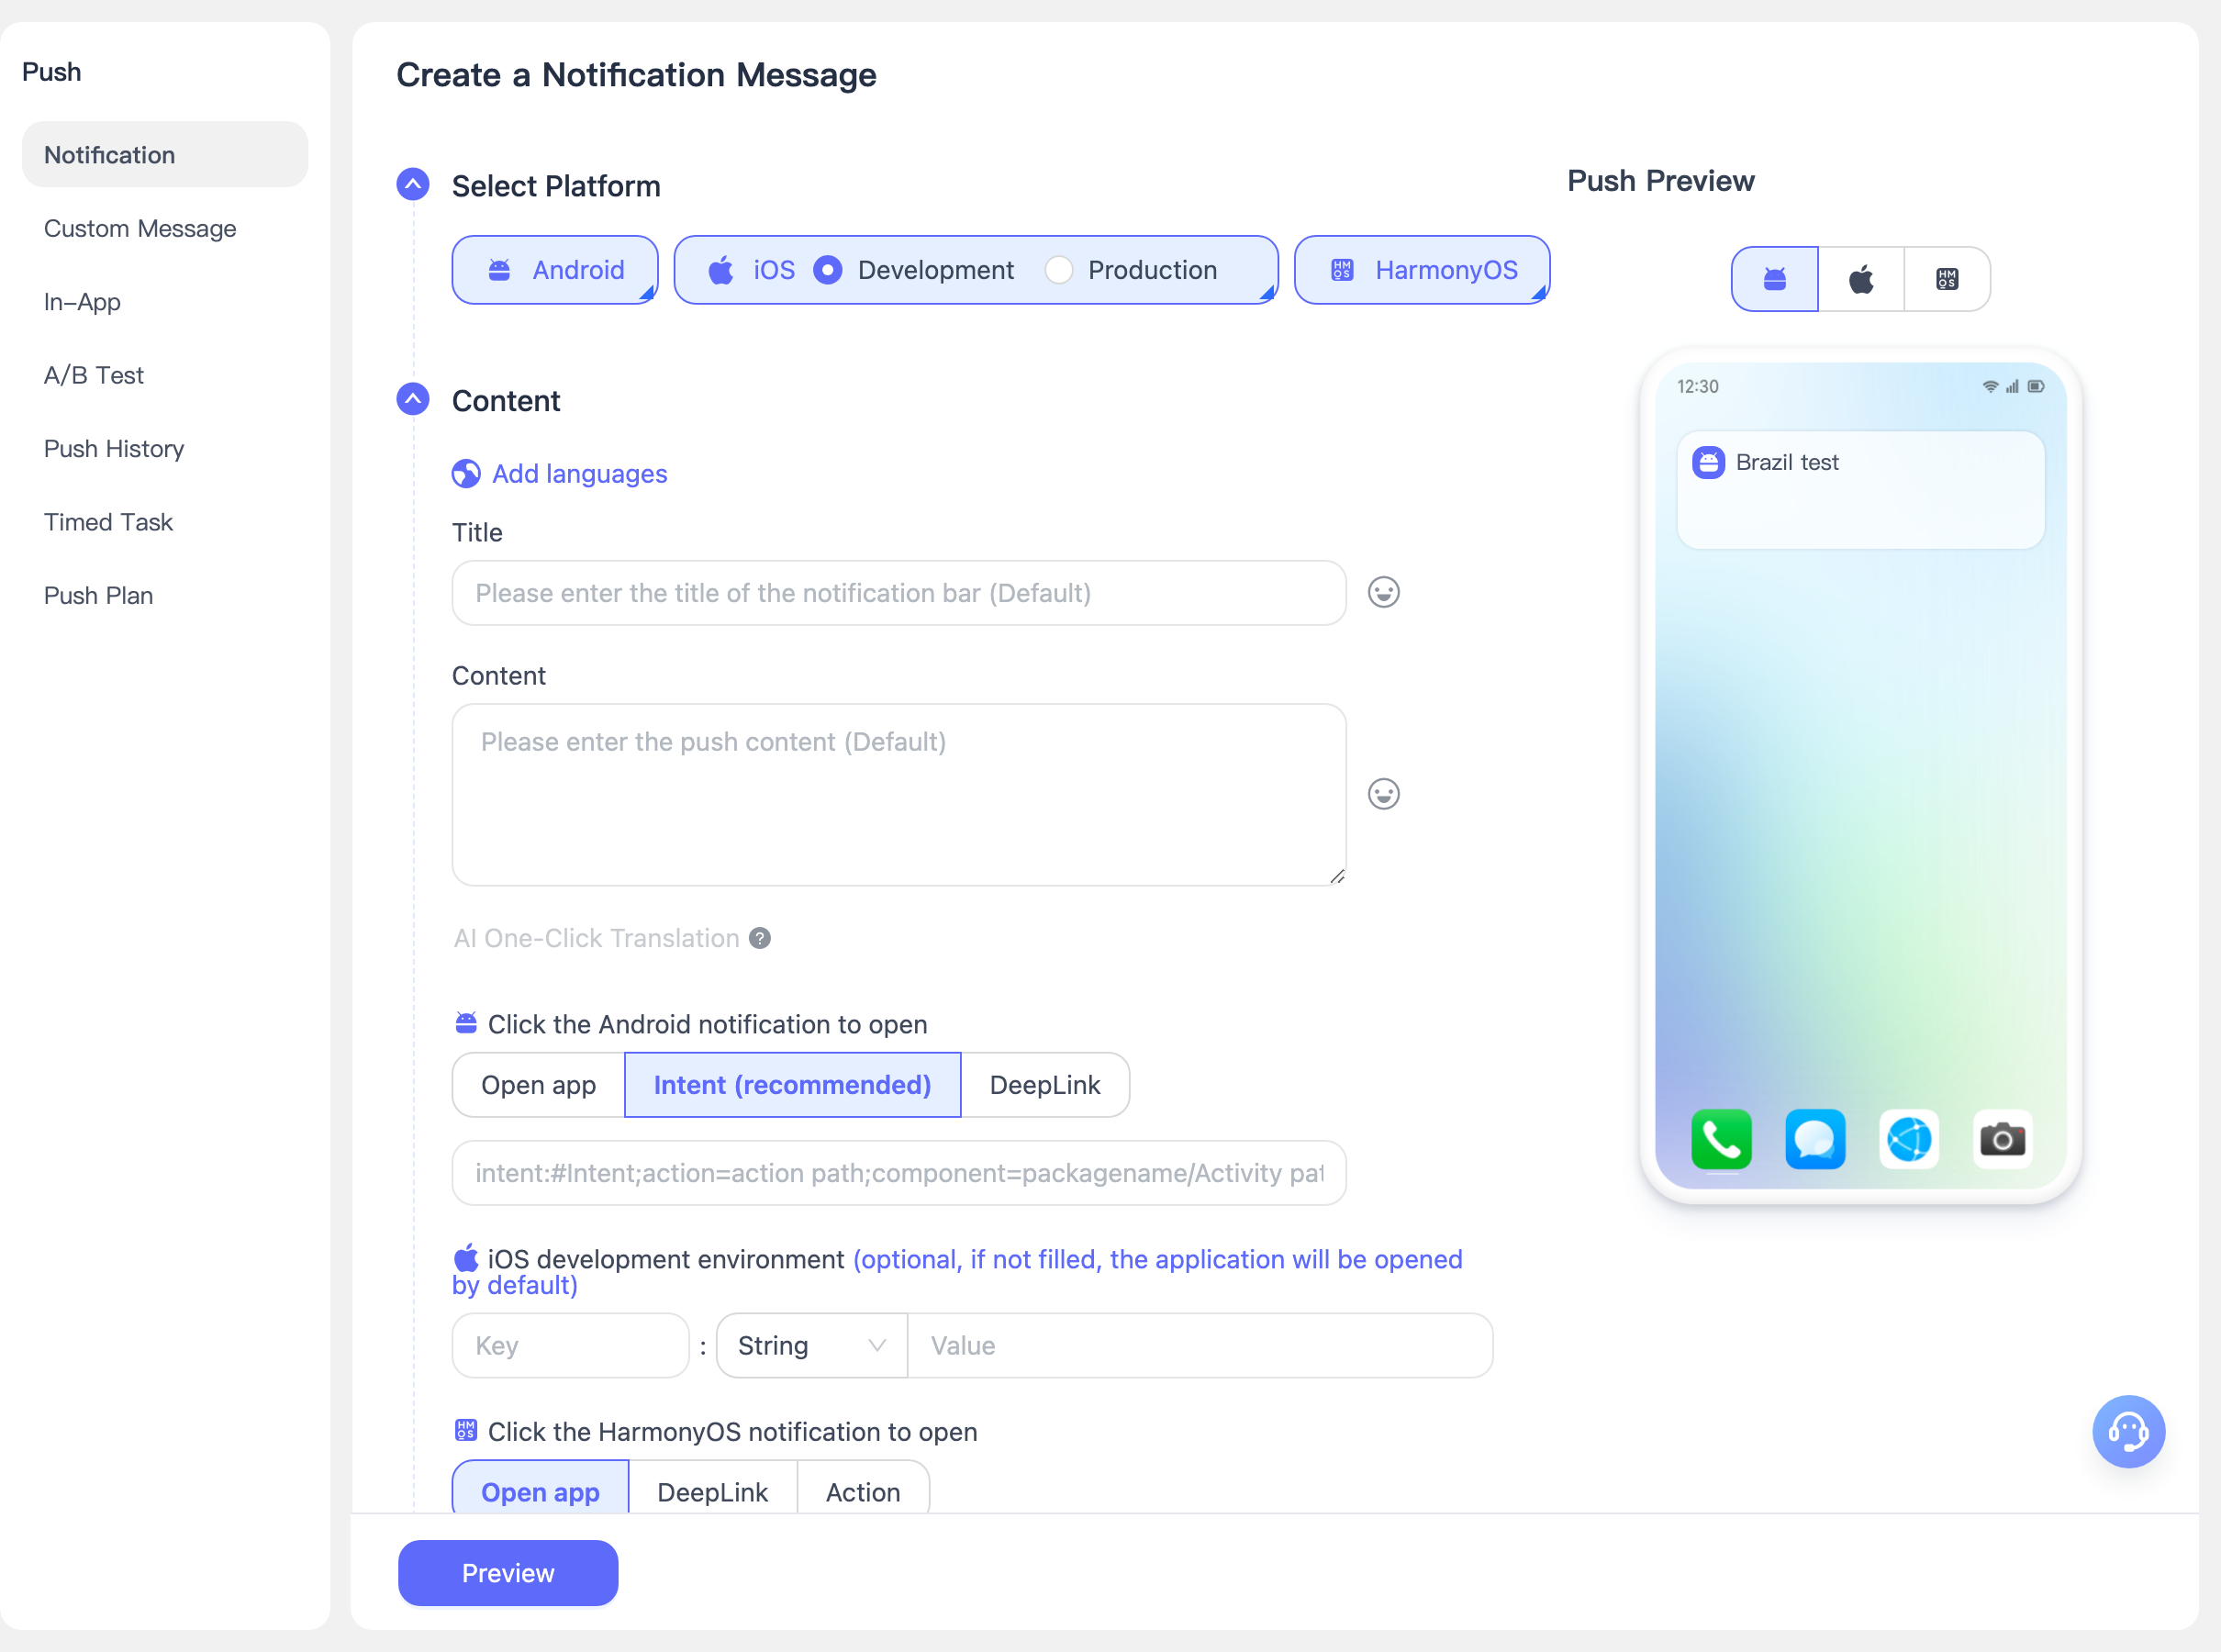
Navigate to Push > Create Push > Notification Message to create a push task. The parameter configuration is described below:
Basic Settings
- Target Platform: Select the platforms you want to push to based on the platforms integrated with the SDK.
- Before selecting a platform, you need to configure the corresponding platform in Push Settings.
- Sub-accounts can only select platforms authorized by the primary account.
- Notification Title: The title of the push message. Please avoid meaningless content such as "test" or pure numbers, as it may be intercepted by device manufacturers and the notification may not be received.
- Notification Content: The content of the push message. Please avoid meaningless content such as "test" or pure numbers, as it may be intercepted by device manufacturers and the notification may not be received.
- Supports adding push titles and content in multiple languages: We automatically detect the end user's device language. If no other language is configured, all target users will receive the content set in the [Default] language.
- Supports one-click AI translation.
- Send Time: Select the time to send the message.
- Immediate: Send the message immediately.
- Scheduled: The send time can only be set to at least 3 minutes after the current time, and scheduled tasks cannot exceed one year.
- Throttled Push: Complete the push within a set time period to reduce server load.
- Click to Open Notification: The action after clicking the notification.
- Open the app directly.
- intent (recommended), format: intent:#Intent;action=action path;component=packagename/ Activity path;end
- deeplink: format: scheme://test?key1=val1&key2=val2
Advanced Settings
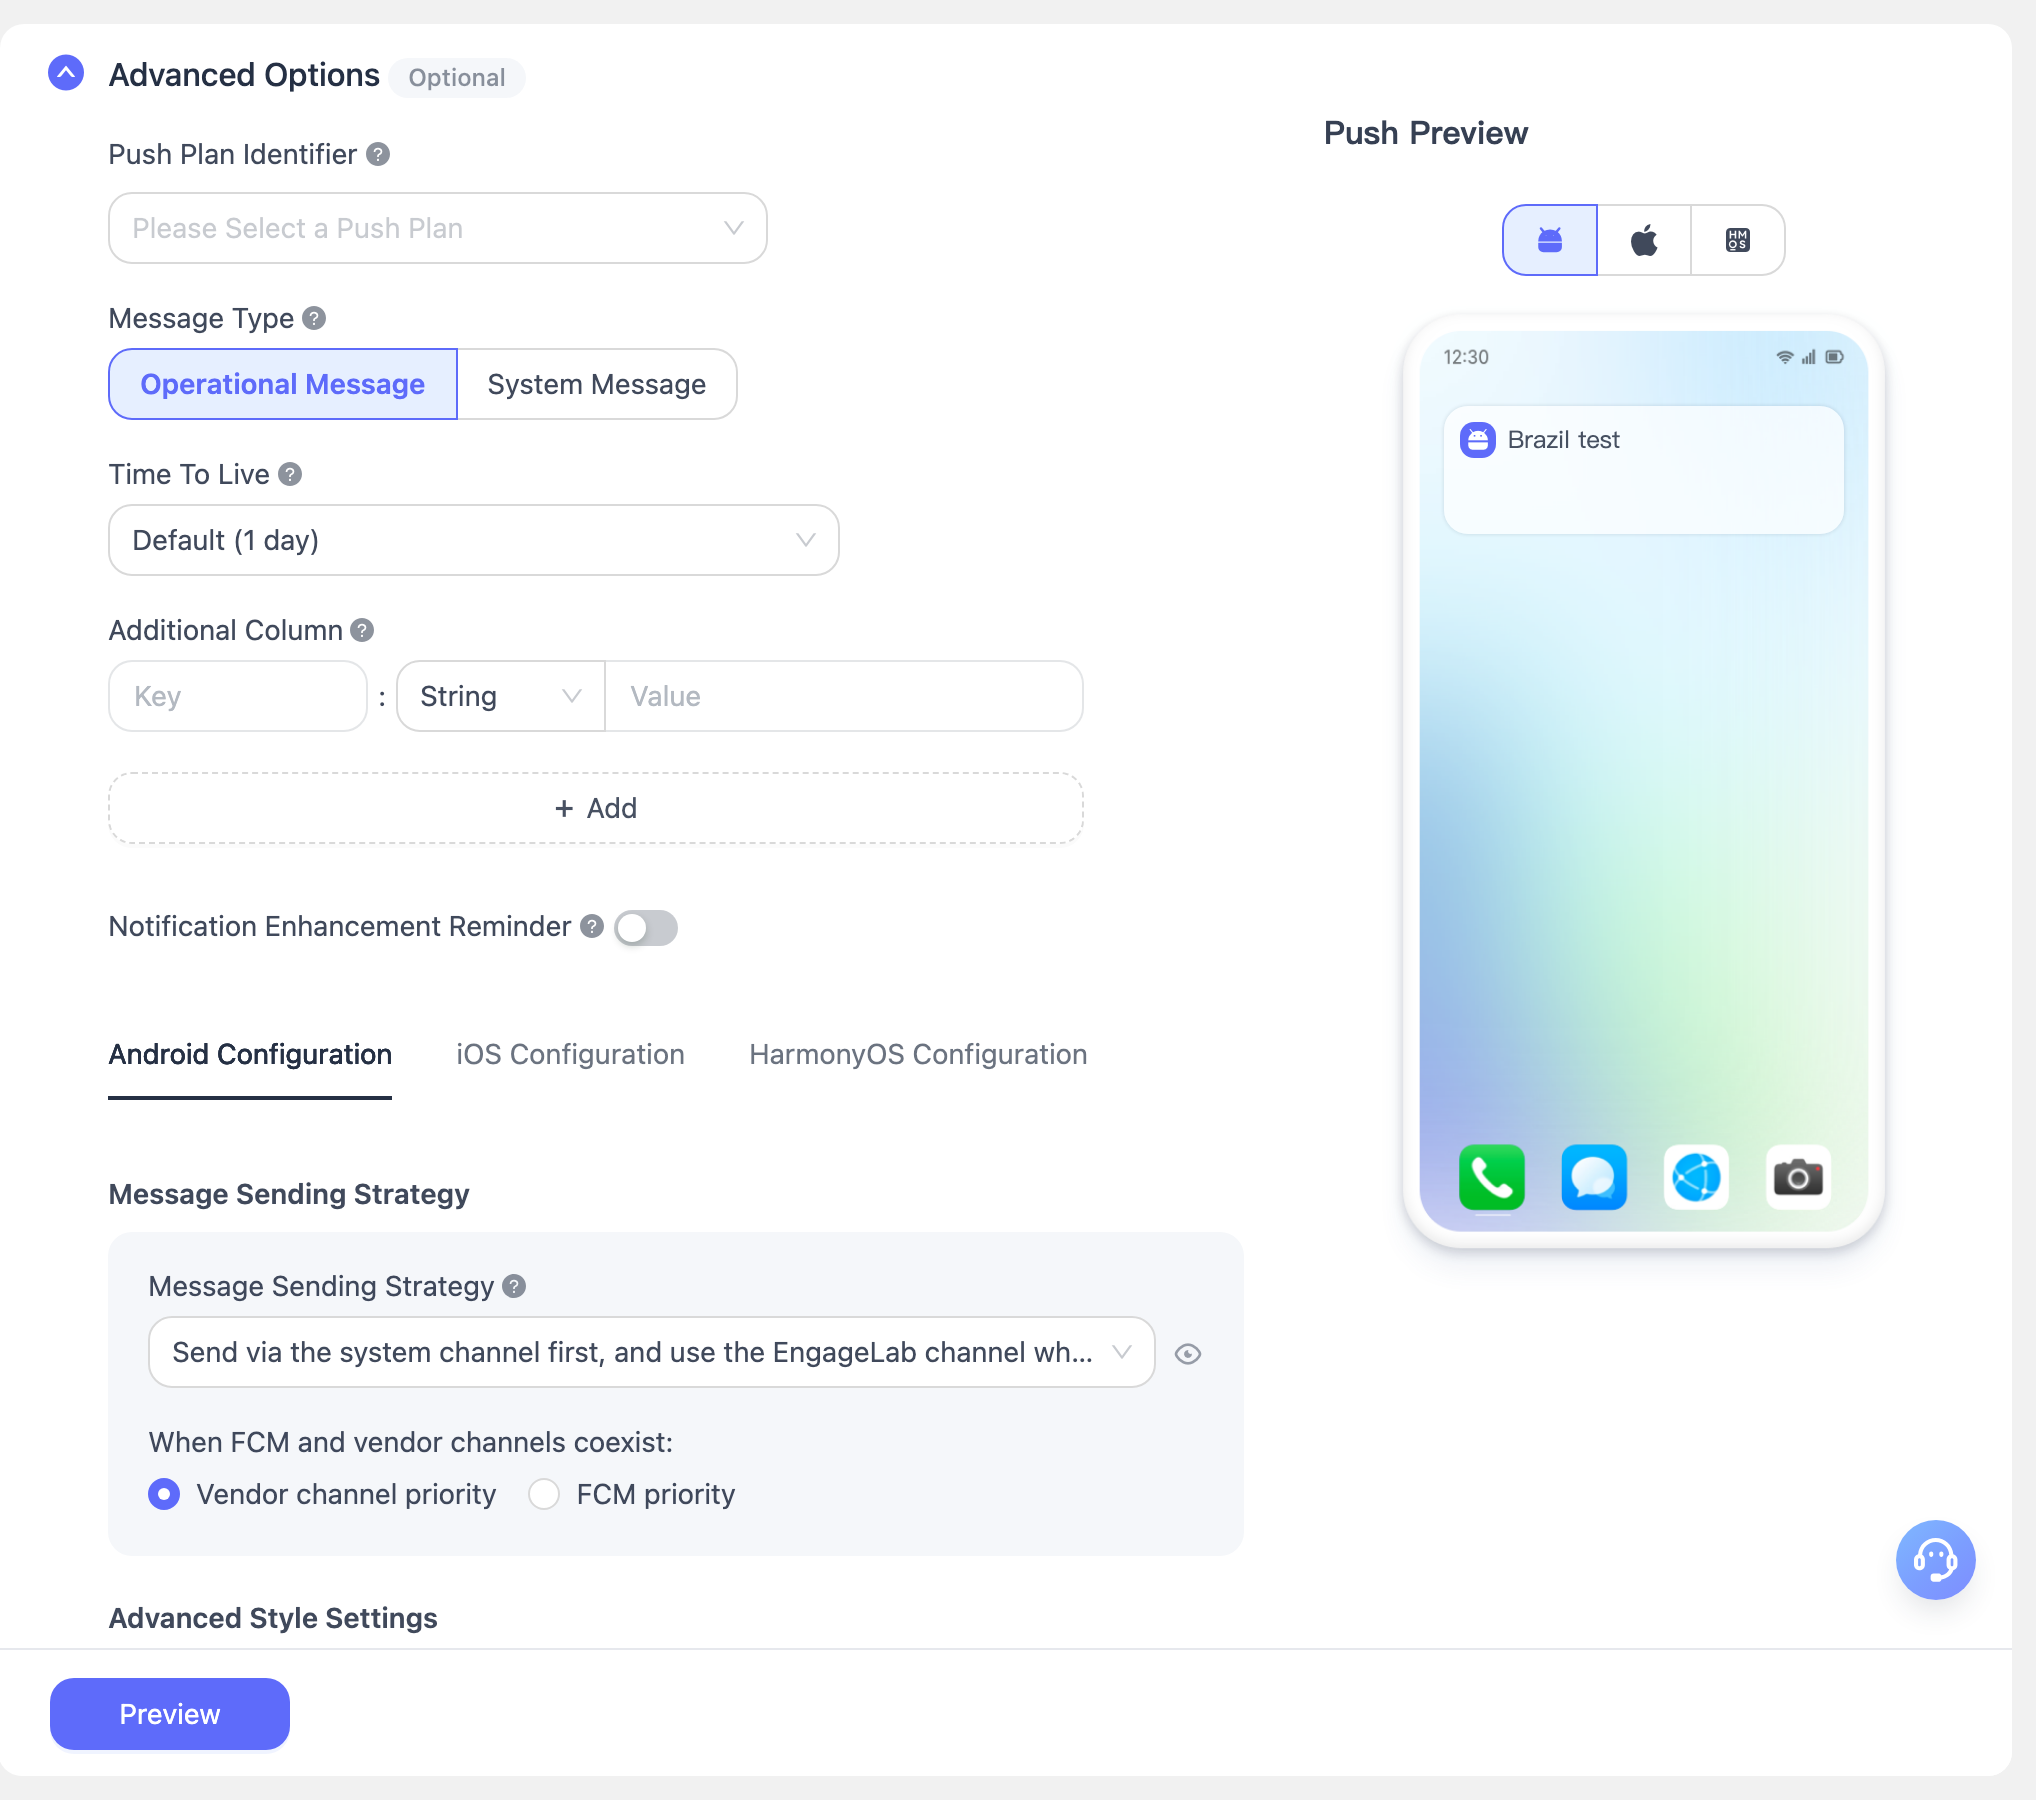
- Push Plan Tag Binding: You can manage similar push messages through push plan tags, and subsequently view total message delivery, user clicks, and other metrics by plan dimension.
- Message Type Selection:
- System Message: Corresponds to service-type notification messages for each manufacturer channel (Huawei/Honor: Service & Communication, Xiaomi/OPPO: Private Message, vivo: System Message). Manufacturers typically do not limit the sending quantity.
- Marketing Message: Corresponds to marketing/operational messages for each manufacturer channel (Huawei/Honor: Marketing & Consulting, Xiaomi/OPPO: Public Message, vivo: Marketing Message). Manufacturers typically impose strict sending limits.
- Marketing Message is selected by default.
We will automatically adapt the message classification fields of each manufacturer channel based on your specified message type, preventing messages from being restricted and avoiding waste of manufacturer message quotas.
- Offline Message Retention Duration: You can specify the duration of offline messages through this value. If the user is currently offline, the message will be saved as an offline message and will continue to be pushed when the user comes online next time. If the user comes online within this duration, they will still receive the push; otherwise, it expires.
- Default duration is 1 day.
- Setting to 0 means offline messages are not retained, meaning only currently online users can receive the message; all offline users will not receive it.
- Extra Fields: The client obtains extra field content for custom event handling. Supports adding and deleting extra parameters.
- Manufacturer-Specific Settings: If the fields set here overlap with those in the "Notification Reminder Template" above, the settings here take precedence. Manufacturers not listed here do not have special personalization settings.
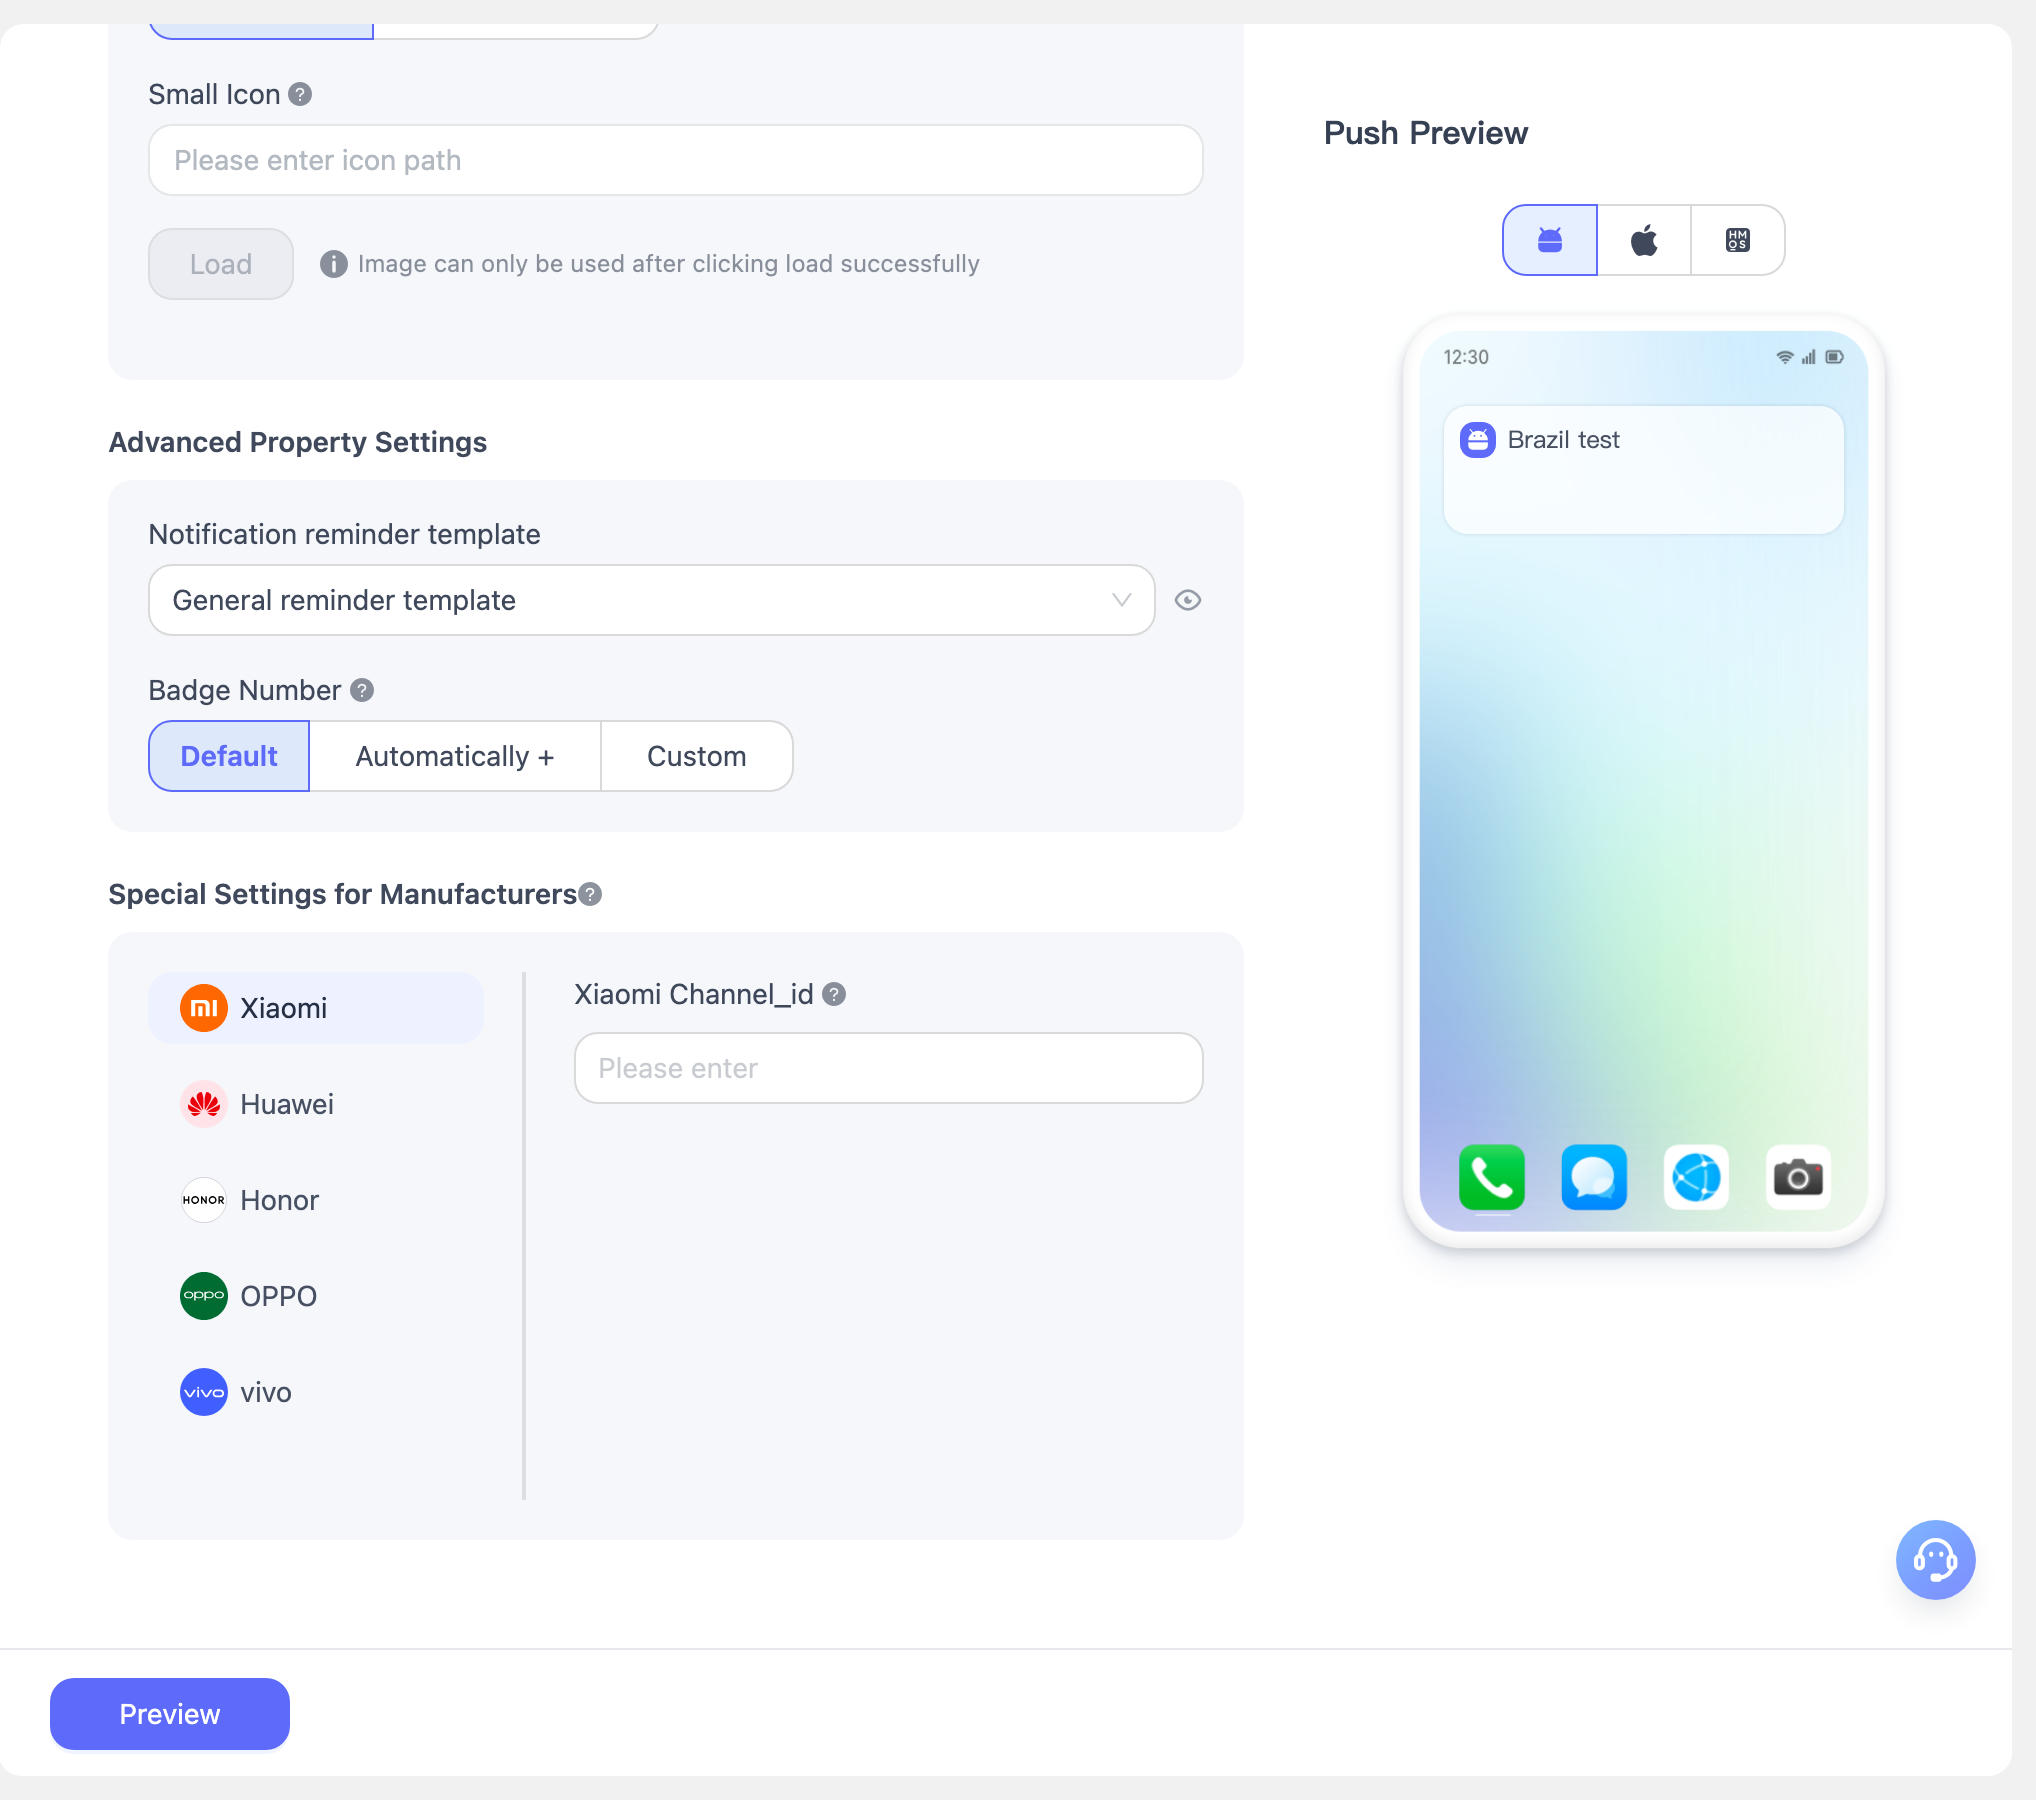
- Xiaomi channel_id: Xiaomi notification category identifier; corresponds to the Push API field options.third_party_channel.xiaomi.channel_id.
- Huawei: For details on importance, category, and target_user_type, refer to the REST API Documentation.
- Huawei channel_id: Huawei custom notification channel identifier; corresponds to the Push API field options.third_party_channel.huawei.channel_id.
- Huawei importance: Huawei manufacturer message reminder level; corresponds to the Push API field options.third_party_channel.huawei.importance.
- Huawei category: Huawei manufacturer message type identifier, requires applying for Huawei self-classification rights; corresponds to the Push API field options.third_party_channel.huawei.category.
- Huawei target_user_type: Huawei manufacturer normal message / test message identifier; corresponds to the Push API field options.third_party_channel.huawei.target_user_type.
- Honor importance: Honor manufacturer message classification; corresponds to the Push API field options.third_party_channel.honor.importance.
- OPPO channel_id: OPPO notification bar channel identifier; corresponds to the Push API field options.third_party_channel.oppo.channel_id.
- vivo:
- vivo pushMode: vivo manufacturer push mode; corresponds to the Push API field options.third_party_channel.vivo.push_mode.
- vivo category: vivo manufacturer secondary message classification identifier; corresponds to the Push API field options.third_party_channel.vivo.category.
Android Configuration
- Manufacturer Channel Status: After completing the corresponding manufacturer channel integration and configuration, the manufacturer channel status for that channel will be highlighted.
- Notification Delivery Strategy: You can specify the priority delivery strategy for manufacturer channels and the Engagelab channel. When selecting the manufacturer strategy, ensure the manufacturer channel has been configured successfully.
- Manufacturer Quota Strategy: This strategy only indicates whether to ignore and skip the quota determination and deduction logic on the Engagelab system side. The actual behavior still follows and is constrained by the manufacturer's quota mechanism. Currently only effective for Xiaomi and OPPO; Xiaomi notification messages and OPPO private messages can select "Ignore", while other types of push messages are recommended to "Not Ignore".
- Notification Bar Style: Unlike the built-in notification bar styles of the MTPush SDK, the notification bar styles here are three commonly used styles built using system APIs. Click "?" for details. Supported in MTPush Android SDK 3.0.1 and later versions.
- Custom Notification Bar Style: Multiple style sets can be configured on the client with different numbers. When pushing from the server side, specifying a number will use the previously set style. The default value is 0, which uses the default style.
- Notification Bar Icon: The icon on the right side of the notification bar.
- Default logo: The notification bar displays the application's default icon.
- Specified icon path: The notification bar displays the icon at the specified path. The image can be a network resource starting with http or https, or a drawable resource folder path.
- Upload icon: The notification bar displays the uploaded icon.
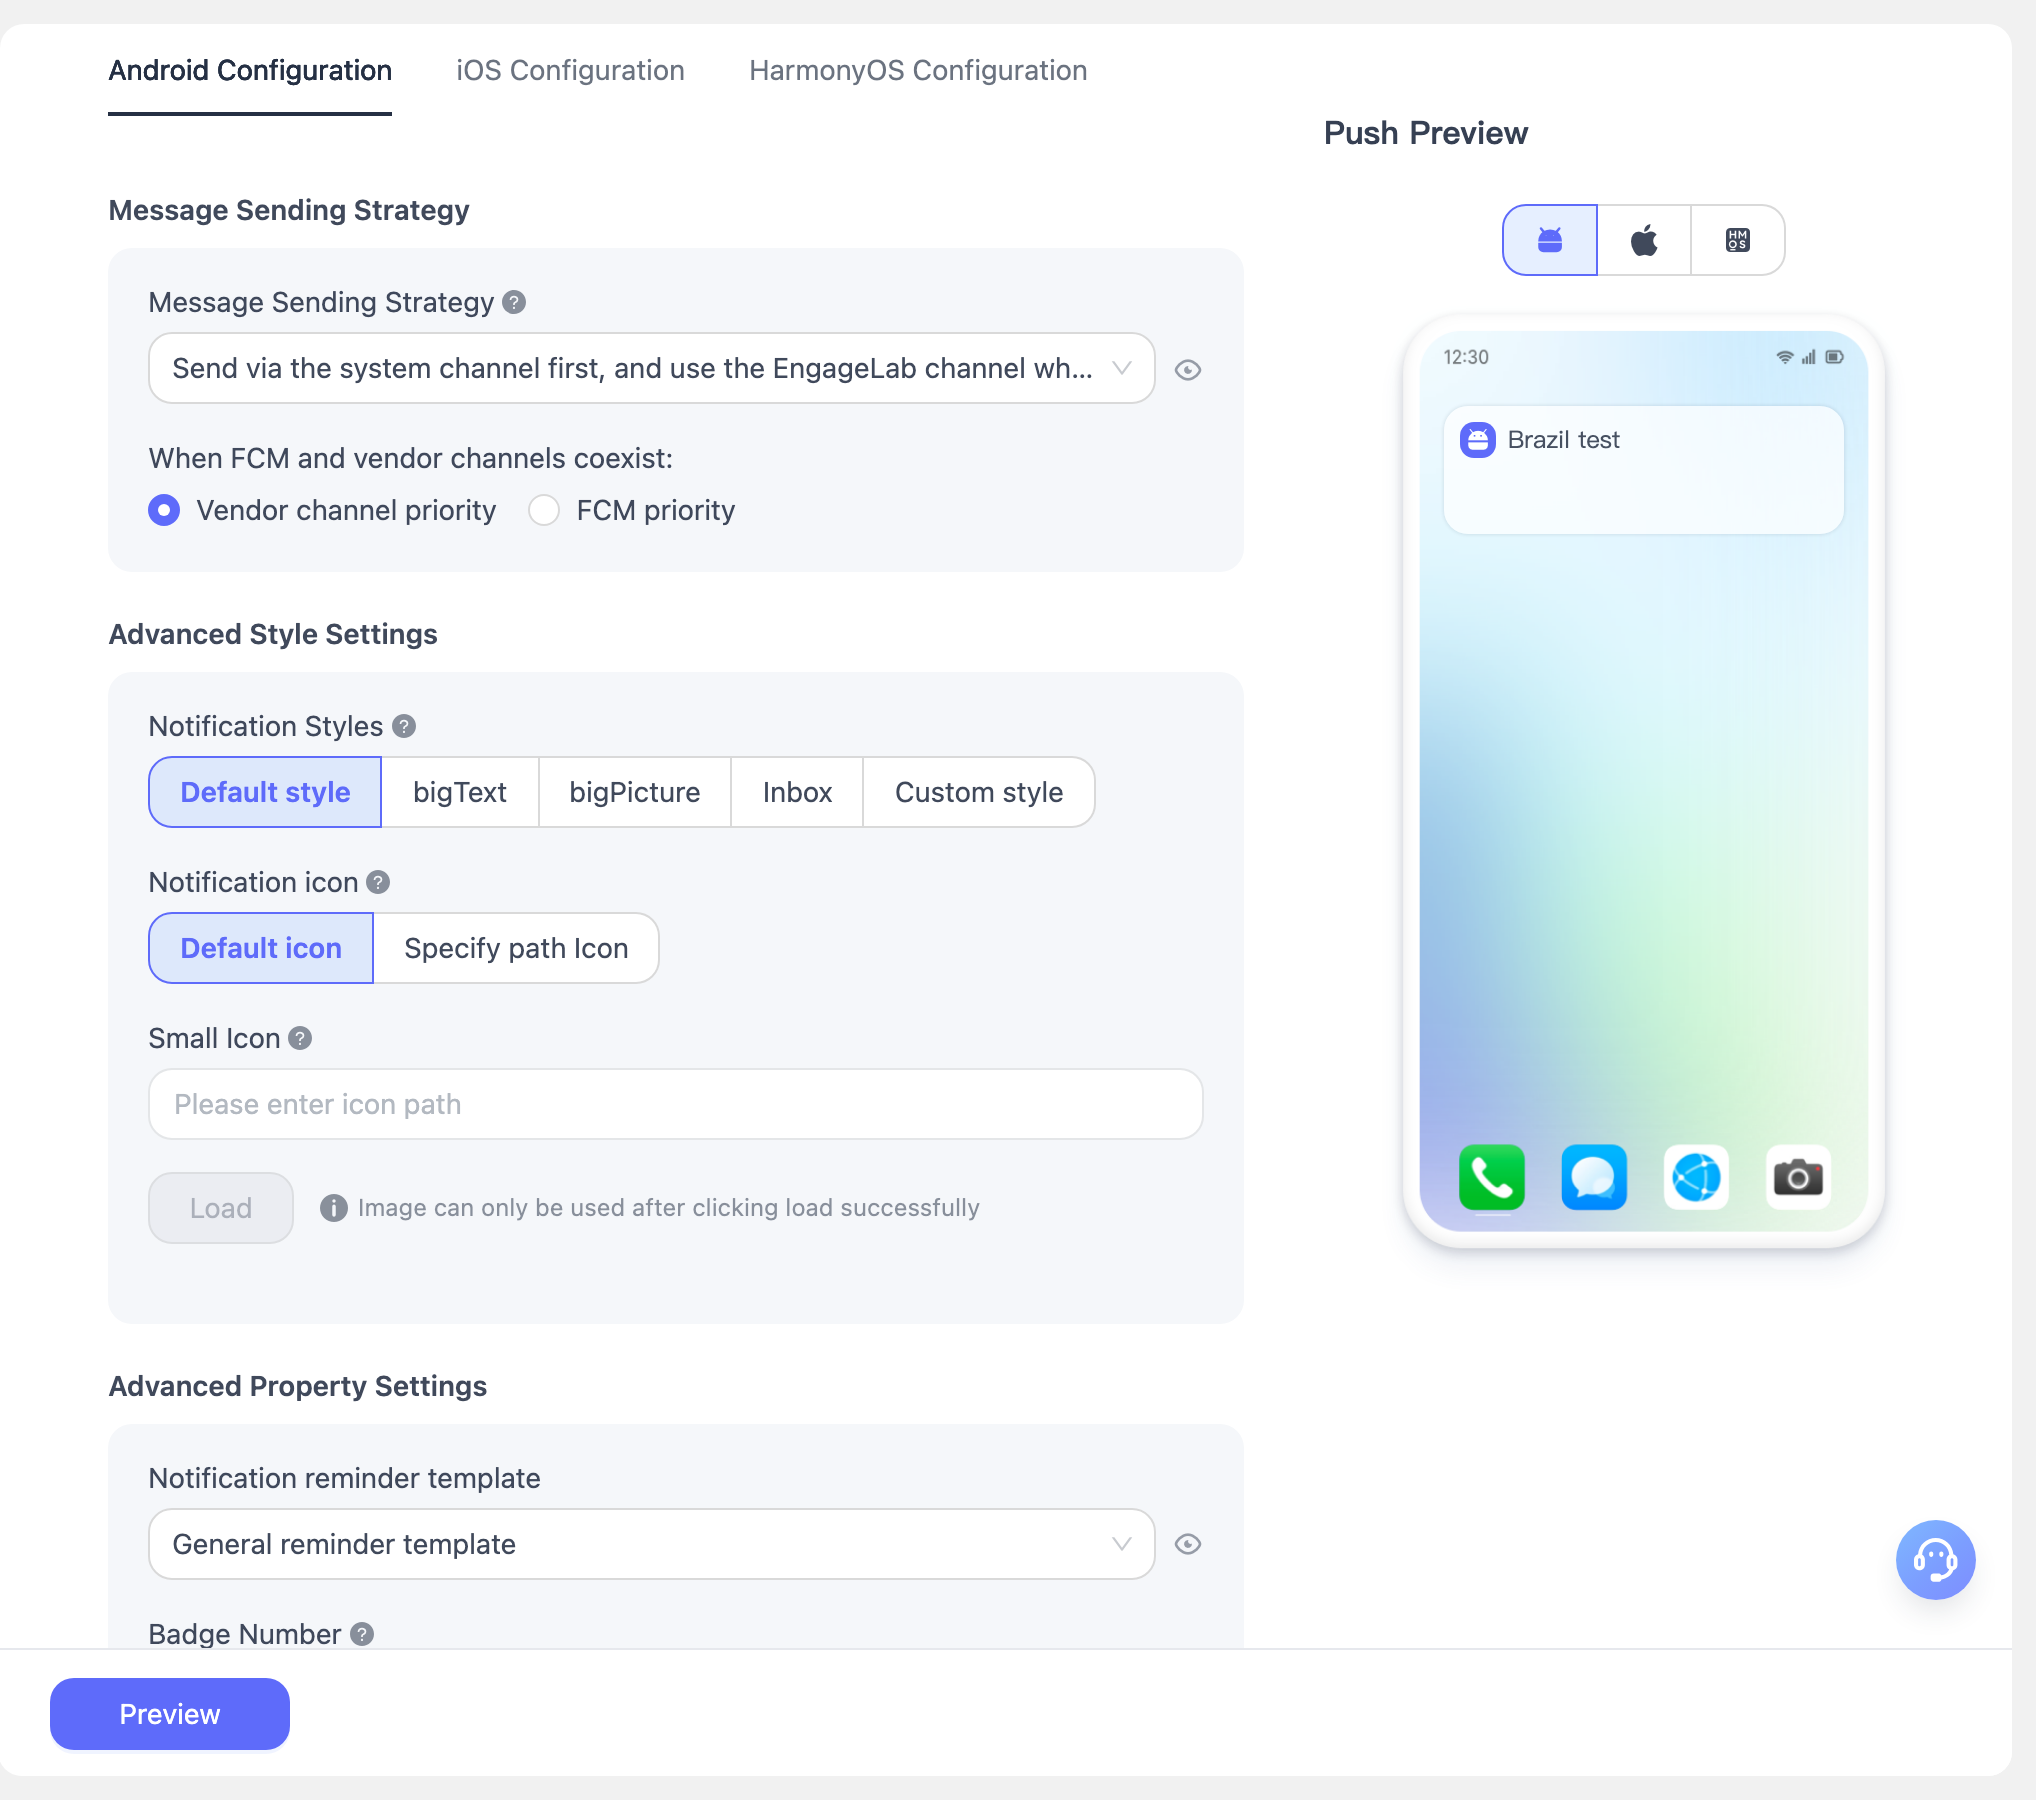
- Notification Message Template: You can set the notification reminder priority to avoid frequently disturbing users. The default is "Regular Reminder Template". Templates include template name, channel name, channel ID, notification priority, notification category, notification reminder type, and sound settings.
- Regular Reminder Template: Notification priority is "PRIORITY_DEFAULT", notification reminder type is "Sound | Vibration | LED".
- Silent Reminder Template: Notification priority is "PRIORITY_LOW", notification reminder type is "LED".
- Strong Reminder Template: Notification priority is "PRIORITY_HIGH", notification reminder type is "Sound | Vibration | LED".
- Click "Create New Message Reminder Template" to customize a reminder template.
- channel_id: For Android 8.0 and later notification channel features, push requires specifying a notification channel ID.
- Notification Priority: This priority only takes effect for the Engagelab channel. The default priority property is set to PRIORITY_DEFAULT. See the official description in the Developer Documentation. Effective in MTPush Android SDK 3.0.1 and later versions.
- Notification Category: The system may use the notification's category property for sorting or filtering in the notification bar. Effective in MTPush Android SDK 3.0.1 and later versions. See the official description in the Developer Documentation.
- Notification Reminder Type: Developers can check the corresponding items to specify the reminder type on the phone when a notification is delivered, but cannot exceed system limitations (e.g., the phone's sound must be on, vibration must be allowed, and the LED indicator must be enabled). Effective in MTPush Android SDK 3.0.3 and later versions.
- Badge Number: The badge on the upper right corner of the application icon.
- This property currently only takes effect on Huawei EMUI 8.0 and above, and Xiaomi MIUI 6 and above devices. Supported in MTPush Android SDK 3.3.6 and later versions.
- If this field is left empty, the badge number remains unchanged (for Xiaomi devices, due to system control, regardless of whether the push is delivered via the Engagelab channel or the manufacturer channel, the default +1 effect still applies even without passing this value). Otherwise, the badge_add_num data configured for the next notification bar message will be added to the previous badge count. It is recommended to set badge_add_num to 1. Example: If badge_add_num is set to 1 and the application's previous badge count is 2, after sending this badge message, the application badge count will display as 3.
iOS Configuration
- silent_push: content-available: 1, does not carry any badge, sound, or message content parameters. It can perform content updates without disturbing the user. Refer to "Silent Remote Notifications".
- Notification Subtitle: This field only applies to iOS 10 and above. Android platforms and other iOS system versions are not affected by this field.
- content-available (Push Wake-up): A new feature introduced in iOS 7. Enabling this indicates a Background Remote Notification; if not enabled, it is a regular Remote Notification. For details, refer to: Background Remote Notification".
- mutable-content: A new feature introduced in iOS 10. Enabling this indicates support for the iOS 10 UNNotificationServiceExtension feature; if not enabled, it is a regular Remote Notification. For details, refer to: UNNotificationServiceExtension".
- apns-collapse-id: A notification carrying a collapse id parameter will override notifications with the same collapse id in the notification center. The collapse id value cannot exceed 64 bytes. For detailed information about this field, refer to APNs Guide.
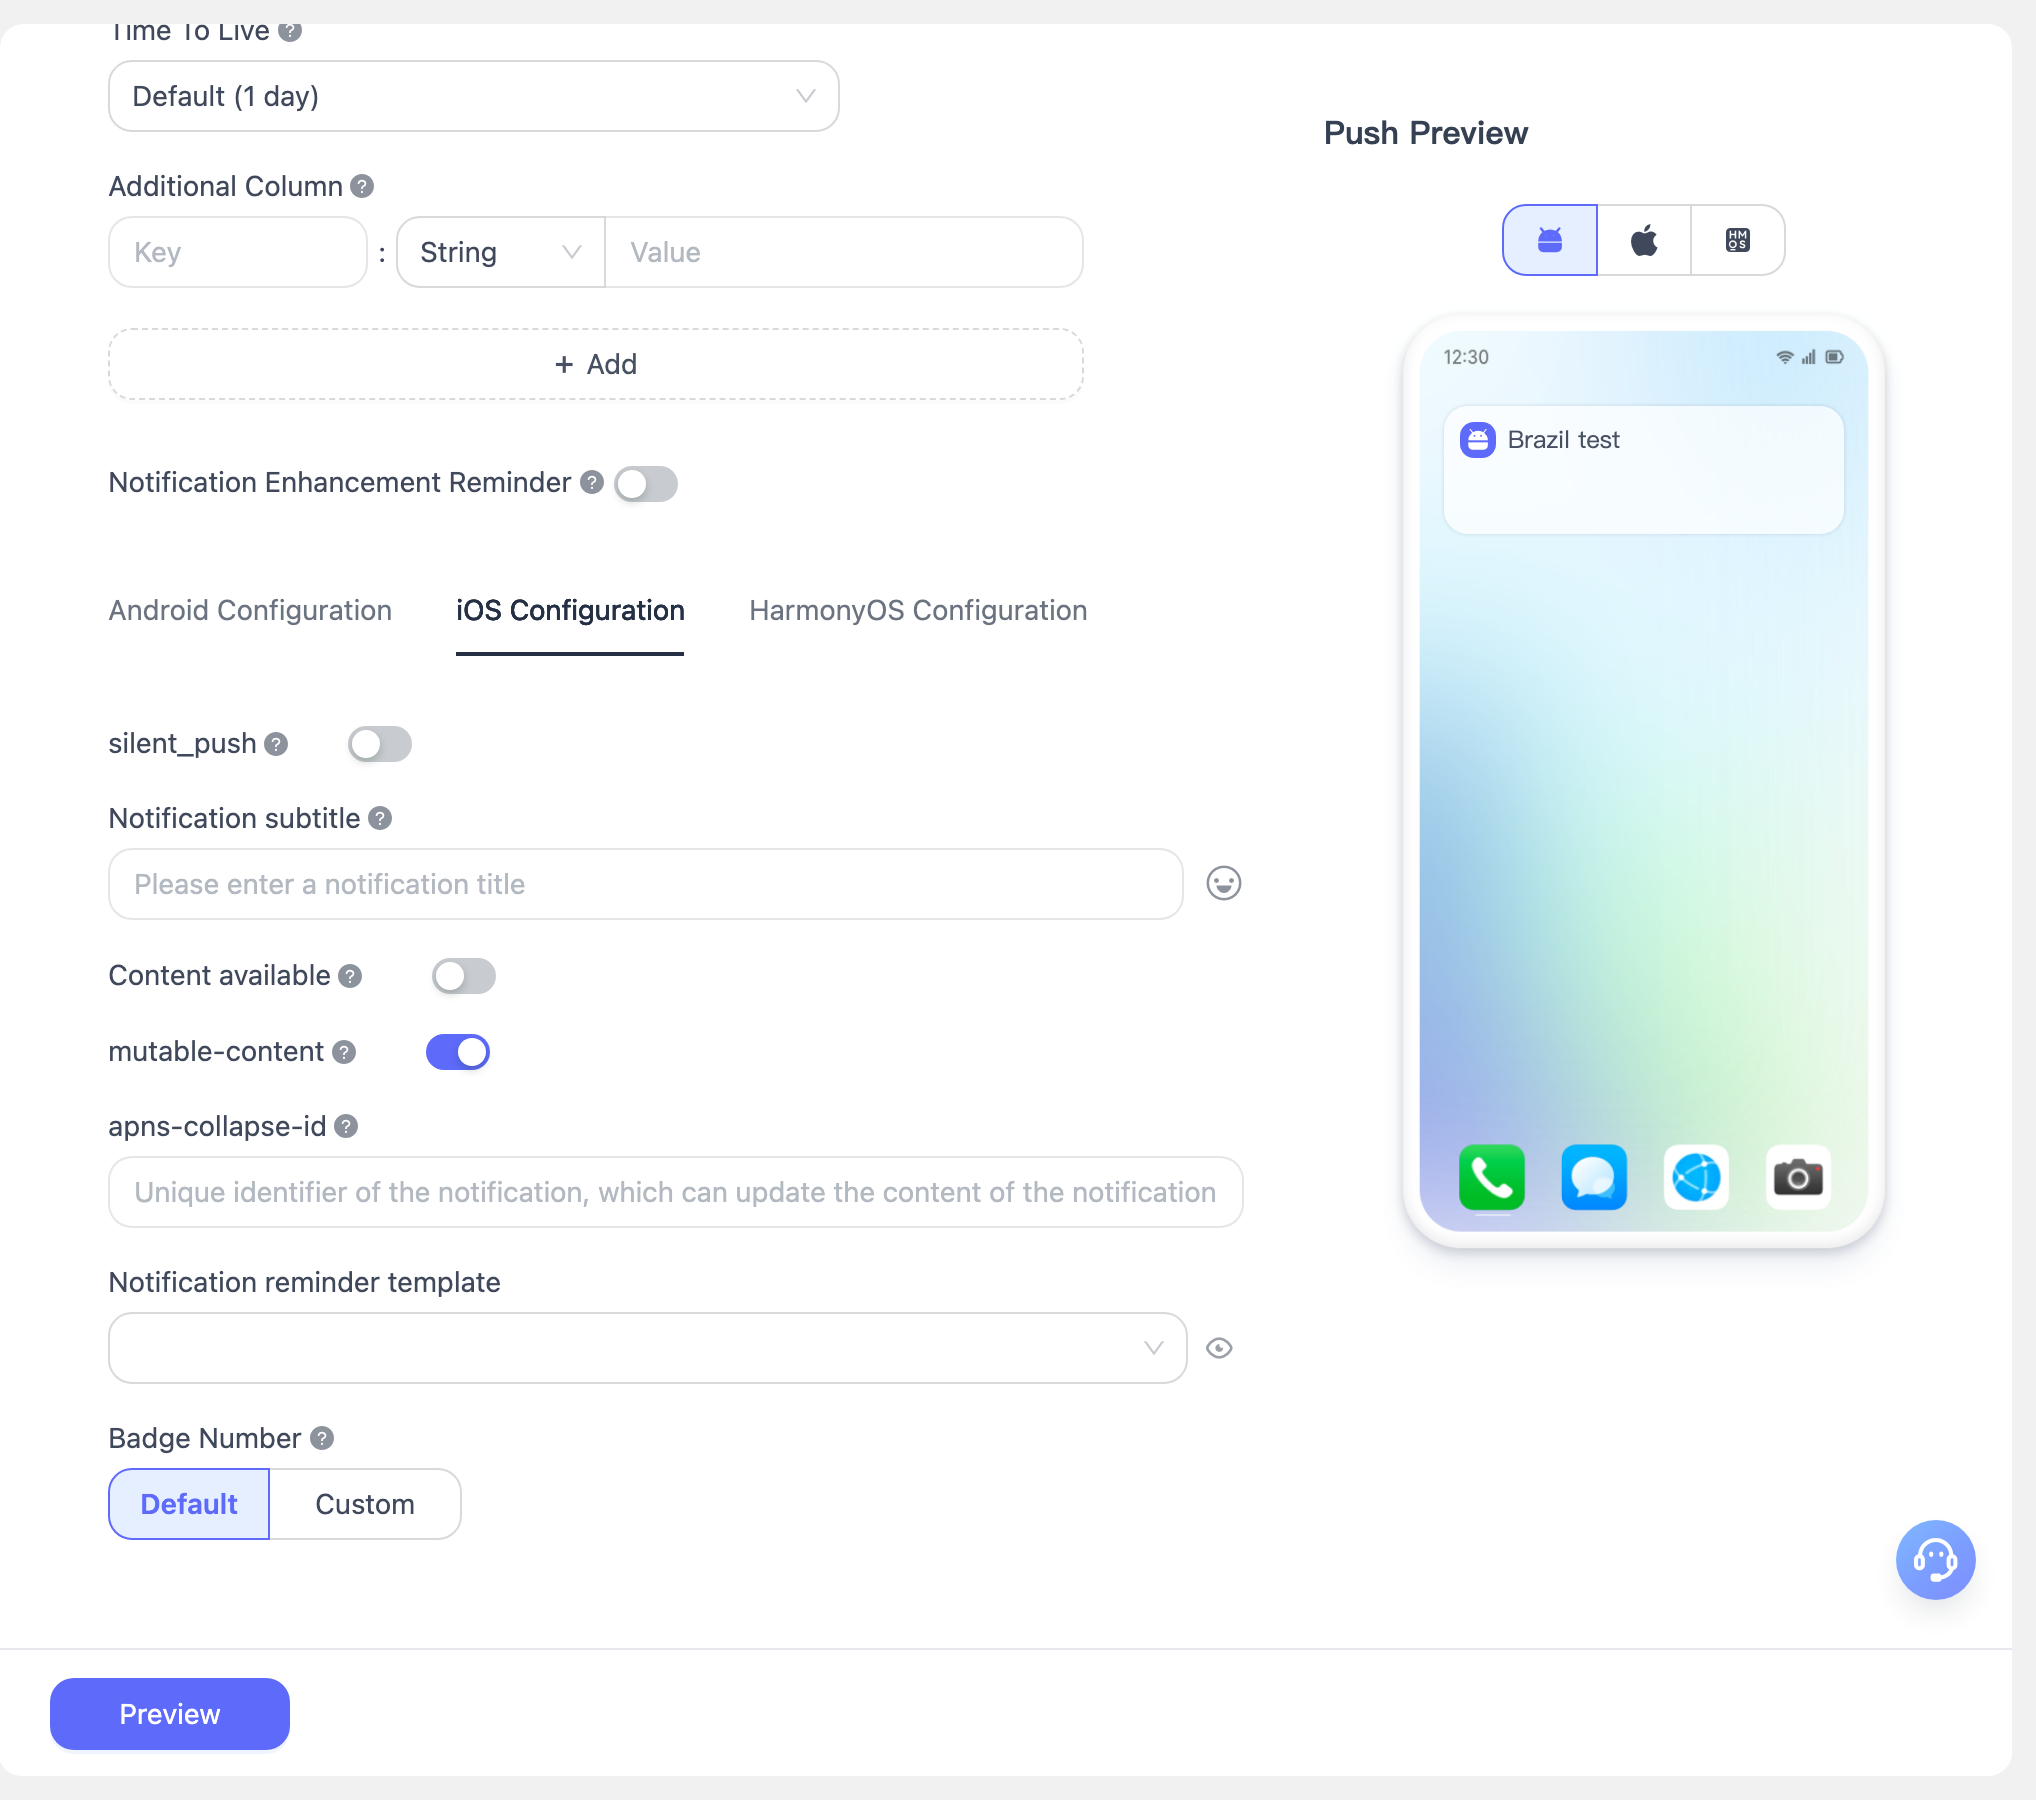
- Notification Message Template: You can set the notification reminder priority to avoid frequently disturbing users. The default is "Regular Reminder Template". Templates include template name, notification type, sound, volume, critical, category, thread-id, and interruption-level.
- Regular Reminder Template: Notification type is "Notification", sound is "Default Notification", interruption-level is "active".
- Silent Reminder Template: Notification type is "Notification", sound is "Silent", interruption-level is "passive".
- Click "Create New Message Reminder Template" to customize a reminder template.
- Regular Notification: Specify sound via the sound field. Default is "default", which is the system default sound. If set to an empty value, it will be silent. If set to a special name, the sound must be configured in your App.
- Critical Alert: Applications that need to push critical alerts must apply for permission at the Apple Developer Website.
- category: iOS category, only supported for iOS 8 and above systems.
- thread-id: An app-specific identifier for grouping notifications. Notifications with the same thread-id are grouped together.
- interruption-level: Used to define the interruption level for notification priority and delivery timing.
- badge: You can specify the badge for APNs push notifications, displayed directly in the upper right corner of the desktop application icon. It represents the number of unread messages for the application. You can also increment/decrement the badge by +N/-N. Example: If recipients A and B have badges of 1 and 2 respectively, after pushing +2, A's badge becomes 3 and B's badge becomes 4. The system default value is 1.
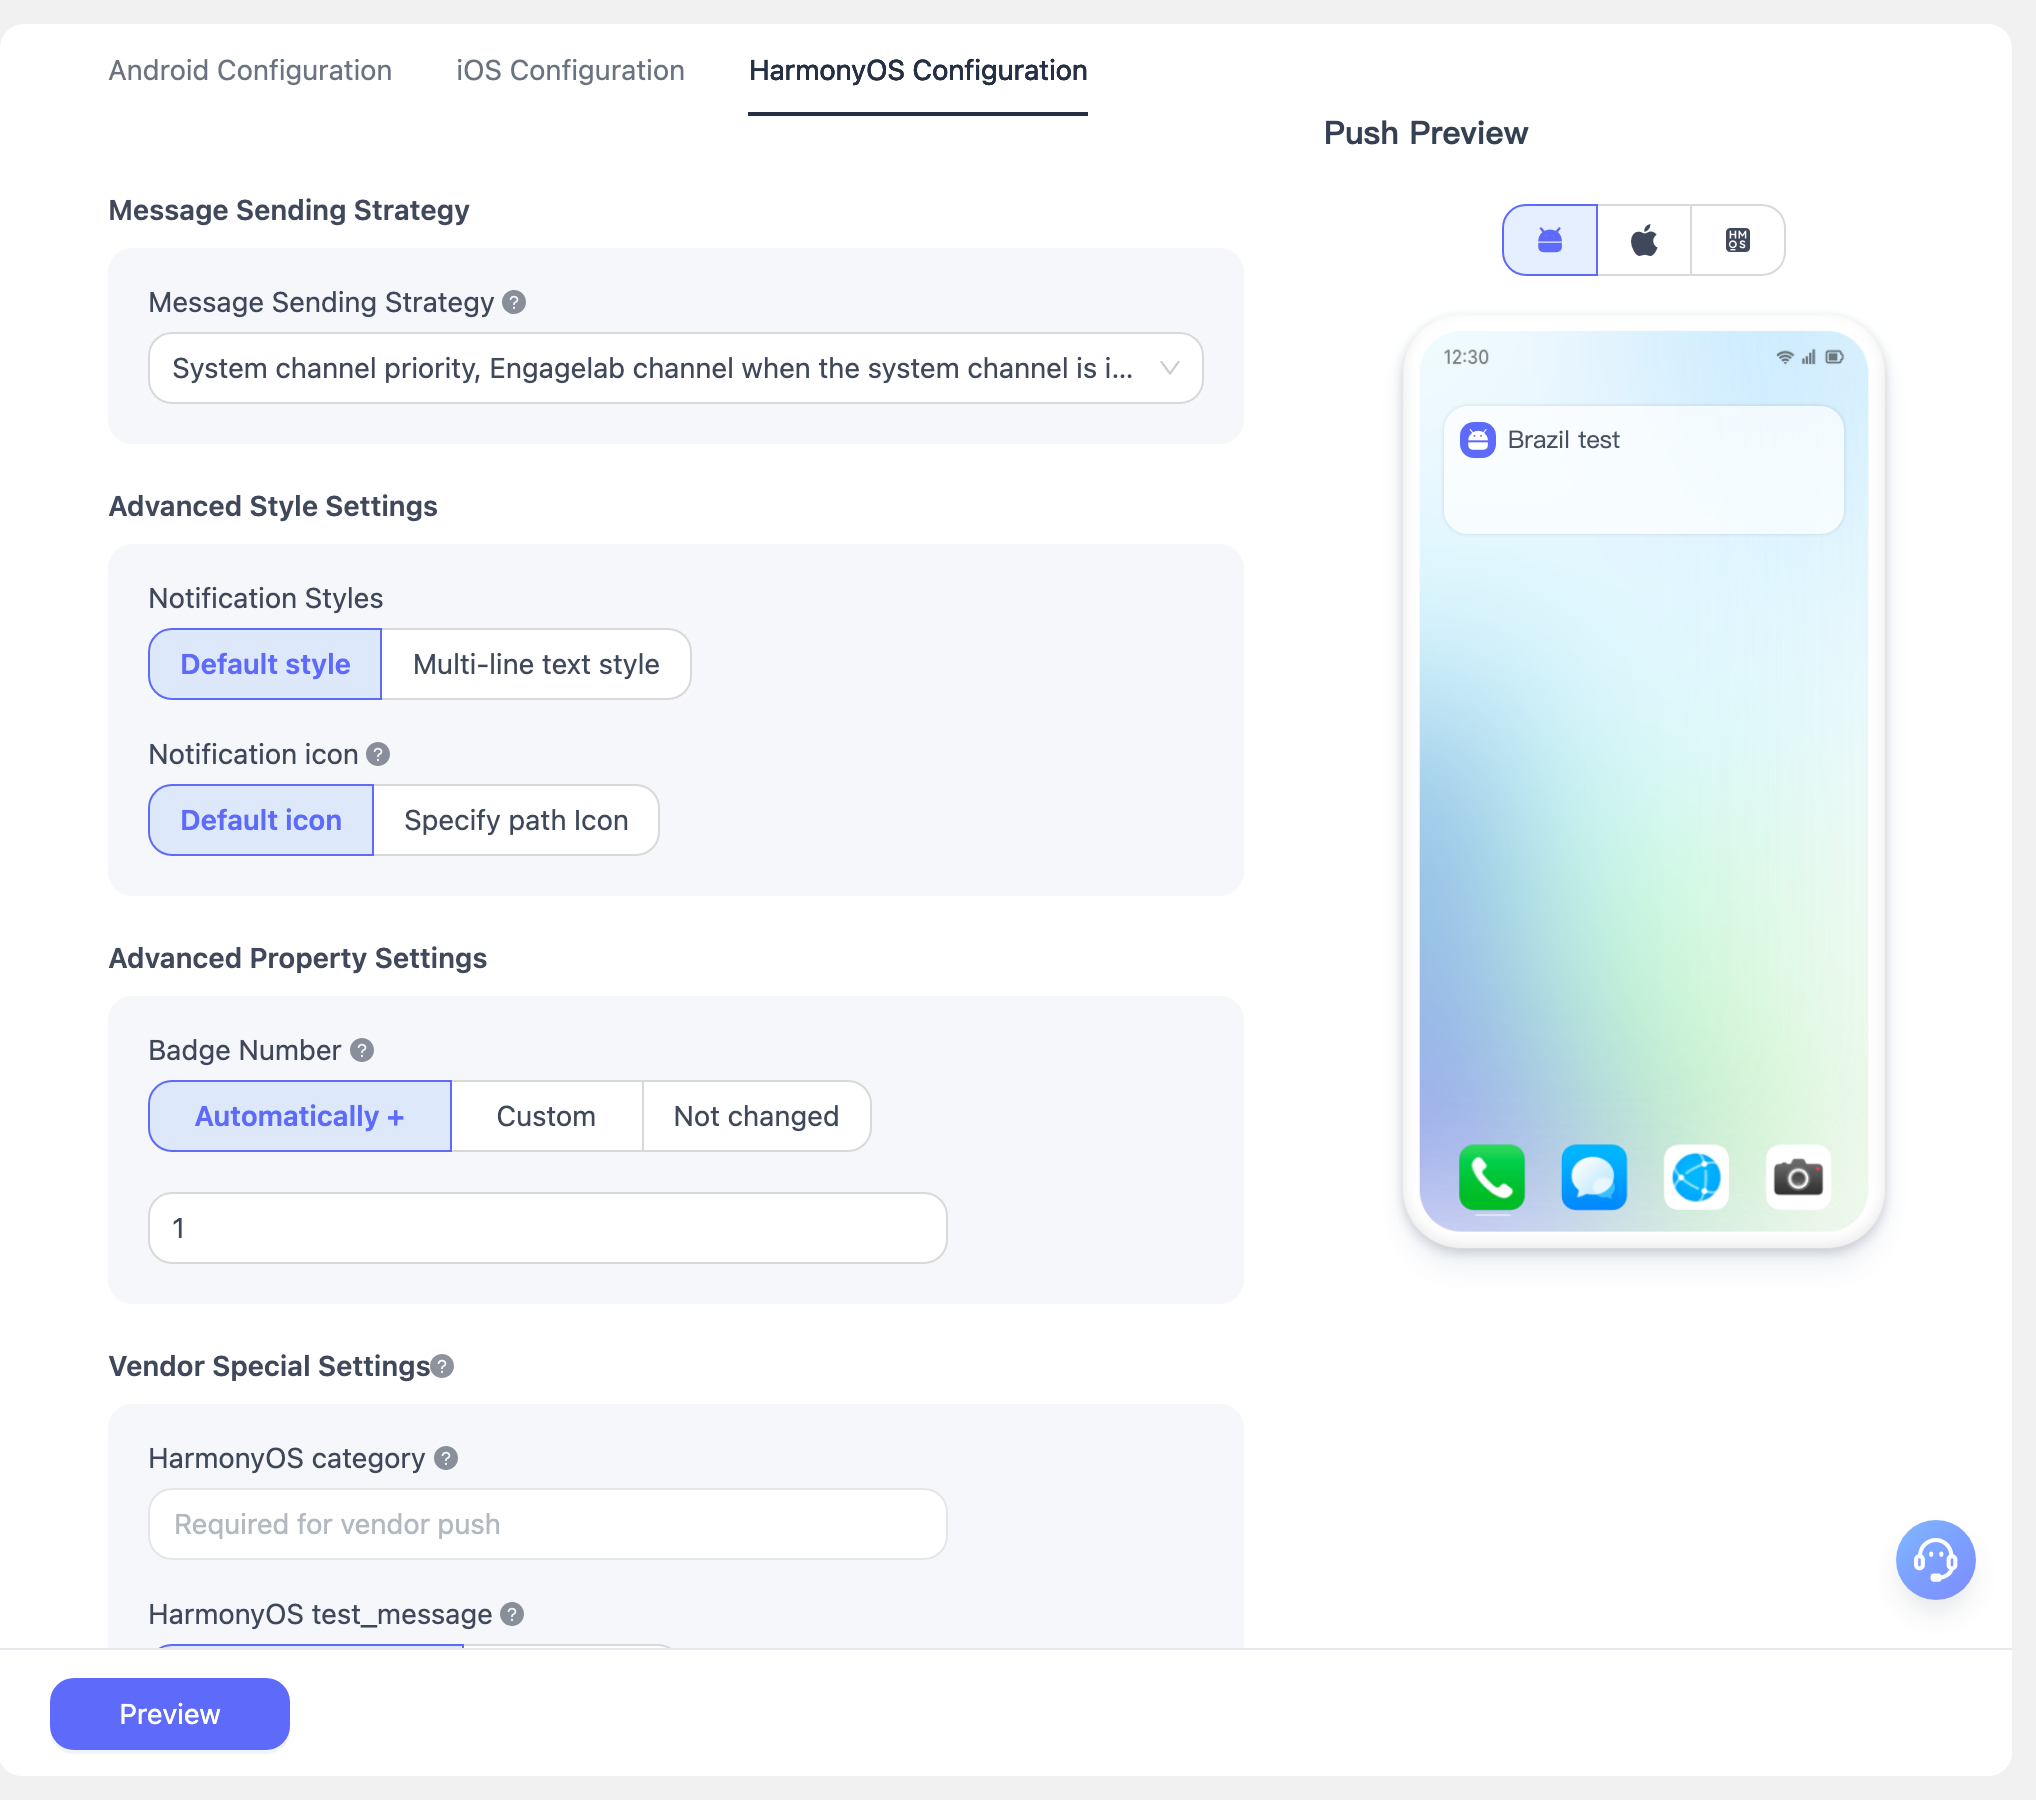
HarmonyOS Configuration
- Notification Bar Style: Supports system default style and multi-line text style.
- Notification Bar Icon: Only supports displaying the application default icon and specified path icon.
- Badge Number: Default +1 effect.
- Manufacturer-Specific Settings:
- category: HarmonyOS manufacturer message type identifier, requires applying for HarmonyOS self-classification rights; corresponds to the Push API field notification.hmos.category.
- test_message: HarmonyOS manufacturer normal message/test message identifier; corresponds to the Push API field notification.hmos.test_message.
- receipt_id: HarmonyOS manufacturer push data receipt address identifier; corresponds to the Push API field notification.hmos.receipt_id.
Target Audience
Select Target: The target audience for the push. During testing, it is recommended to use the registrationID obtained from the registration log.
- All/Broadcast to Everyone: Push to all currently registered and future registered online users of the application.
- User Segments: Supports custom user segmentation based on rules for targeted pushing.
- registrationID: A maximum of 1000 per push.
Send Timing
- Send Immediately: The message will be delivered immediately.
- Scheduled by Organization Time: Send based on the current organization's configured time zone. Scheduled tasks cannot exceed one year.
- Scheduled by End User Time: Send based on each terminal device's configured time zone. If you want to send a notification to all users in different time zones at 10 AM tomorrow, just set it to 10 AM tomorrow here. Note: If the time has already passed for a certain time zone when this message is sent, the message will be discarded. Please ensure you start sending at least 24 hours in advance to avoid important messages not being delivered to end users.
- Recurring Scheduled Send: Recurring scheduled push can be set to automatically send notifications at regular intervals within a period of time. Note that if you select monthly recurring and choose the 30th for February, the 30th selection will be ignored.
Send Preview
After configuring the push parameters, click Send Preview to view the configured push parameters.
Confirm the send parameters and click Confirm to successfully create the push task.
Create Custom Message
Navigate to Push > Custom Message to create a push task. For parameter configuration, refer to Create Notification Message.
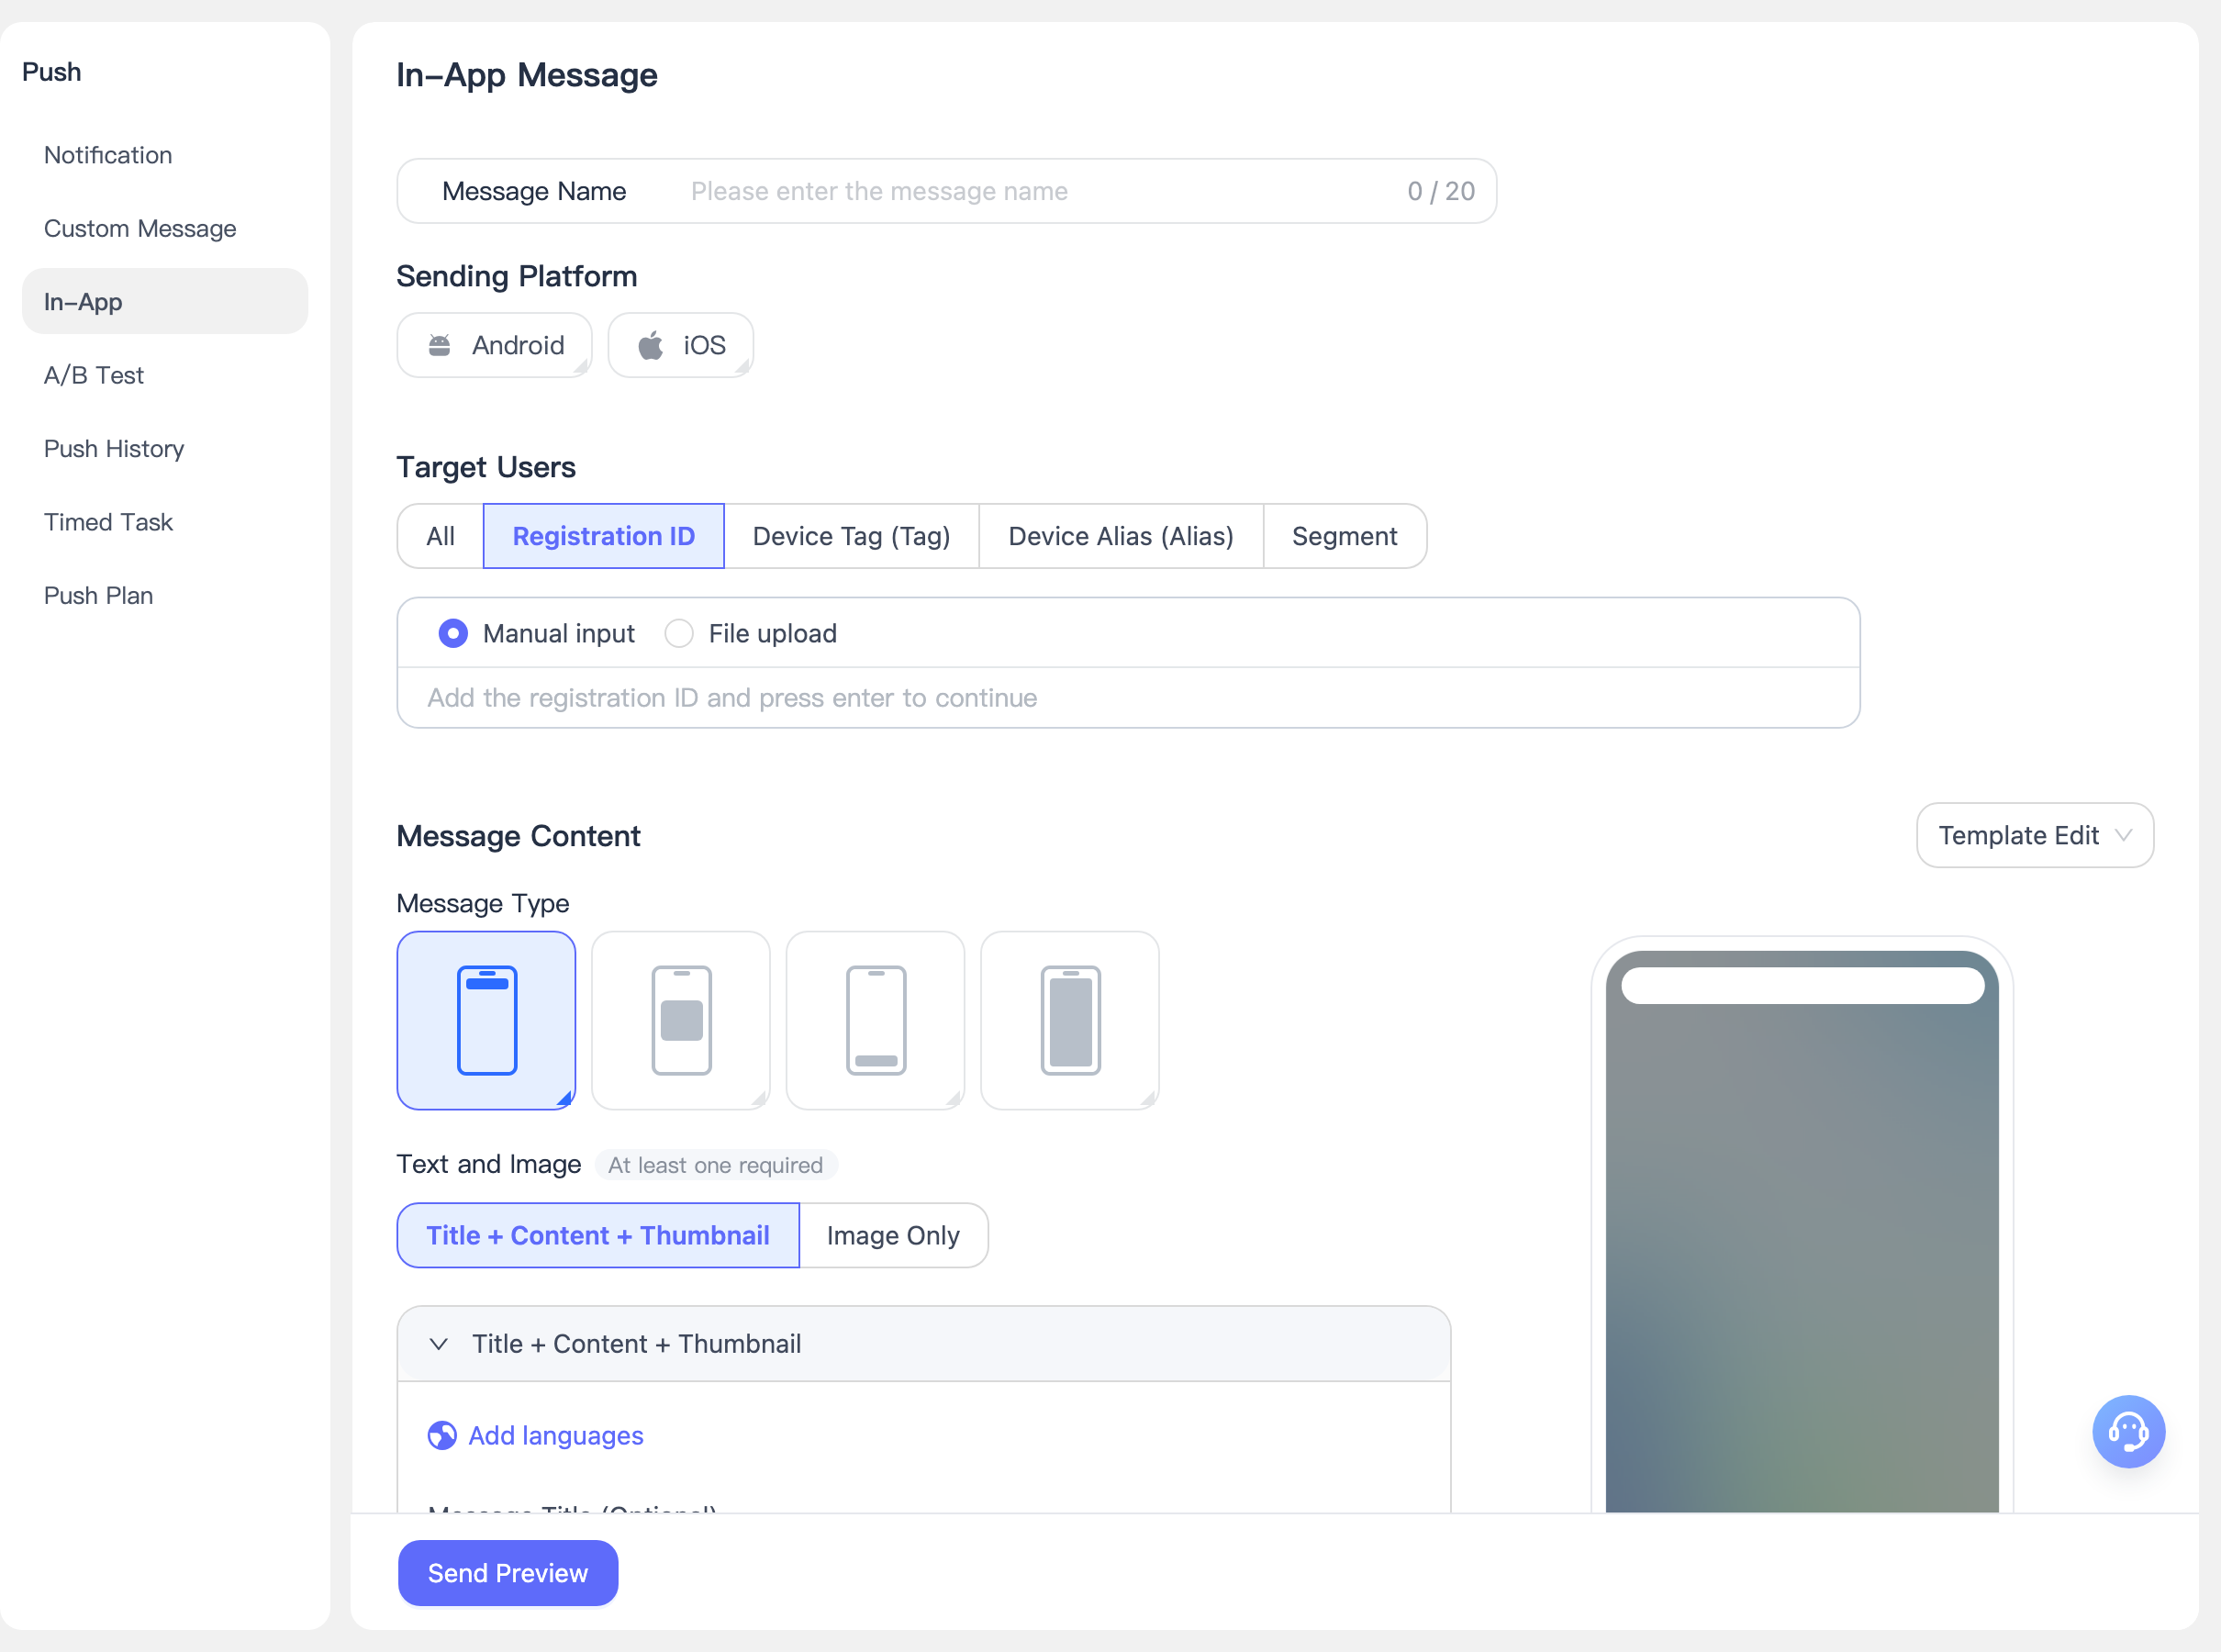
Create In-App Message
In-app messages are messages displayed within the application, used to convey information, promotional activities, or remind users to perform certain actions. This document describes the in-app message types we support and the corresponding creation steps.
- In-app messages are only delivered through the Engagelab channel and only support Android and iOS platforms.
- In-app messages can only be sent through the web portal; API sending is not currently available.
- This feature requires SDK version v4.5.0+
Basic Settings
Message Name: Maximum 20 characters.
Target Platform: Select the platforms you want to push to based on the platforms integrated with the SDK.
- Before selecting a platform, you need to configure the corresponding platform in Push Settings.
- Sub-accounts can only select platforms authorized by the primary account.
After selecting a platform, you can also choose the message popup page method:
- No Page Restriction: This in-app message can be displayed on any page (each message pops up only once).
- Specify Page Path: This in-app message only pops up on the specified App page (each message pops up only once).
- Target Users: The target audience for the push. During testing, it is recommended to use the registrationID obtained from the registration log.
- All/Broadcast to Everyone: Push to all currently registered and future registered online users of the application.
- User Segments: Supports custom user segmentation based on rules for targeted pushing.
- registrationID: A maximum of 1000 per push.
Message Content
Our in-app messaging system supports three fixed models: interstitial, banner, and full-screen, which can be switched via buttons. You can also write HTML code to create custom templates.
- Message Content:
- Message Image:
- Image URL: Supports network images.
- Image Action: Use web links or deep links to guide your users to external pages or specific pages within your application. Supports selecting redirect URL, open Deeplink, push permission prompt, and no action.
- Redirect URL
- Open Deeplink
- Push Permission Prompt: If the user previously denied permission in the native prompt, the click action will open your application's device settings. If the user has already enabled notification permission, the device settings will not be opened.
- No Action: When this option is selected, the popup disappears when the user clicks.
- Title Text:
- Message Title: Supports setting bold, font size, position, and font color.
- Body Text:
- Message Content: Supports setting bold, font size, position, and font color.
- Supports adding push titles and content in multiple languages: We automatically detect the end user's device language. If no other language is configured, all target users will receive the content set in the [Default] language.
- Action Buttons: If sending marketing promotional information or advertisements, please ensure the page has a prominent one-click close function.
- Supports setting primary and secondary buttons.
- You can customize button names and button actions. Button action usage refers to the image action described above.
- Close Button: Click to close the current page. Supports setting at bottom center or top right corner.
- Message Image:
Send Timing
- Send Time: Select the time to send the message.
- Immediate: Send the message immediately.
- Scheduled: The send time can only be set to at least 3 minutes after the current time, and scheduled tasks cannot exceed one year.
- Throttled Push: Complete the push within a set time period to reduce server load.
Advanced Settings
- Delayed Popup:
- Immediate Popup: When the in-app message meets the conditions, it will immediately pop up on the page.
- Delayed Popup: Supports setting to "Pop up after staying on page for ** seconds", default is 3 seconds. Also supports setting to "Pop up ** seconds after the previous in-app message", default is 3 seconds.
- Disappear Timing: Default is to disappear after a set time. You can switch to requiring the user to manually close the popup.
- Disappear After Set Time: Banner messages default to disappearing after 5 seconds, interstitial and HTML messages default to 30 seconds. The configurable time range is 5-180 seconds. Full-screen messages are not controlled by this setting if a skip button and skip time are configured.
- User Manual Close: If this option is selected, the close button must be enabled. If not enabled, the system will automatically enable it.
- Message Display Validity Period: The message will only be displayed if the user comes online and enters the display page within this duration; otherwise, it expires.
- For a push to a specific user, if that user is currently offline, the message will be saved as an offline message before the "display deadline" and will be pushed when the user comes online next time.
- For messages already delivered to the App, if the end user never enters the specified page and enters the page after the "display deadline" has passed, the in-app message will not be displayed.
- Extra Parameters: Used for client-side custom event handling.
A/B Testing
Navigate to Create Push > A/B Test to create a push task. The parameter configuration is described below:
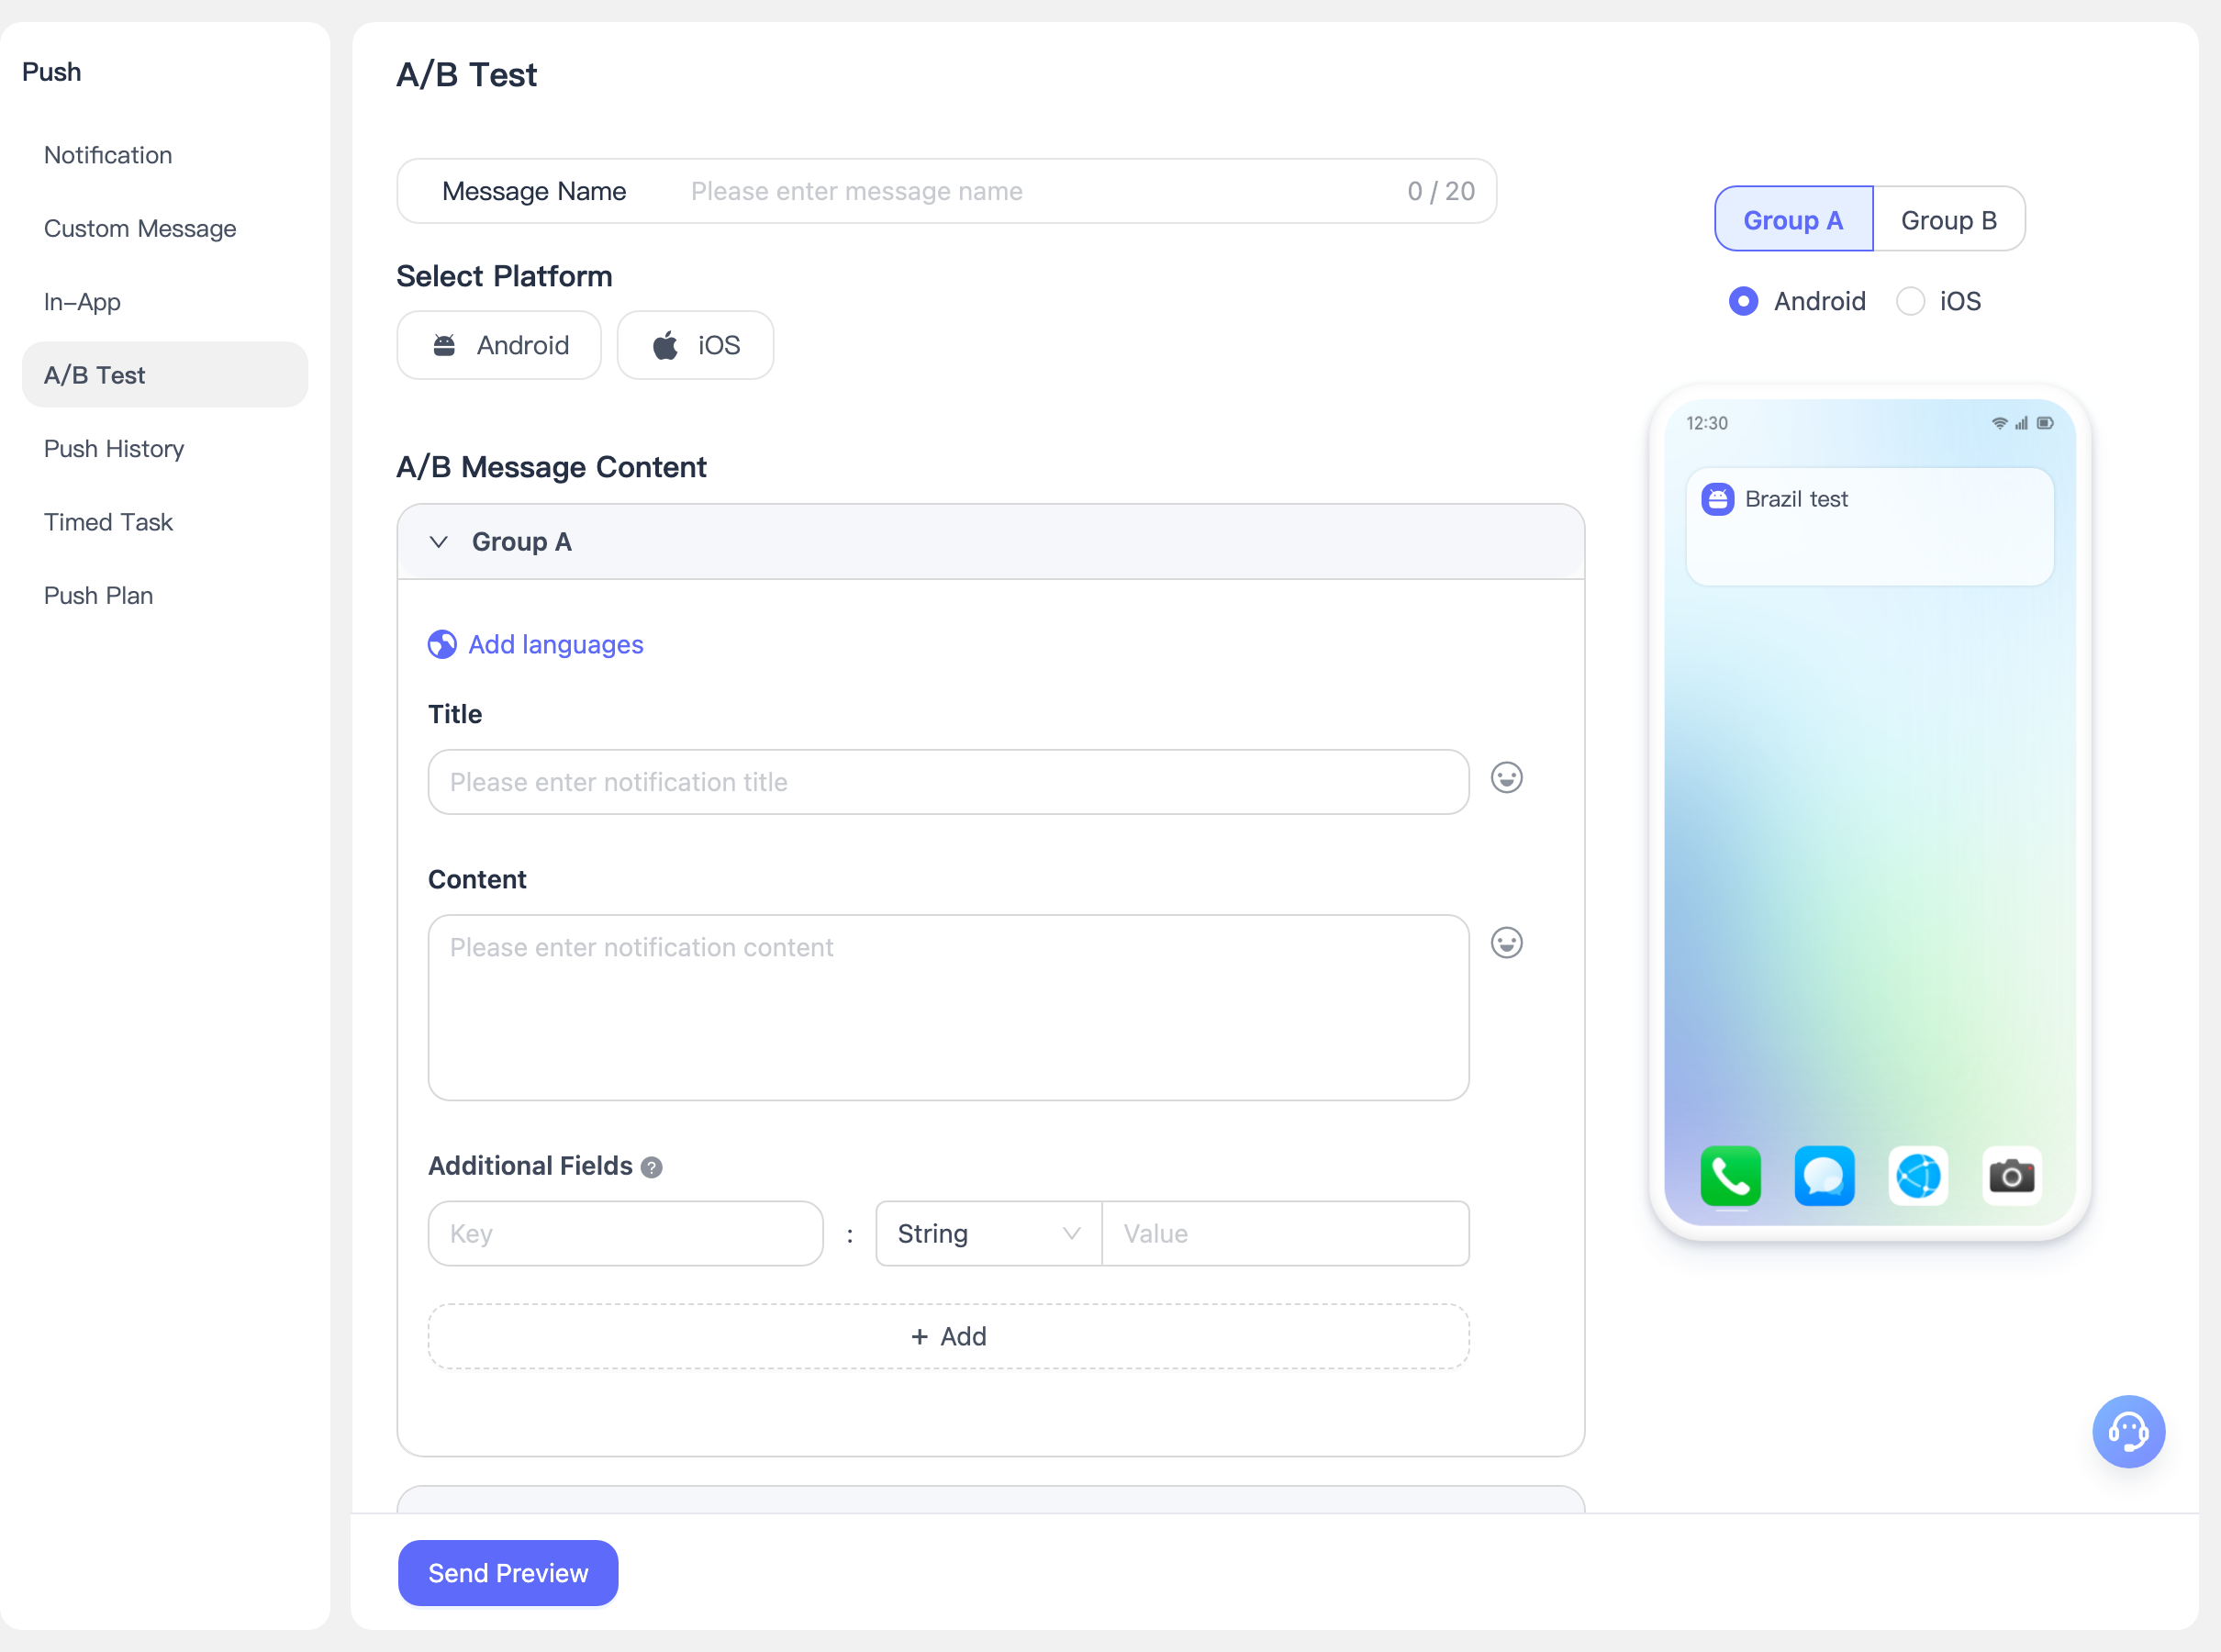
- Message Name: Customize the message name for this A/B test for easy management and retrieval.
- Select Platform: Currently supports Android and iOS platforms. iOS platform allows selecting development or production environment. When no platform is selected, the A/B group message content will display dual-platform preview by default. After selecting a platform, the advanced settings will include corresponding platform configurations.
A/B Group Message Content Configuration
The message content configuration for A/B groups is consistent with "Notification Message", supporting multilingual, notification title, subtitle, content, extra fields, click behavior, advanced styles, and other settings.
Group B supports one-click copy of all Group A configurations for quickly building control group content.
Group B supports one-click copy of Group A settings. You can click one-click copy and then modify on the basis of Group A.
Target Audience
The EngageLab push platform supports multiple target audience selection methods, enabling developers and operators to precisely reach users based on different business needs. During testing, it is recommended to use the registrationID obtained from the registration log. For specific configuration, refer to "Notification Message".
A/B Test Settings
Among users who simultaneously meet the target audience conditions and platform conditions (MacOS/Android), set the percentage of users participating in the A/B test. The user proportion for Group A and Group B is equal. For example, if the user proportion is 40%, then the user proportion for Group A and Group B is 20% each.
The final calculation result is rounded down to an integer. If the target number of A/B Test participants is less than 2, the push will fail.
Send Time and Advanced Settings
The send time and advanced settings for A/B group push are consistent with "Notification Message". For detailed configuration instructions, refer to "Notification Message".
Android Configuration
Notification Delivery Strategy: You can specify the priority delivery strategy for manufacturer channels and the Engagelab channel. When selecting the manufacturer strategy, ensure the manufacturer channel has been configured successfully.
- The priority between FCM and phone manufacturer channels needs to be configured.
Advanced Property Settings: You can choose a regular reminder template or a custom template to meet notification style requirements for different business scenarios. The badge number (badge_add_num) setting only takes effect on Huawei EMUI 8.0 and above, and Xiaomi MIUI 6 and above devices.
For different Android manufacturers, EngageLab supports personalized push parameter configurations. Please fill in the specific fields according to each manufacturer's push specifications and the detailed instructions in the page prompts.
iOS Configuration
EngageLab supports personalized push parameter configurations. Please fill in the specific fields according to each manufacturer's push specifications and the detailed instructions in the page prompts.
Notification Reminder Template: You can choose a regular reminder template or a silent message template. Click "Create New Message Template" to add a custom template.
Badge Number: You can set the App icon badge number. Supports "System Default" or custom specific values, applicable to scenarios such as unread message counts.
Send Preview
After completing all configurations, click the "Send Preview" button at the bottom of the page to view the actual display effect of the current notification template. After confirming everything is correct, click "Confirm Send" to send the push message to the test audience. After the message is sent, you can view the detailed effectiveness analysis of this A/B test on the "Push Records" page.