Scheduled Tasks
Scheduled Tasks are pushes sent at a specified time. This article explains how to manage scheduled tasks for notification messages and custom messages in the EngageLab console.
Create a Scheduled Task
On the [Push] - [Create Push] - [Notification Message/Custom Message] page, select "Scheduled" as the send time when creating a message, then choose the date and time to deliver it.
Organization time: The message is sent according to the time zone configured for the current organization. A scheduled task cannot be set more than one year in advance.
End-user time: The message is sent according to the time zone configured on each end-user device. For example, if you want to send a notification to users in different time zones at 10:00 AM tomorrow, you only need to set 10:00 AM tomorrow here. Note that if the message is sent after the scheduled time in a given time zone has already passed, it will be discarded. To avoid important messages failing to reach end users, make sure to start sending at least 24 hours in advance.
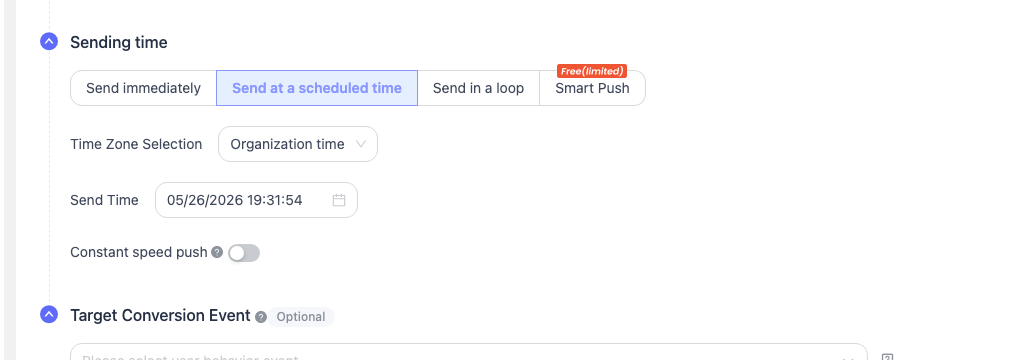
Recurring scheduled pushes can be configured to automatically send notifications on a repeated basis within a period of time. If you choose monthly repetition and select the 30th day of February, that day will be ignored.
Task List
After a scheduled push is created successfully, go to [Scheduled Tasks] - [Notification Message/Custom Message] to view all scheduled tasks that have been created but not yet sent. You can filter tasks by push type and date, and perform actions such as viewing details, editing, forwarding, and deleting.
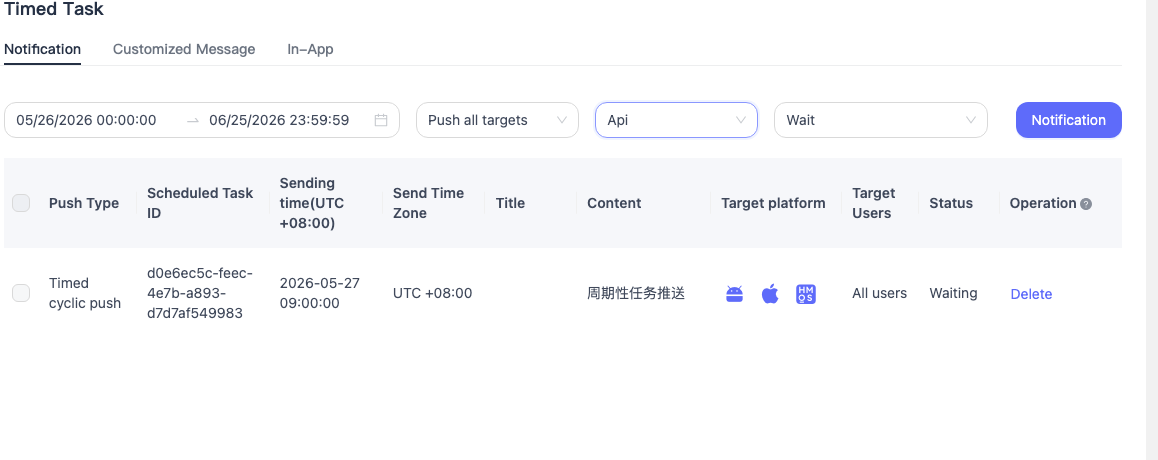
Details
Click "Details" to view information such as the push parameters and send ID of the scheduled task.

Delete
Select the task you want to delete, click "Delete", and confirm again to remove the scheduled task.