プッシュを作成
この記事では、EngageLab コンソールでさまざまなプッシュタスクを作成する方法をご案内します。通知メッセージ、カスタムメッセージ、アプリ内メッセージに関する一連のワークフロー全体をカバーしています。以下の各セクションでは、異なるメッセージタイプに応じた作成手順、パラメータ設定、注意事項を紹介し、プッシュタスクの設定を効率的に完了できるよう支援します。
通知メッセージを作成
[Push] - [Create Push] - [Notification Message] に移動して、プッシュタスクを作成します。パラメータ設定の説明は以下のとおりです。
基本設定
- Notification Title: プッシュメッセージのタイトルです。できる限り「test」「测试」や数字のみのような意味のない内容は避けてください。そうしないと、ベンダーによってブロックされ、通知メッセージを受信できない可能性があります。
- Notification Content: プッシュメッセージの本文です。できる限り「test」「测试」や数字のみのような意味のない内容は避けてください。そうしないと、ベンダーによってブロックされ、通知メッセージを受信できない可能性があります。
- 複数言語でプッシュタイトルとプッシュ内容を追加できます。エンドユーザーのデバイス言語は自動的に検出されます。他の言語が設定されていない場合は、[Default] 言語の内容がすべての対象ユーザーに送信されます。
- ワンクリック AI 翻訳に対応しています。
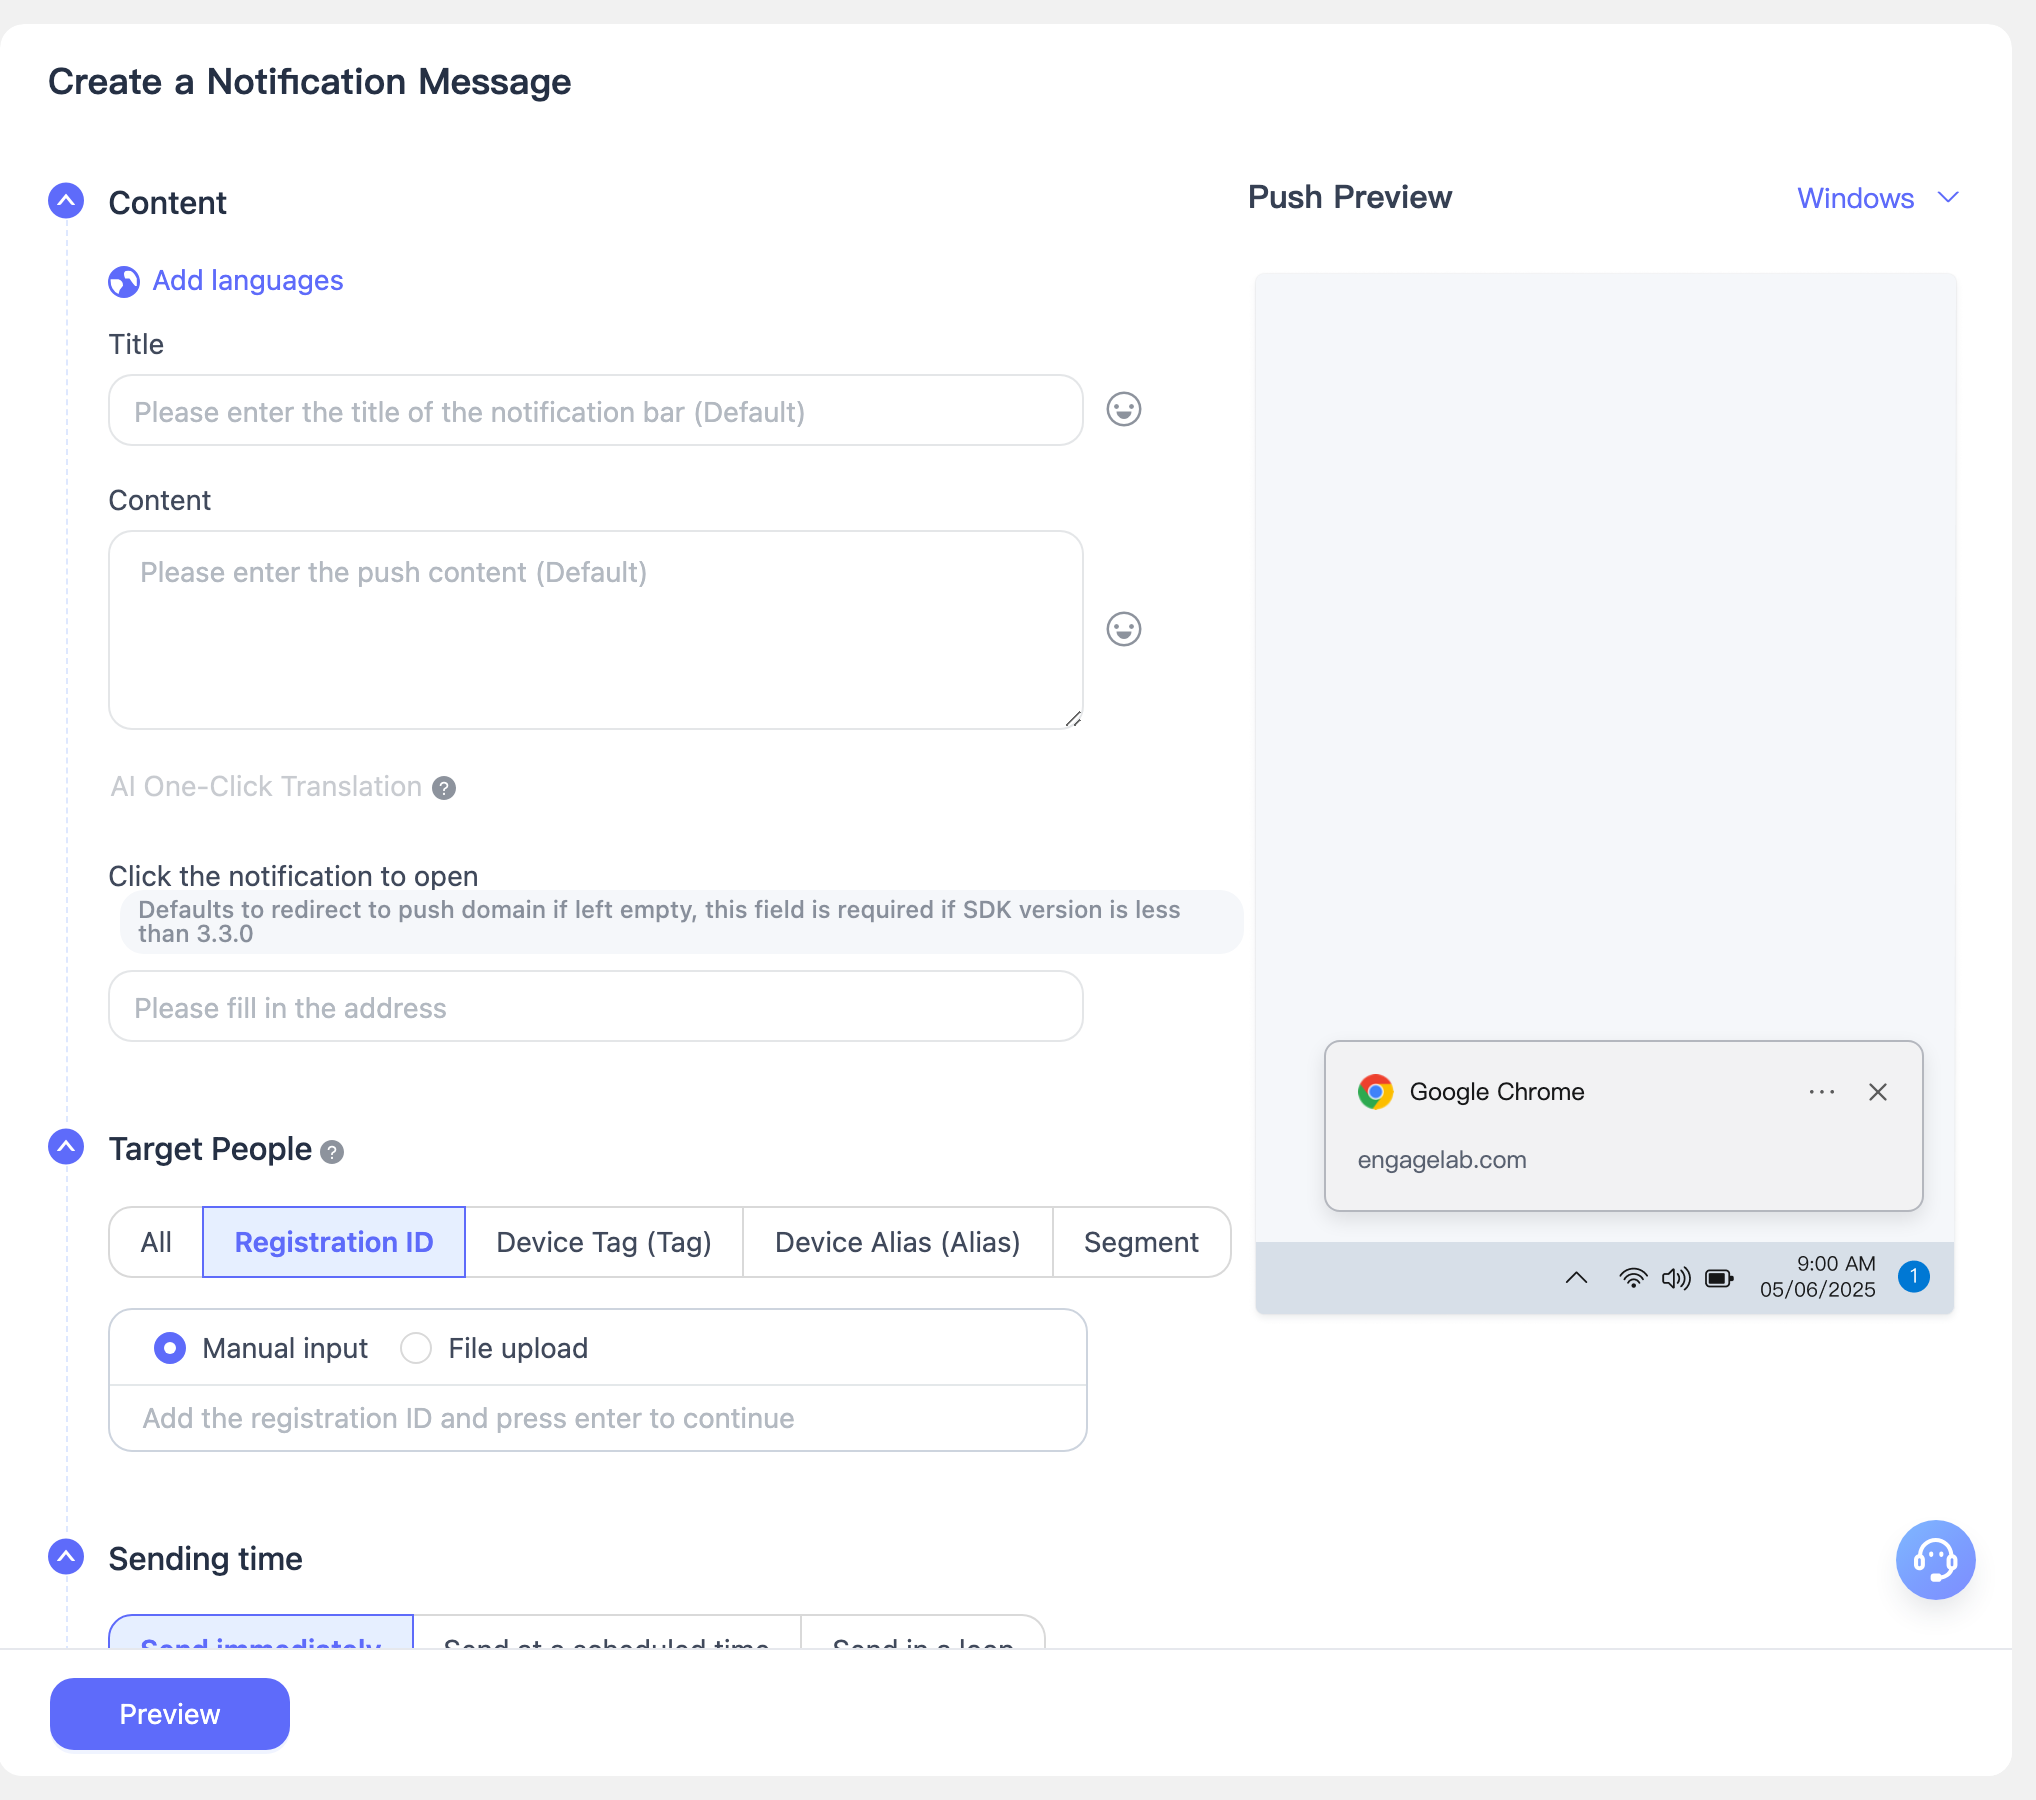
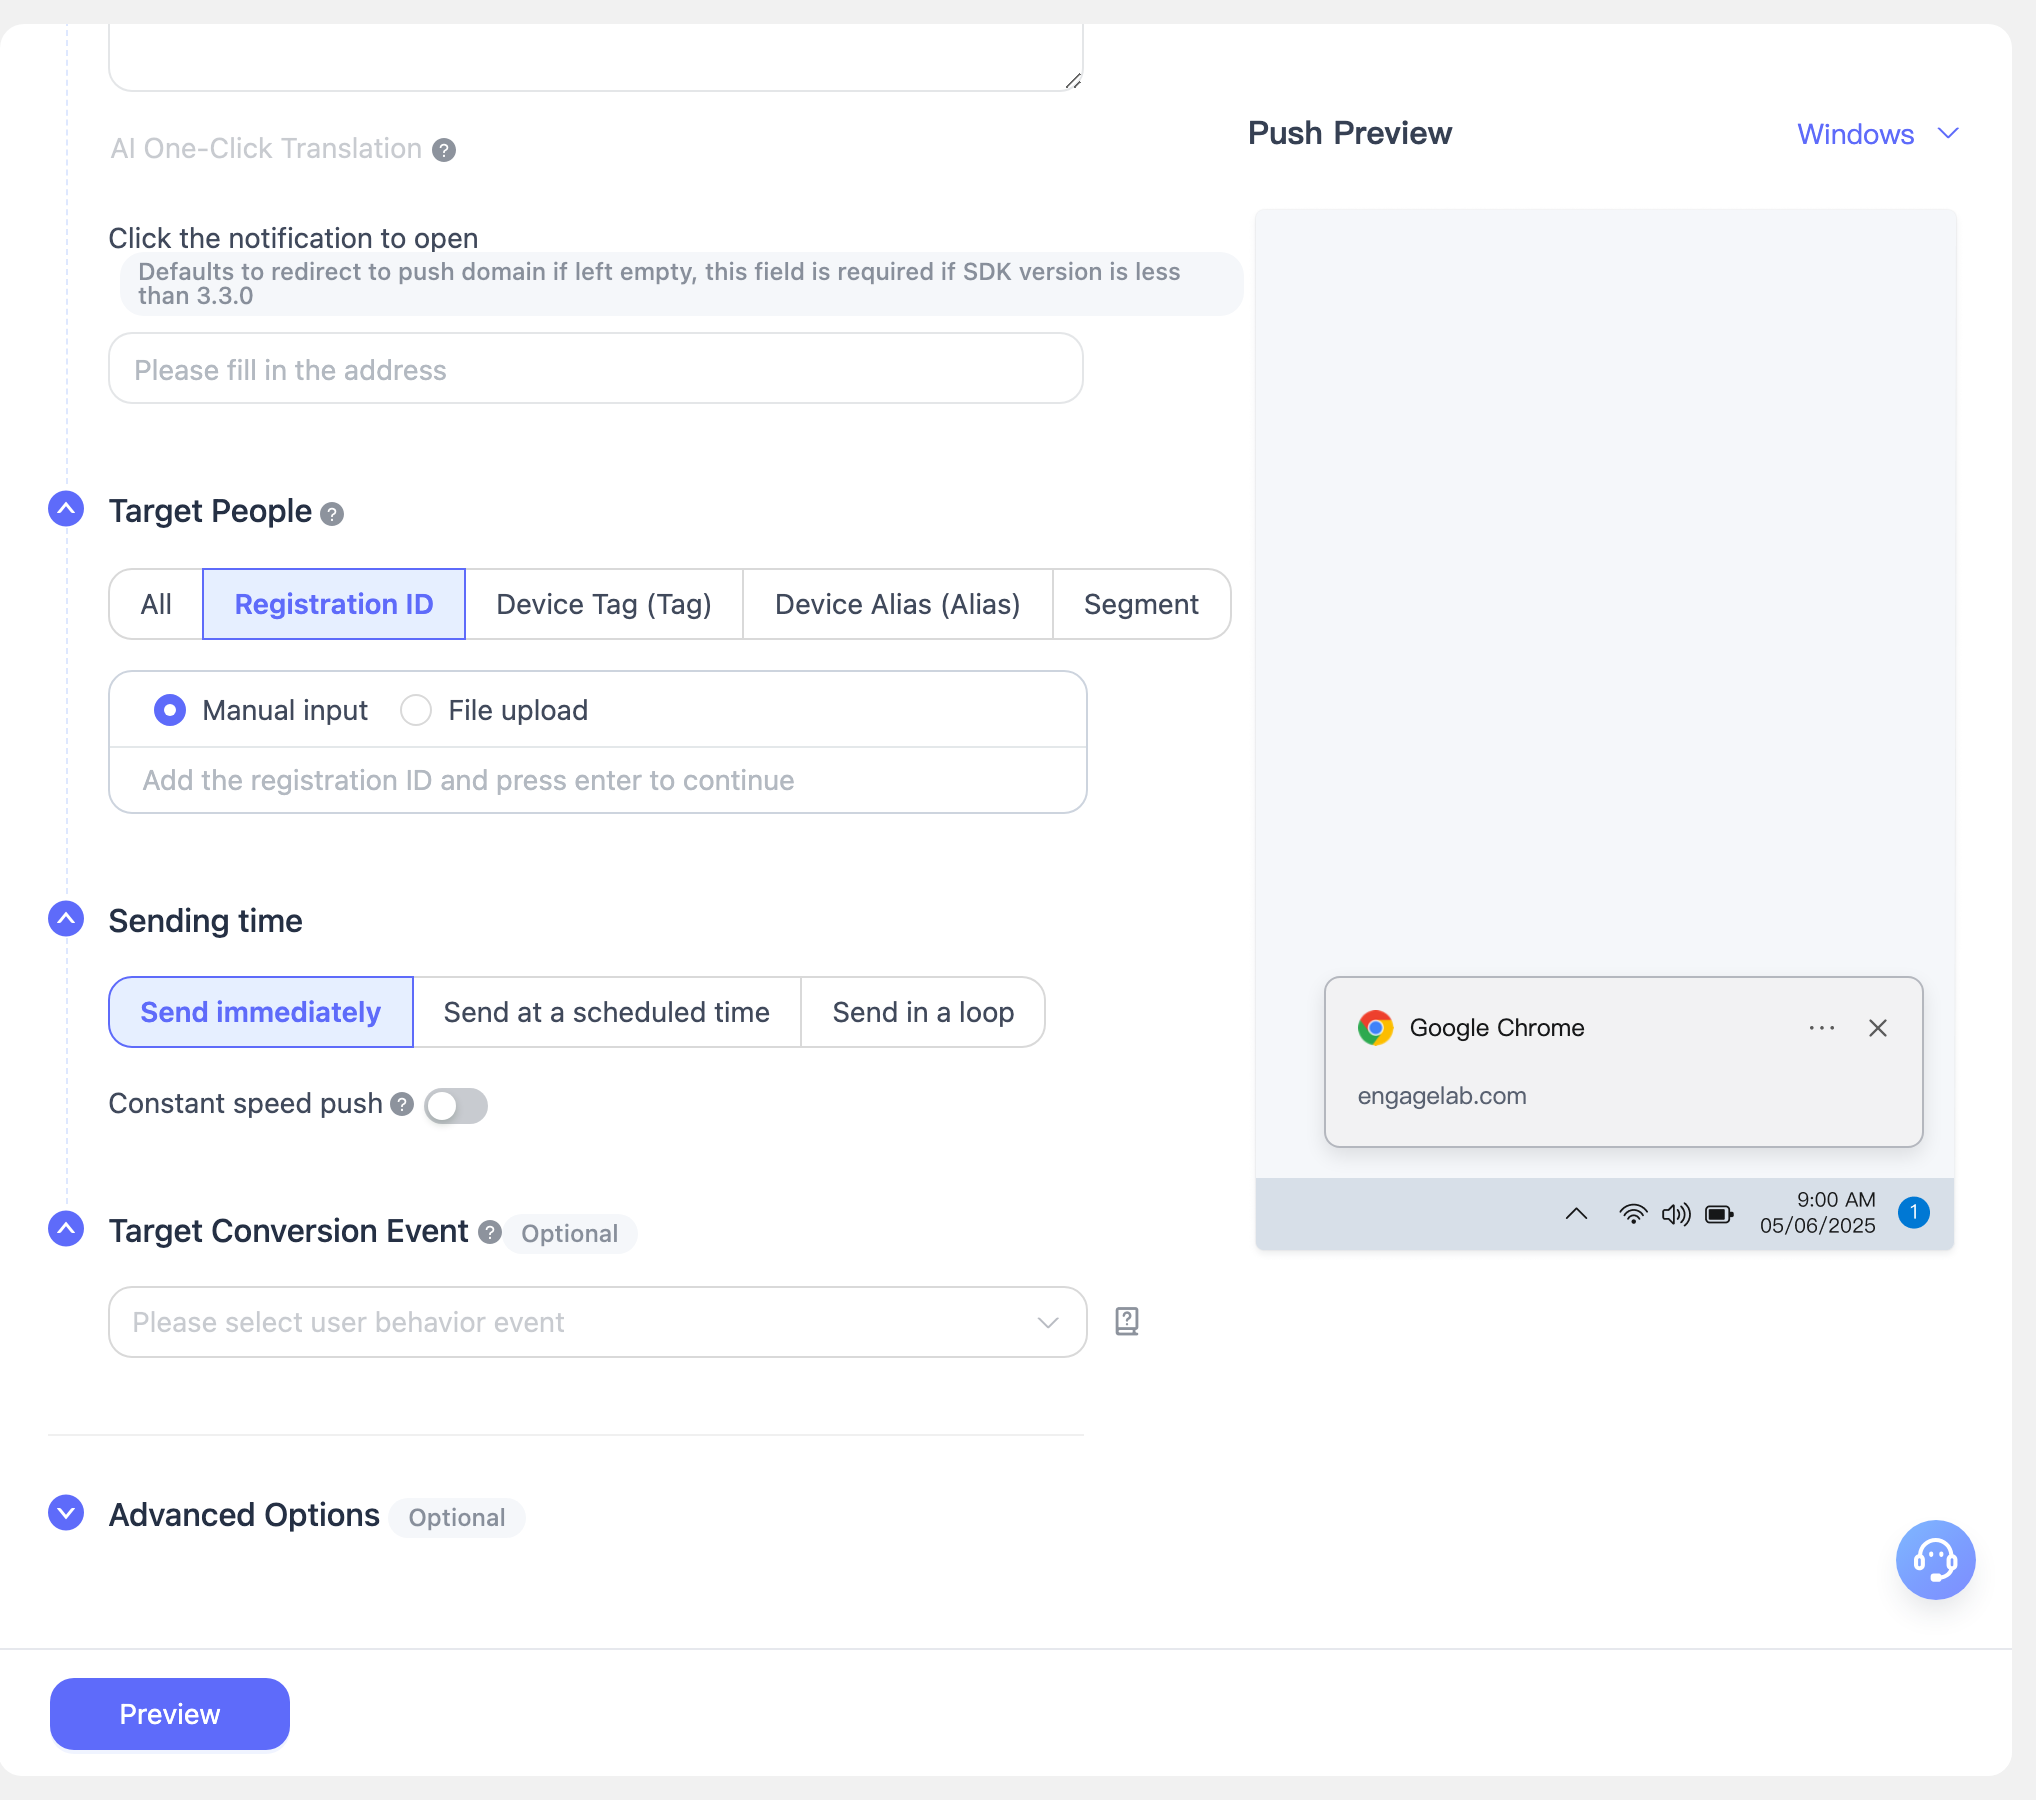
Target Audience: EngageLab のプッシュプラットフォームは複数のターゲットオーディエンス選択方法に対応しており、開発者や運用チームがさまざまなビジネスニーズに応じてユーザーへ正確に配信できます。テスト時は、登録ログから取得した registration ID を使用して配信することを推奨します。
- Broadcast to All: 現在アプリケーションに登録済みのオンラインユーザー全員と、今後オンラインで登録するユーザー全員にプッシュメッセージを送信します。
- Registration ID: 手動入力または TXT ファイルのアップロードにより、最大 1,000 件のデバイス ID を指定してプッシュできます。
- Set Tags: 和集合、積集合、補集合など複数の組み合わせを使用して、デバイスタグに基づき対象ユーザーを絞り込んでプッシュします。
- Set Alias: エイリアスを入力またはアップロードして、特定のユーザーデバイスに対してプッシュメッセージを送信します。
- User Segments: カスタムセグメンテーションルールにより同じ属性を持つユーザーをグループ化し、対象セグメントを選択してターゲット配信を行います。
Send Time: メッセージの送信タイミングを選択します。
- Immediate: メッセージを即時配信します。
- Scheduled: 組織時間またはエンドユーザー時間に基づいて予約送信タスクを設定します。
- Recurring: 指定した期間内で自動的に繰り返し通知を送信するよう設定します。
- Smart: EngageLab SDK がインストールされた Web サイトまたはモバイルアプリを通じてユーザーがサービスにアクセスするたびに、ユーザーの直近のアクティビティ時間を追跡します。システムはこのデータを記録し、ユーザーの過去の利用習慣に基づいて、ユーザーのデバイスのタイムゾーンに応じた適切な時間に通知を送信します。
Rate-Limited Push: 指定時間内に配信を完了し、サーバー負荷を軽減します。
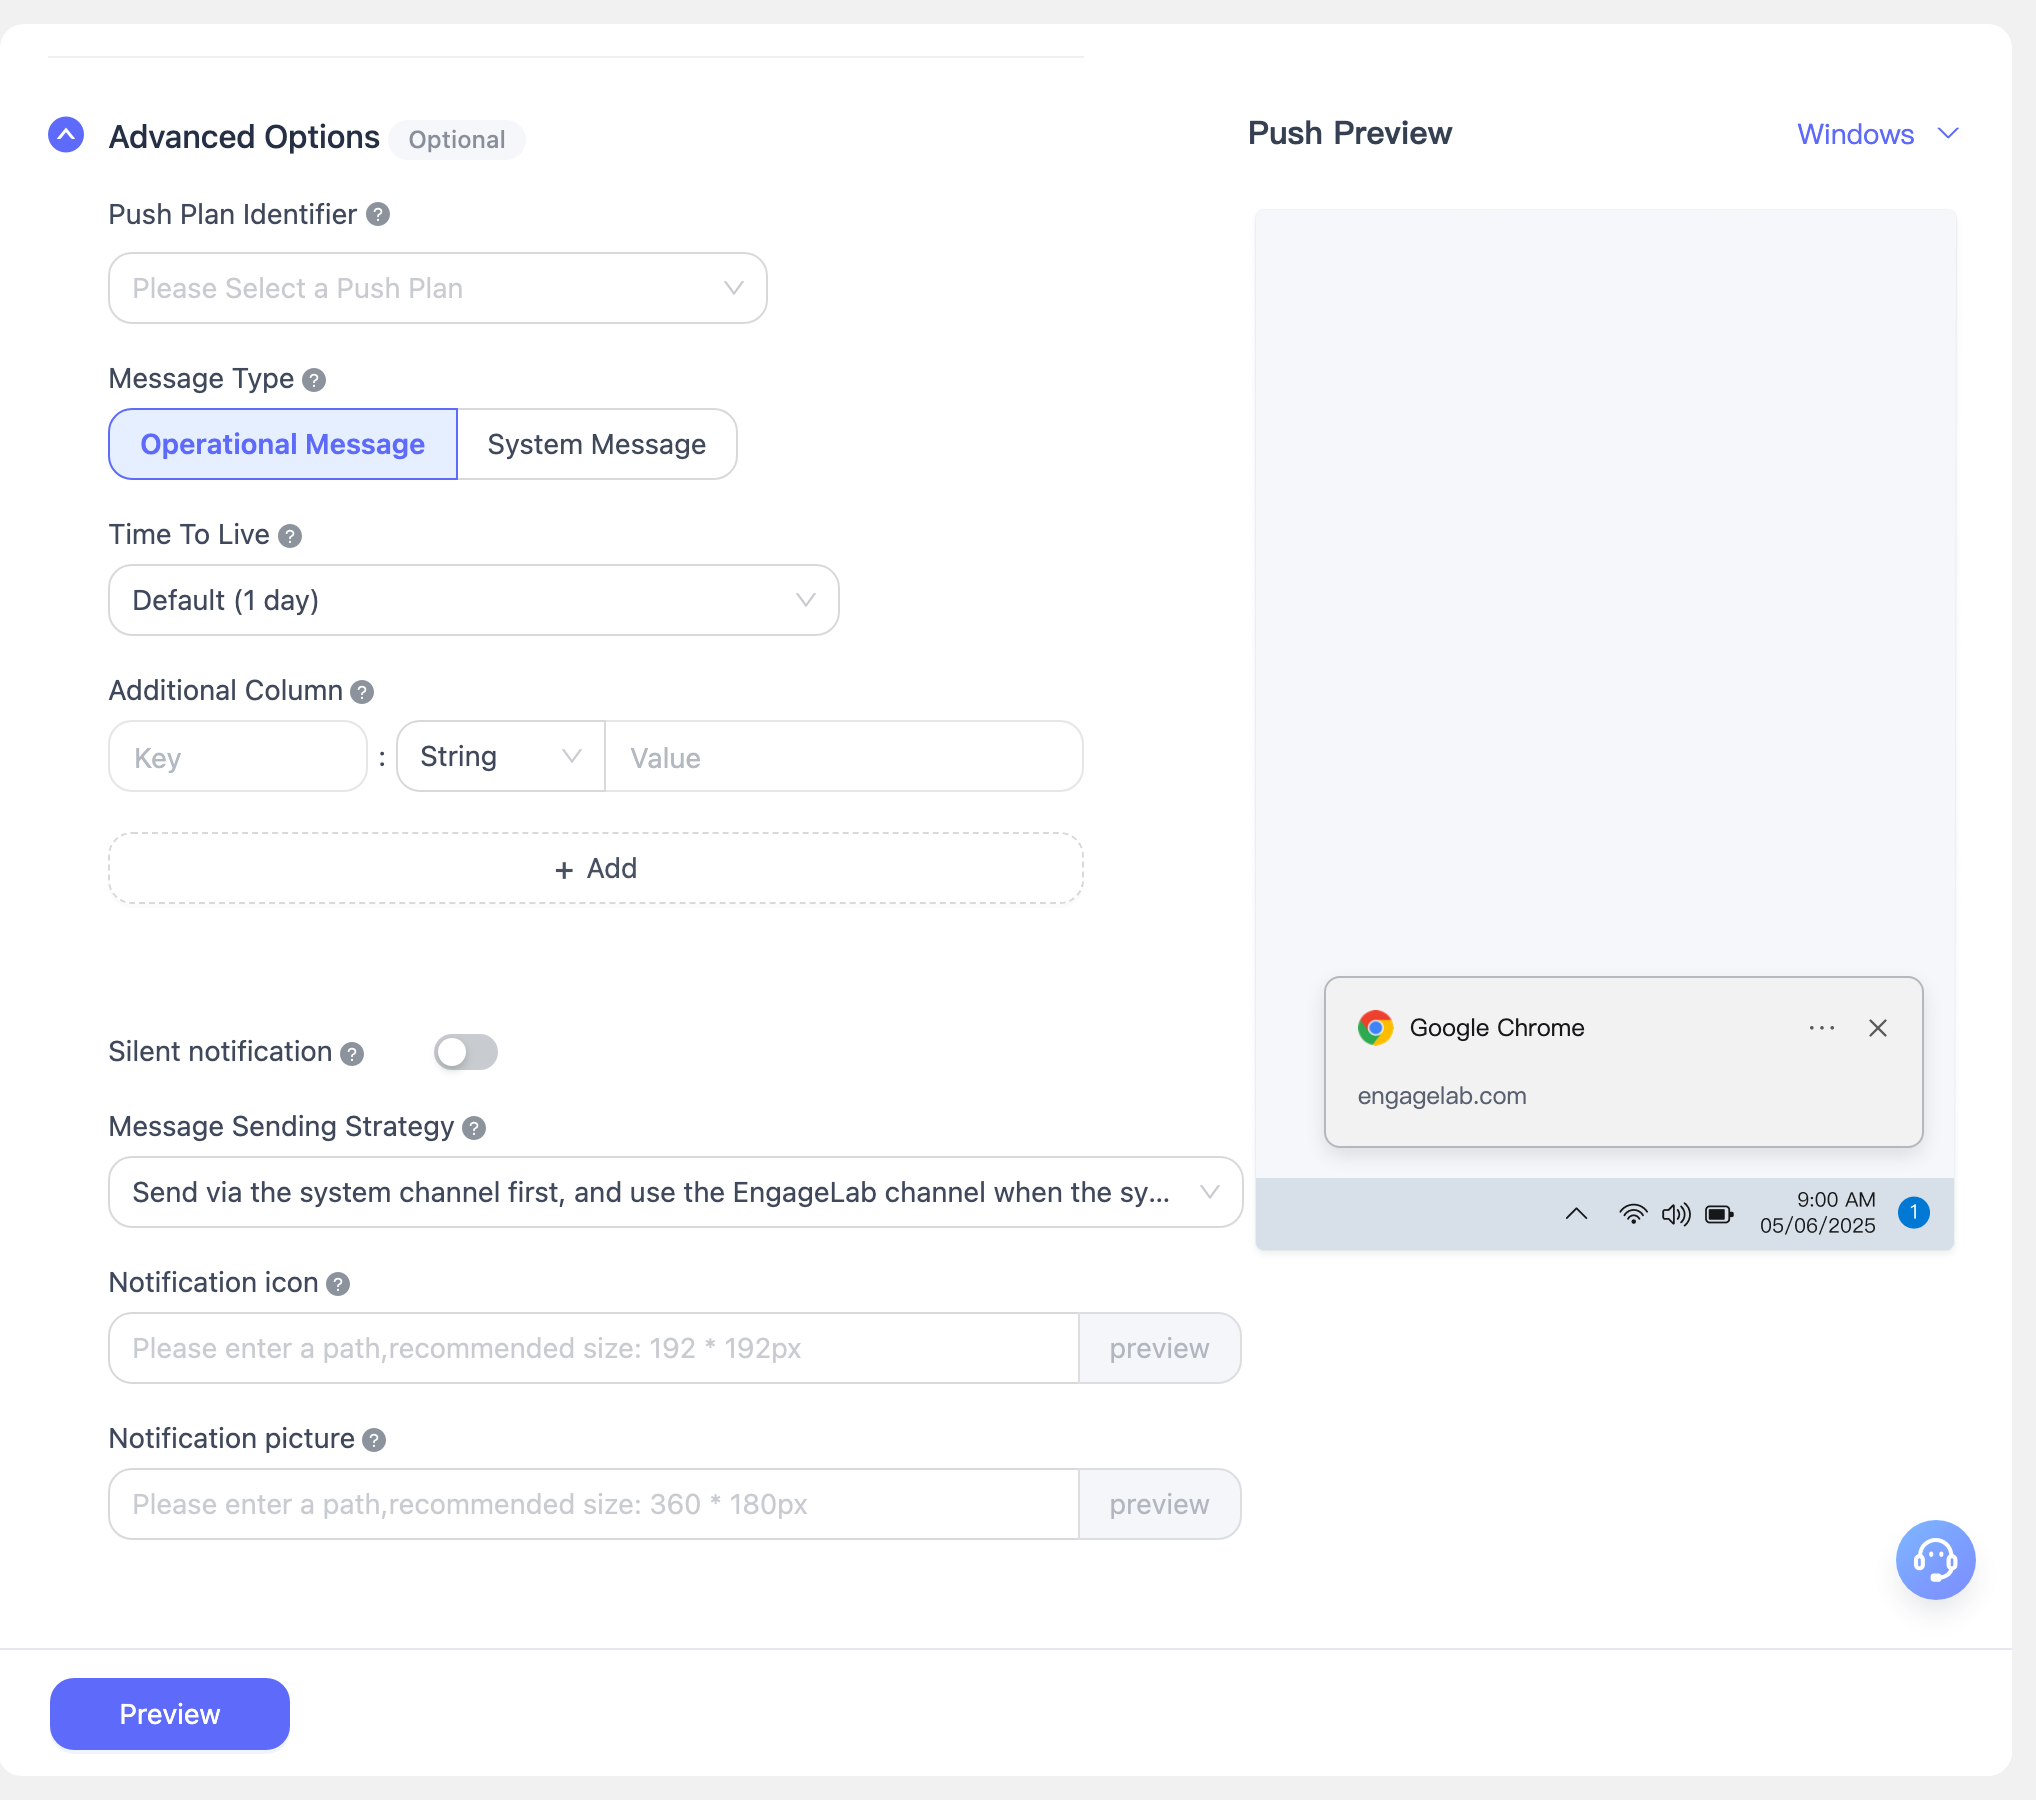
詳細設定(任意)
このセクションでは、プッシュメッセージの詳細設定について説明します。ビジネスニーズに応じて柔軟に設定し、プッシュの効果とユーザー体験を向上させることができます。
Push Plan Identifier
プッシュ計画を設定し、同じシリーズのプッシュを同一の計画識別子のもとにまとめることができます。これにより、後続の統計分析や効果分析が容易になります。Message Type
Operational Message または System Message を選択できます。選択内容に基づいて、プラットフォームが各ベンダーチャネルに適したメッセージタイプへ自動的に調整します。- System Message: サービスシナリオに適しており、通常はベンダーの配信枠制限の対象になりません。たとえば、アカウント変更やシステムメンテナンスに関する重要通知などです。
- Operational Message: マーケティングや運用シナリオに適しており、通常はベンダーのプッシュ配信枠制限の対象となります。主にマーケティングキャンペーンやユーザーの再活性化に使用されます。
Offline Message Retention Duration
オフラインメッセージの保持期間を指定できます。ユーザーが現在オフラインの場合、メッセージはオフラインメッセージとして保存され、次回オンラインになった際にプッシュされます。この期間内にオンラインになればプッシュを受信できますが、期間を過ぎると失効します。- デフォルトの期間は 1 日です。
- 0 に設定すると、オフラインメッセージは保持されません。現在オンラインのユーザーのみが受信でき、オフラインのユーザーは受信できません。
Additional Fields
カスタムパラメータの設定に対応しています。クライアントはこれらのフィールド内容を取得して、カスタムイベント処理に利用できます。さまざまなビジネスニーズに対応するため、追加パラメータの追加や削除が可能です。Silent Notification
有効にすると、新しい通知を受信した Web サイトユーザーに対して、振動・音・画面点灯などのデフォルトのデバイス動作を回避し、ユーザーへの干渉を抑えることができます。Notification Delivery Strategy
異なる通知配信方法を選択できます。- System Channel Delivery: ユーザーがサイトページを開いている必要はありません。ブラウザが OS のプロセス内に存在していれば通知を配信できます。
- EngageLab Channel Delivery: EngageLab 独自の WebSocket 方式で配信され、ユーザーがサイトページを開いていることに依存します。
Notification Icon
通知アイコンをカスタマイズでき、リアルタイムプレビューにも対応しています。- 推奨サイズ: 192 × 192 px
- 最大サイズ: 1 MB
- 対応形式: JPG、PNG、GIF
- 対応ブラウザ: Chrome、Firefox、Opera、Edge
- 画像リンクは
httpまたはhttpsで始まる Web リソースである必要があります
Notification Large Image
通知の大きな画像をカスタマイズでき、リアルタイムプレビューにも対応しています。- 推奨サイズ: 360 × 180 px
- 最大サイズ: 1 MB
- 対応形式: JPG、PNG、GIF
- 対応プラットフォーム: Windows 上の Chrome、Opera、Edge
- 画像リンクは
httpまたはhttpsで始まる Web リソースである必要があります
送信プレビュー
プレビューサムネイルはページ右側に表示されます。プッシュパラメータを設定した後、Send Preview をクリックすると、設定済みのプッシュパラメータを確認できます。
送信パラメータを確認した後、Confirm をクリックすると、プッシュタスクの作成が完了します。
カスタムメッセージを作成
[Create Push] - [Custom Message] に移動して、プッシュタスクを作成します。パラメータ設定の説明は以下のとおりです。
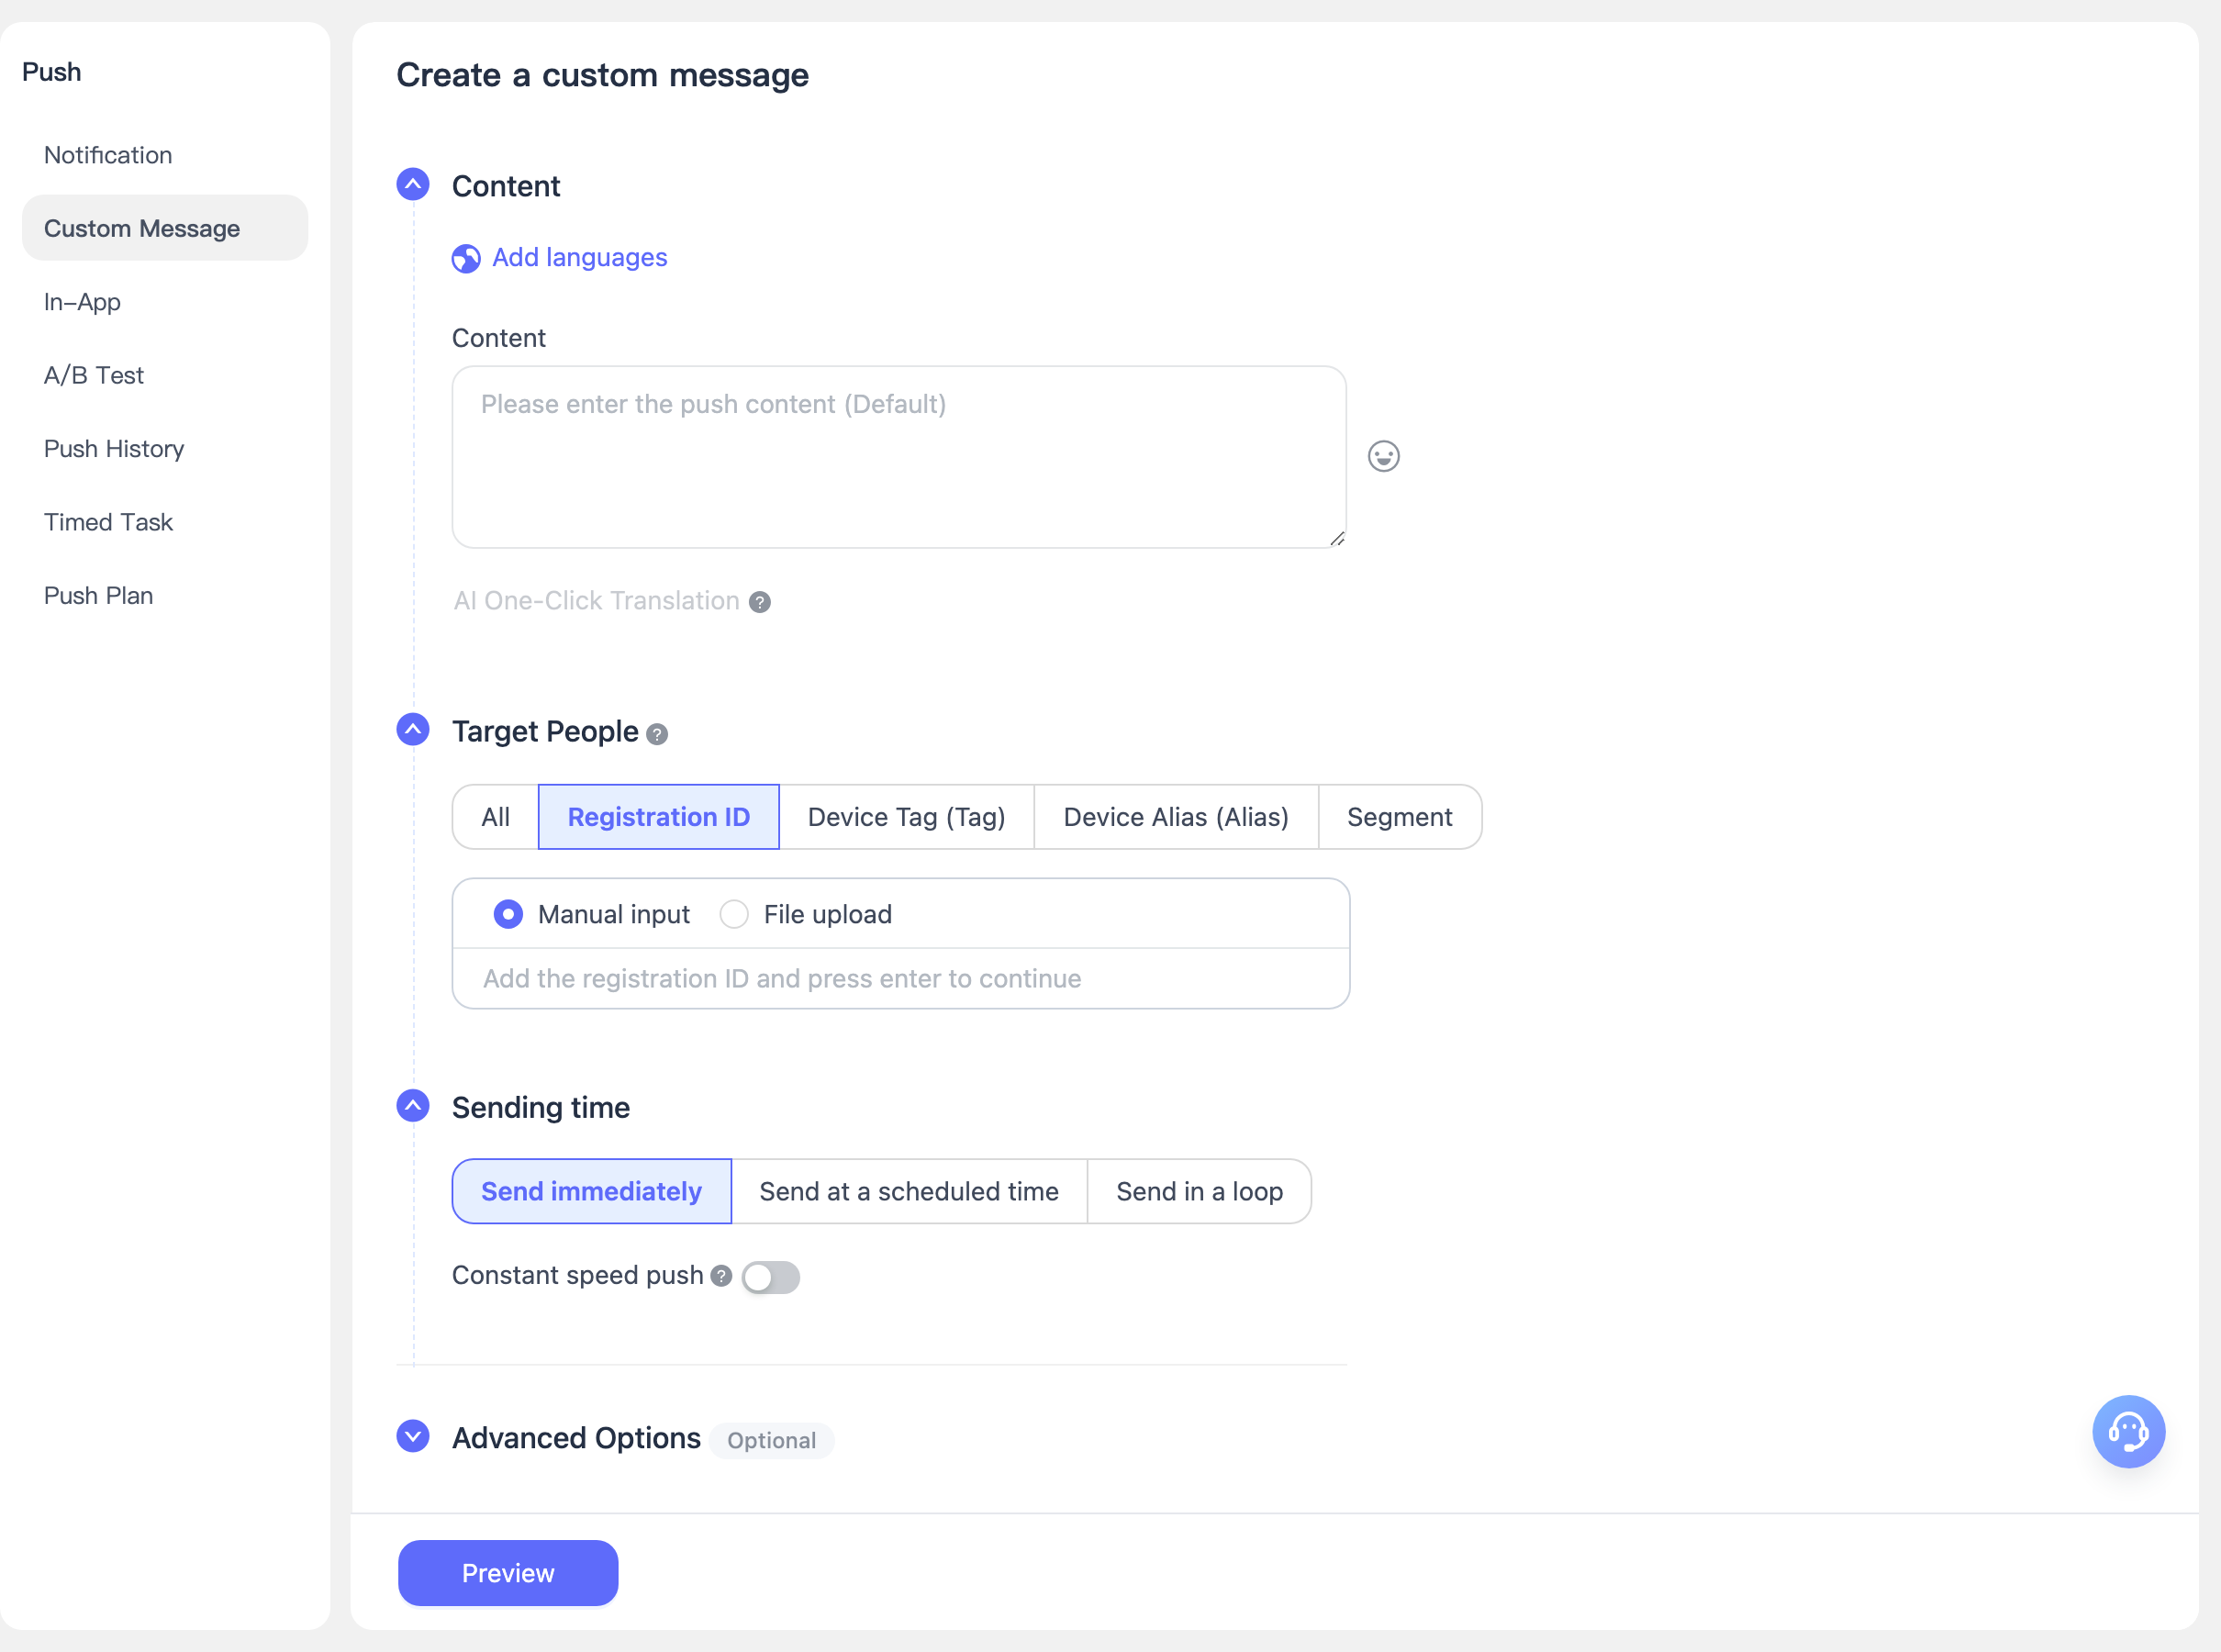
基本設定
- Notification Content: プッシュメッセージの本文です。できる限り「test」「测试」や数字のみのような意味のない内容は避けてください。そうしないと、ベンダーによってブロックされ、通知メッセージを受信できない可能性があります。
- 複数言語でプッシュタイトルとプッシュ内容を追加できます。エンドユーザーのデバイス言語は自動的に検出されます。他の言語が設定されていない場合は、[Default] 言語の内容がすべての対象ユーザーに送信されます。
- ワンクリック AI 翻訳に対応しています。
- Target Audience: 通知メッセージを作成 を参照してください。
- Send Time: 通知メッセージを作成 を参照してください。
詳細設定(任意)
このセクションでは、プッシュメッセージの詳細設定について説明します。ビジネスニーズに応じて柔軟に設定し、プッシュの効果とユーザー体験を向上させることができます。
Push Plan Identifier
プッシュ計画を設定し、同じシリーズのプッシュを同一の計画識別子のもとにまとめることができます。これにより、後続の統計分析や効果分析が容易になります。Message Type
Operational Message または System Message を選択できます。選択内容に基づいて、プラットフォームが各ベンダーチャネルに適したメッセージタイプへ自動的に調整します。- System Message: サービスシナリオに適しており、通常はベンダーの配信枠制限の対象になりません。
- Operational Message: マーケティングや運用シナリオに適しており、通常はベンダーのプッシュ配信枠制限の対象となります。
Offline Message Retention Duration
オフラインメッセージの保持期間を指定できます。ユーザーが現在オフラインの場合、メッセージはオフラインメッセージとして保存され、次回オンラインになった際にプッシュされます。この期間内にオンラインになればプッシュを受信できますが、期間を過ぎると失効します。- デフォルトの期間は 1 日です。
- 0 に設定すると、オフラインメッセージは保持されません。現在オンラインのユーザーのみが受信でき、オフラインのユーザーは受信できません。
Additional Fields
カスタムパラメータの設定に対応しています。クライアントはこれらのフィールド内容を取得して、カスタムイベント処理に利用できます。さまざまなビジネスニーズに対応するため、追加パラメータの追加や削除が可能です。
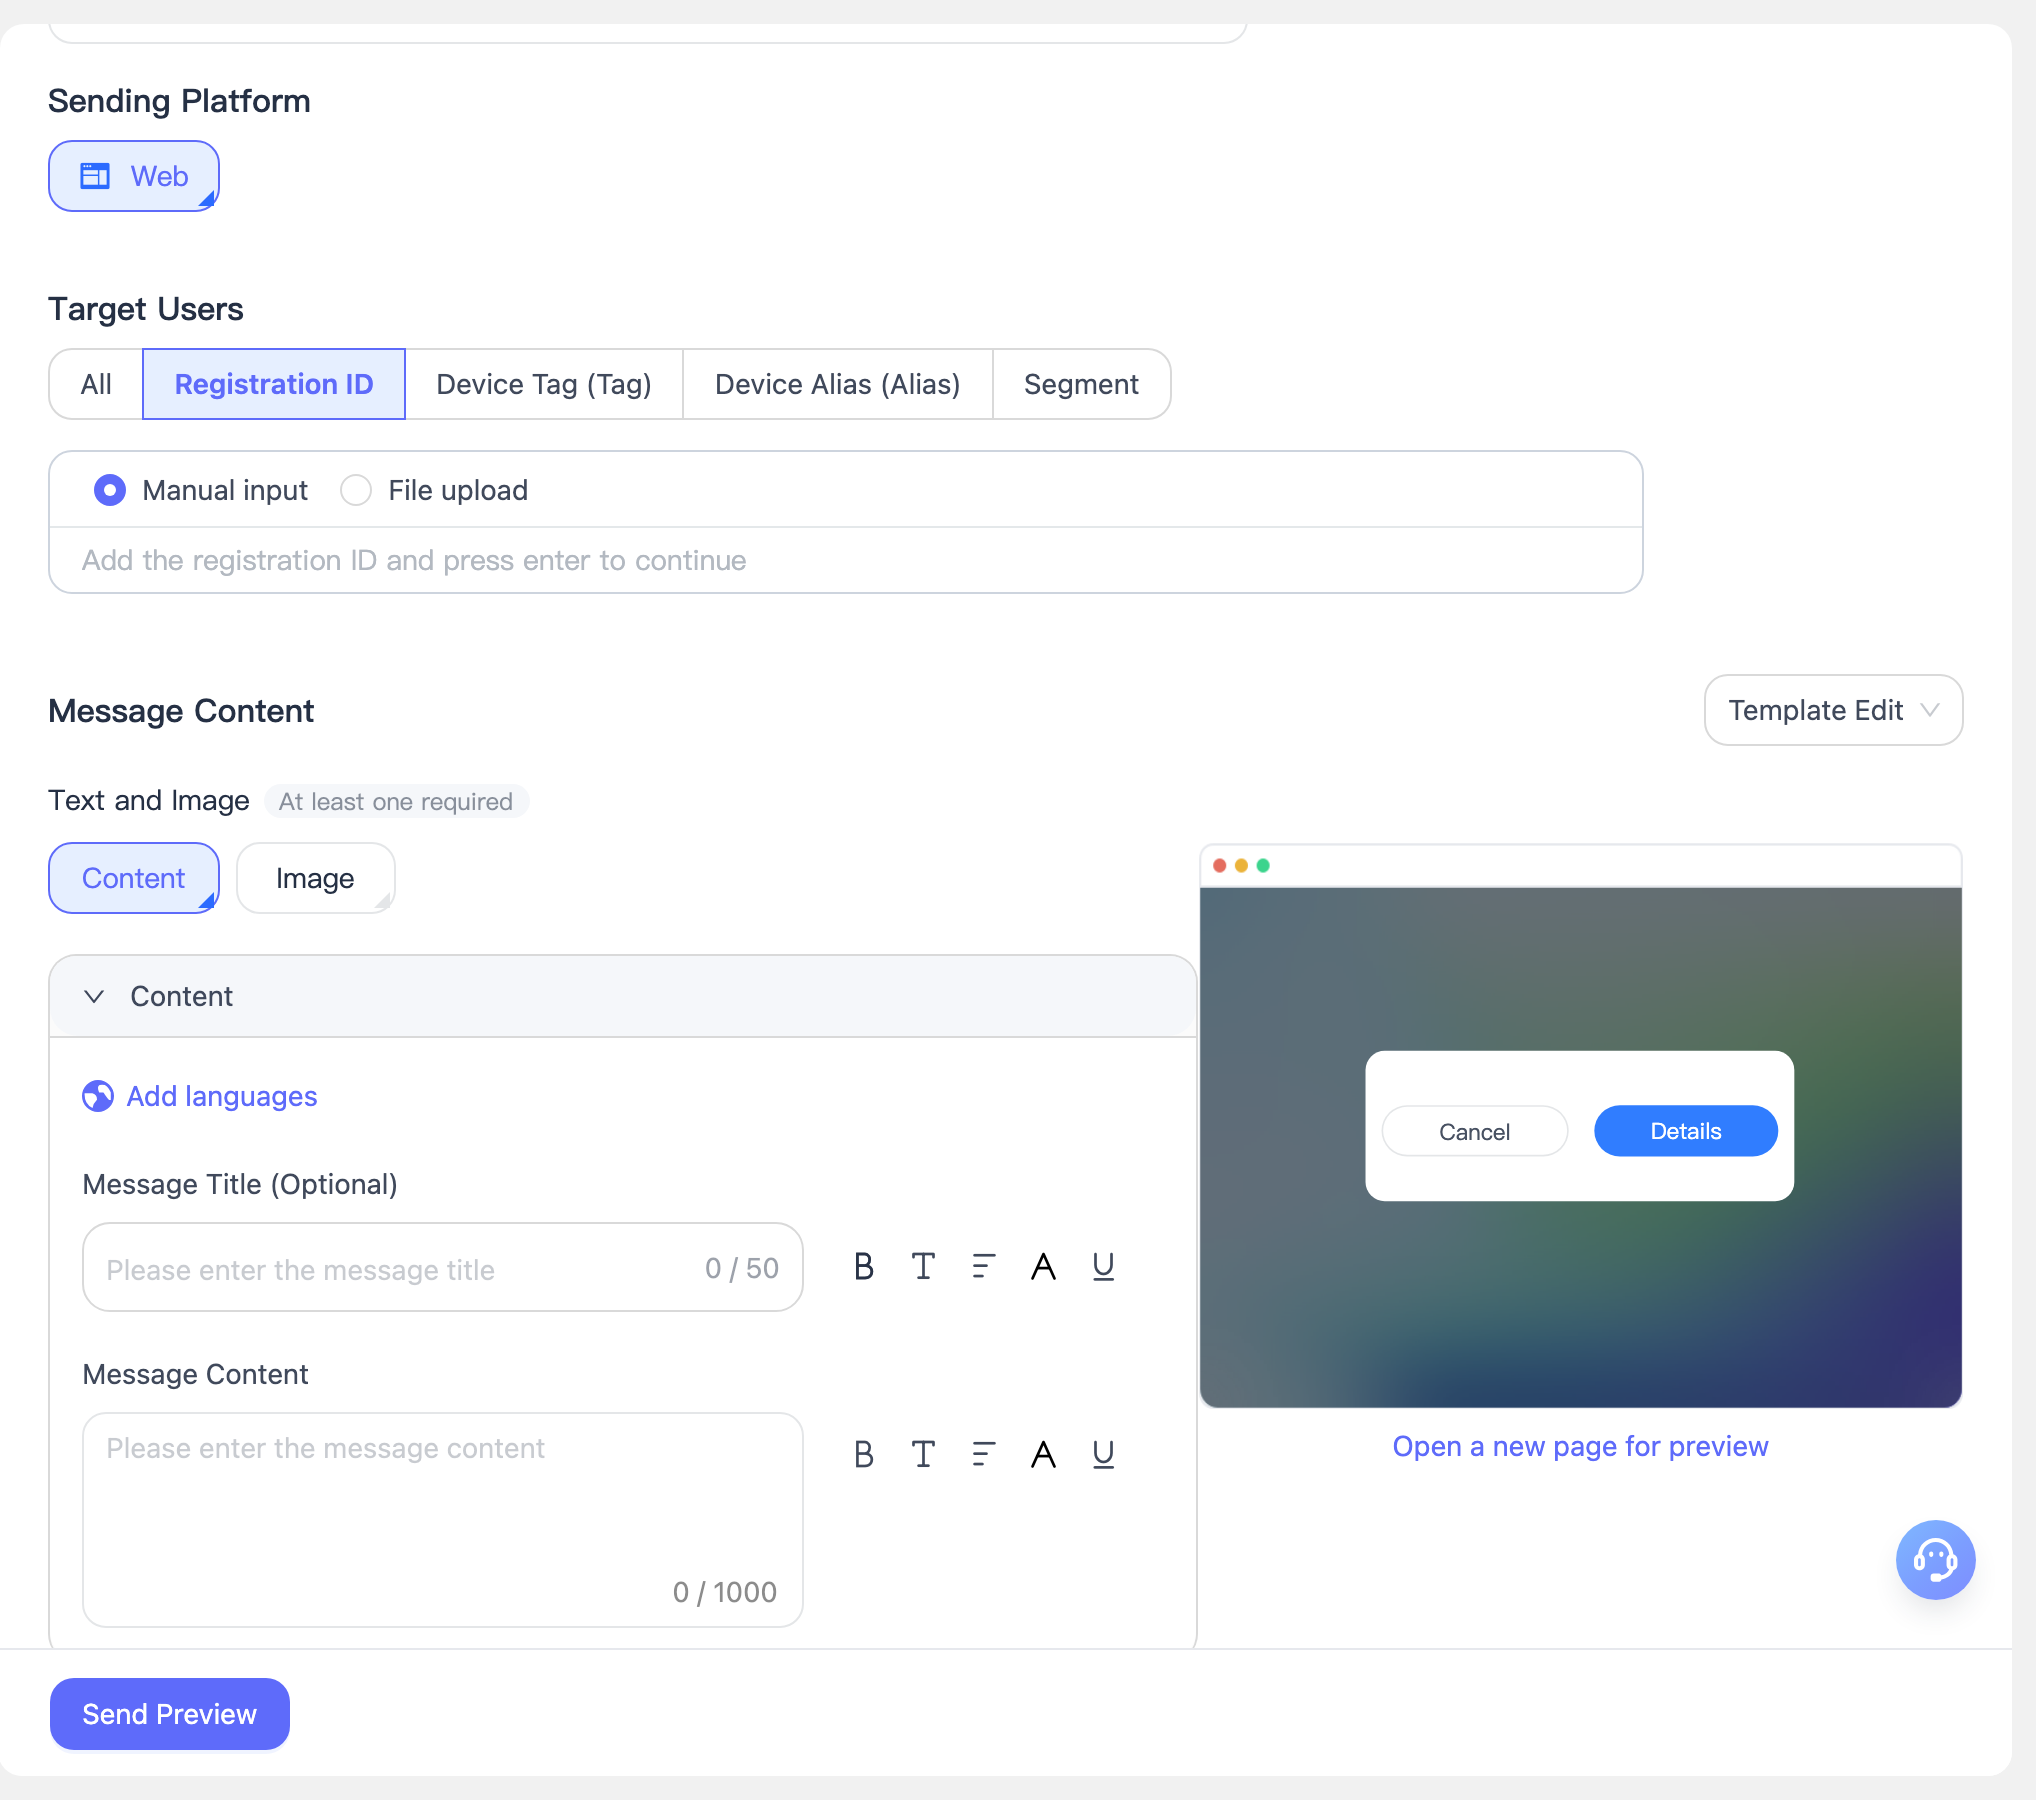
アプリ内メッセージ
[Push] - [Create Push] - [In-App Message] に移動して、プッシュタスクを作成します。パラメータ設定の説明は以下のとおりです。
基本設定
- Message Name: 必須項目です。20 文字以内に制限されています。
- Delivery Platform: Web のみ対応しています。
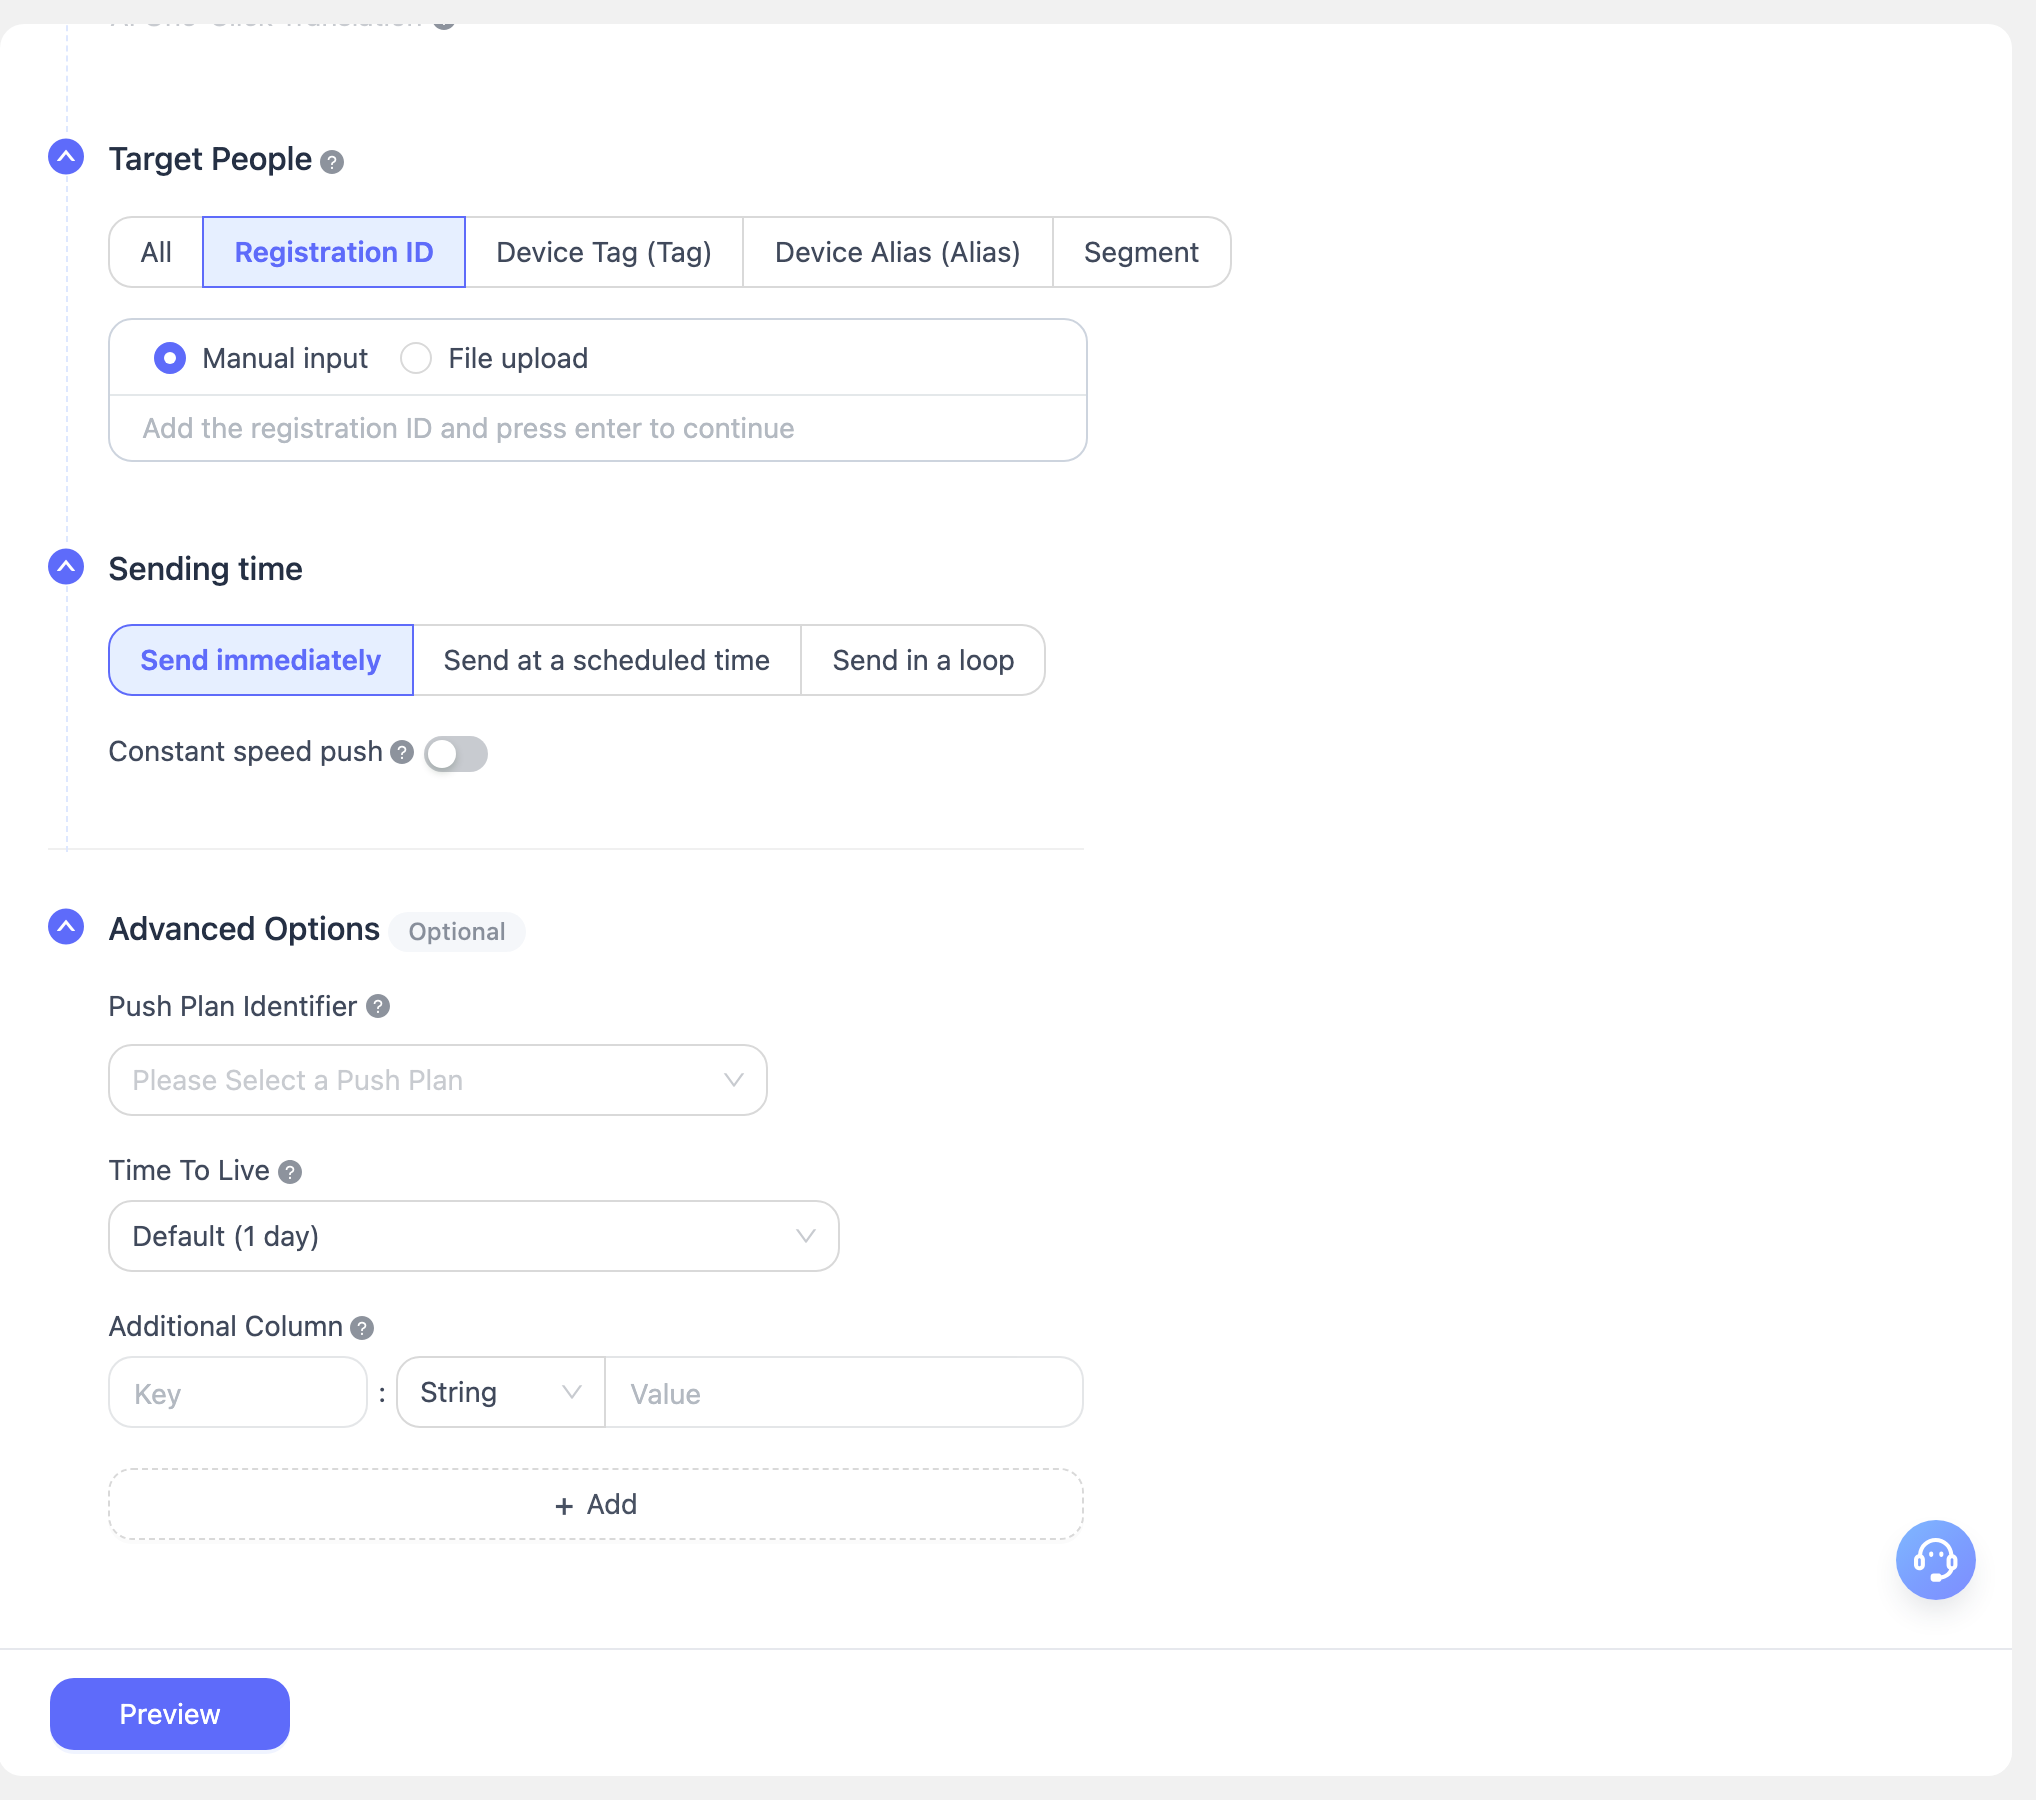
- Target Users: EngageLab のプッシュプラットフォームは複数のターゲットオーディエンス選択方法に対応しており、開発者や運用チームがさまざまなビジネスニーズに応じてユーザーへ正確に配信できます。テスト時は、登録ログから取得した registration ID を使用して配信することを推奨します。
- Broadcast to All: 現在アプリケーションに登録済みのオンラインユーザー全員と、今後オンラインで登録するユーザー全員にプッシュメッセージを送信します。
- Registration ID: 手動入力または TXT ファイルのアップロードにより、最大 1,000 件のデバイス ID を指定してプッシュできます。
- Set Tags: 和集合、積集合、補集合など複数の組み合わせを使用して、デバイスタグに基づき対象ユーザーを絞り込んでプッシュします。
- Set Alias: エイリアスを入力またはアップロードして、特定のユーザーデバイスに対してプッシュメッセージを送信します。
- User Segments: カスタムセグメンテーションルールにより同じ属性を持つユーザーをグループ化し、対象セグメントを選択してターゲット配信を行います。
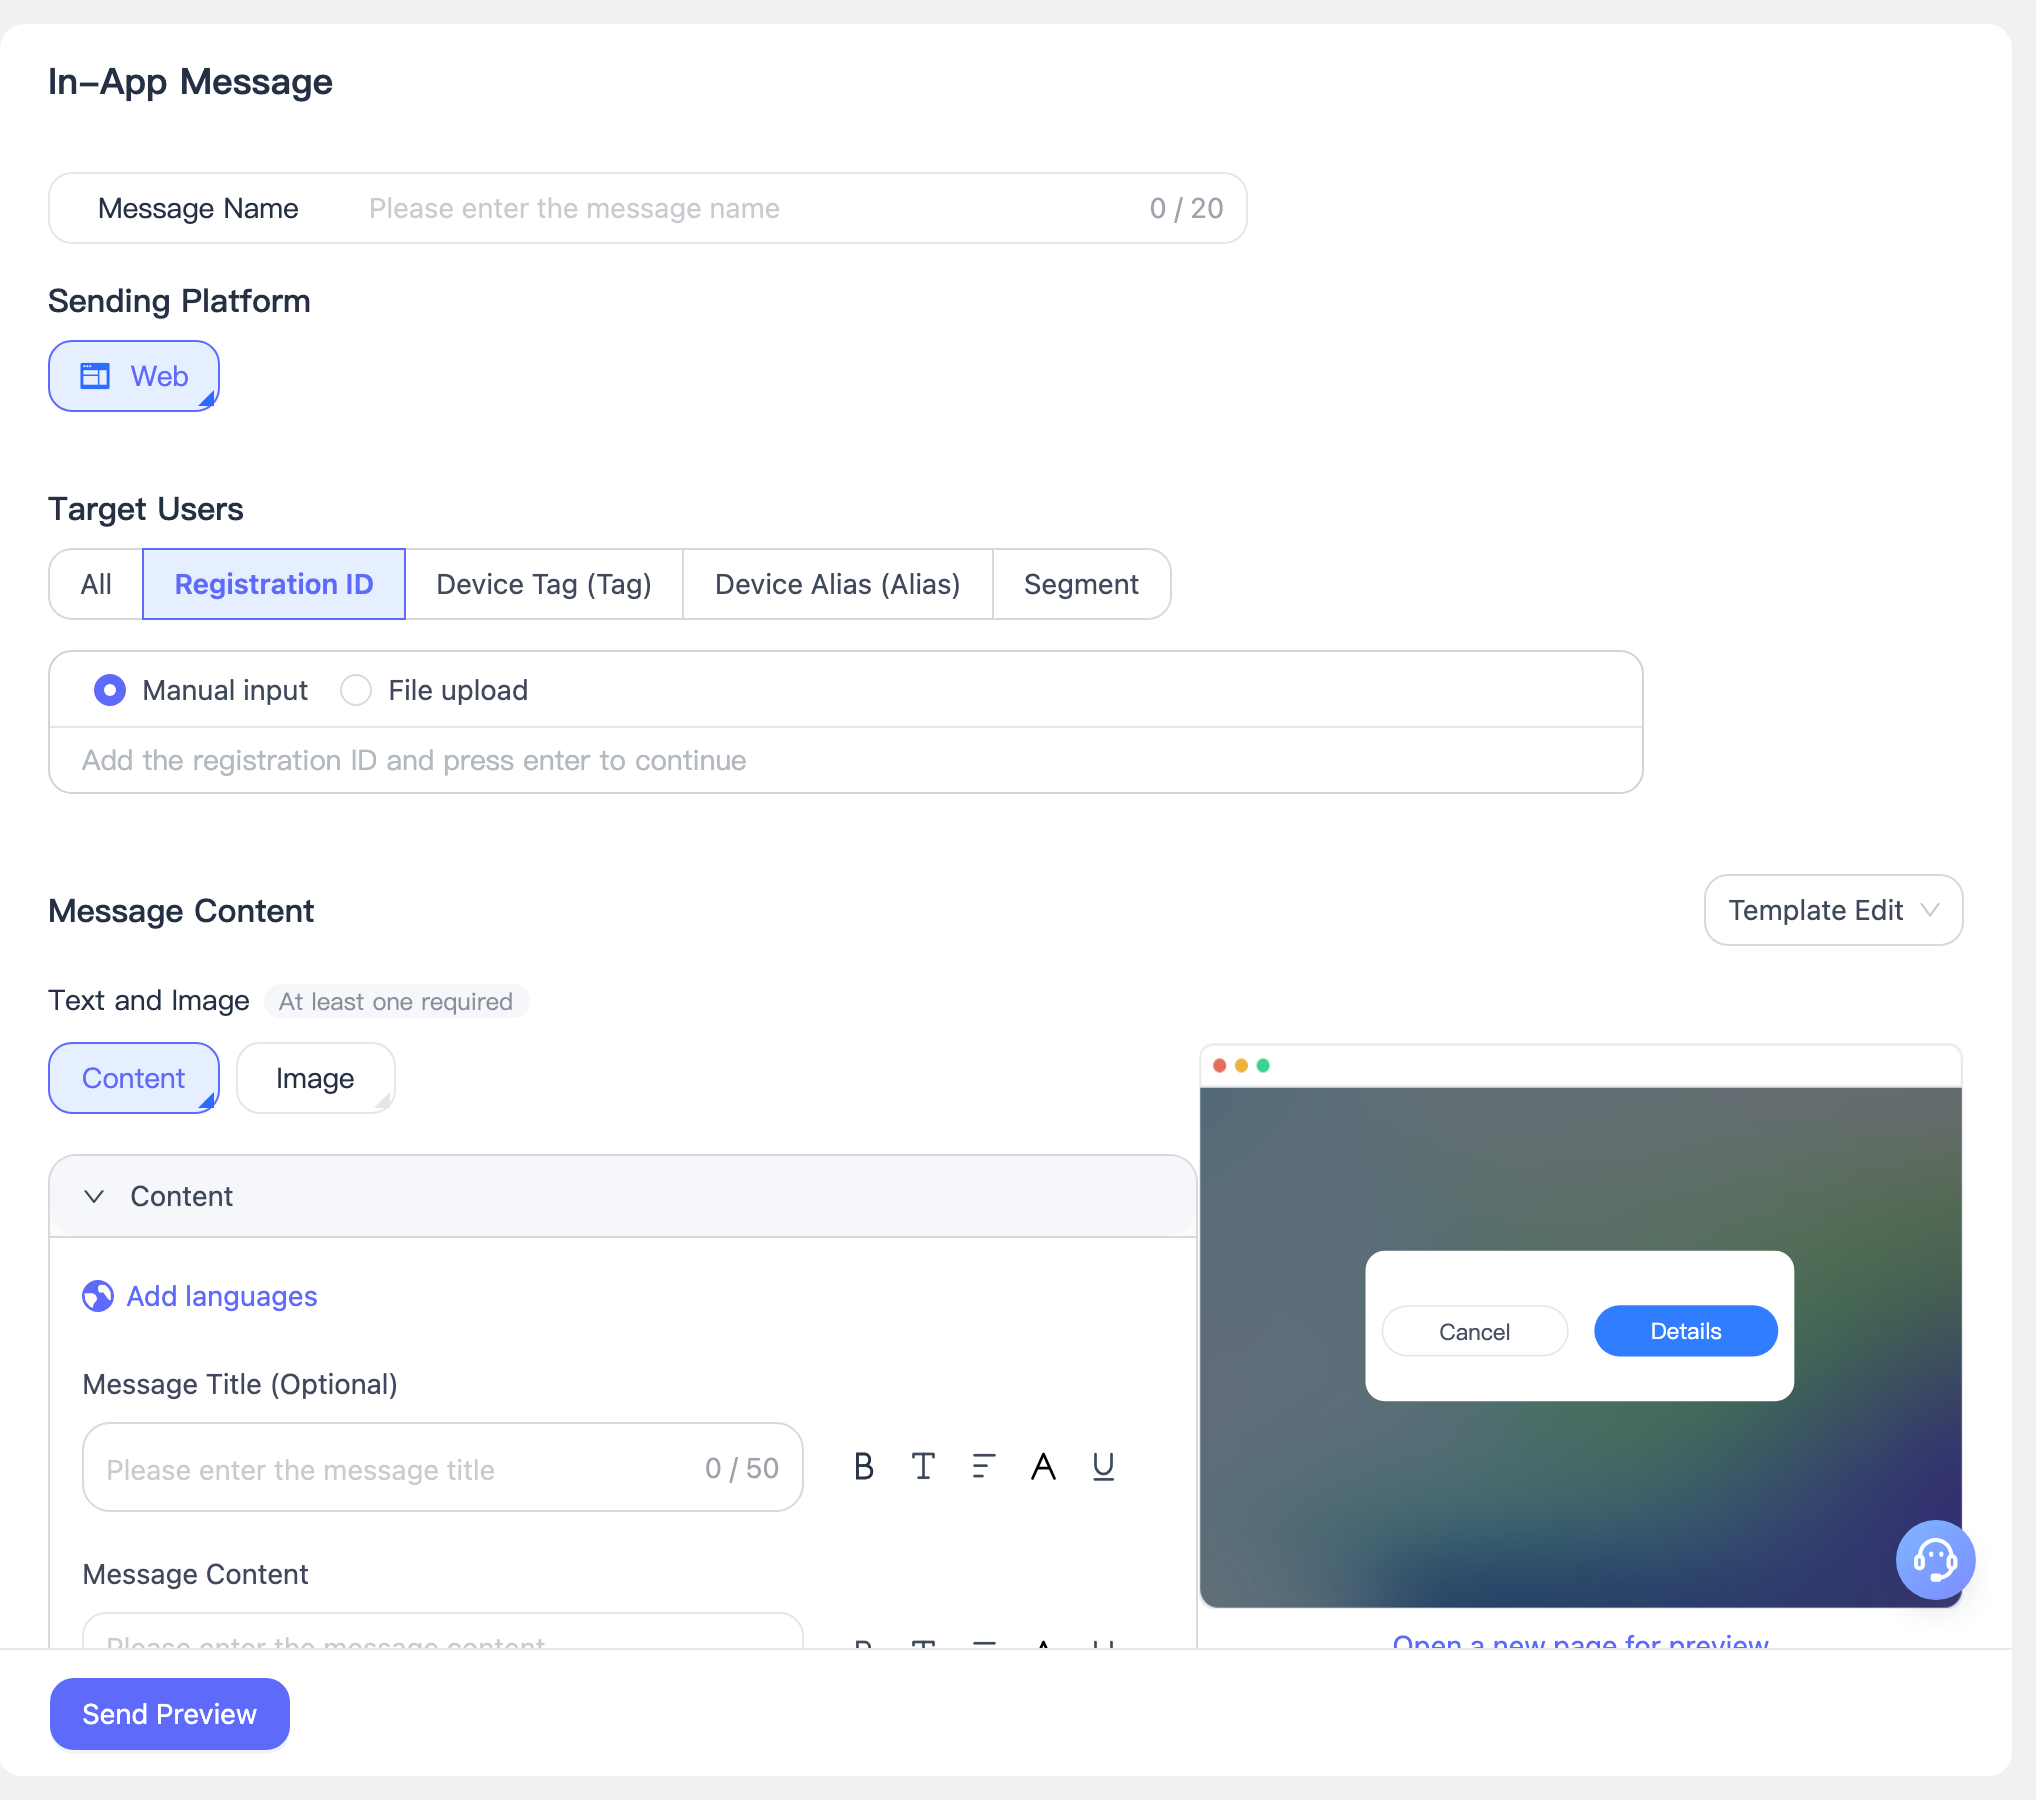
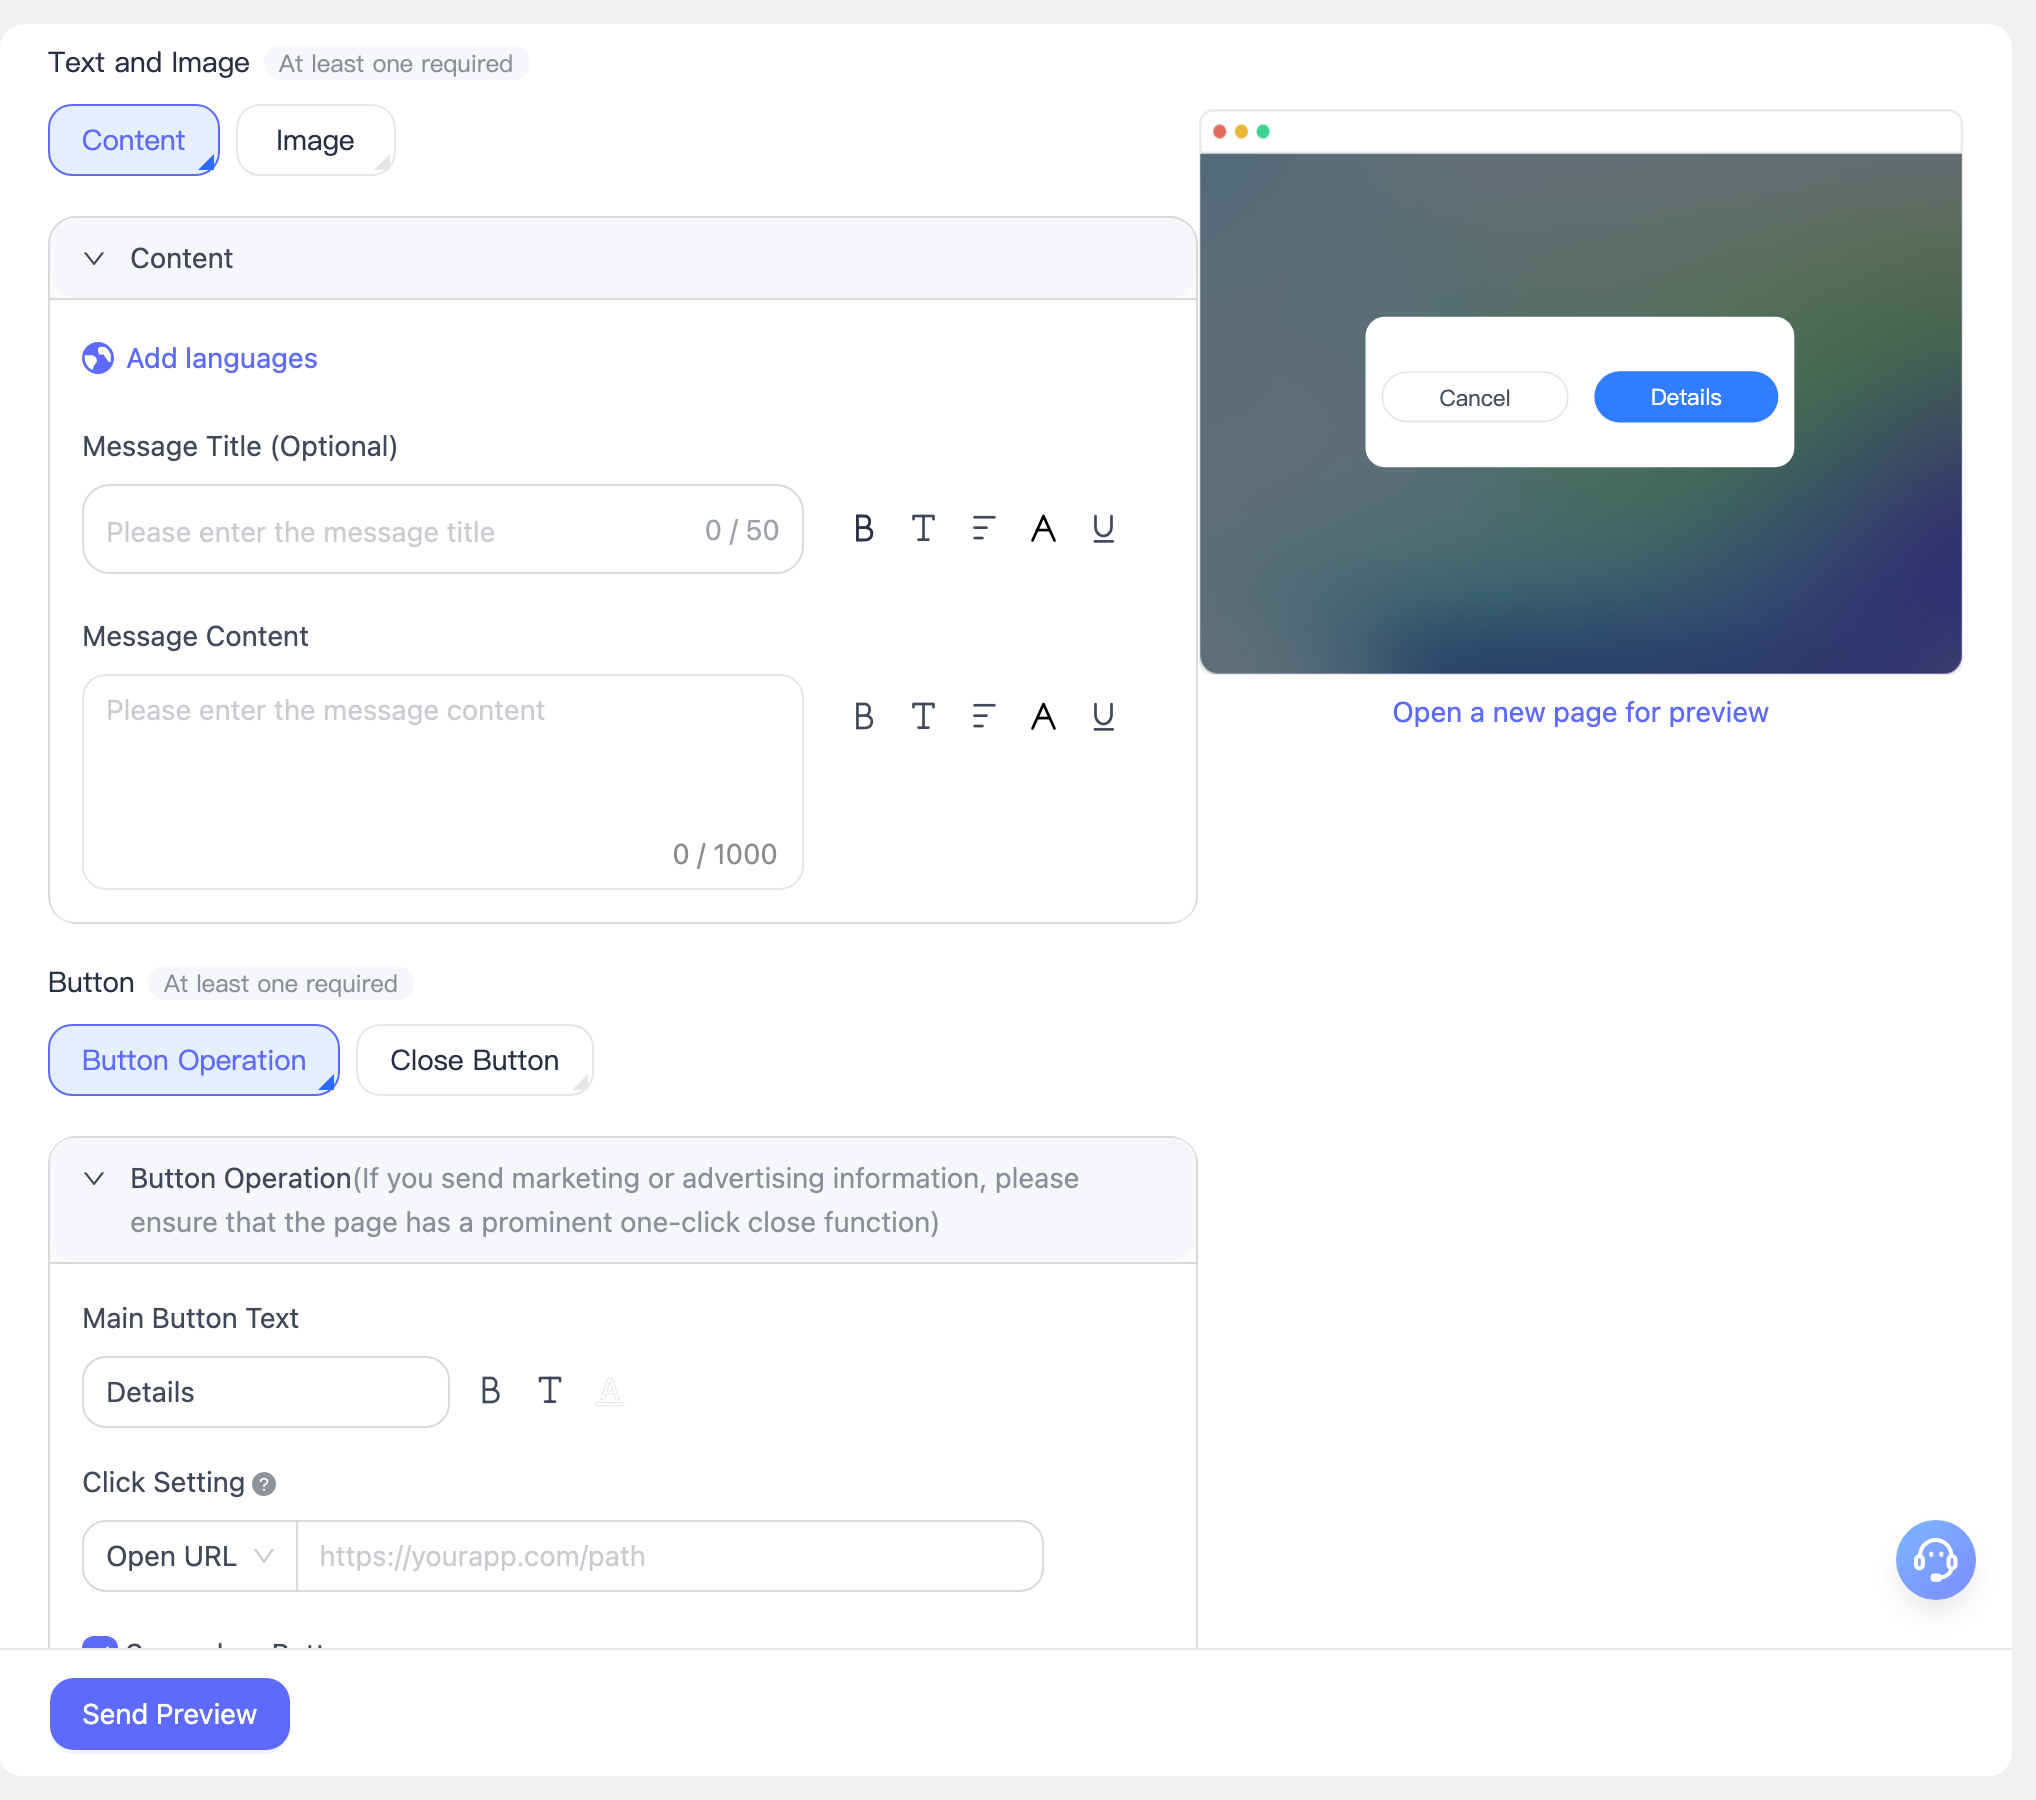
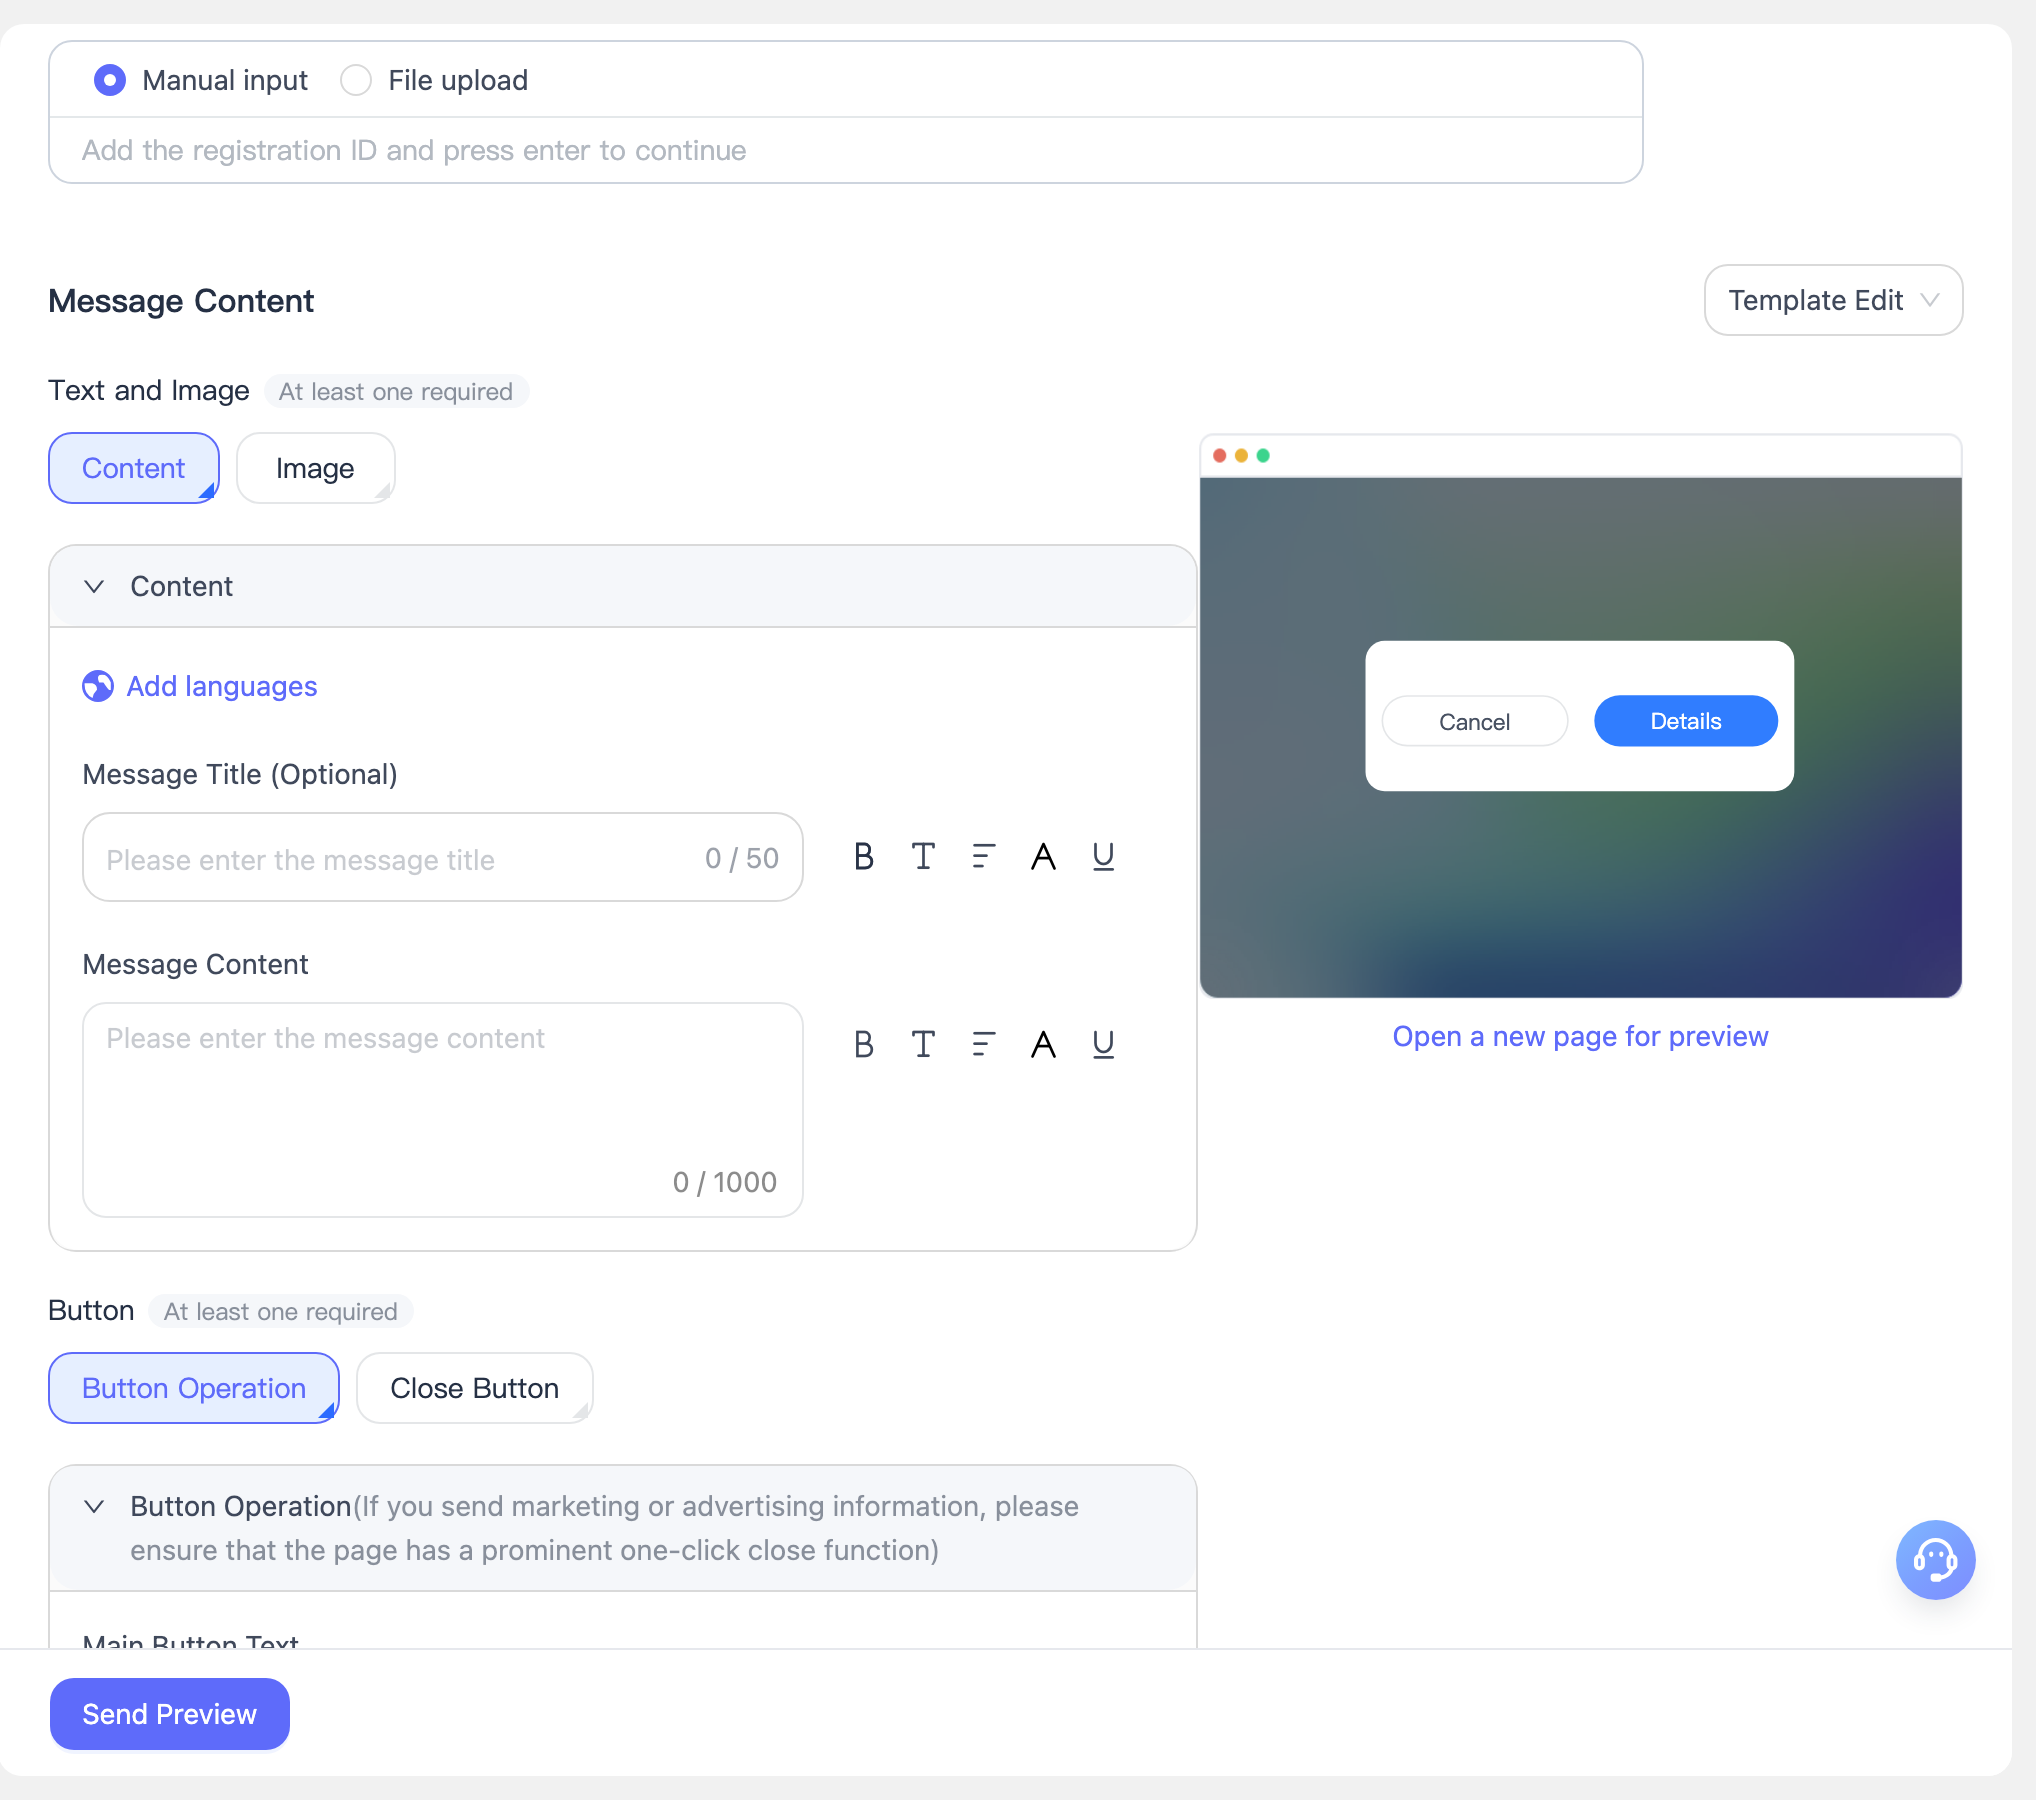
メッセージ内容
画像とテキストの設定
Content: テキストコンテンツを入力し、タイトル(任意)と本文を設定します。
- Add Language: 複数言語でプッシュタイトルとプッシュ内容を追加できます。エンドユーザーのデバイス言語は自動的に検出されます。他の言語が設定されていない場合は、[Default] 言語の内容がすべての対象ユーザーに送信されます。

- Font Settings:
メッセージタイトルおよび内容の編集エリアでは、太字(B)、斜体(T)、配置(≡)、フォントサイズ(A)、下線(U)を含む基本的なリッチテキスト書式をサポートしています。
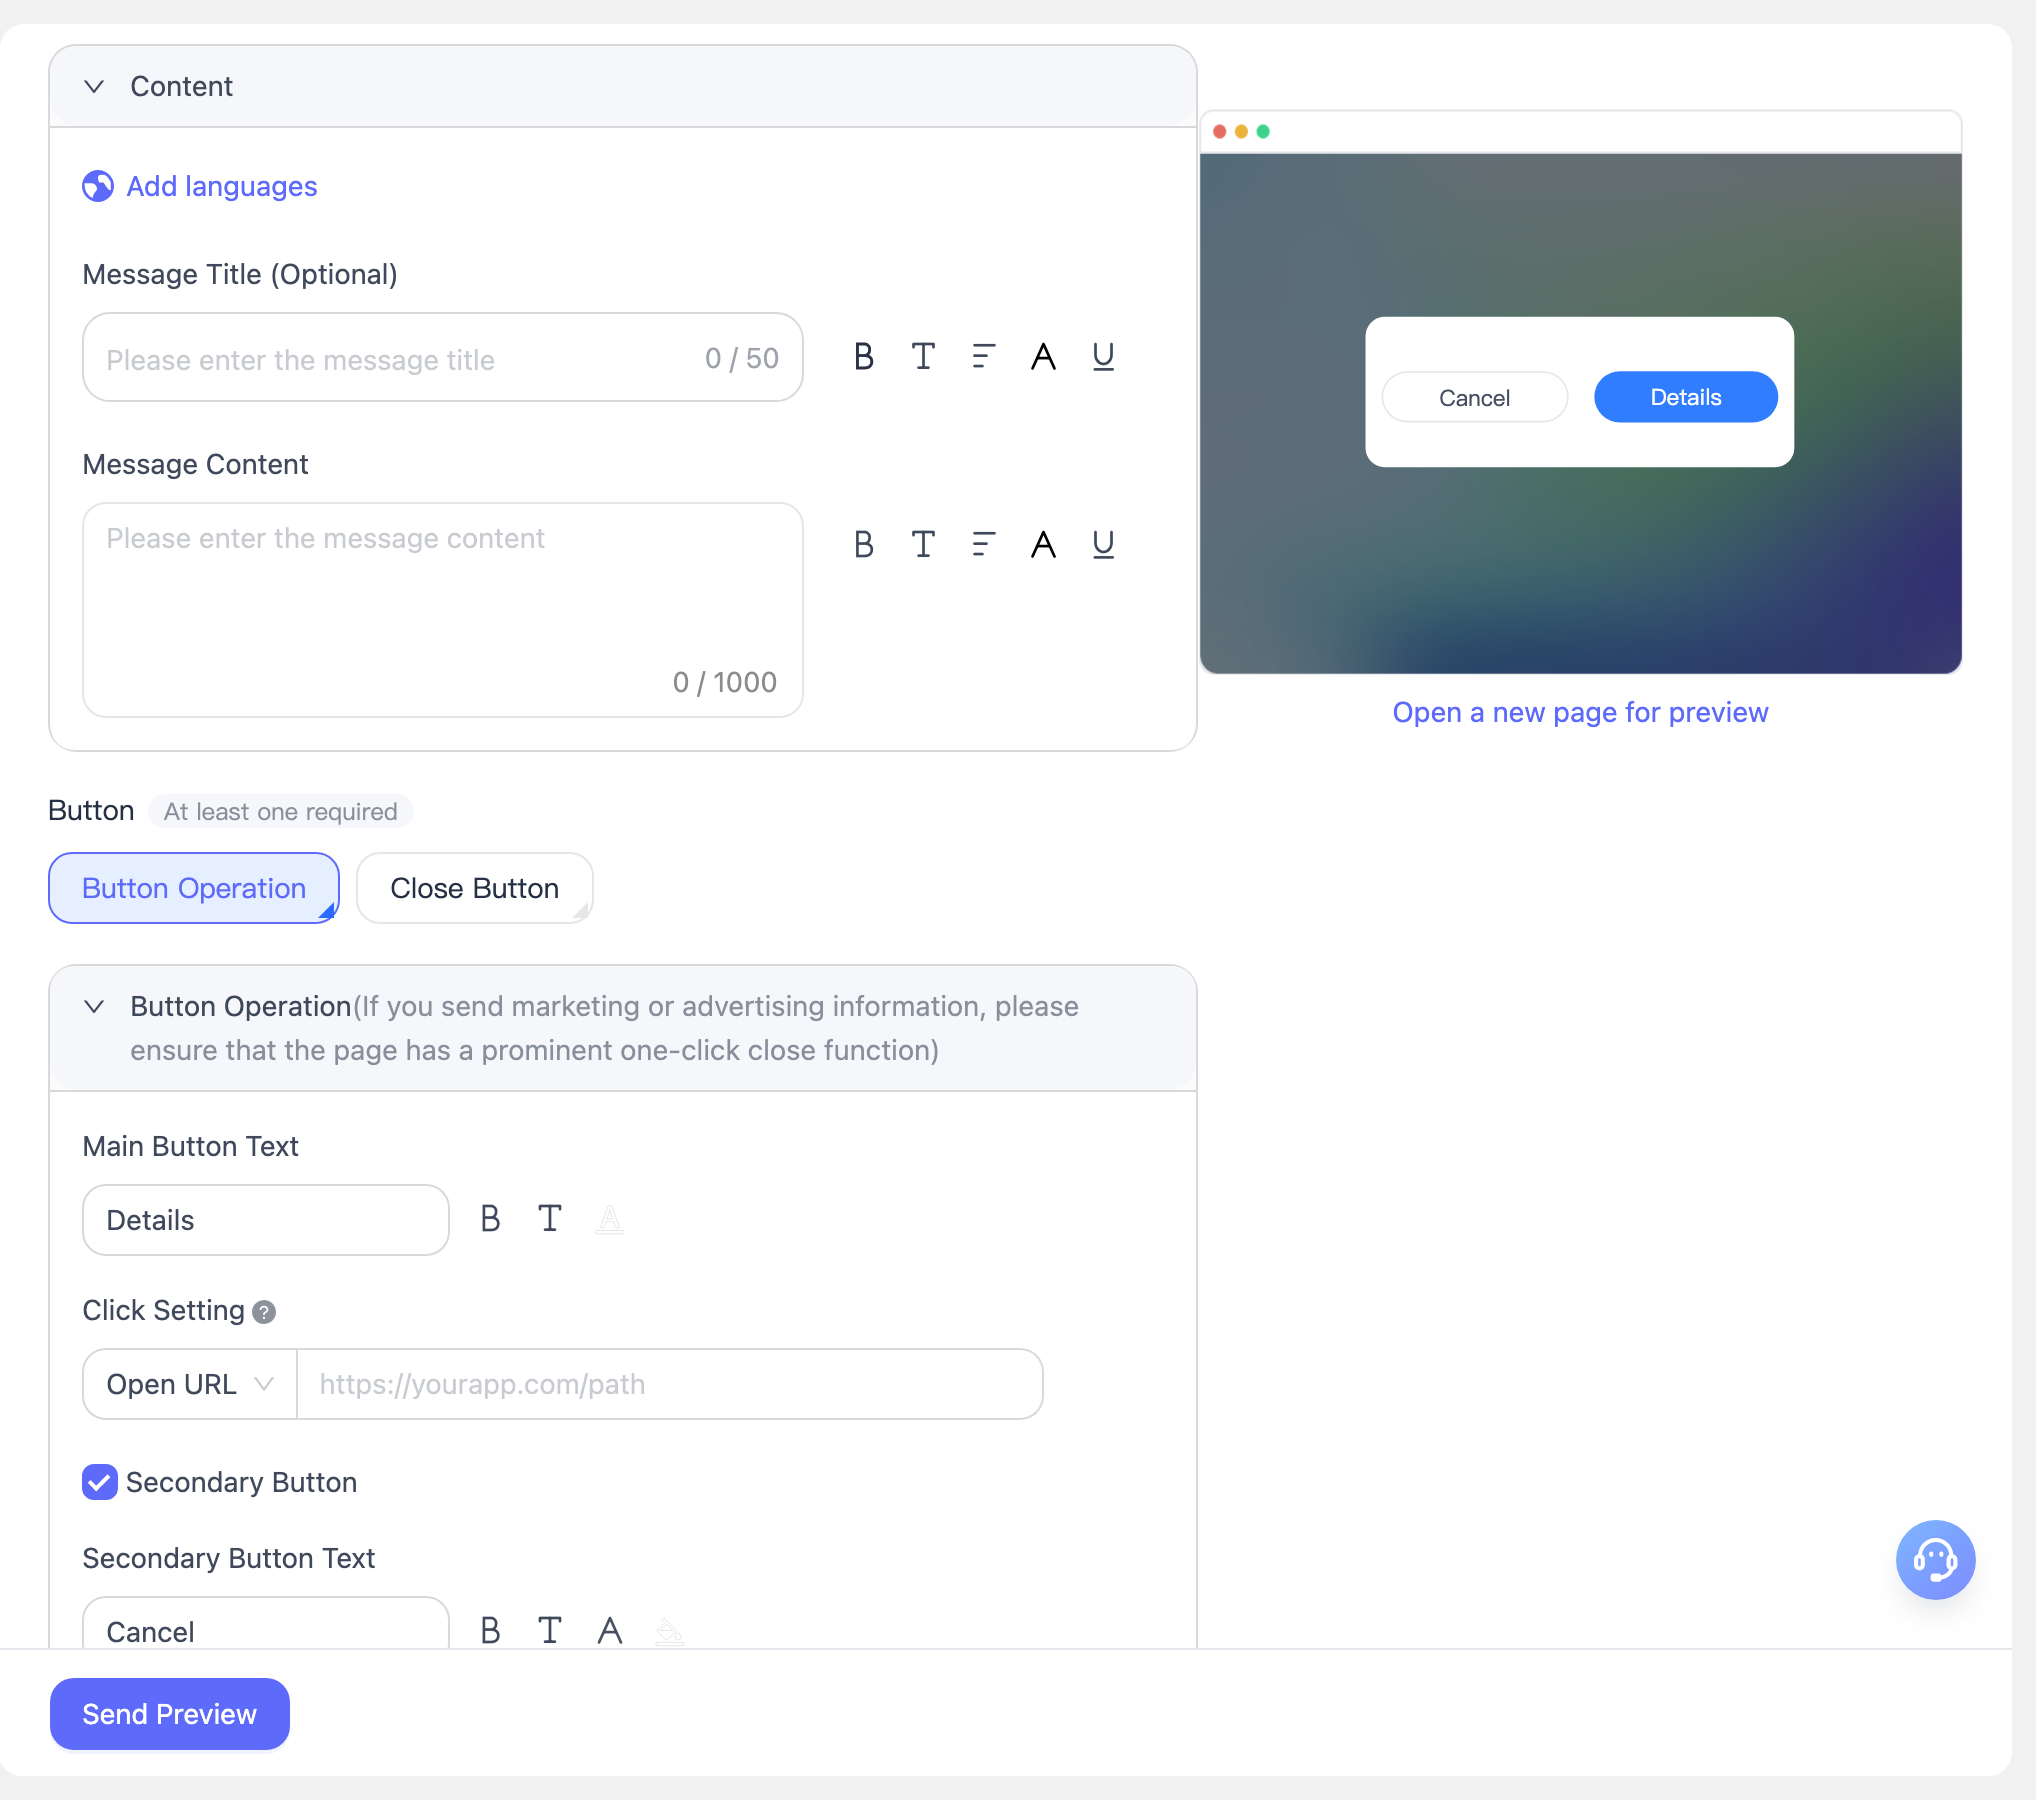
Image: Web 画像 URL を入力し、画像クリック時の動作を選択します。
- Click Settings: クリック時に URL を開くか、何も動作しないかを選択できます。URL リンクの一般的な用途は次のとおりです。
- Use a web link or deep link: ユーザーを外部ページまたはアプリケーション内の特定ページへ誘導します。
- Use push guidance: ユーザーが以前にネイティブプロンプトで権限を拒否していた場合、クリックするとアプリケーションのデバイス設定が開きます。(このアプリ内メッセージは、すでに通知を許可しているユーザーには表示されません。)
Content または Image のいずれかを必ず選択する必要があります。これら 2 つのコンテンツ形式に基づき、合計 3 種類のメッセージコンテンツタイプを作成できます。以下は各タイプの設定プレビューです。
タイプ 1: テキストコンテンツ
タイプ 2: 画像コンテンツ
- Load をクリックして、画像が利用可能かどうかを確認します。利用できない場合、システムは画像 URL の差し替えを求めます。
- Click Settings では、画像クリック時に URL にリダイレクトするかどうかを選択します。リダイレクトが必要な場合は、開く Web ページリンクを入力してください。リダイレクトが不要な場合は、No Action を選択します。
- リダイレクト URL を設定した後、プレビューサムネイル内の画像をクリックして、リダイレクト動作をテストできます。
タイプ 3: 画像とテキストのコンテンツ

- 図のように、画像コンテンツとテキストコンテンツの両方が含まれます。
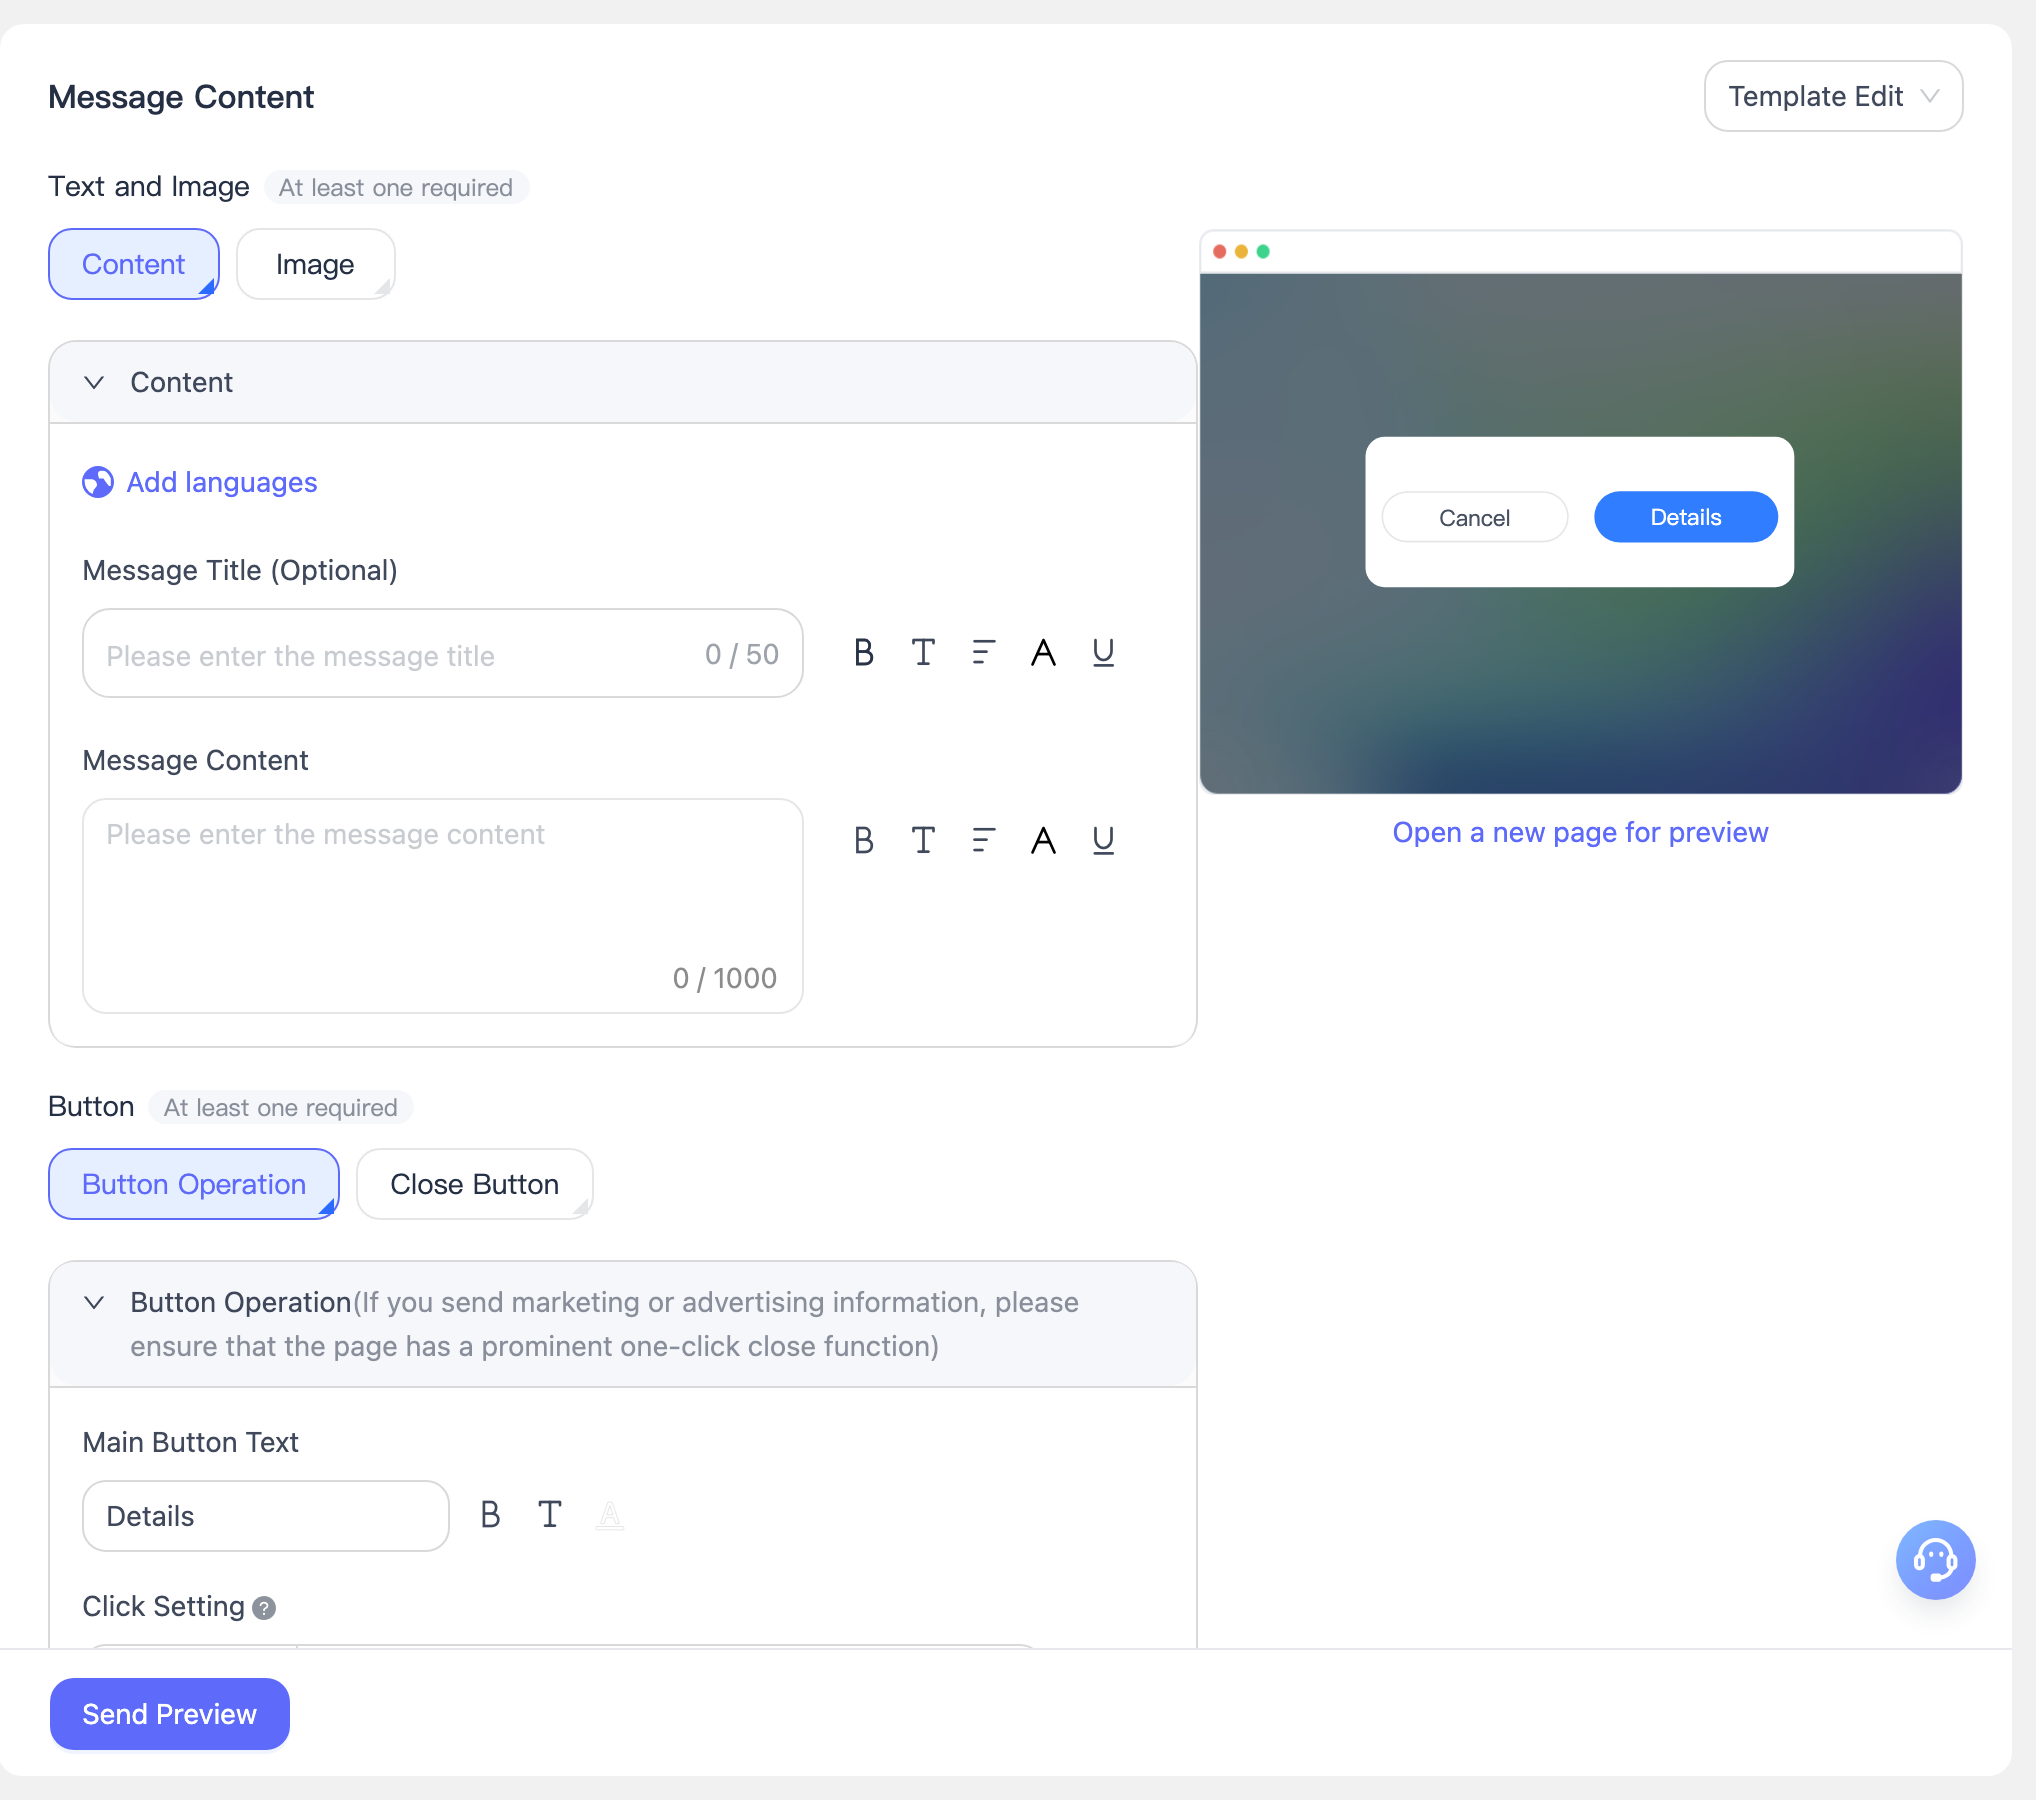
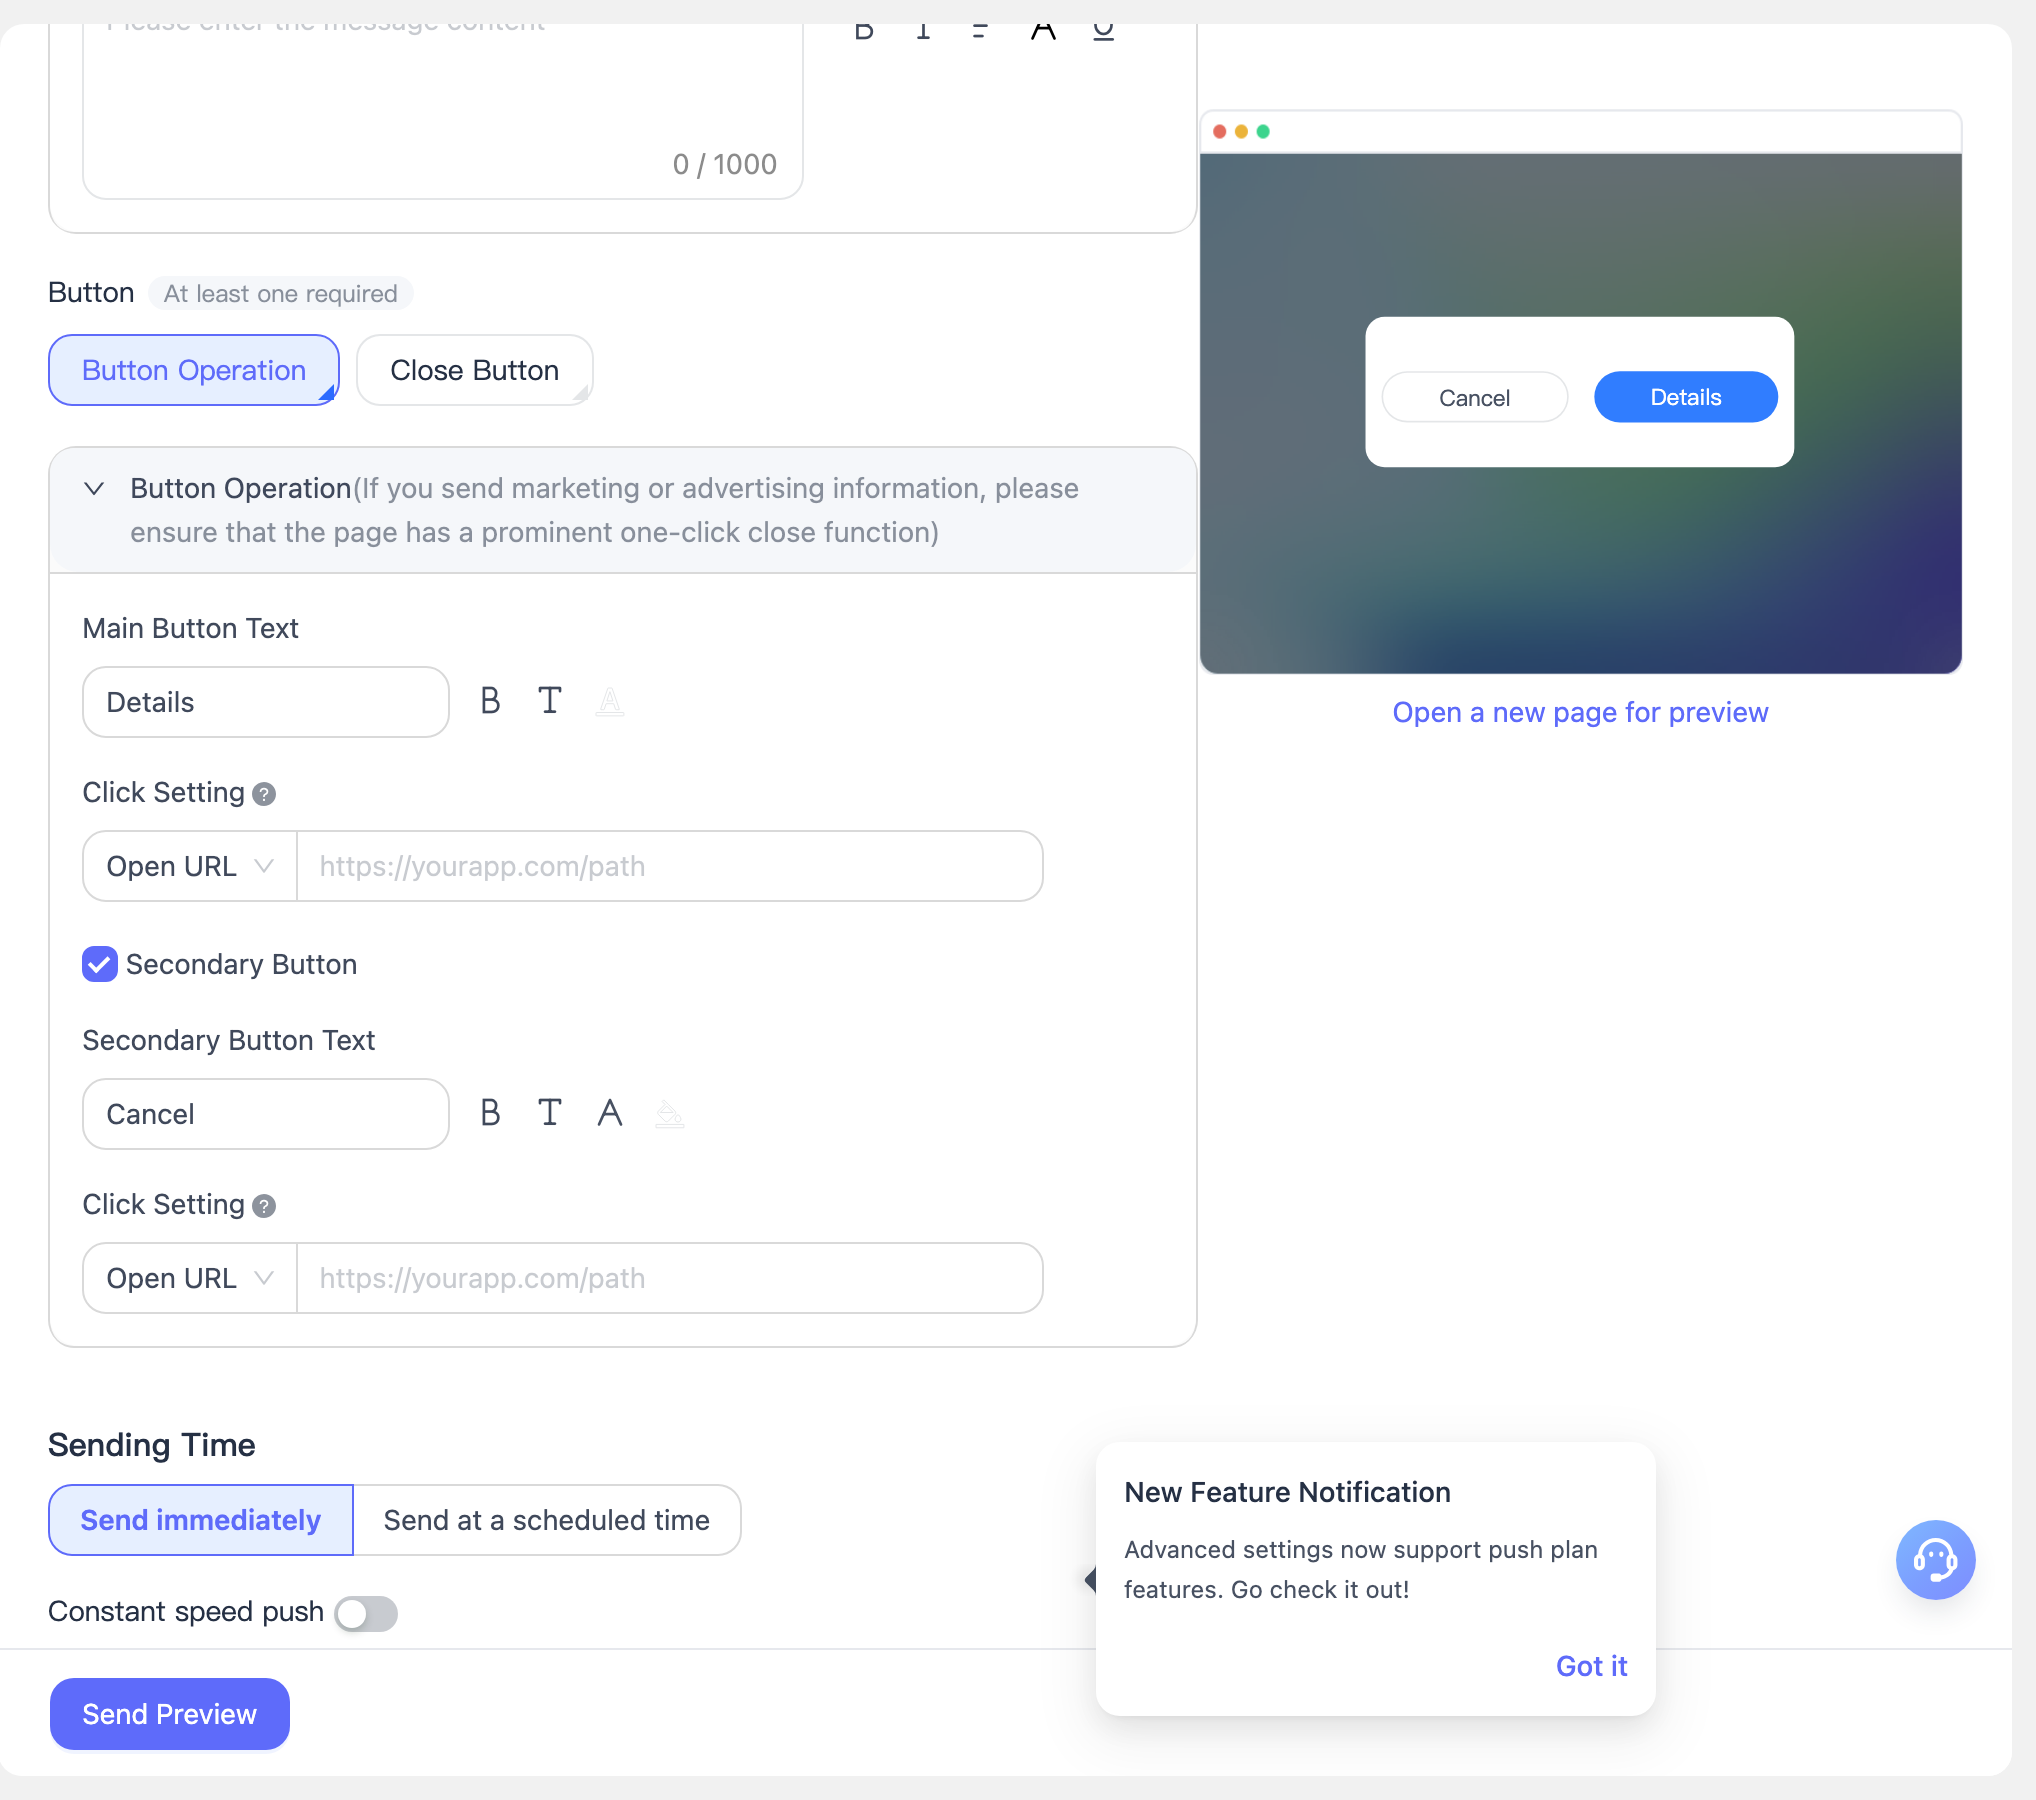
ボタン設定
説明をわかりやすくするため、ボタン設定の例示画像では メッセージ内容 セクションの Image and Text Content の例をそのまま使用しています。この例に基づくボタン設定の変化にご注目ください。
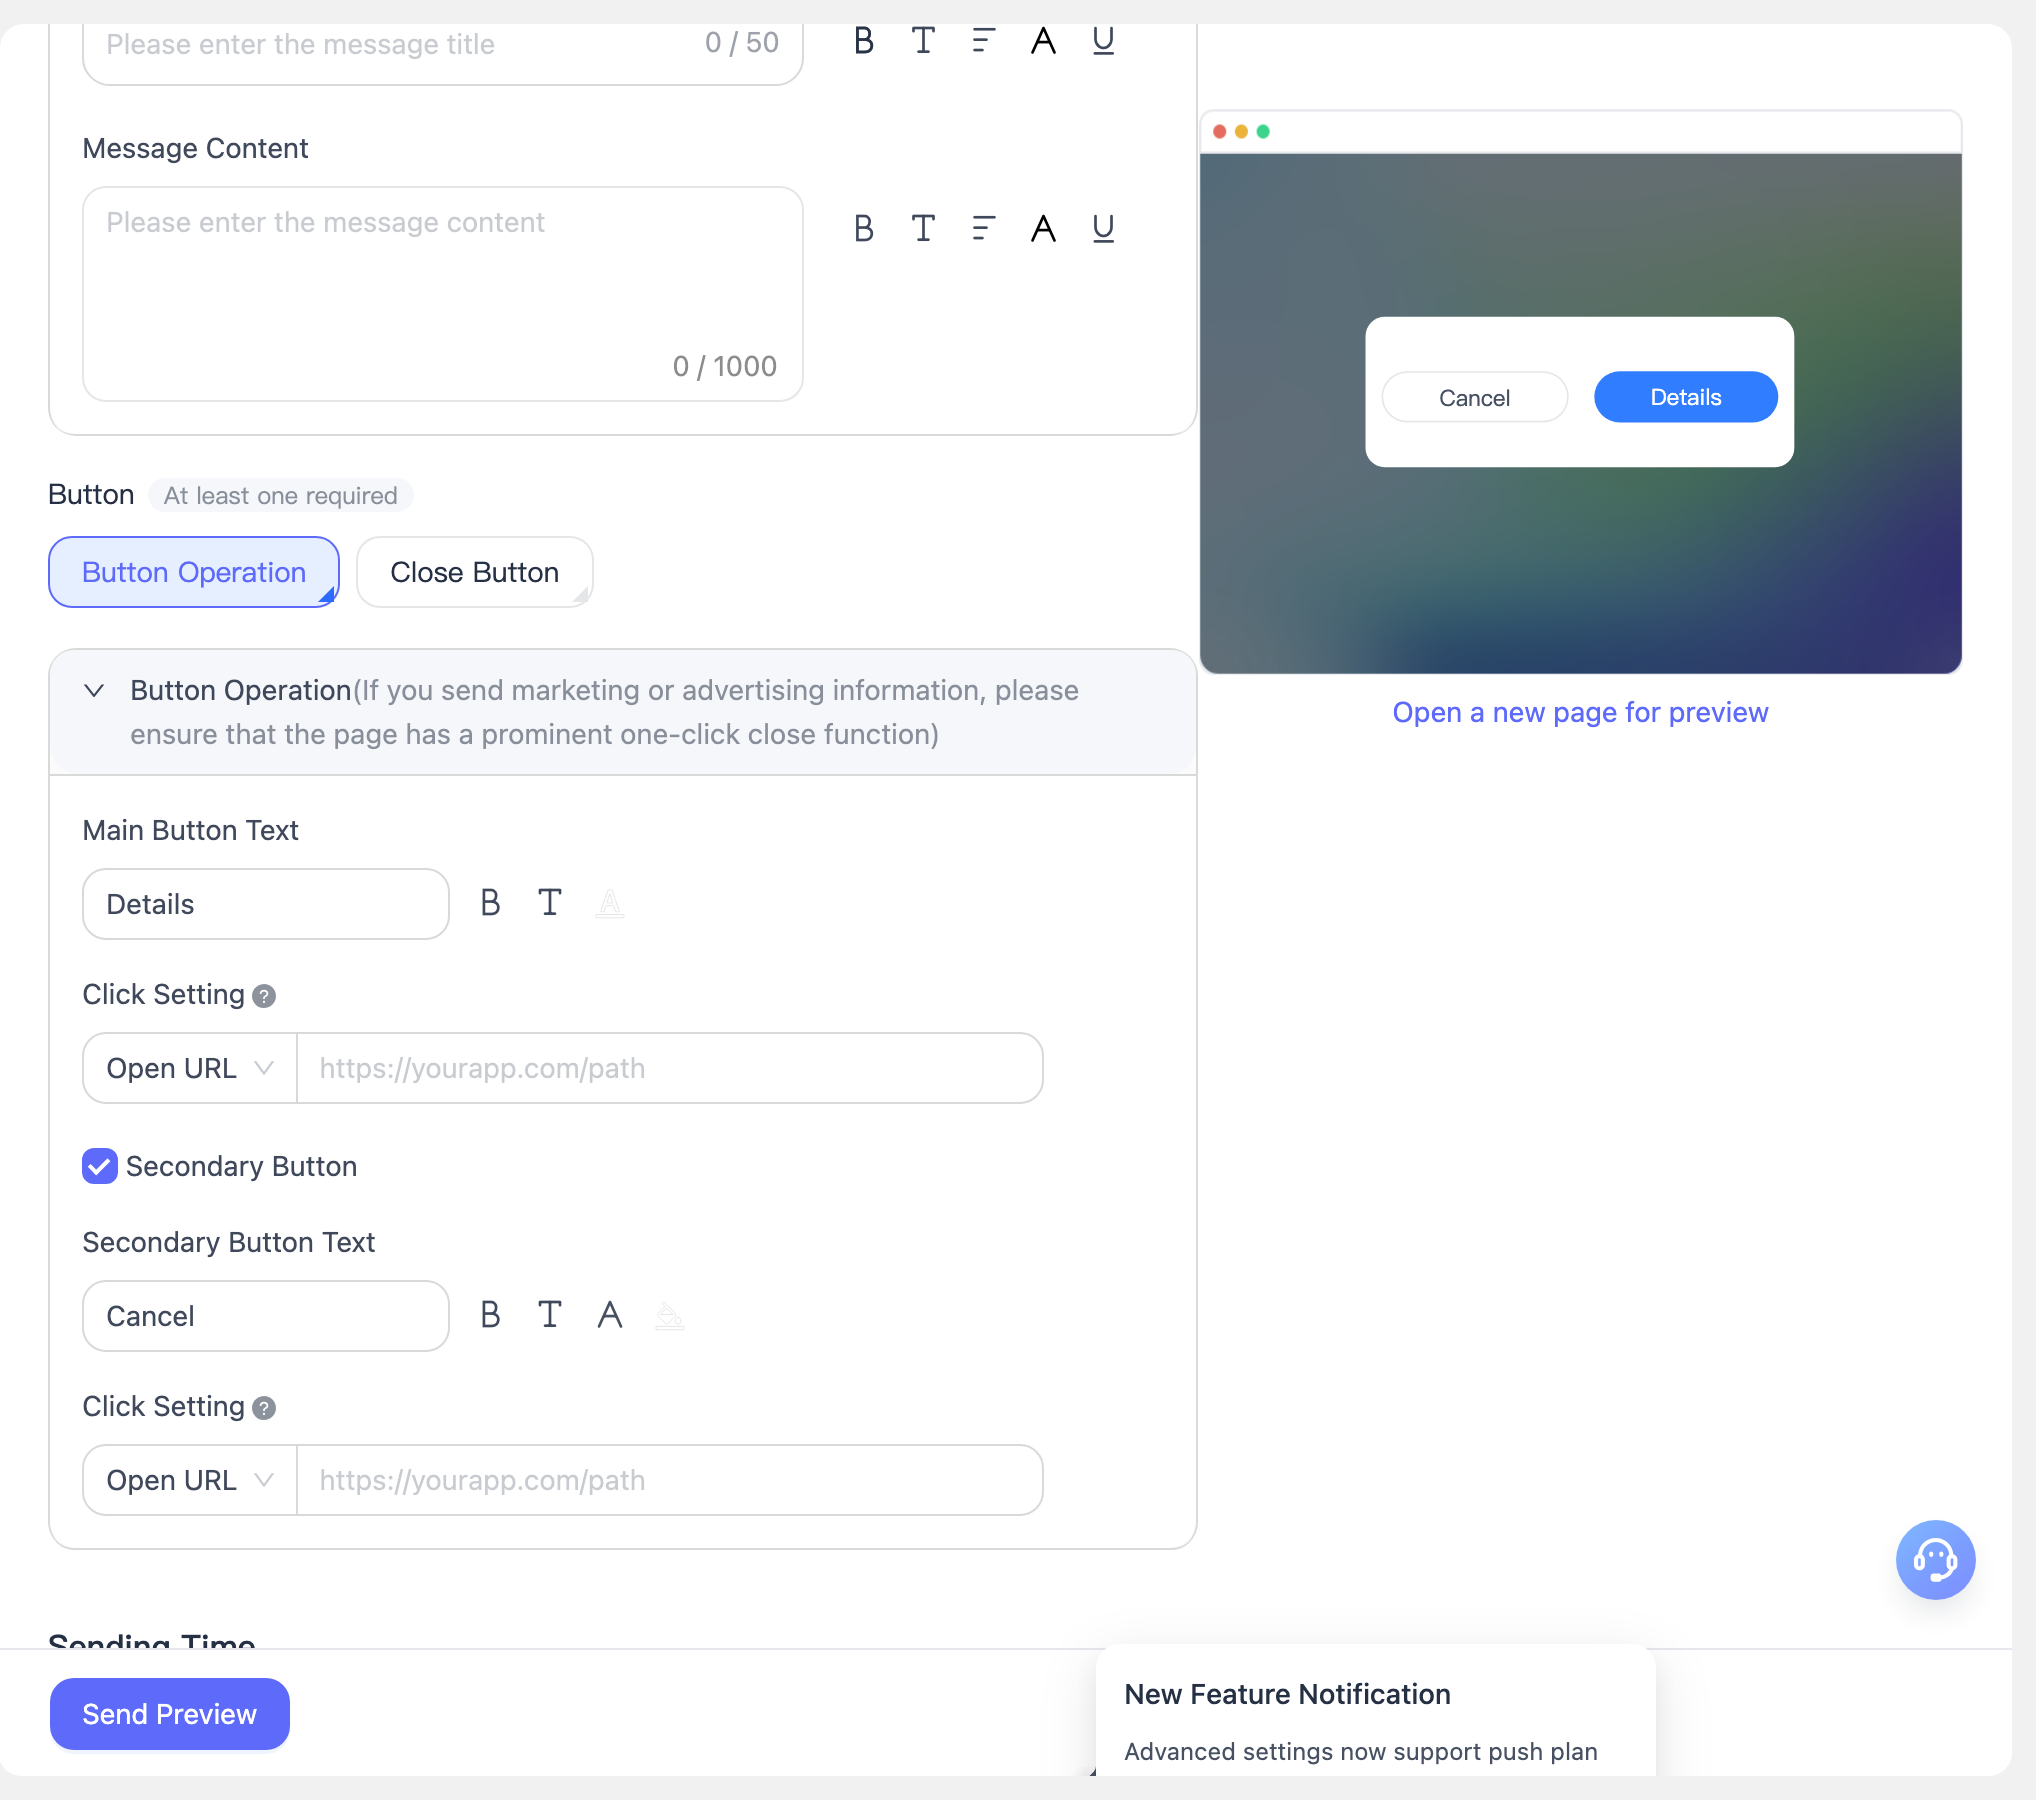
Primary Button:
- Primary Button Text: プライマリボタンのテキスト、太字にするかどうか、フォントサイズ、フォントカラー(カスタムカラー値対応)、ボタンカラー(カスタムカラー値対応)を設定できます。

- Click Settings: プライマリボタンのクリック時に、指定した URL へリダイレクトするかどうかを設定します。リダイレクトが必要な場合は、開く Web ページリンクを入力してください。リダイレクトが不要な場合は、No Action を選択します。
Secondary Button:
- セカンダリボタンを有効にするかどうかは 任意 です。
- Secondary Button Text: プライマリボタンと同じです。
- Click Settings: プライマリボタンと同じです。
Close Button:
- ポップアップ内での閉じるボタンの位置(右上または下中央)を選択できます。
ボタン設定のいずれか 1 つを必ず選択する必要があります。合計 3 種類のボタン機能タイプを作成できます。以下は各タイプの設定プレビューです。
タイプ 1: ボタンアクションのみ設定し、閉じるボタンはなし。
(マーケティングプロモーションや広告を送信する場合は、ページに目立つワンクリックの閉じる機能があることを確認してください。)
タイプ 2: 閉じるボタンのみ設定し、ボタンアクションはなし。
タイプ 3: 閉じるボタンとボタンアクションの両方を設定。
HTML 編集
メッセージ内容エリアの右側では、ドロップダウンメニューから Template Editing と HTML Editing モードを自由に切り替えることができます。Template Editing は視覚的なコンテンツ設定に適しており、HTML Editing ではメッセージの HTML ソースコードを直接記述・調整して、より複雑なコンテンツやスタイルのニーズに対応できます。
- Real-Time Preview: HTML 編集モードでは、Go to Preview ボタンをクリックすると、現在の HTML コンテンツのレンダリング結果を右側でリアルタイムに確認でき、メッセージスタイルの検証や調整をすばやく行えます。以下の図は、システムのデフォルト例を示しています。

- Applicable Scenarios: HTML 編集は、表示内容を高度にカスタマイズしたいフロントエンド開発経験のあるユーザーに適しています。通常のコンテンツ配信のみが必要な場合は、Template Editing モードを優先して使用することを推奨します。
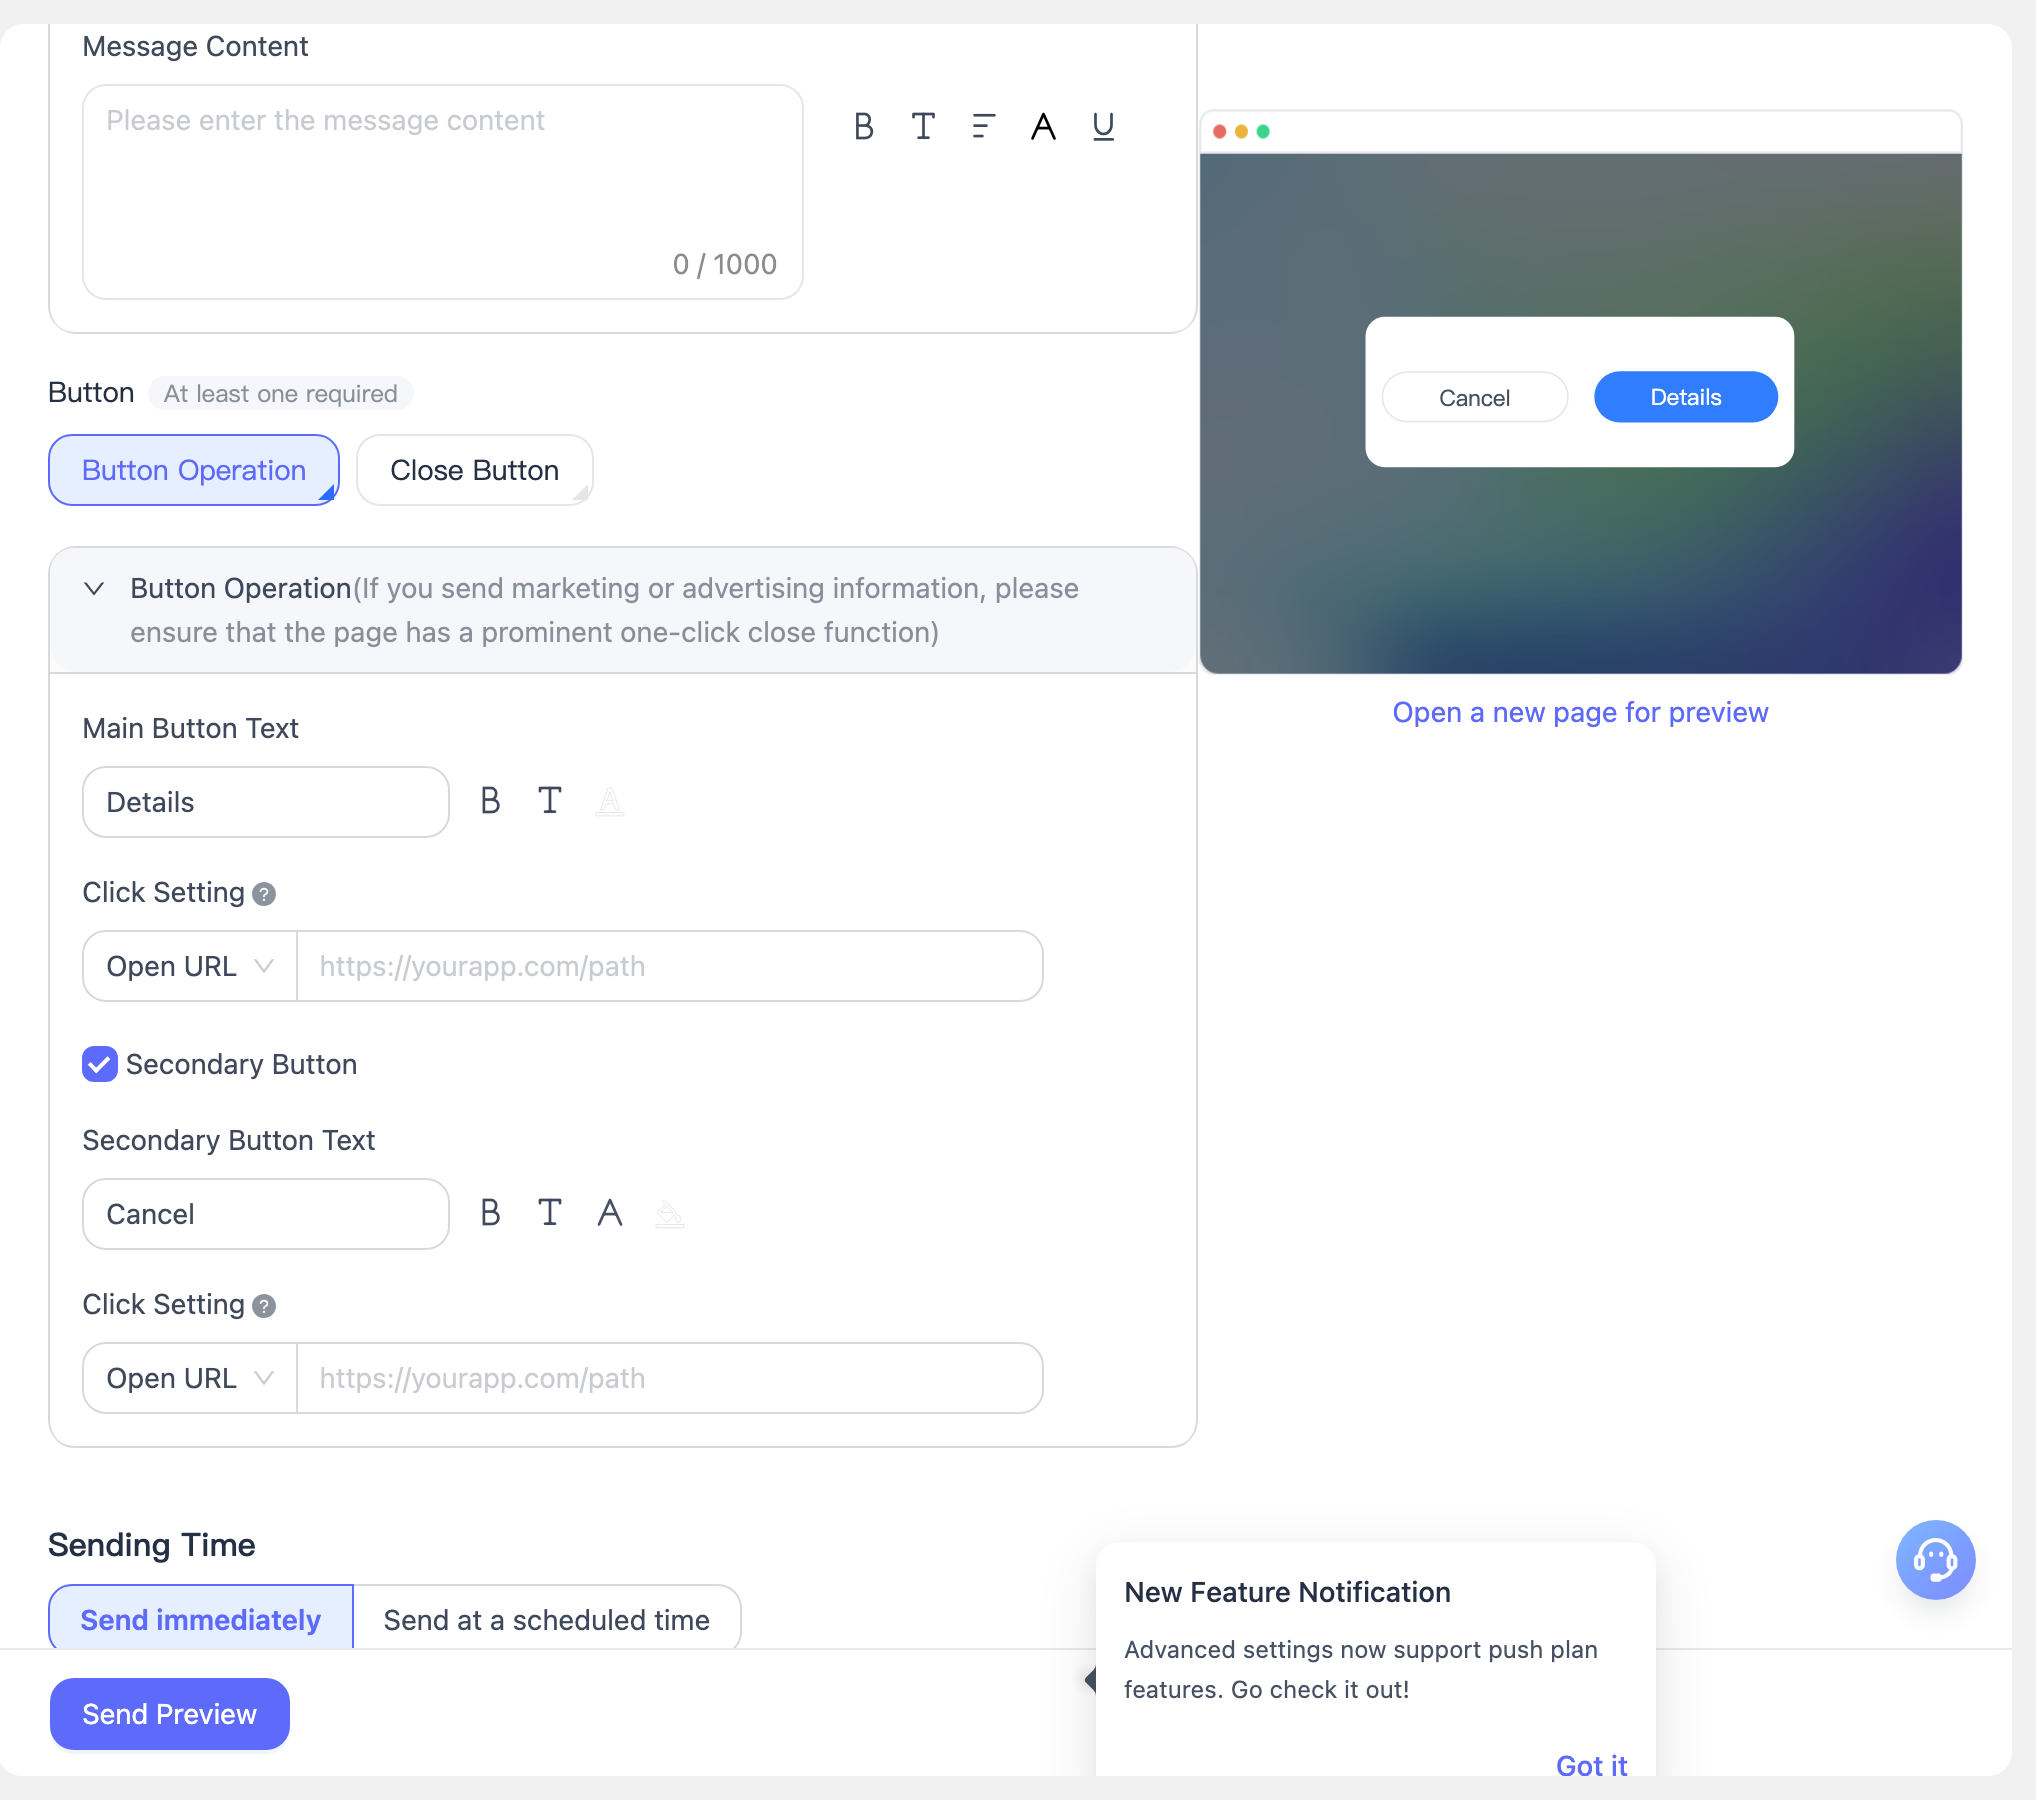
送信タイミング
- Send Immediately: メッセージを即時配信します。
- Scheduled Send: 組織時間またはエンドユーザー時間に基づいて予約送信タスクを設定します。
- Rate-Limited Push: 指定時間内に配信を完了し、サーバー負荷を軽減します。
新しいページでのプレビュー
メッセージ内容の編集中、右側のプレビューパネルにはメッセージポップアップの表示効果がリアルタイムで表示されます。
Open New Page Preview をクリックすると、新しいページが開き、現在設定されている Web ページのポップアップ効果が表示されます。新しいページでは、URL リダイレクトが設定されたボタンをクリックして、リダイレクト動作をテストできます。

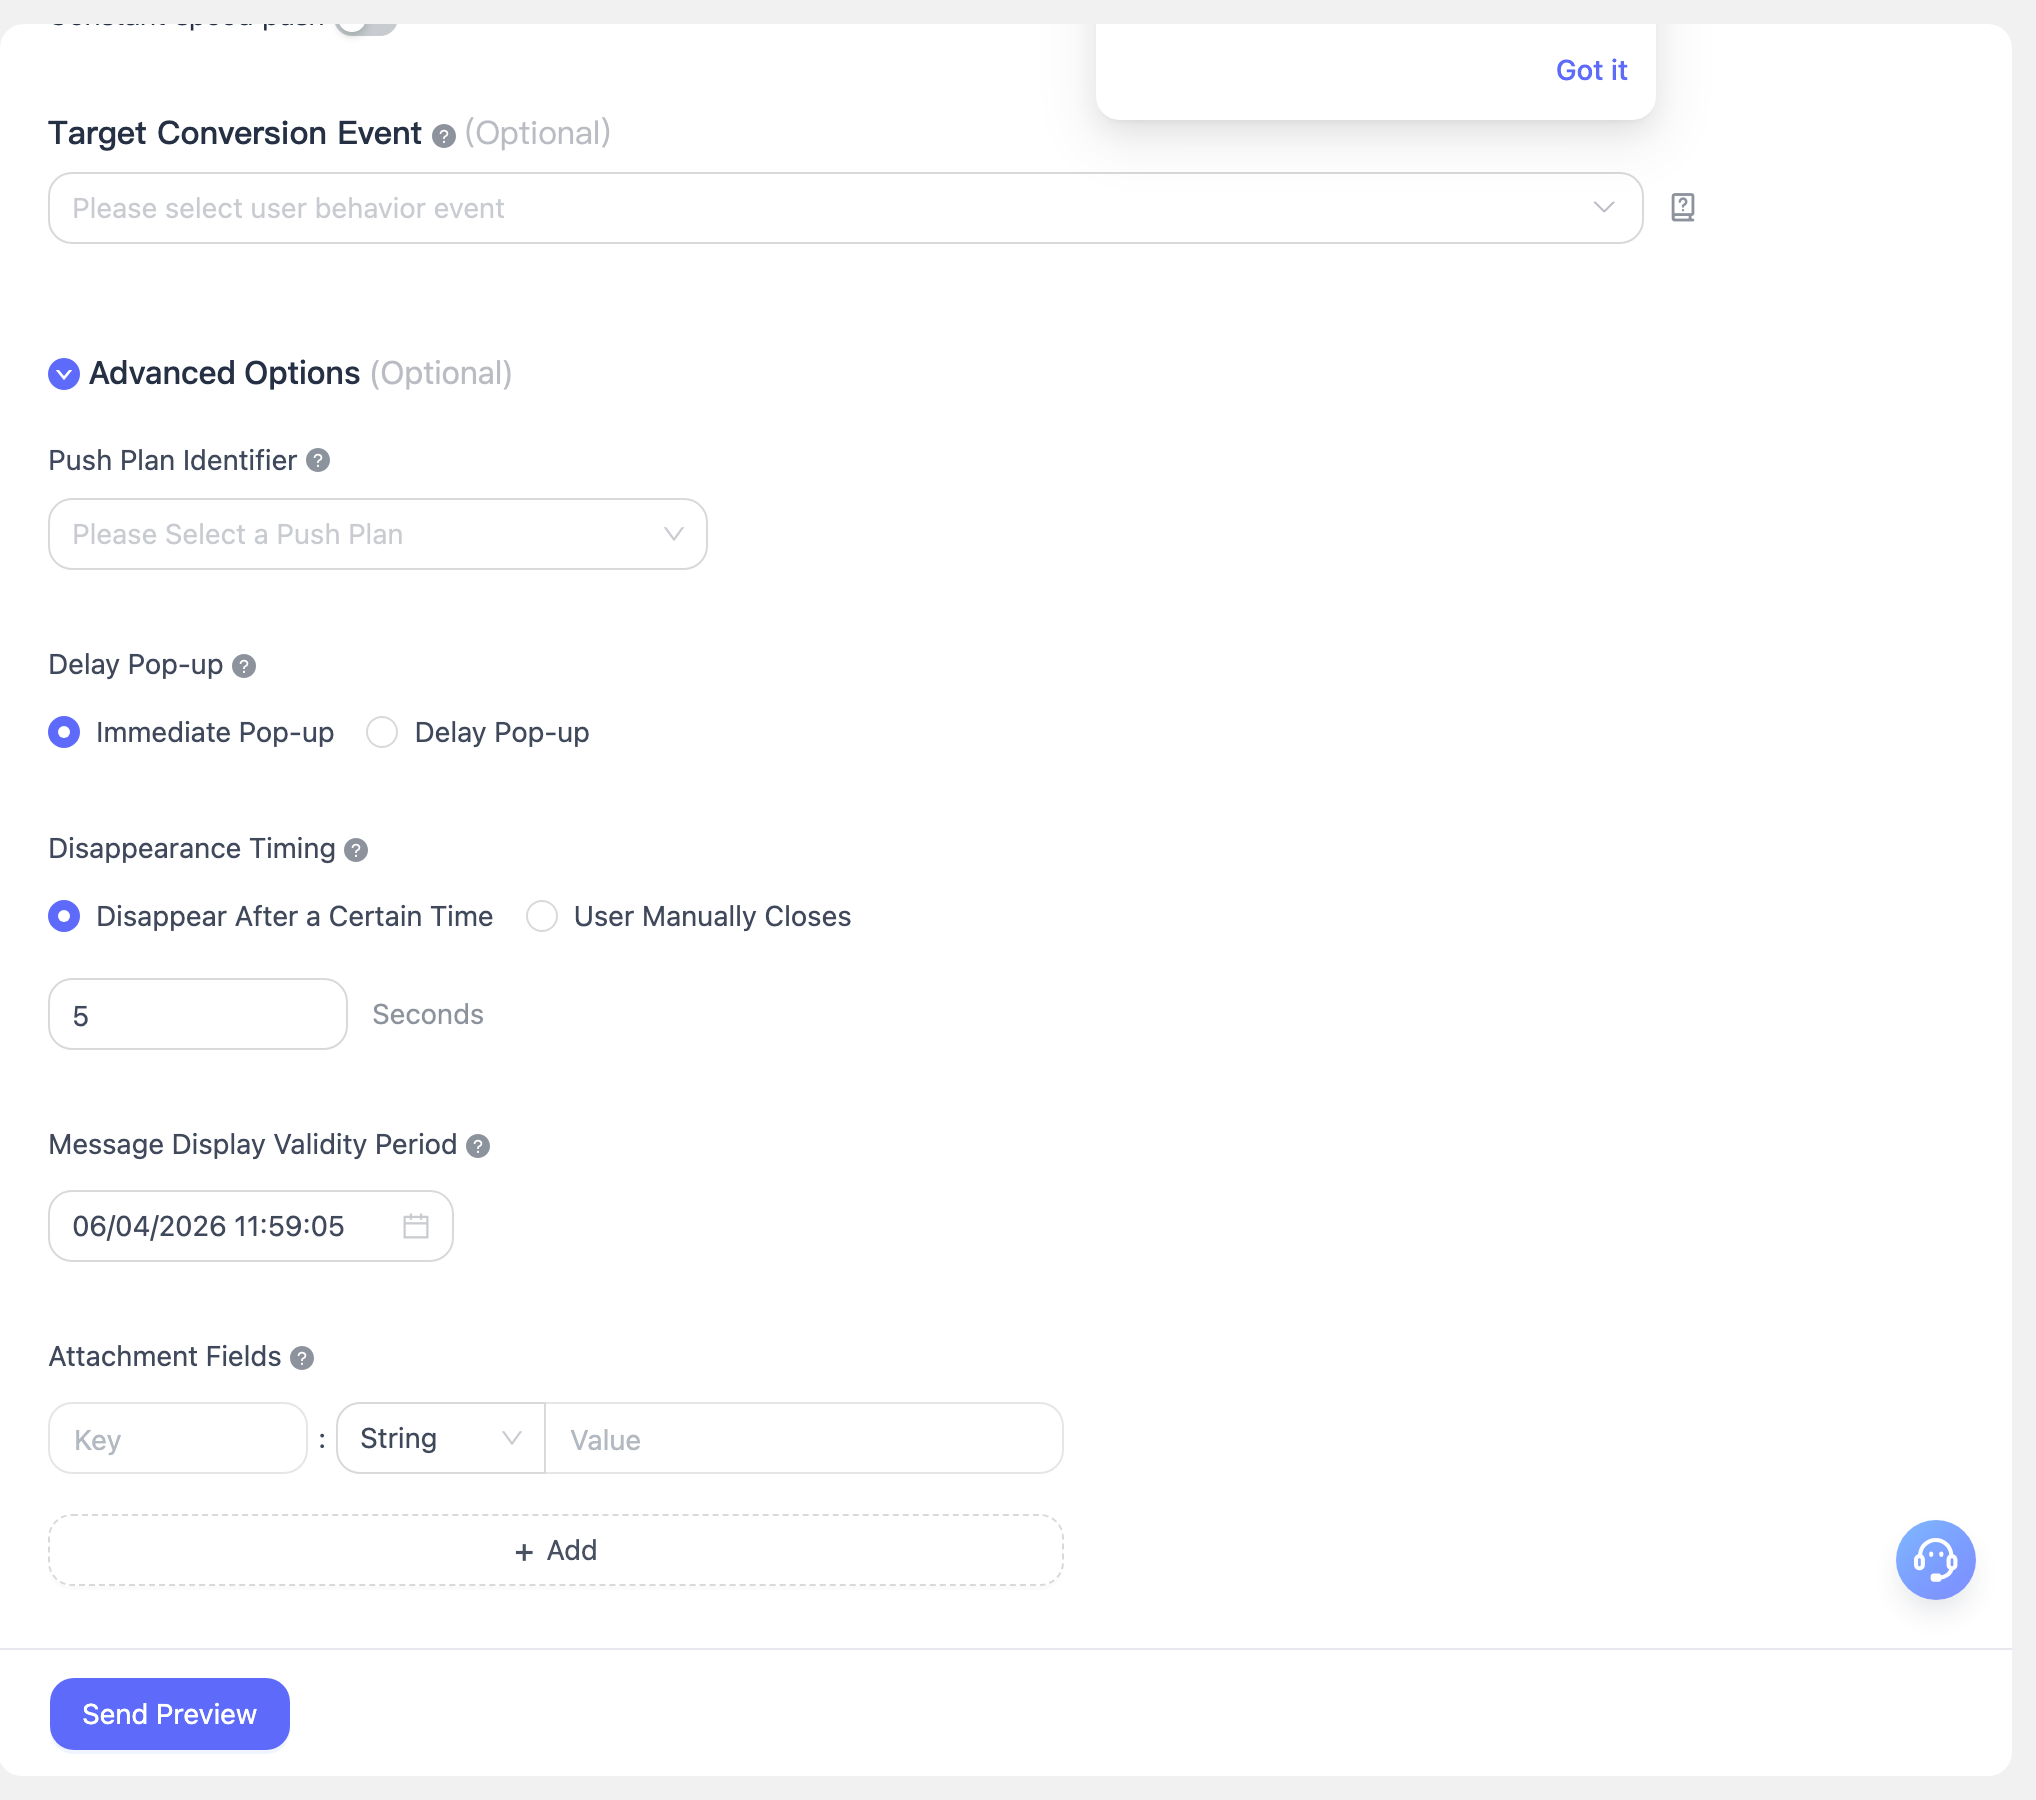
詳細設定
このセクションでは、アプリ内メッセージプッシュの詳細設定について説明します。実際の運用ニーズに応じて柔軟に設定し、メッセージ到達率とユーザー体験を向上させることができます。
Push Plan Identifier
プッシュ計画を設定し、同じシリーズのプッシュを同一の計画識別子のもとにまとめることができます。これにより、後続の統計分析や効果分析が容易になります。Delayed Pop-up
メッセージポップアップの表示タイミングを選択でき、即時ポップアップまたは遅延ポップアップとして設定できます。- 同一ページ上での異なる種類のアプリ内メッセージの優先順位は、Fullscreen > Interstitial > Banner > In-App Reminder Message です。
- 同一ページ上のインタースティシャルメッセージとフルスクリーンメッセージは複数回トリガーできず、最新の 1 件のみが表示されます。
- 複数のバナーメッセージは同一ページ上に表示できます。
Disappearance Timing
メッセージポップアップの自動消失時間を制御します。- バナーメッセージのデフォルト表示時間は 5 秒、インタースティシャルメッセージおよび HTML メッセージのデフォルト表示時間は 30 秒で、5~180 秒のカスタム設定に対応しています。
- フルスクリーンメッセージにスキップボタンとスキップ時間が設定されている場合、この設定の制御対象にはなりません。
Message Display Validity Period
メッセージのオフライン有効期間を設定します。- ユーザーが現在オフラインの場合、メッセージはオフラインメッセージとして保存され、次回オンラインになった際にプッシュされます。
- すでにアプリに配信済みのメッセージについて、エンドユーザーが指定ページに一度も入っていない場合、表示有効期間の失効後にそのページへ入ってもメッセージは表示されません。
- ユーザーが有効期間内にオンラインになり、表示ページへ入った場合にのみ、メッセージは正常に表示されます。
Additional Fields
カスタムパラメータの設定に対応しています。クライアントはこれらのフィールド内容を取得して、カスタムイベント処理に利用できます。さまざまなビジネスニーズに対応するため、追加パラメータの追加や削除が可能です。
送信プレビュー
プレビューサムネイルはページ右側に表示されます。プッシュパラメータを設定した後、Send Preview をクリックすると、設定済みのプッシュパラメータを確認できます。
送信パラメータを確認した後、Confirm をクリックすると、プッシュタスクの作成が完了します。条件を満たすプッシュ対象が存在しない場合、以下のエラーが返されます。

追加のご要望がある場合や問題が発生した場合は、EngageLab テクニカルサポートまでお問い合わせください。
A/B テスト
[Create Push] - [A/B Testing] に移動して、プッシュタスクを作成します。パラメータ設定の説明は以下のとおりです。
- Message Name: この A/B テスト用のメッセージ名をカスタマイズして、後続の管理や検索をしやすくします。
- Select Platform: 現在は Web Push をサポートしています。
A/B グループのメッセージ内容設定
A/B グループのメッセージ内容設定は Notification Message と同じで、複数言語、通知タイトル、サブタイトル、本文、追加フィールド、クリック動作、高度なスタイルなどの設定に対応しています。
グループ B では、グループ A のすべての設定をワンクリックでコピーできるため、比較用コンテンツをすばやく構築できます。
グループ B は、グループ A の設定をワンクリックでコピーできます。ワンクリックコピーを使用した後、グループ A を基に変更を加えることができます。
Target Audience
EngageLab のプッシュプラットフォームは複数のターゲットオーディエンス選択方法に対応しており、開発者や運用チームがさまざまなビジネスニーズに応じてユーザーへ正確に配信できます。テスト時は、登録ログから取得した registration ID を使用して配信することを推奨します。具体的な設定の詳細については、Notification Message を参照してください。
A/B テスト設定
ターゲットオーディエンス条件およびプラットフォーム条件(Windows/macOS/Android)を同時に満たすユーザーの中で、A/B テストに参加するユーザーの割合を設定します。
テストに参加する A グループと B グループのユーザー比率は等しくなります。たとえば、ユーザー比率が 40% の場合、A グループと B グループのユーザー比率はそれぞれ 20% です。
最終的に算出されるユーザー数は整数に切り捨てられます。A/B テストに参加する対象ユーザー数が 2 未満の場合、プッシュは失敗します。
送信時間と詳細設定
A/B グループプッシュの送信時間と詳細設定は、Notification Message と同じです。詳細な設定方法については、Notification Message を参照してください。
送信プレビュー
すべての設定を完了した後、ページ下部の Send Preview ボタンをクリックすると、まず現在の通知テンプレートの実際の表示効果を確認できます。内容に問題がないことを確認したら、Confirm Send をクリックして、テスト対象ユーザーにプッシュメッセージを送信します。
メッセージ送信後は、Push Records ページでこの A/B テストの詳細な効果分析を確認できます。