


AI Email Editor
EngageLab provides a visual, AI-assisted email editor. You don’t need to write code — build responsive, mobile-friendly email designs by dragging and dropping, and use AI to generate first drafts, polish content, adjust layouts, and handle images. Before sending, you can also verify how emails render in major clients using the inbox preview.
Sign in to EngageLab Email to create a template and receive 300 points for free.
Creating an email template
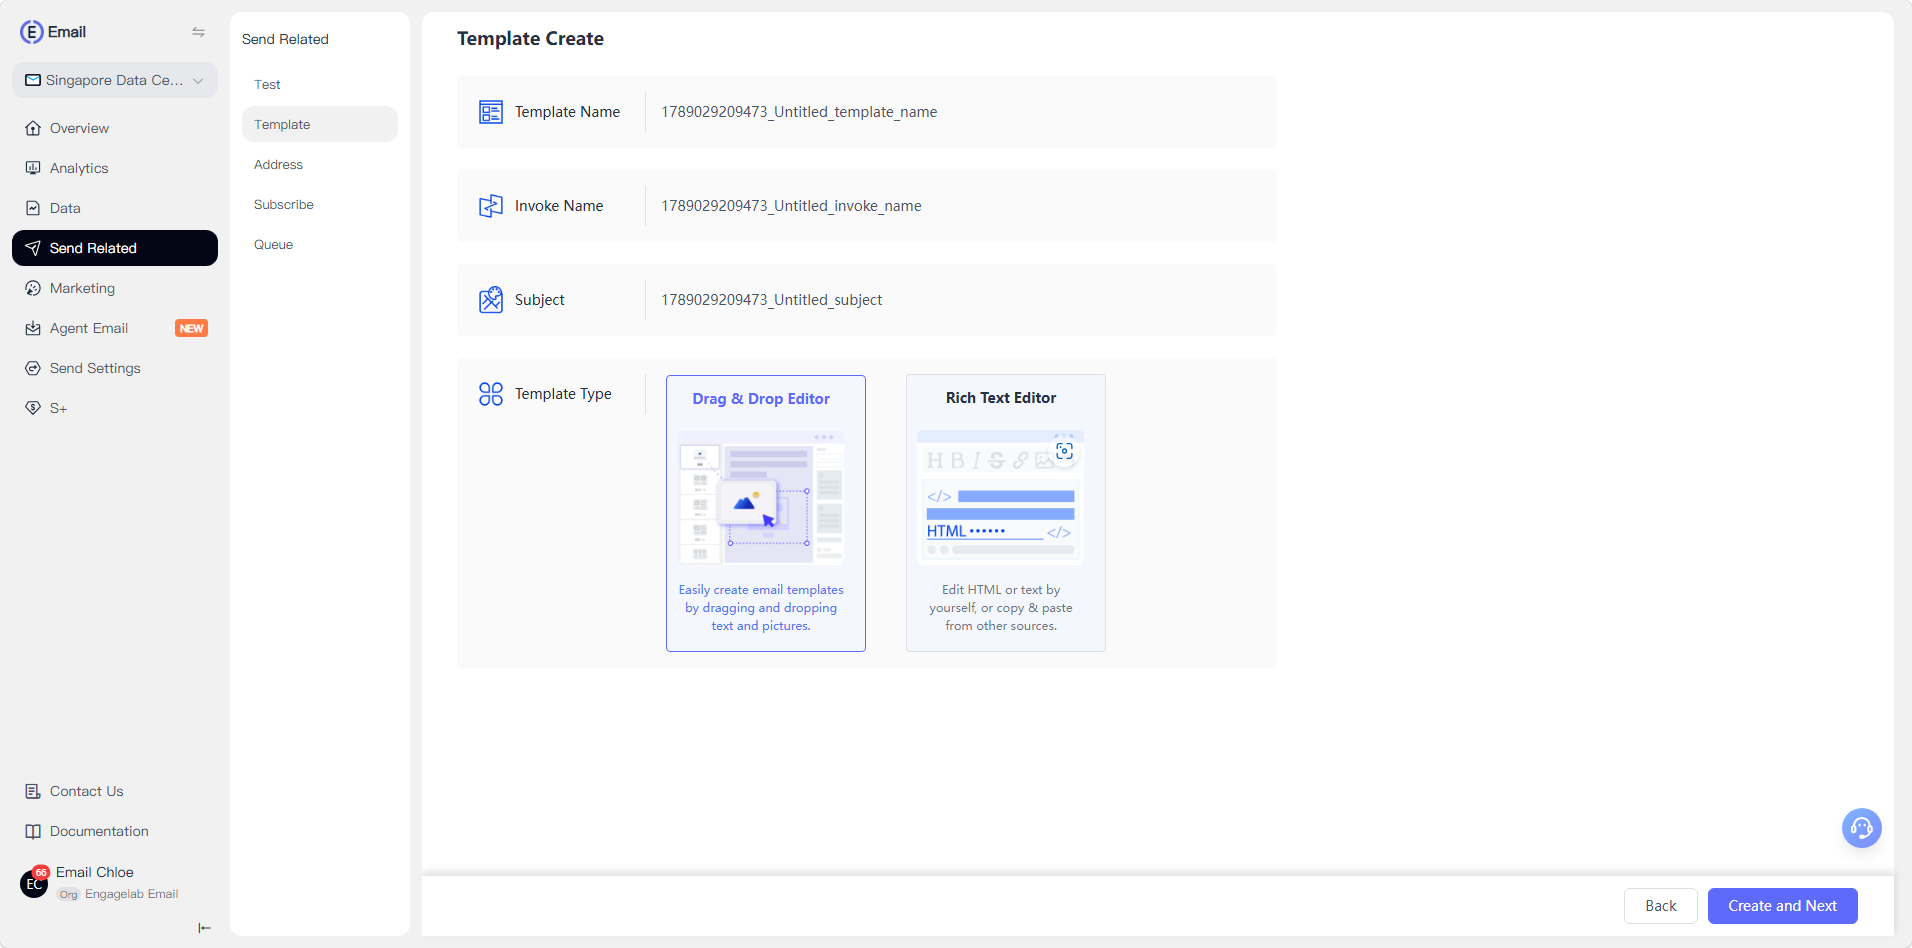
After signing in, go to the Email template management page to create a new template. The editor provides two editing modes:
Drag & Drop Editor: Recommended for most users. Easily create email templates by dragging and dropping blocks such as text and images — no coding required. Emails you build adapt to different email clients and mobile devices.
Rich Text Editor: Suitable for editing HTML directly, or for copying and pasting email content from other sources.
Three ways to create
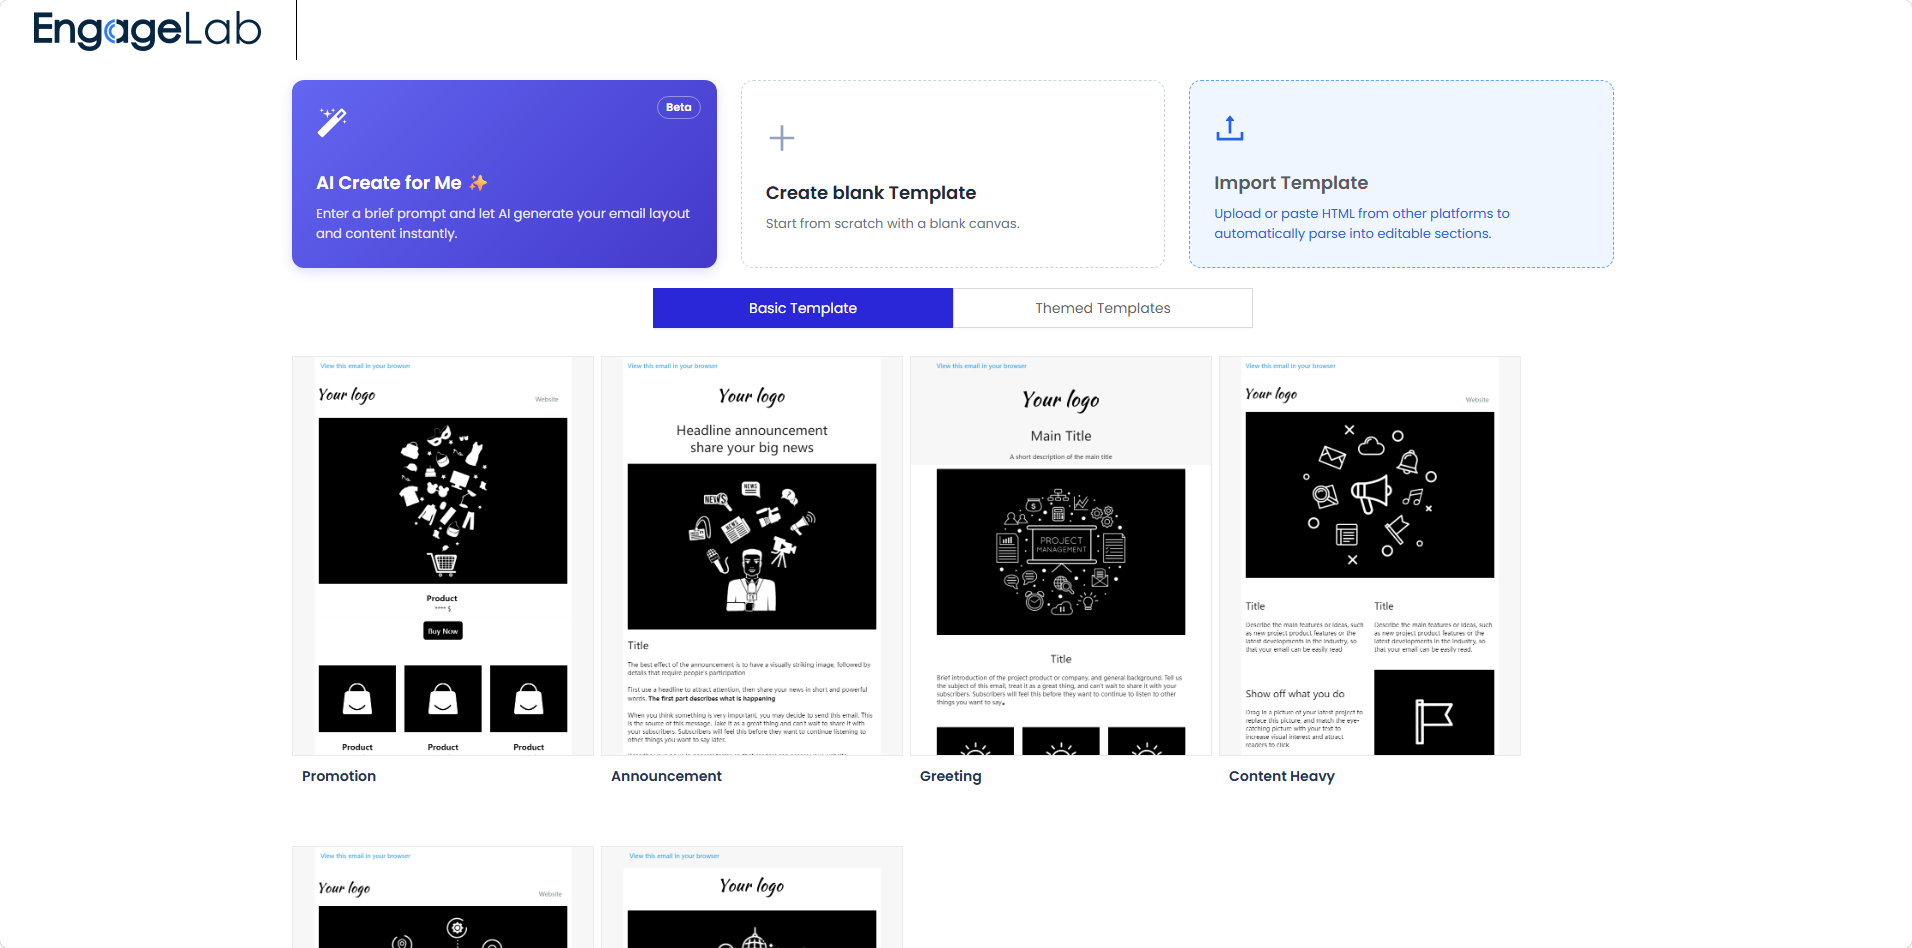
After selecting the Drag & Drop Editor, you can start a new email in three ways:
AI Create (AI Create for Me): Enter a short prompt and AI automatically generates the email content and layout as a starting point. You can then continue editing in the workspace. See AI features below.
Create blank Template: Start from a blank canvas and build the email entirely on your own.
Import Template: Upload or paste HTML from other platforms. The editor parses the imported content into editable Sections. Because not all HTML structures map perfectly to drag-and-drop blocks, manual adjustments may be required after import.
Template categories
The template library is divided into two categories. You can search by keywords or browse the template cards:
Basic Template: General-purpose layout templates, such as Promotion, Announcement, Greeting, and Content Heavy — a solid starting point for all kinds of emails.
Themed Templates: Templates with visual styles preset by industry or scenario. Select one and replace the content directly.
Editor workspace
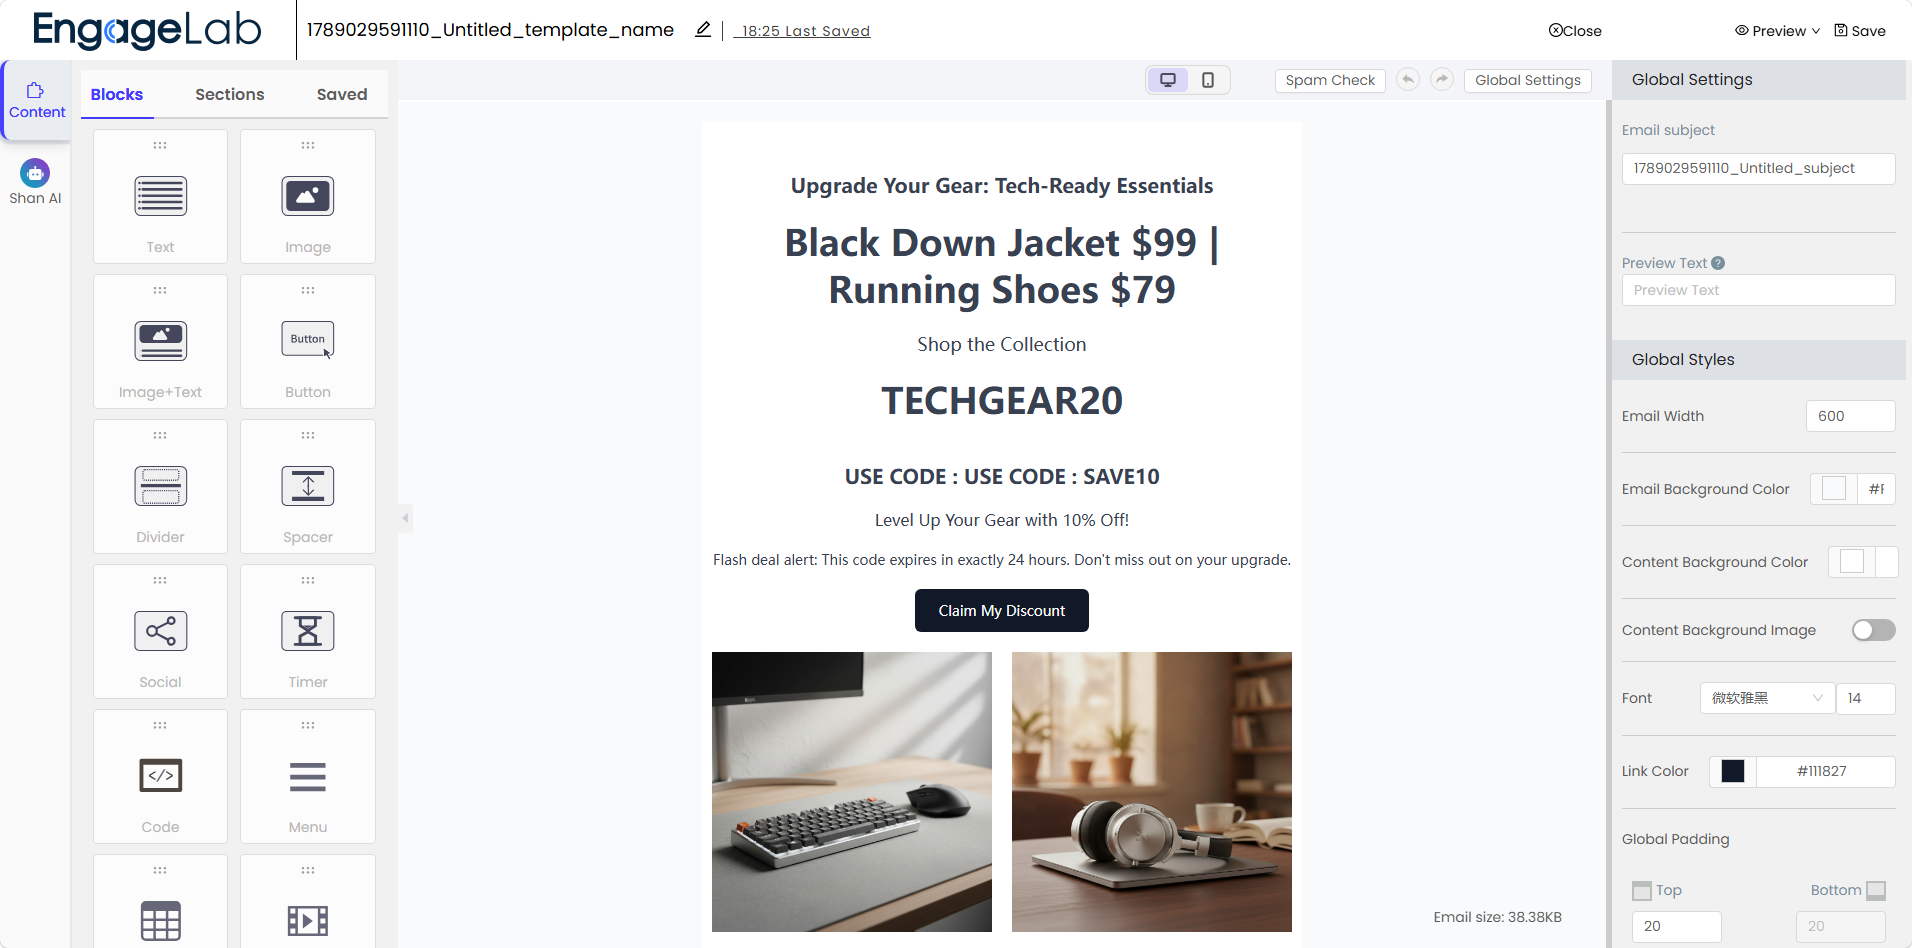
Whether you start with AI, a template, or an import, the editor opens the workspace. This is the core area for adding content, editing layouts, configuring styles, previewing, and saving your email.
1. Main areas
| Area | What you do there |
|---|---|
| Top bar | View/rename the email, see save status, undo, preview, save |
| Left navigation | Switch between modes like "Content editing" and "AI-assisted tools" |
| Content panel | Drag blocks, sections, or Saved content into the email |
| Canvas | Visually edit the email layout and content |
| Right settings panel | Configure global settings or the selected content block |
2. Top bar
View or rename the current email, see the most recent save status, go back, open preview, and save the email. After saving, the current email state and content are written back to your EngageLab email account for later sending or marketing campaigns.
3. Left navigation and content panel
The left navigation provides the editor’s main modes; common entries include "Content editing" and "AI-assisted editing".
The content panel contains reusable building tools. Common tabs:
Blocks: Independent content blocks such as Text, Image, Button, Divider, Social, Timer, Code, Menu, etc.
Sections: Prebuilt layout sections that can be added to the email with one click.
Saved: Organized, saved reusable content.
4. Right settings panel
This panel changes with context:
When no specific block is selected, it shows global email settings: subject line, preview text, email width, background color, content background color, fonts, link color, variable delimiter settings, etc.
When a block or section is selected, it shows that item’s specific settings.
5. Canvas
The canvas is the visual editing area where you can select text/images/buttons, rearrange visually, edit layouts, and see results in real time.
6. Preview and save
You can preview the email before saving; the workspace also includes the spam check (Spam Check), multi-device previews, and inbox preview.
Blocks and Sections
The editor uses a "building block" approach composed of three element types.
1. Blocks — the smallest draggable content units
After dragging a block onto the canvas, configure its content, style, spacing, and visibility. Common blocks:
| Block | Purpose |
|---|---|
| Text | Headings, body text, descriptions |
| Image | Add or replace images |
| Image + Text | Image and text combination layouts |
| Button | Call-to-action (CTA) buttons |
| Divider | Visually separate content areas |
| Spacer | Vertical spacing between content |
| Social | Social media links or icons |
| Timer | Countdown for time-sensitive campaigns |
| Code | Custom HTML or code content |
| Menu | Navigation-style links |
| Table | Structured rows and columns |
| Video | Video content or video preview blocks |
2. Sections — prebuilt layout groups
Sections are pre-arranged layout groups that help build emails faster without adding blocks one by one. Common categories:
Image + Text: Hero areas, feature highlights, product showcases.
Text: Text-focused announcements, descriptions, or messages.
Images: Galleries, banners, product visuals.
Headers: Logo, navigation, title, or top-of-email structure.
Footer & signatures: Footer links, sender information, signatures, unsubscribe areas.
Empty columns: Custom multi-column layouts.
You can drag a Section into the canvas and then edit the blocks, layout, and styles within it.
3. Saved sections — custom reusable sections
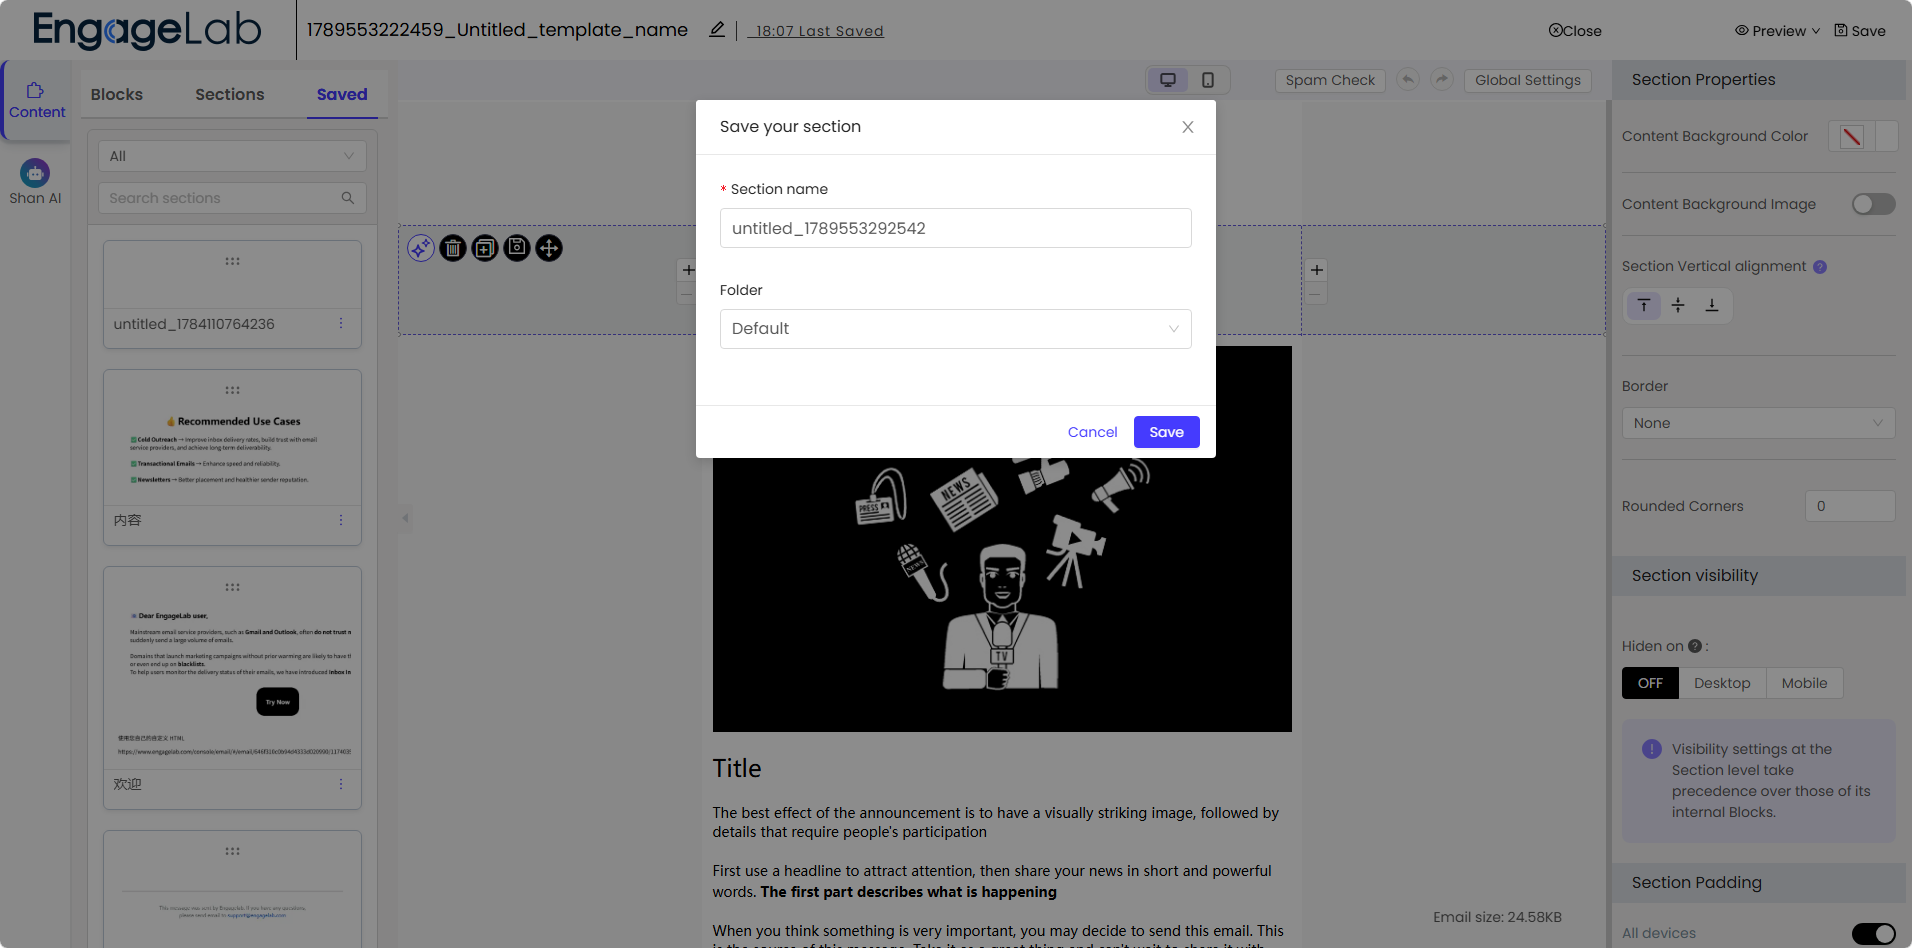
Saved sections are custom sections saved for reuse, suitable for content that appears across multiple emails, such as headers, footers, logos, legal text, brand signatures, common promotional blocks, or reusable product layouts. After saving, they are available under the "Saved" tab for reuse, helping teams maintain consistency across campaign emails.
When a block or Section is selected on the canvas, the editor shows relevant controls. Common options include: text, images, links, background color, borders, corner radius, padding, alignment, and desktop/mobile visibility.
AI features
AI features help speed up first-draft creation, content polishing, layout adjustments, and image editing. AI Credits are consumed by operations such as AI Create, AI Rewrite, AI Conversation, and image generation. See AI Credits below.
1. AI Create
Start a new email from a prompt. The generation flow consists of three steps.
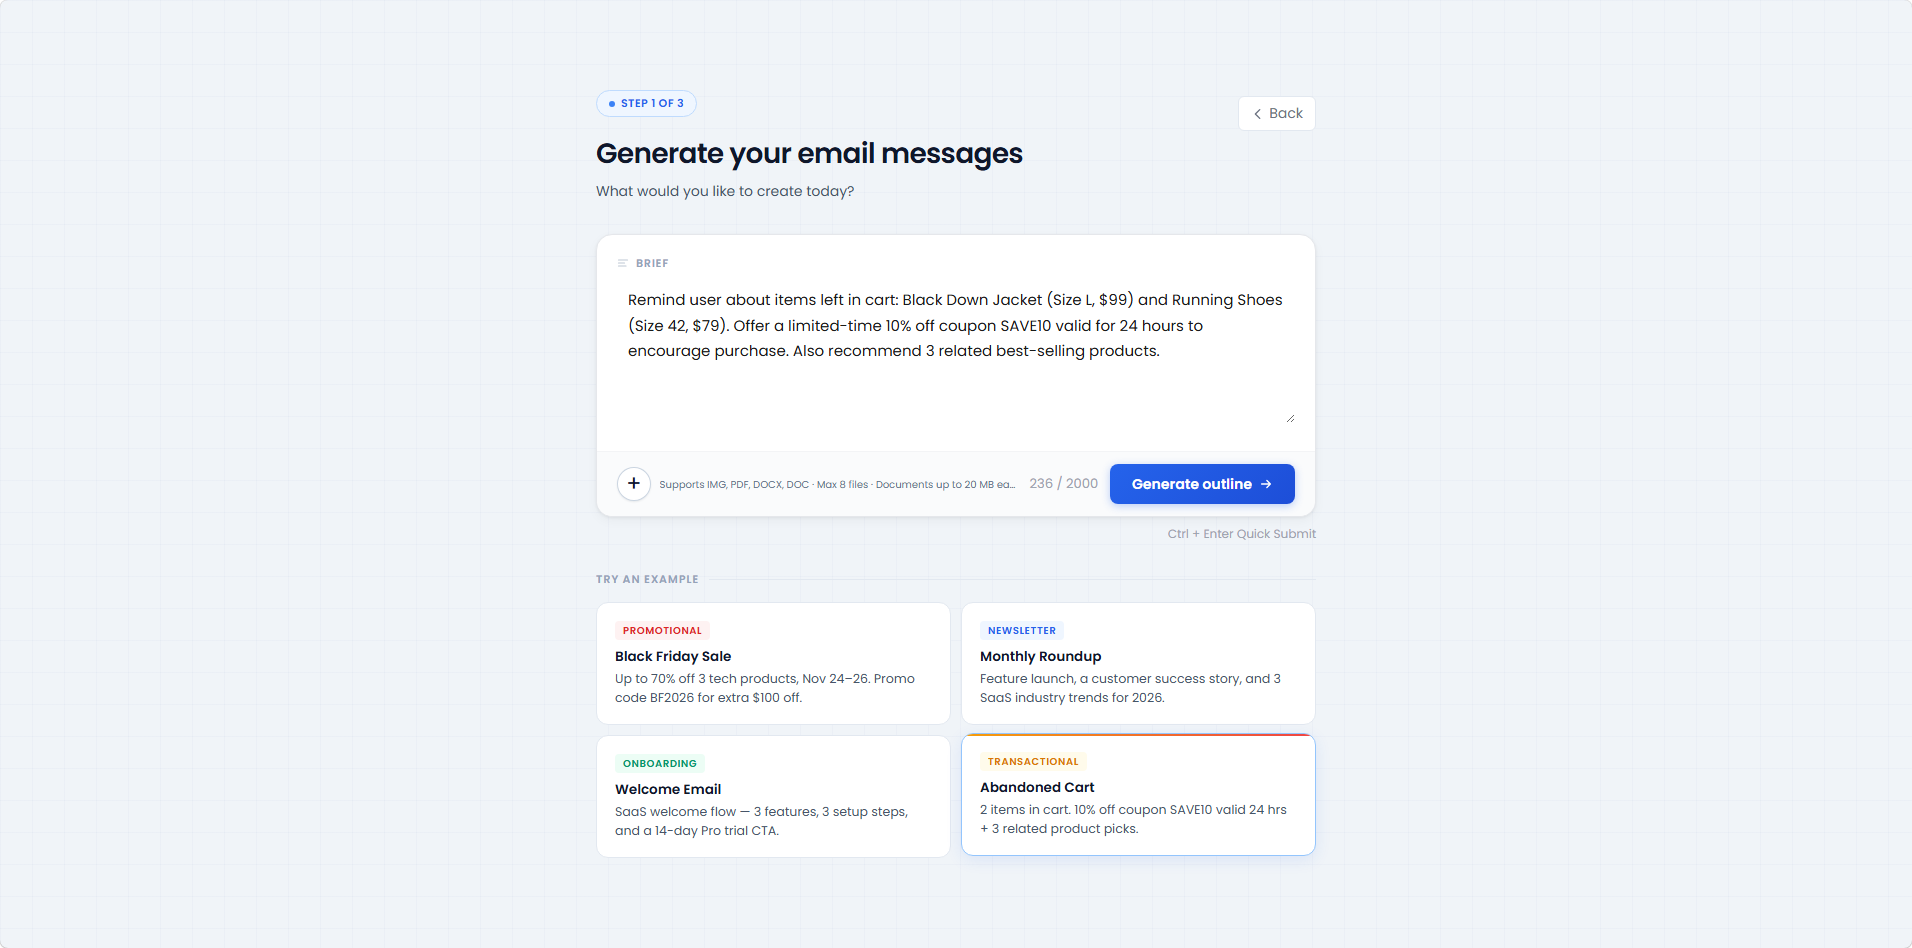
Step 1: Enter Prompt
Describe your requirements in the input box — for example the campaign goal, audience, offer, product, or the message you want to convey (up to 2,000 characters).
Upload reference documents for AI to consider (.msg / .pdf / .docx, up to 8 files, 20 MB max per file).
Click "Generate outline" when done (or use the Ctrl + Enter shortcut).
Not sure where to start? Pick one of the sample scenarios: Promotional, Newsletter, Onboarding, or Transactional.
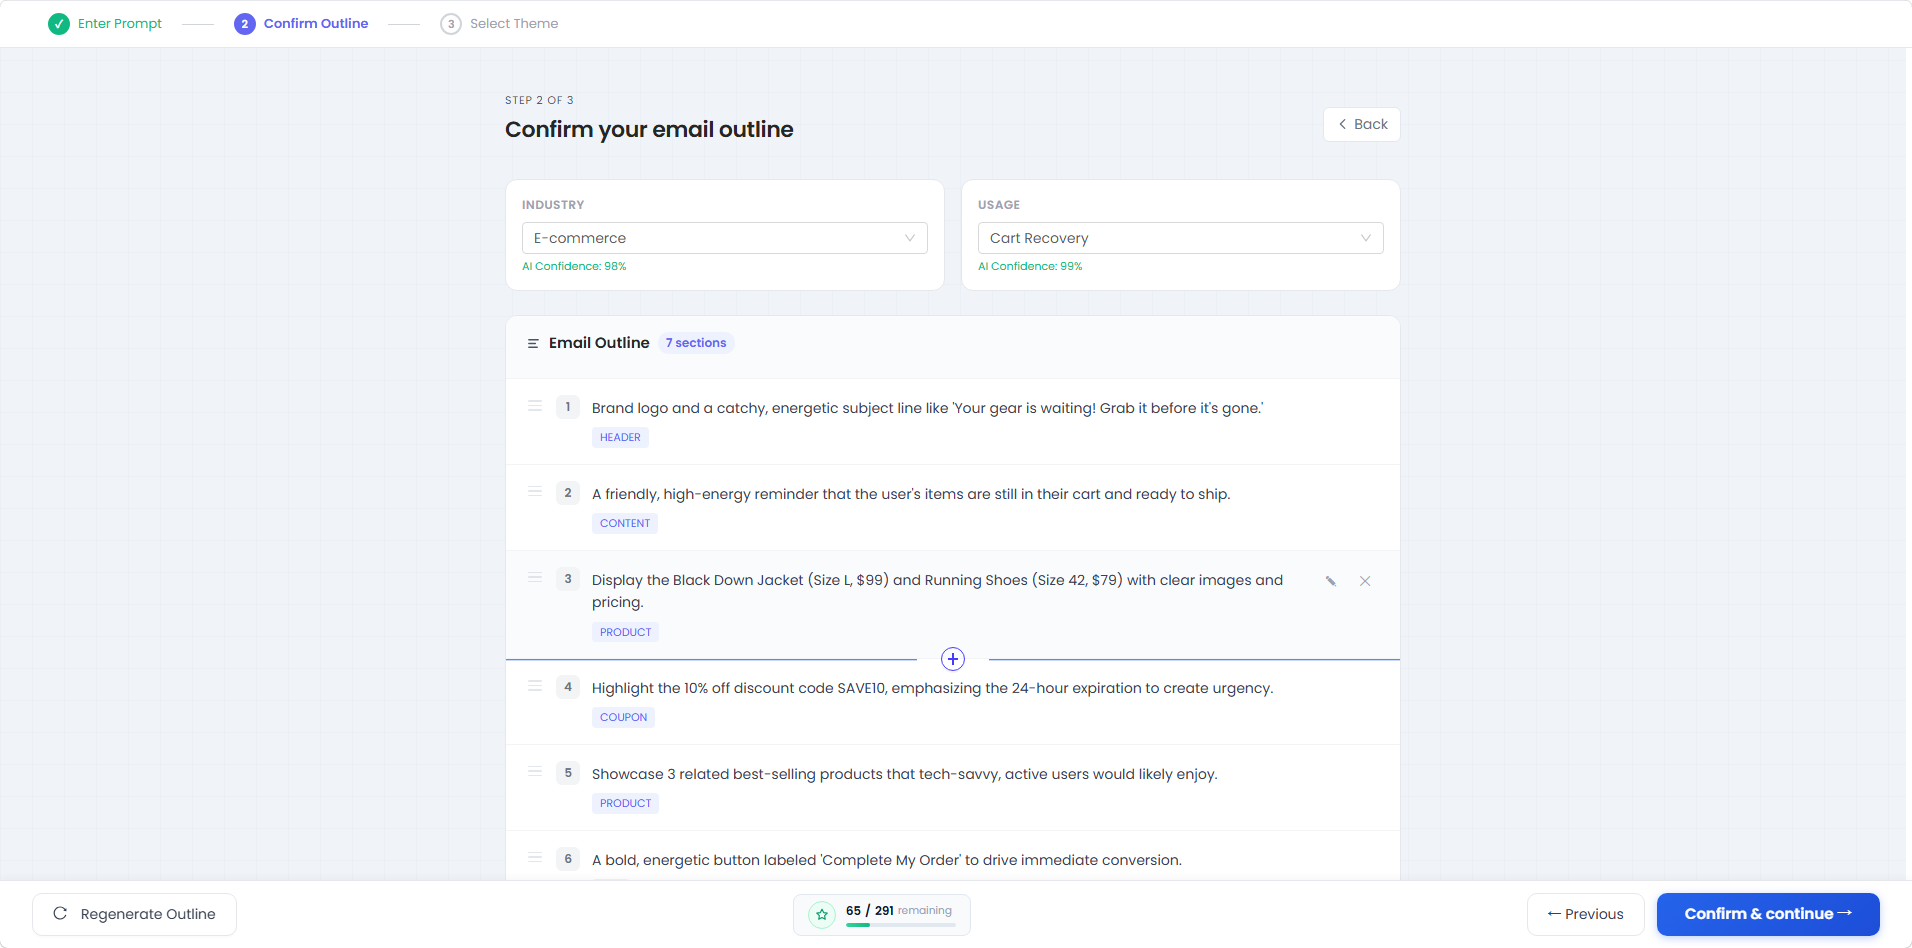
Step 2: Confirm Outline
AI automatically detects and suggests the Industry and Usage, each with an AI confidence score, and you can change them manually. AI then generates a structured email outline:
The outline is broken into blocks (such as Header, Content, Product, Coupon), each labeled with its purpose.
You can edit block content, reorder blocks, delete them, or add new ones.
Not satisfied with the result? Click "Regenerate Outline" to try again.
The page shows your remaining AI Credits for this generation in real time.
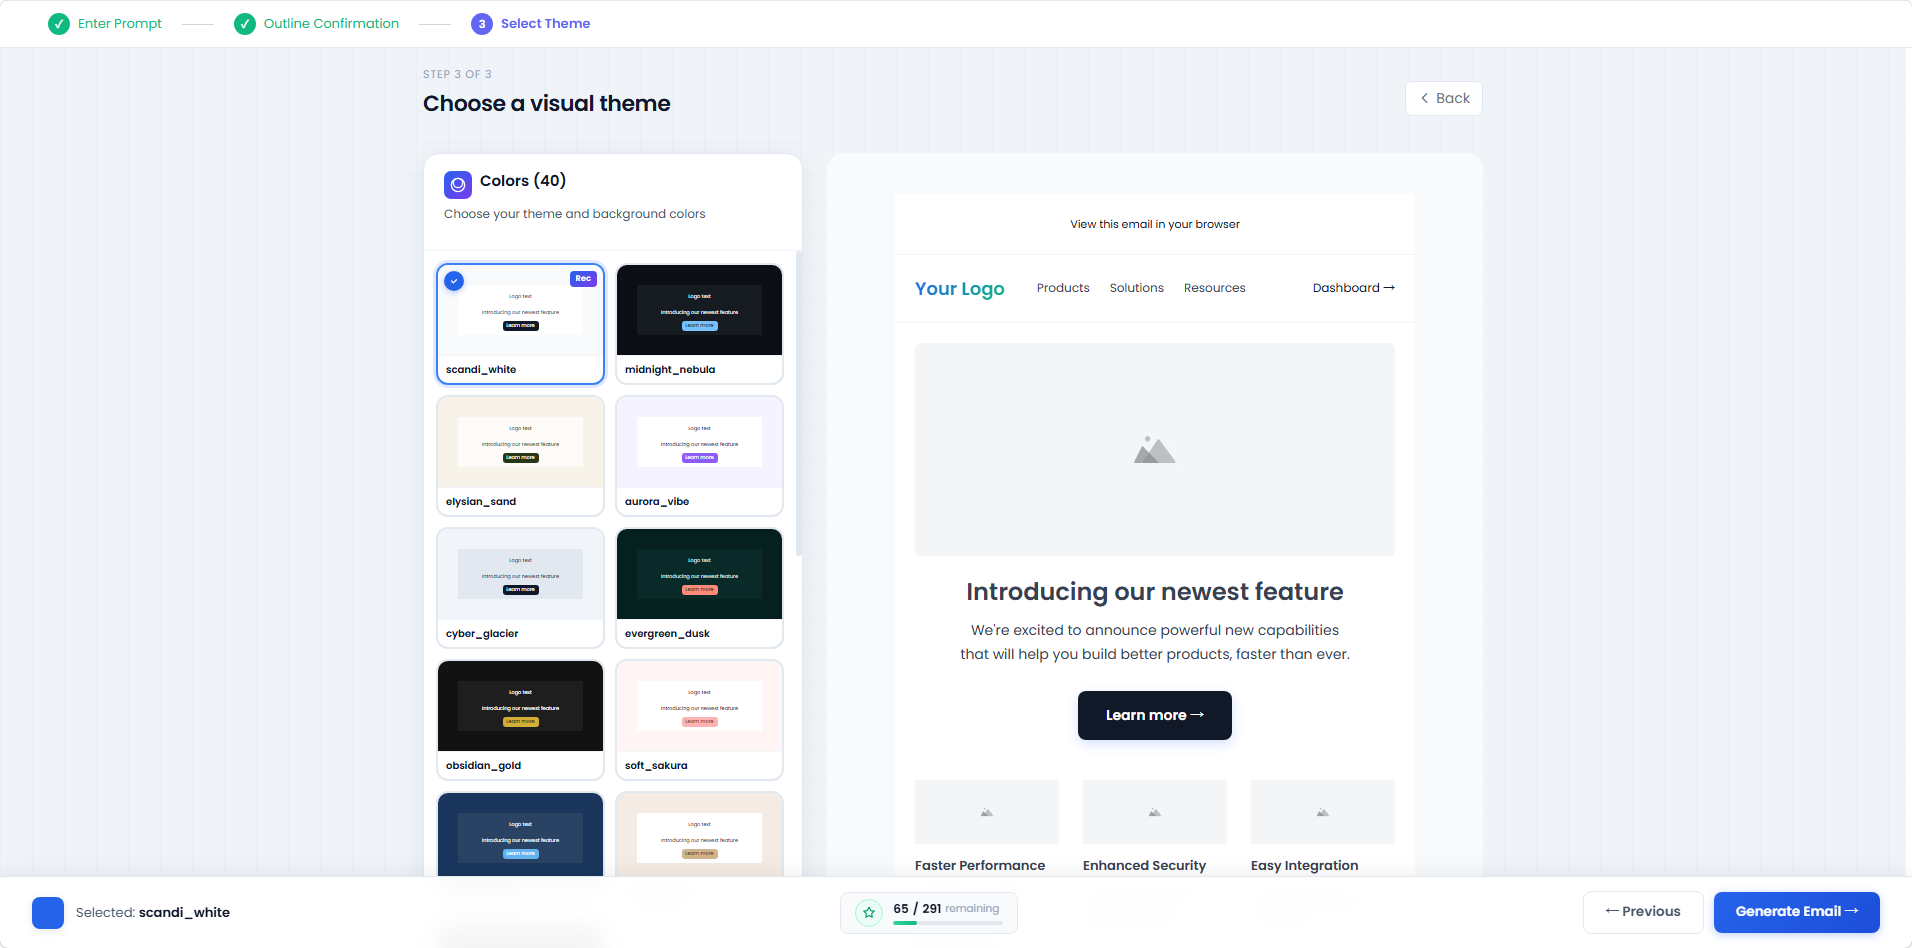
Step 3: Select Theme
Choose from the preset color themes (such as scandi_white, midnight_nebula); the theme library keeps growing.
The right panel previews the email under the selected theme in real time. Click "Generate Email" to generate the email.
Generation in progress
While generating, a banner at the top of the canvas reminds you not to close or leave the current tab. AI generates content and images block by block following the outline; the progress panel on the left shows the status of each block as the canvas fills in gradually.
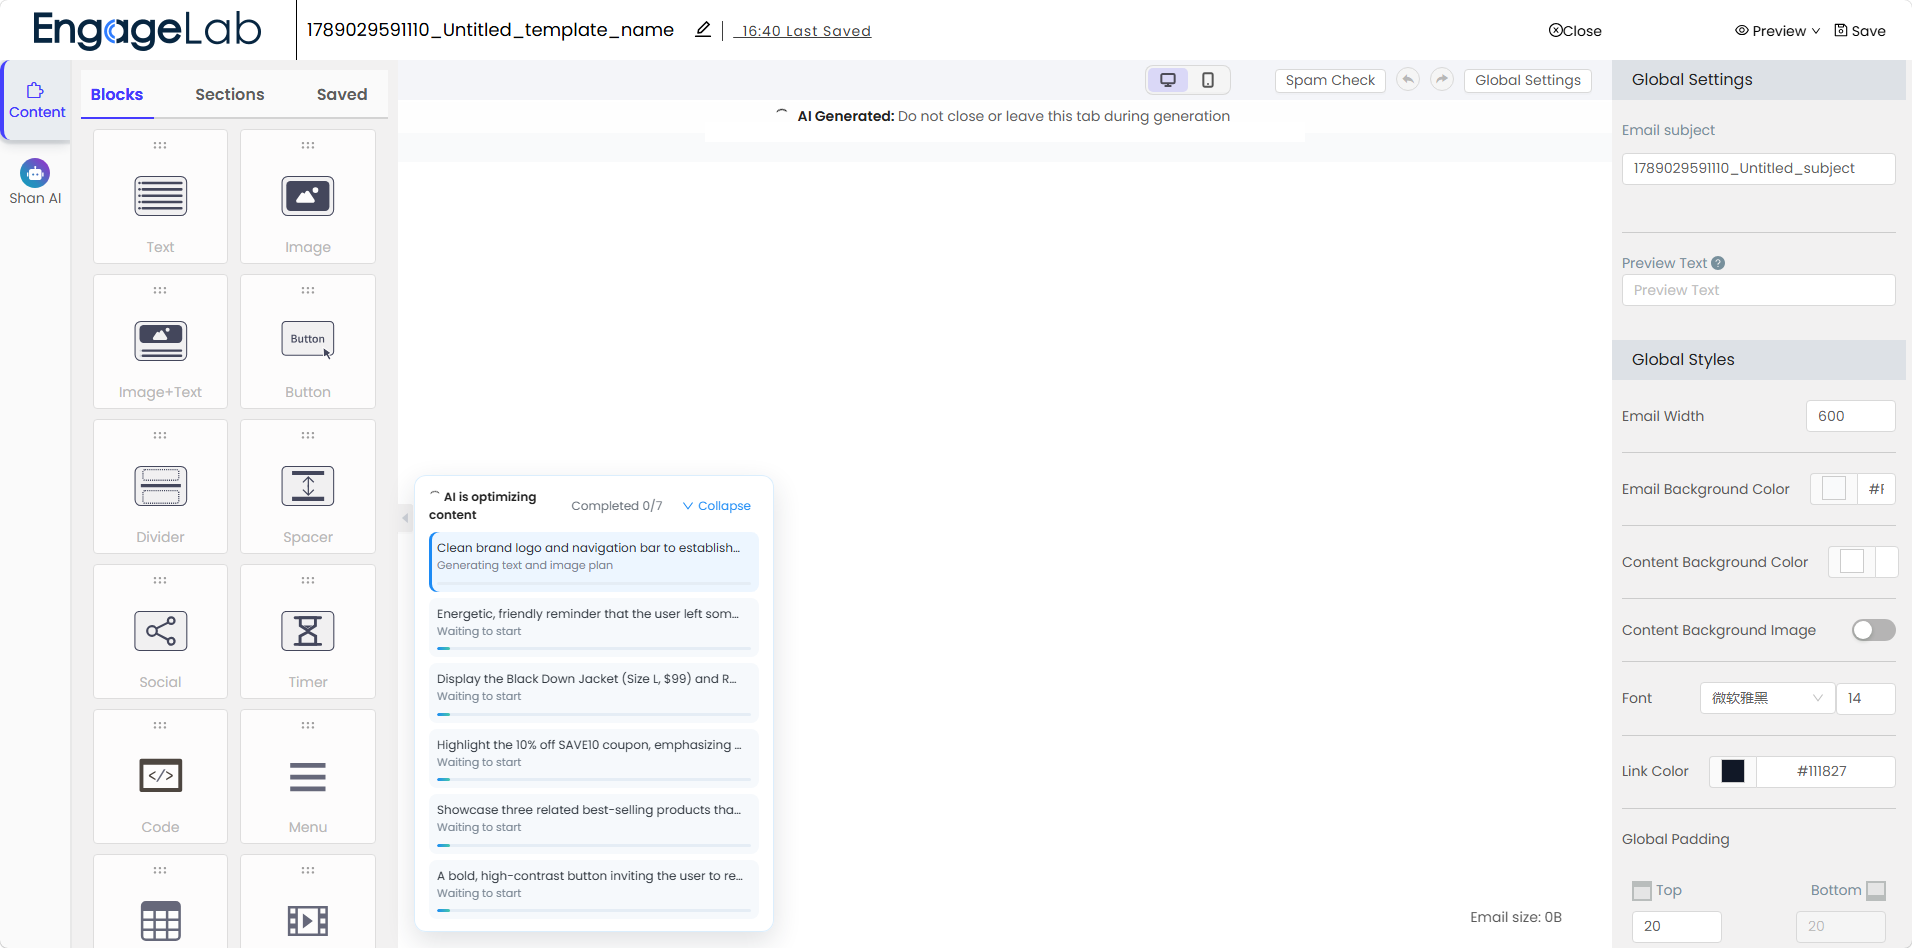
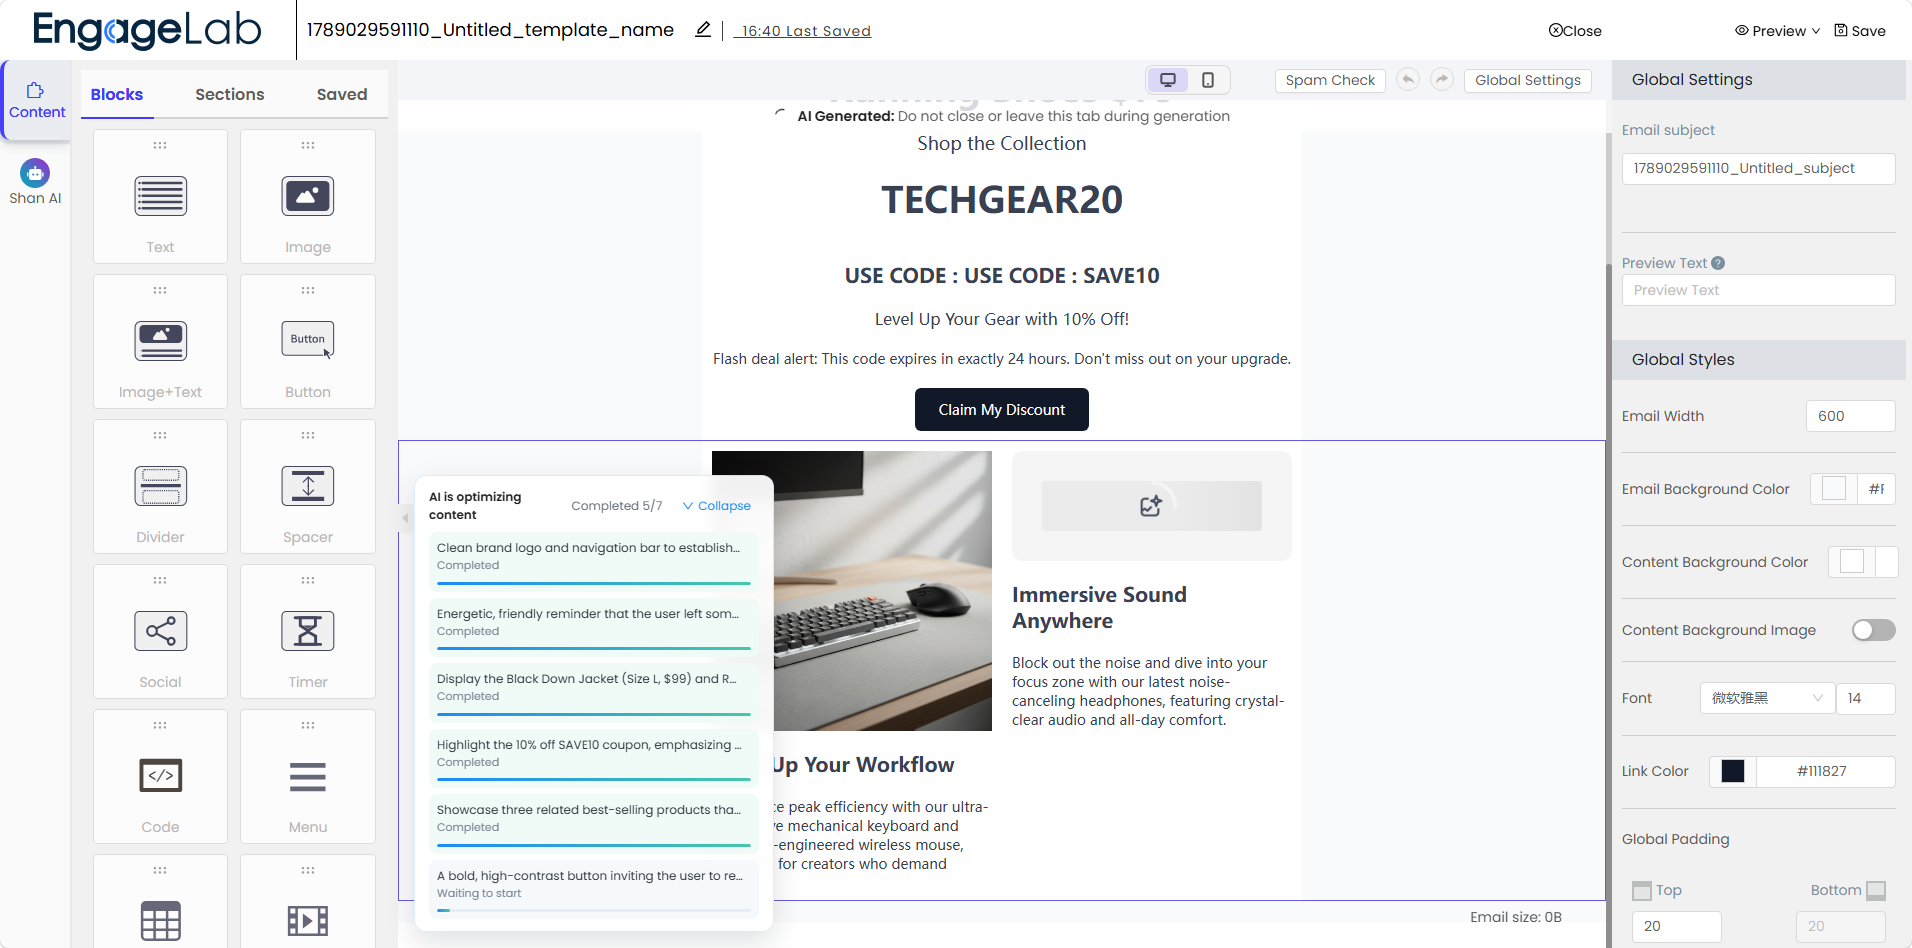
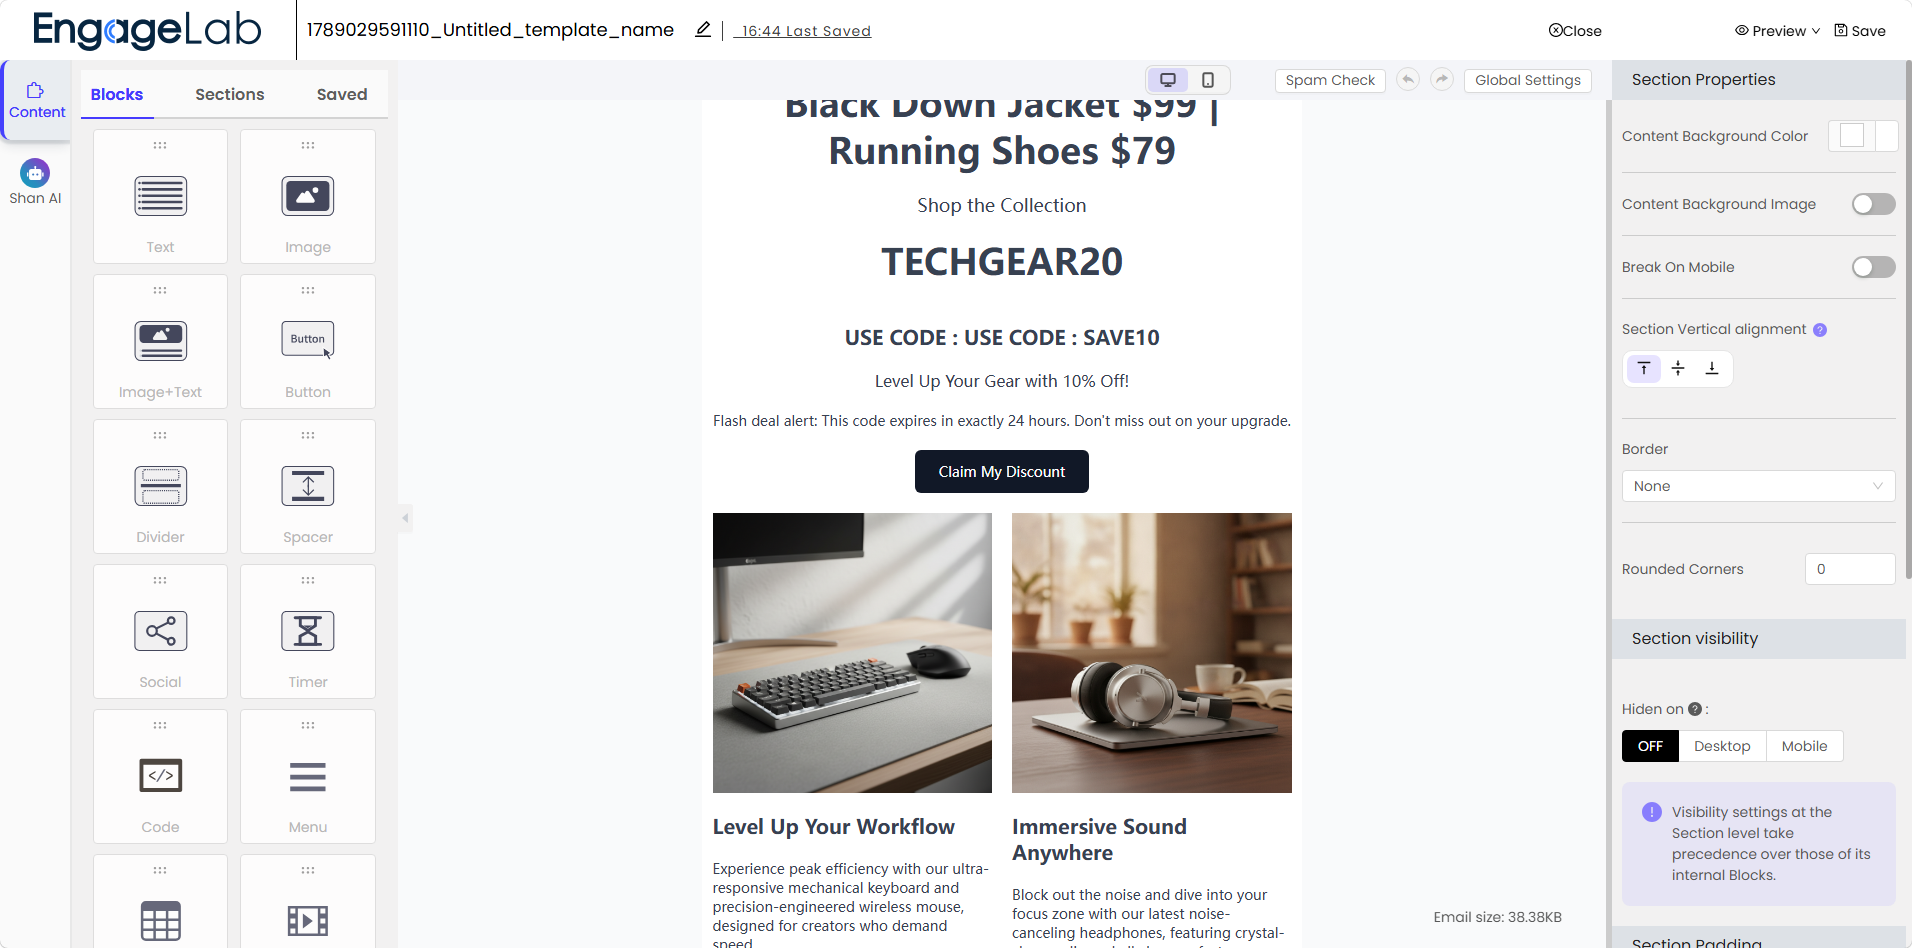
When generation completes, the email opens in the workspace as a regular editable email, and you can keep refining it with blocks, Sections, global settings, and AI editing tools.
2. AI Rewrite
Use AI to modify selected content or Sections within the workspace. After selecting a Section or block, give AI instructions through the "Edit: Section" dialog — besides custom descriptions, quick actions are available:
| Category | Example actions |
|---|---|
| Writing | Improve writing, Fix spelling, Make shorter, Make longer, Simplify, Add urgency |
| Layout | Try new layout, Two columns, Add CTA |
| Visual | Make more visual, Add image |
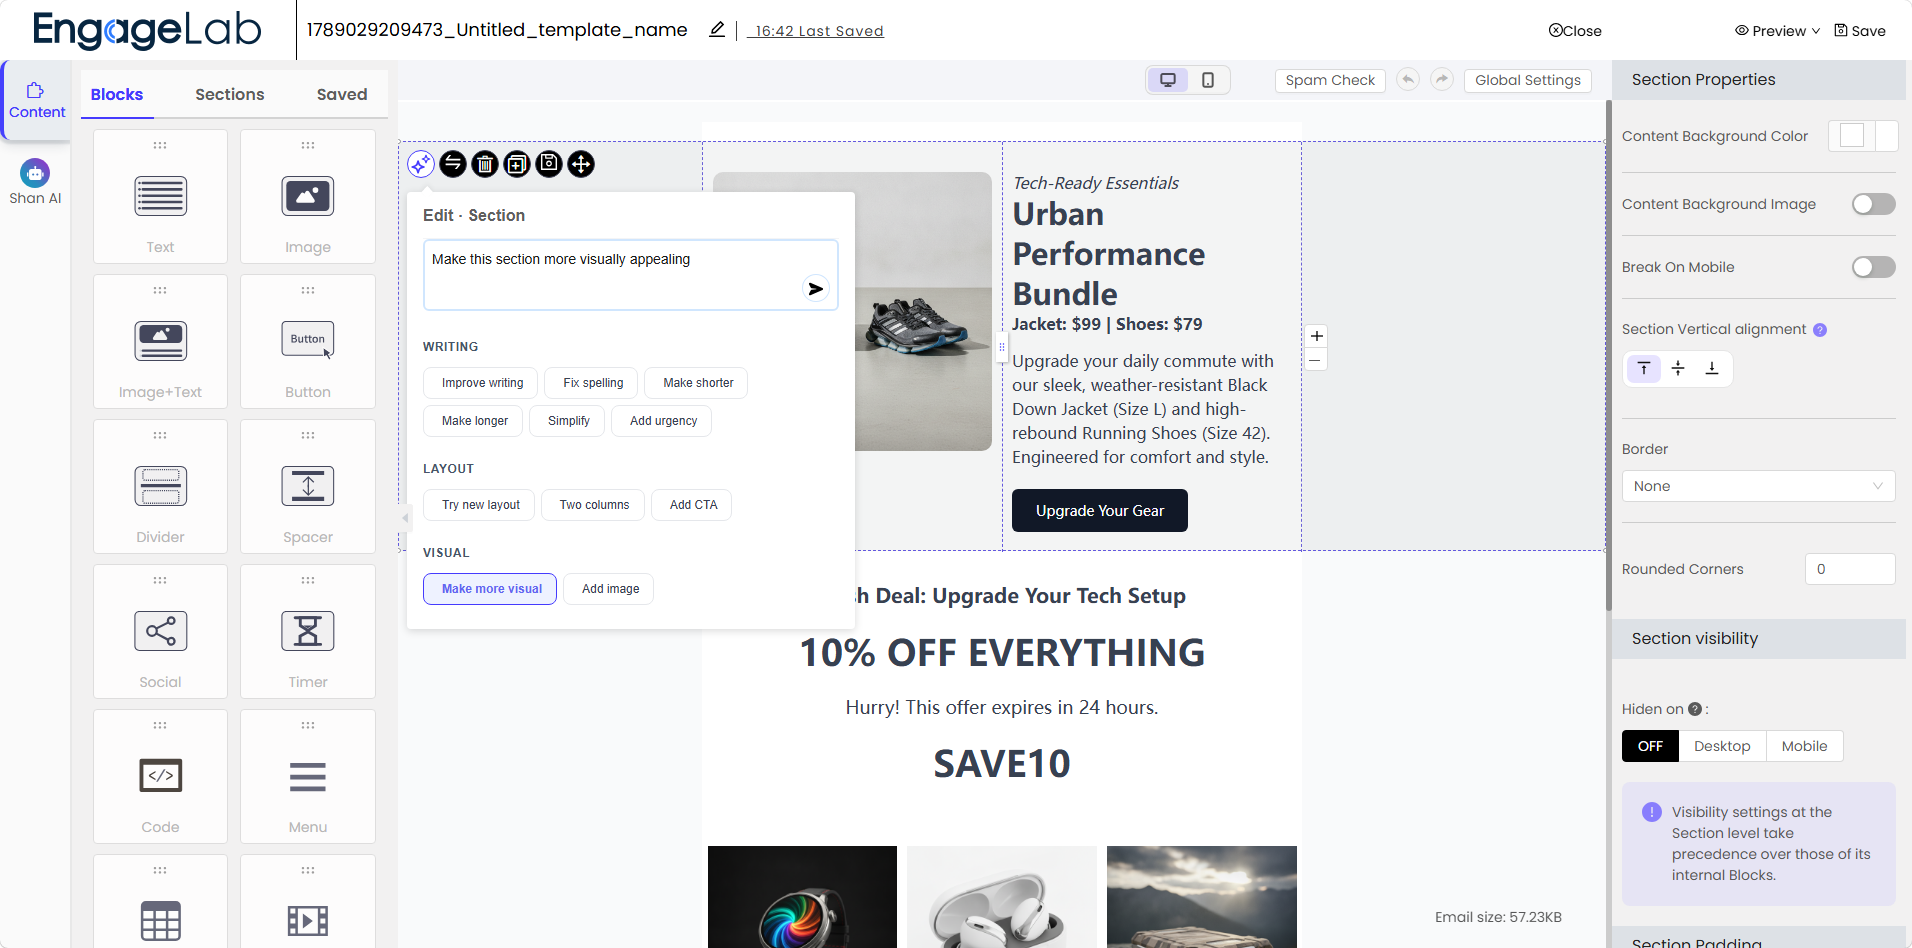
AI Rewrite is especially useful when you already have a draft and only want to improve parts of it rather than rebuild the entire email.
3. AI Conversation
The AI panel (Shan AI) in the left navigation supports conversational interaction with AI, and offers one-click quick actions:
Image Generation
Generate Preview Text
Generate Email Title
Write Email Paragraphs
Create Marketing Emails
Polish Copy
The panel shows both the Original and Modified versions so you can compare results before applying changes.
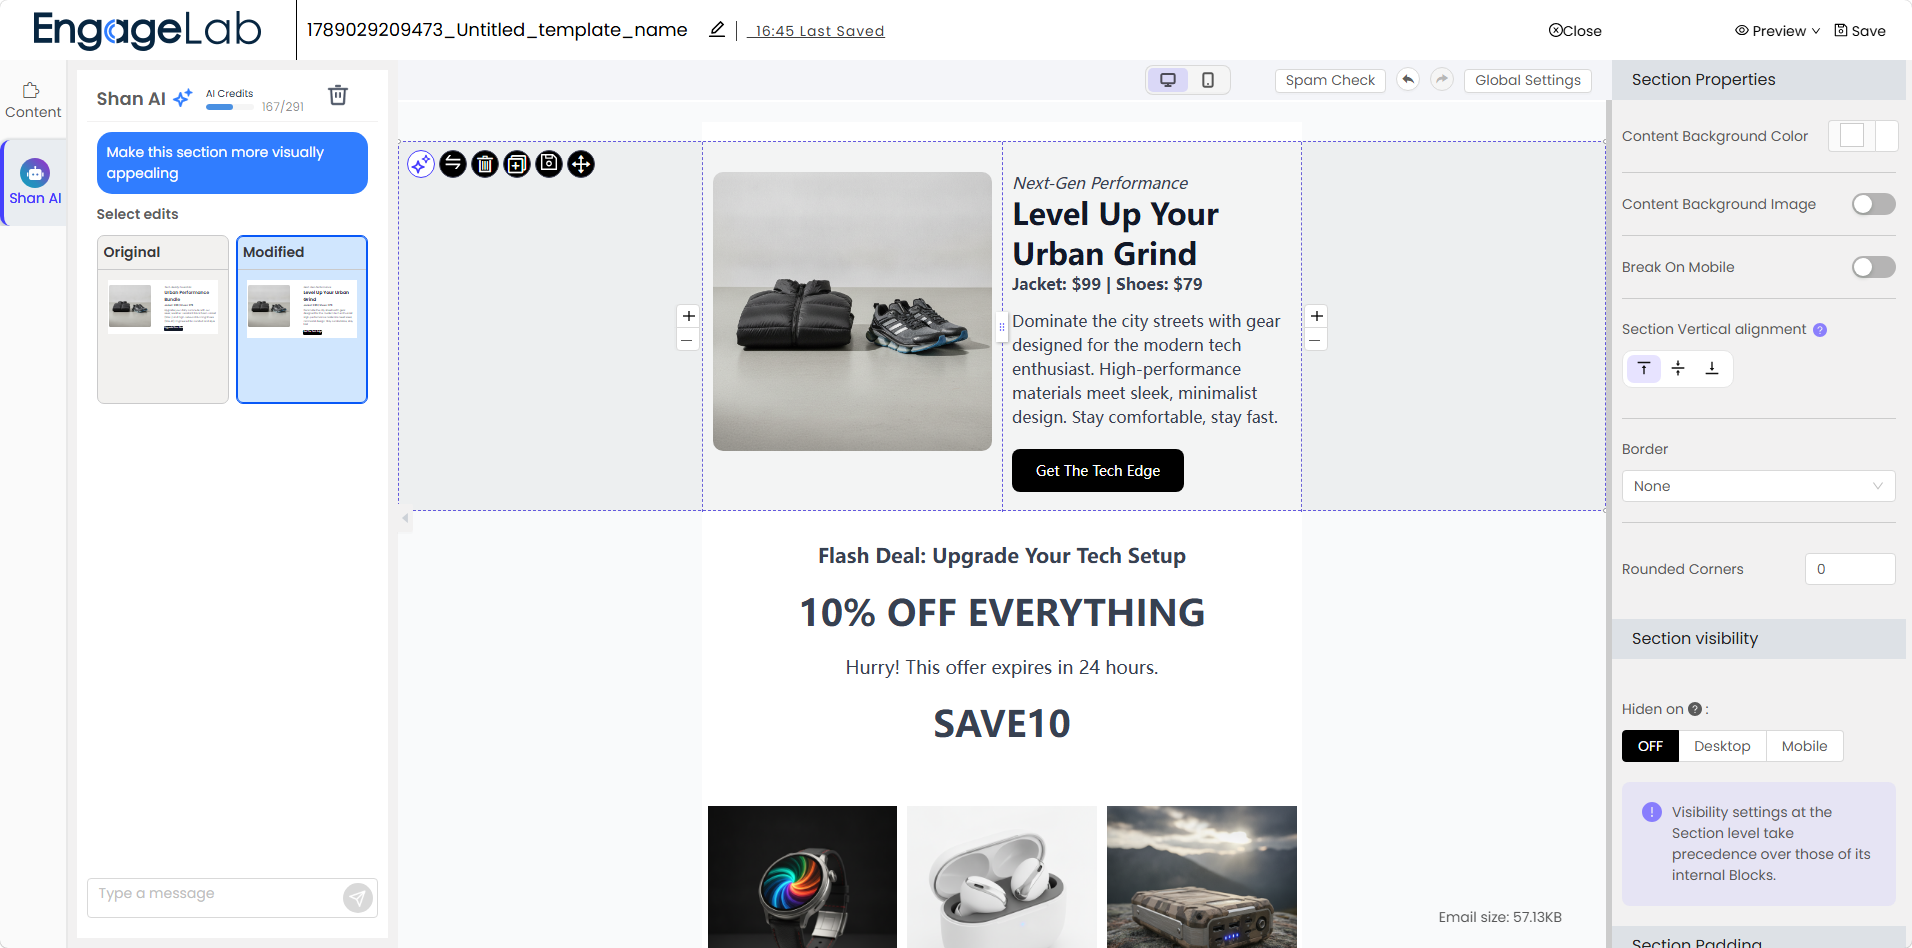
4. AI image editing
When an image is selected, AI-assisted image operations may be offered, such as:
Remove background;
Upscale;
Remove text;
Generate or replace image content based on prompts.
AI Credits
AI features are billed in credits (AI Credits):
Consumption: AI operations — including AI Create (generating the outline and the email, regenerating the outline), AI Rewrite, AI Conversation, and AI image generation — consume credits. Image modifications and text modifications cost about 2 credits each, while a complete AI email creation flow costs about 20 credits. Actual consumption is shown on the page in real time.
Balance: Your remaining credits are displayed in real time during steps such as outline generation and theme selection, and at the top of the Shan AI panel in the editor.
