Twilio
LiveDesk supports adding a WhatsApp channel so users can communicate with customers. Three API provider options are available: WhatsApp Cloud Service, Twilio, and EngageLab WhatsApp. Below is an explanation of how to add Twilio.
Prerequisites
- Create a Twilio account.
- Have a valid phone number.
There are two ways to use Twilio with LiveDesk:
- Standard method, with no Messaging Service required
- Messaging Service method
Standard Method
Create a Twilio Account
- Log in to your Twilio account, then click "Create a new account."
Fill in all required fields and complete the account creation process.
Copy the Account SID, Auth Token, and phone number. If you have not yet added a phone number to your Twilio account, add one first.
Add a Channel in LiveDesk
Enter Configuration Information
Enter the Account SID, Auth Token, and phone number obtained in the previous step. Define the channel name, then click Confirm after completing the configuration. The interface will return a webhook URL.
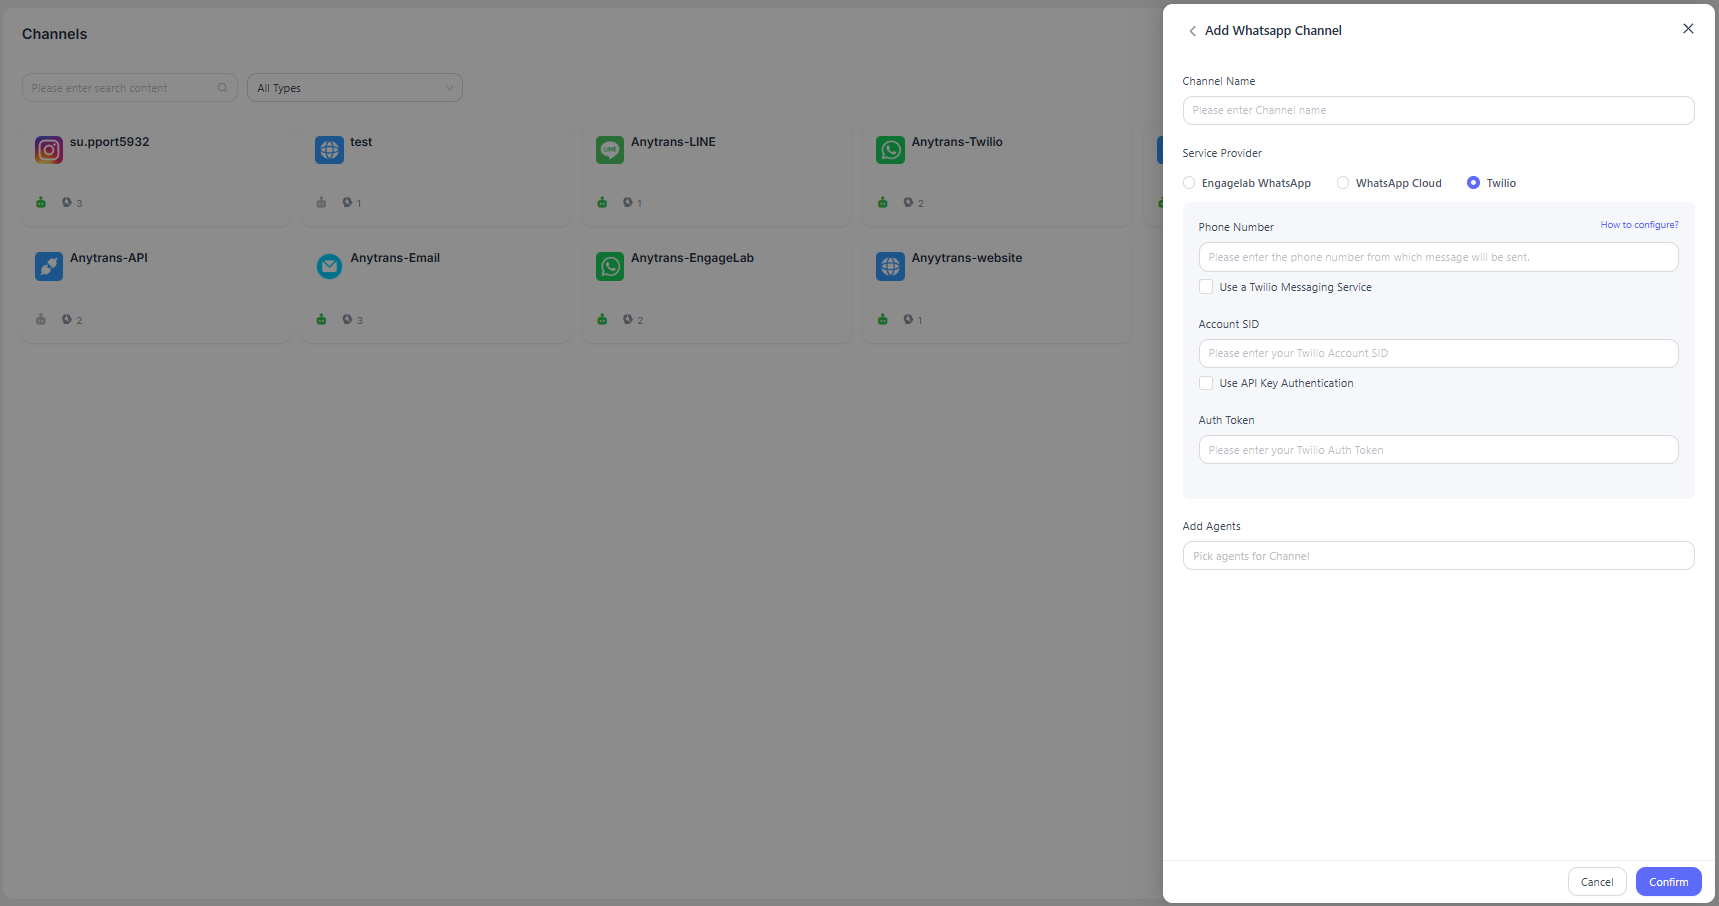
Go to the Twilio Console, select "Integration," paste the webhook URL, and then click "Save." You can now start sending WhatsApp messages through LiveDesk.
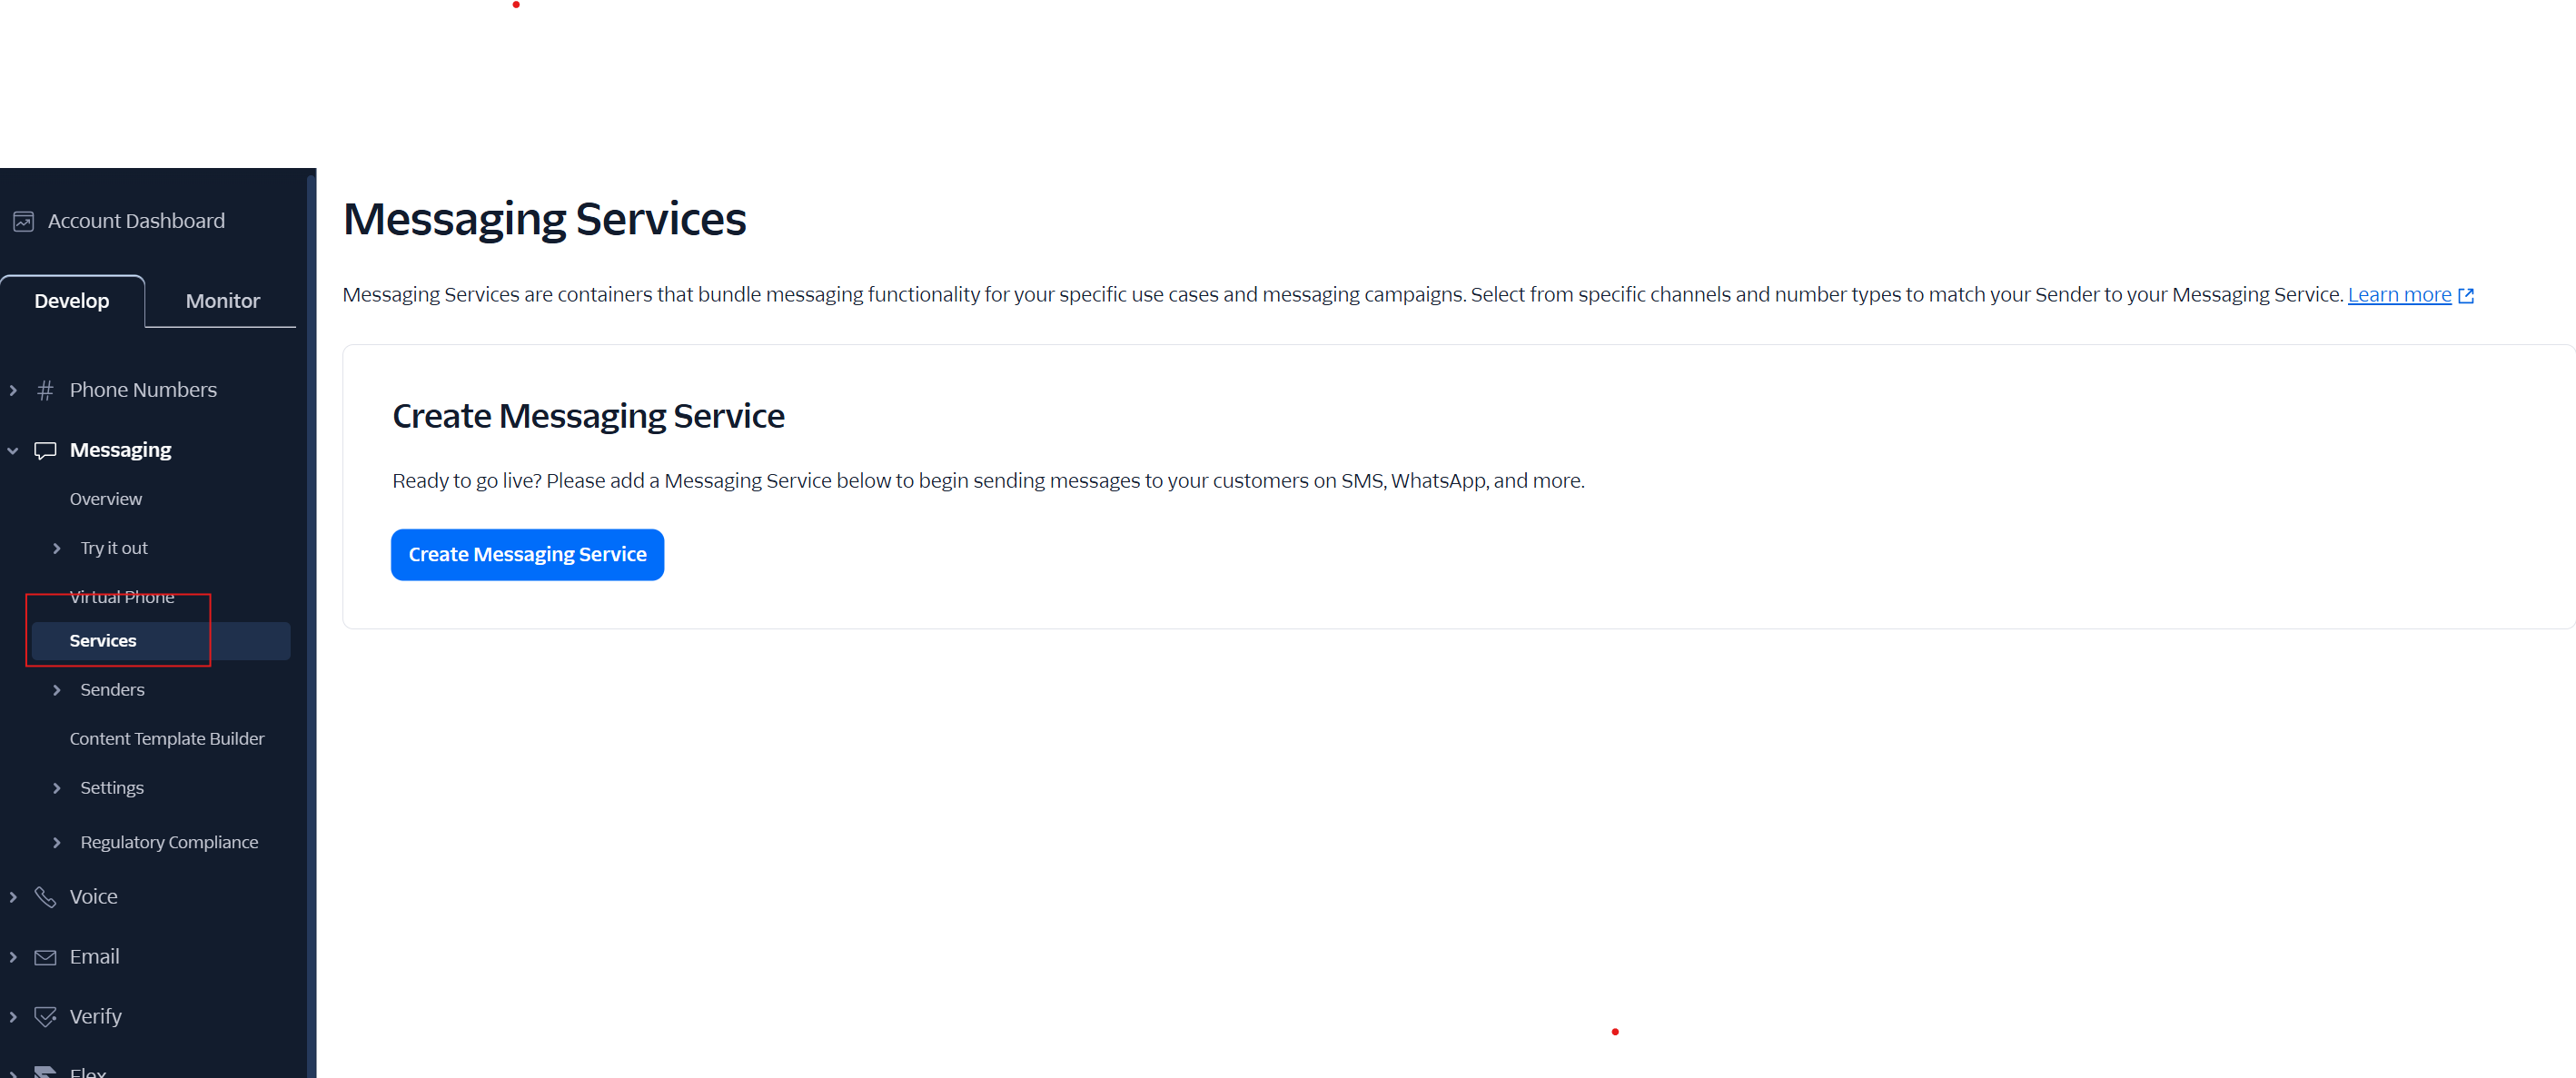
Set Up the Twilio Messaging Service Method
Create a Twilio Messaging Service
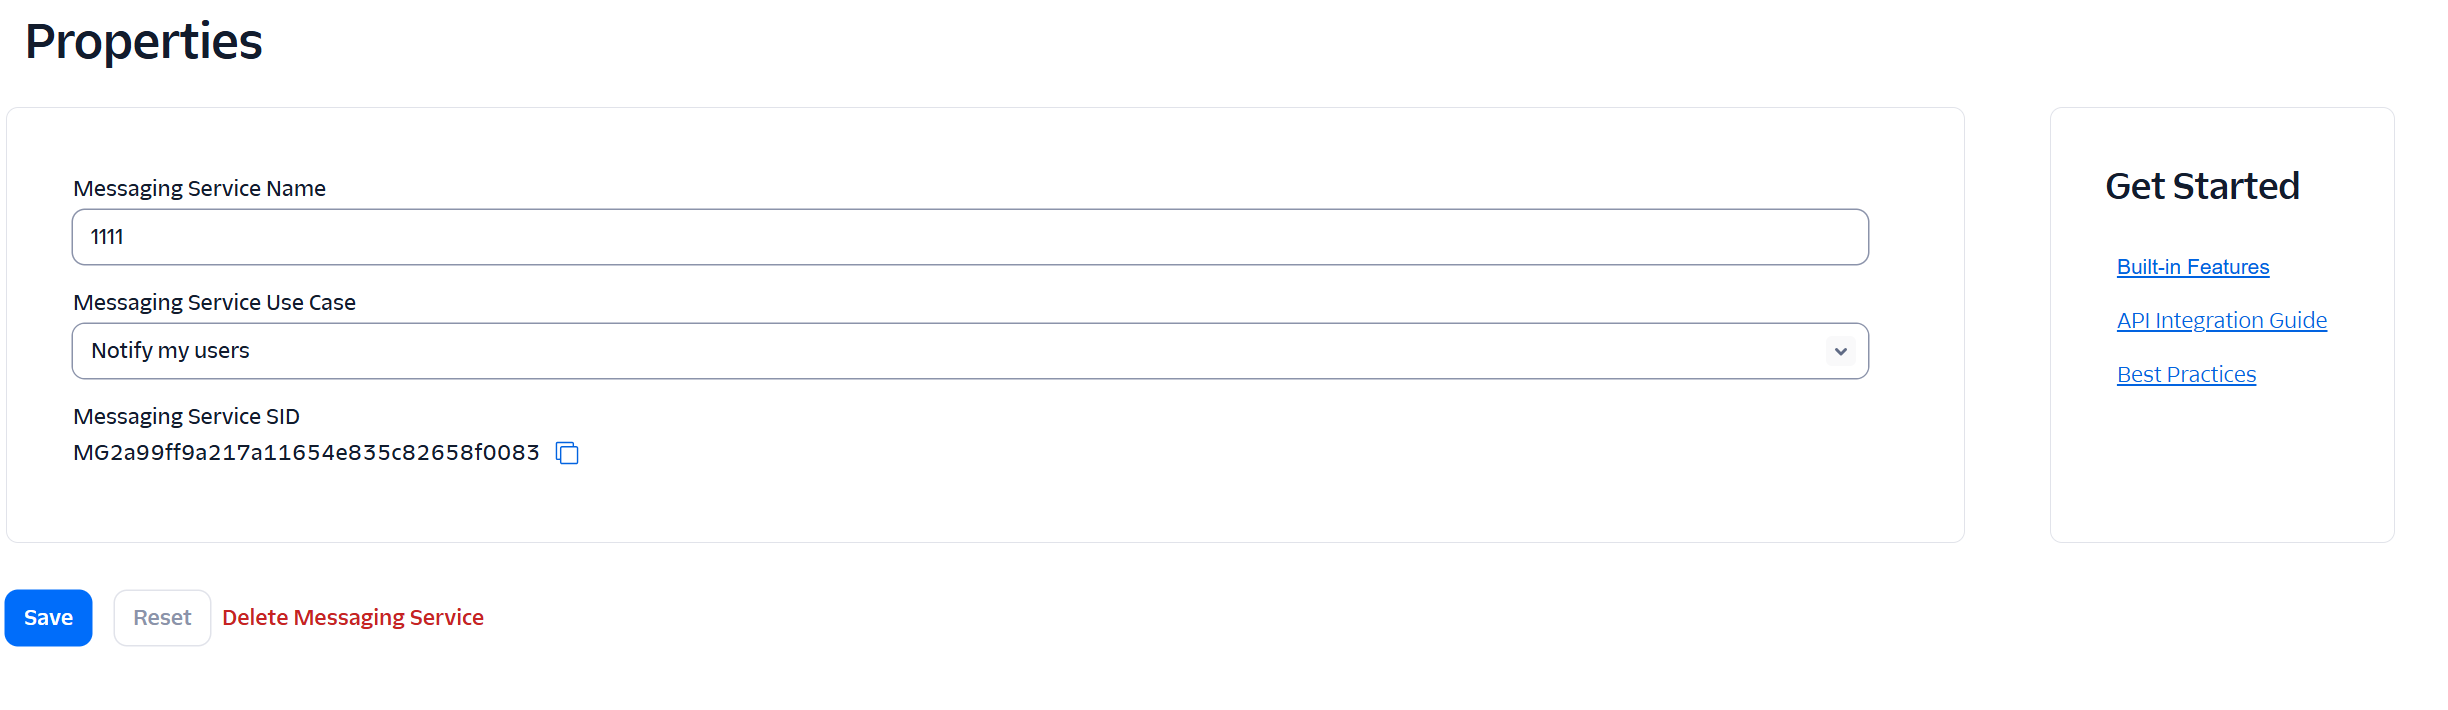
- Select "Messaging" > "Services," then click the "Create Messaging Service" button.
- Fill in all required fields by following the subsequent steps. Copy the corresponding Messaging Service SID, then click "Save."
Add a Channel in LiveDesk
Log in to your LiveDesk account. When creating a WhatsApp channel, select the "Use Twilio Messaging Service" checkbox. Then copy and paste the Account SID, Messaging Service SID, and token into the corresponding fields.
In the Twilio Console, go to "Messaging" > "Services" > "Integration," then paste the webhook URL generated in the previous step. You can now start sending WhatsApp messages through LiveDesk.
Detailed Settings
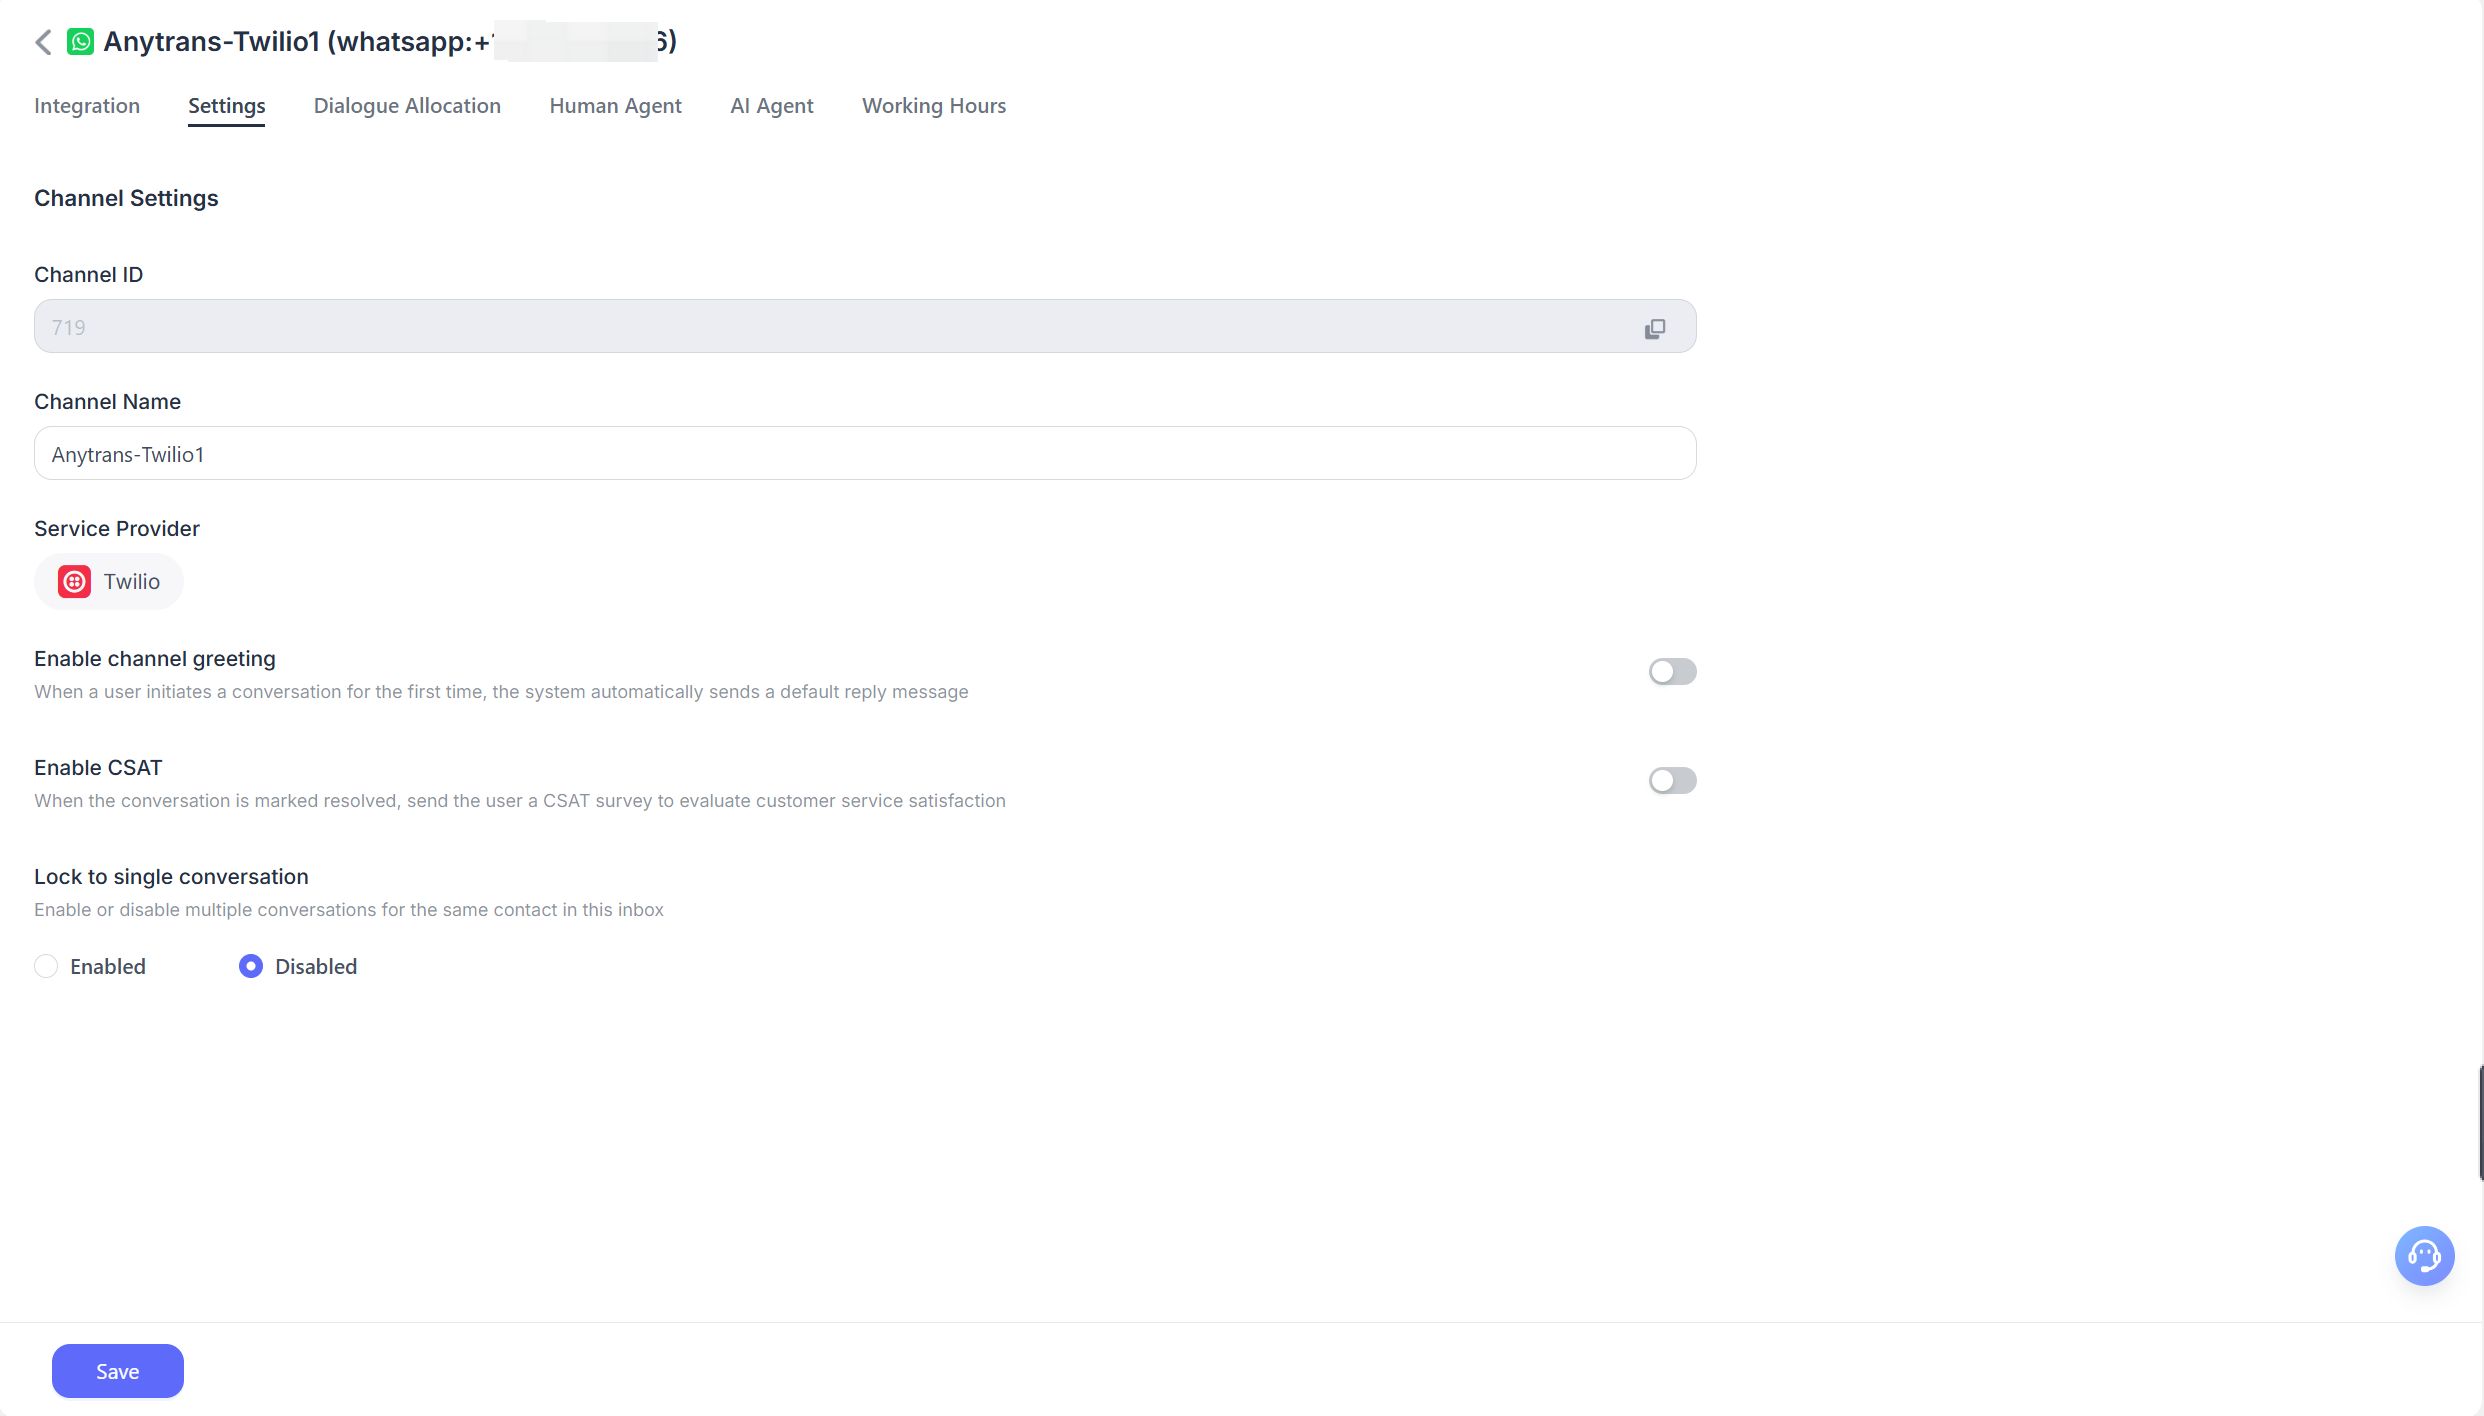
After creating the channel, you can configure detailed settings in the corresponding channel.
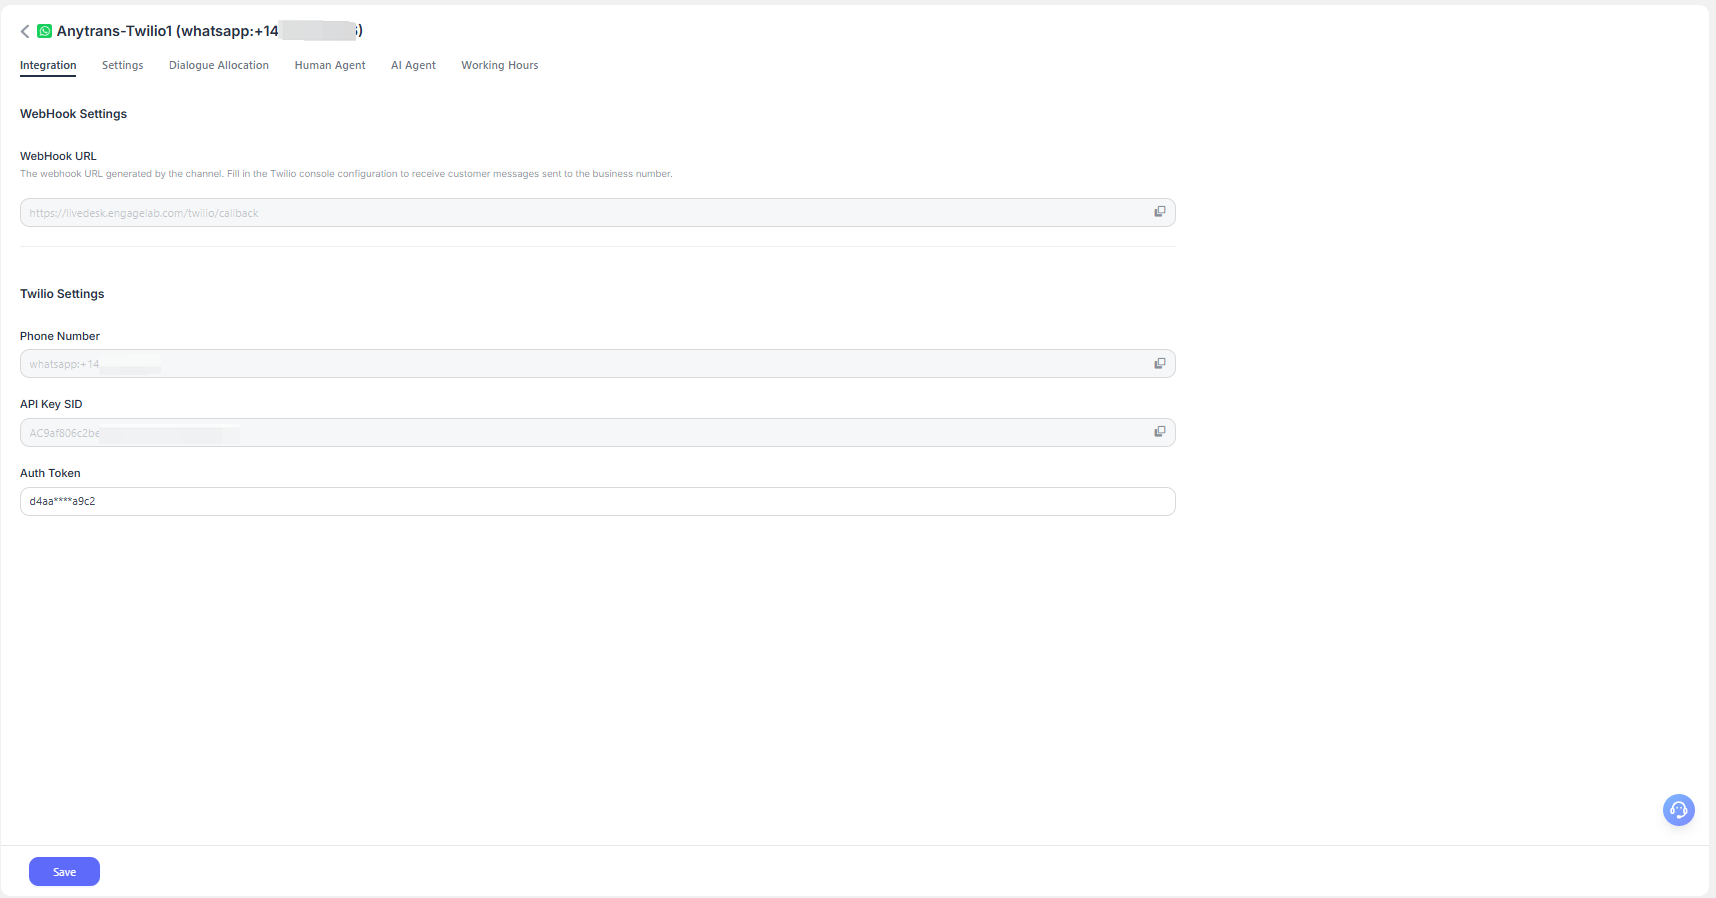
Integration
WebHook URL
The WebHook URL generated after the channel is created is used to enable sending and receiving message push notifications. You only need to enter it in the corresponding settings in the Twilio Console.
Twilio Settings
Phone number: Displays the corresponding WhatsApp sender number
API Key SID: The key SID entered when creating the channel
Auth Token: The authentication token entered when creating the channel
Settings
Set Channel Greeting Message
Disabled by default. Enter a custom greeting message, which will be sent automatically to customers when they start a conversation.
Enable CSAT
After this feature is enabled, a customer satisfaction survey is launched automatically each time an issue is resolved. CSAT scores can be viewed later in the Reports section.
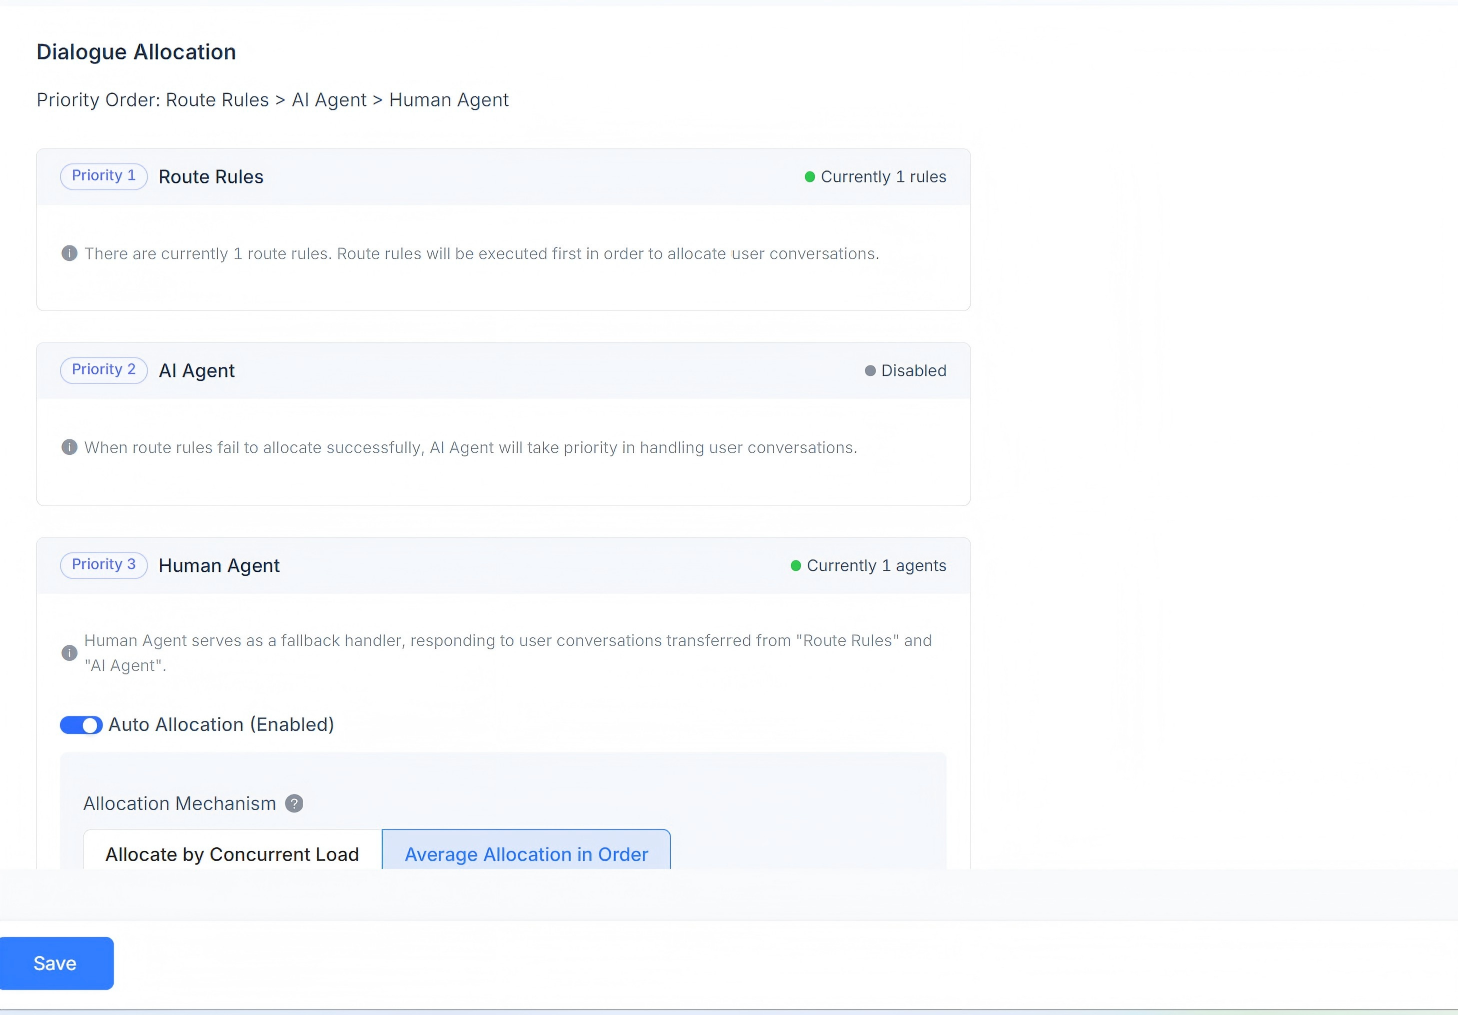
Conversation Assignment
Displays the conversation assignment rules for the current channel. Routing rules, AI Agent, and Human Agent responses are supported. Conversation assignment priority: routing rules > AI Agent > Human Agent.
When routing rules exist, the system first checks whether the routing rule conditions are met. If multiple routing rules exist at the same time, they are evaluated in order, and conversations are assigned according to the first matching rule.
If the current scenario does not meet the routing rule conditions, the conversation is assigned to the AI Agent first.
If there is no AI Agent, the conversation is assigned to the corresponding Human Agent. Automatic assignment is supported, with both load-based assignment and sequential round-robin assignment mechanisms available.
Load-Based Assignment Mechanism
Conversations are assigned based on the defined load capacity, with priority given to agents with lower concurrent workloads.
Sequential Round-Robin Assignment Mechanism
Without considering each agent's load settings, conversations are assigned equally to each agent in sequence.
Custom Agent Load Assignment Mechanism
Set a custom load value separately for each agent, with priority given to agents with lower concurrent workloads.
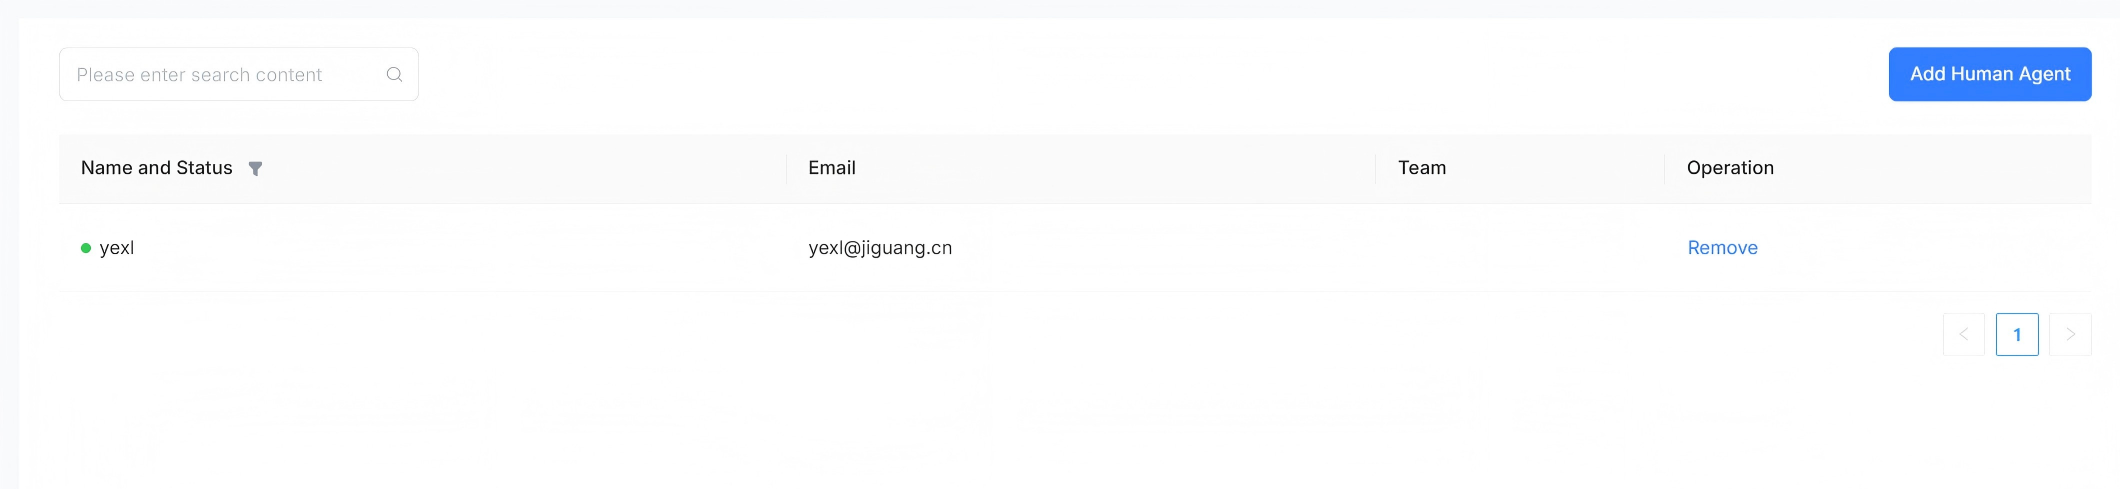
Human Agent
Supports configuring human agents to handle conversation messages for this channel. Agents can be added or removed.
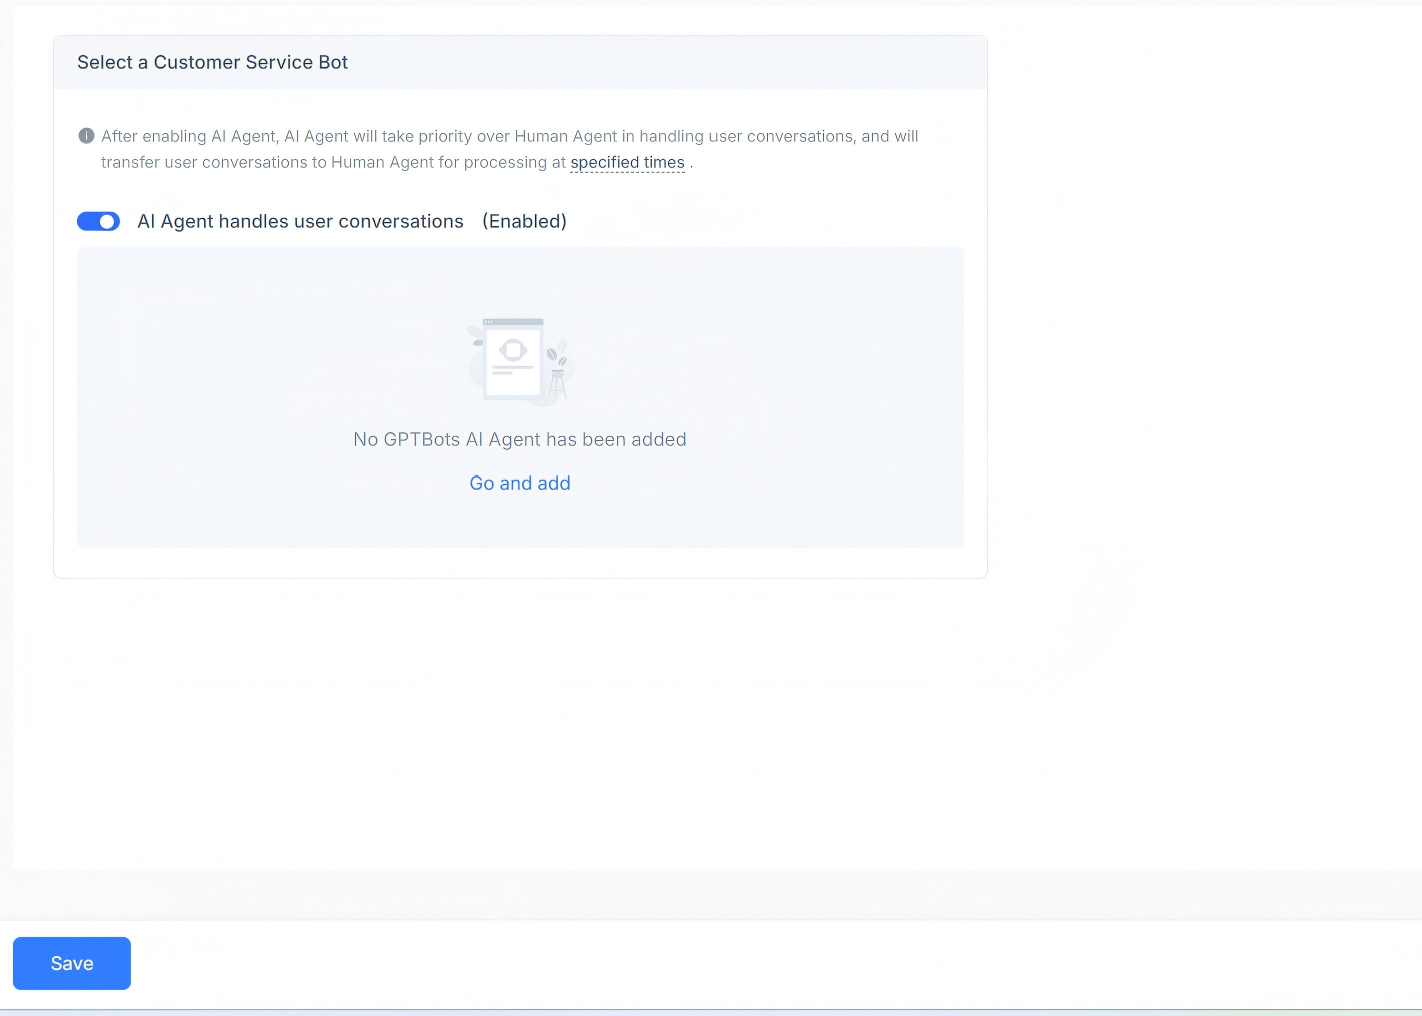
AI Agent
Supports configuring AI agents to handle conversation messages for this channel. You can choose to enable or disable them, and adding a GPT AI Agent is supported.
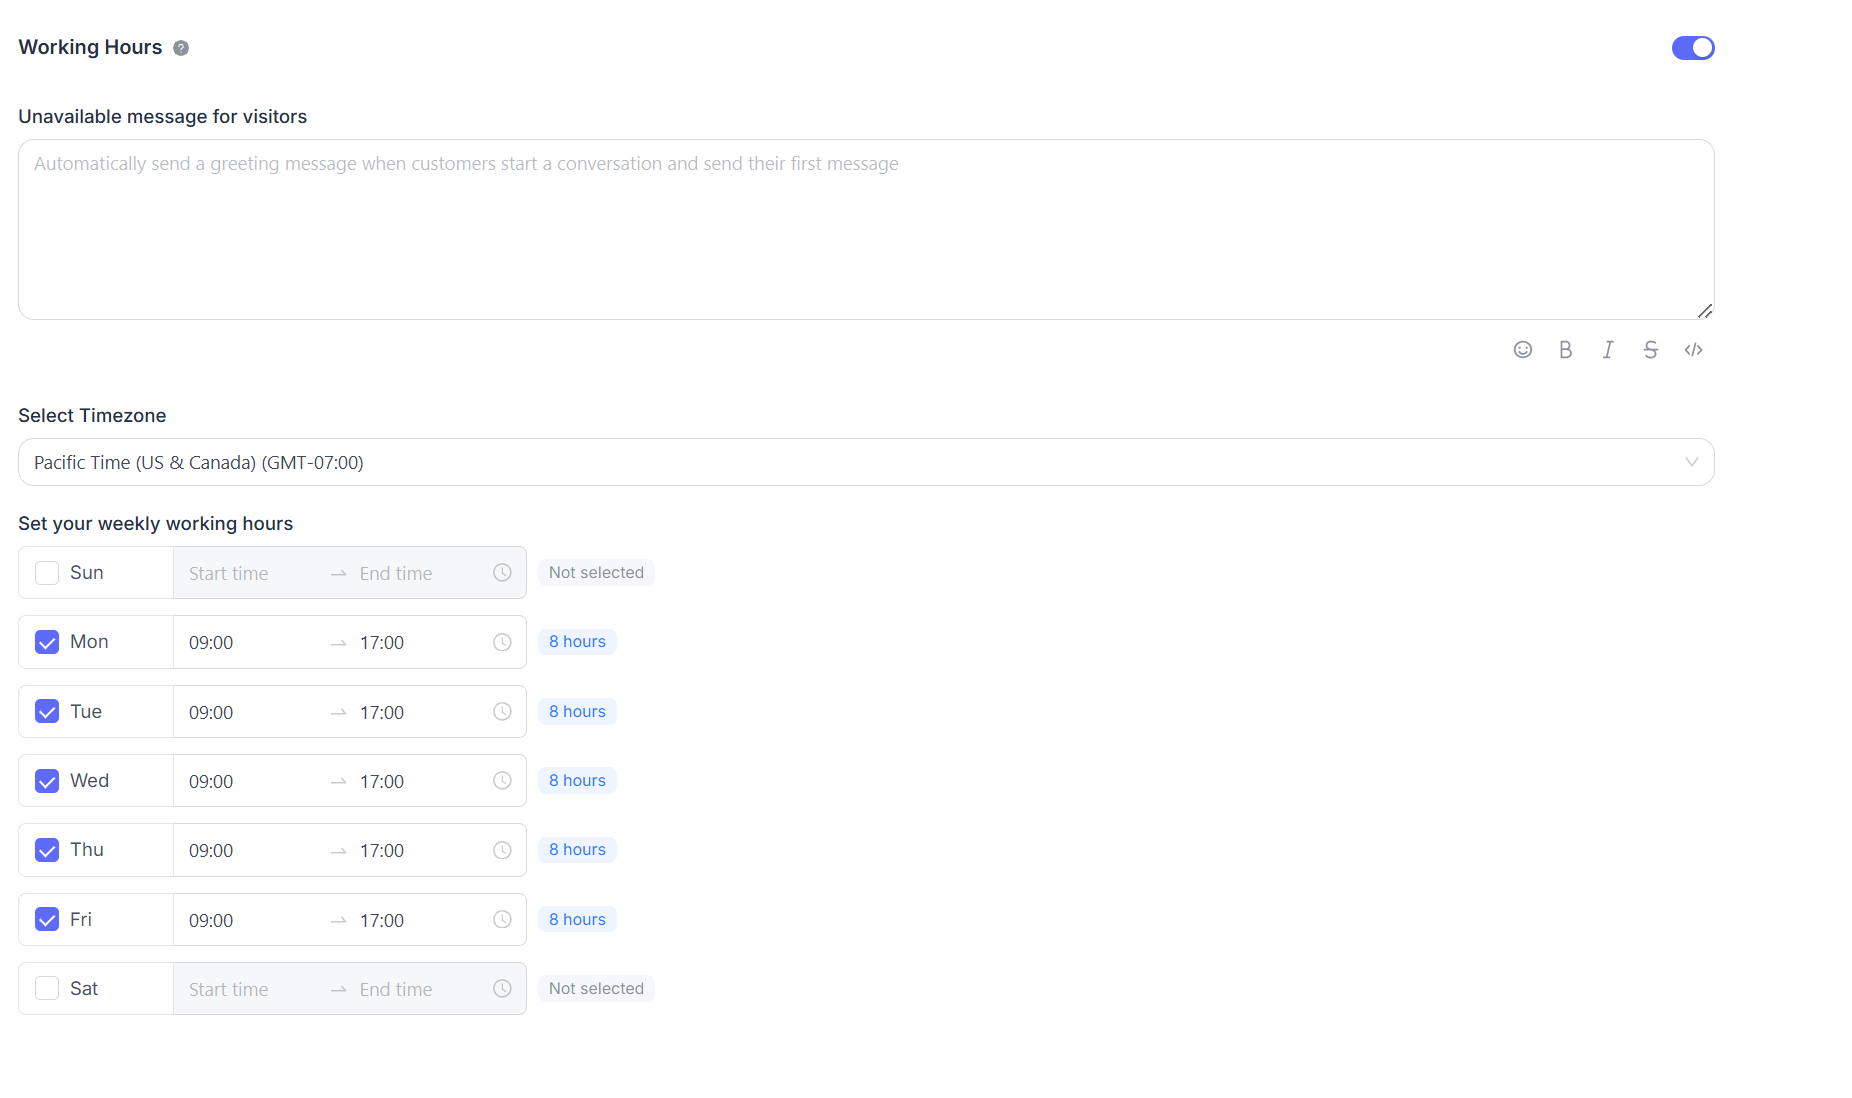
Business Hours
You can set the team's business hours.

If you have clearly defined business hours, select the "Enable business availability for this inbox (enabled)" checkbox. After selecting this option, the corresponding parameter settings are displayed below. You can set an unavailable message for visitors during non-business hours. You can also select business hour time ranges and the corresponding time zone for each day.