WhatsApp Cloud
WhatsApp Cloud is supported by LiveDesk, allowing users to add a WhatsApp channel to communicate with customers. Three API provider options are available: WhatsApp Cloud, Twilio, and EngageLab WhatsApp. The following explains how to add WhatsApp Cloud.
Prerequisites
- You need a Meta Developer account to set up the WhatsApp API. If you do not already have an account, create one and apply as required.
- A valid phone number.
Create a WhatsApp Business Account
The WhatsApp Cloud API is available to all businesses and individual developers. Because it is hosted on Meta's cloud infrastructure, there is no longer a need to use third-party providers (business solution providers) such as Twilio, Zendesk, 360Dialog, or MessageBird to host the WhatsApp Business API.
- Set up a business profile
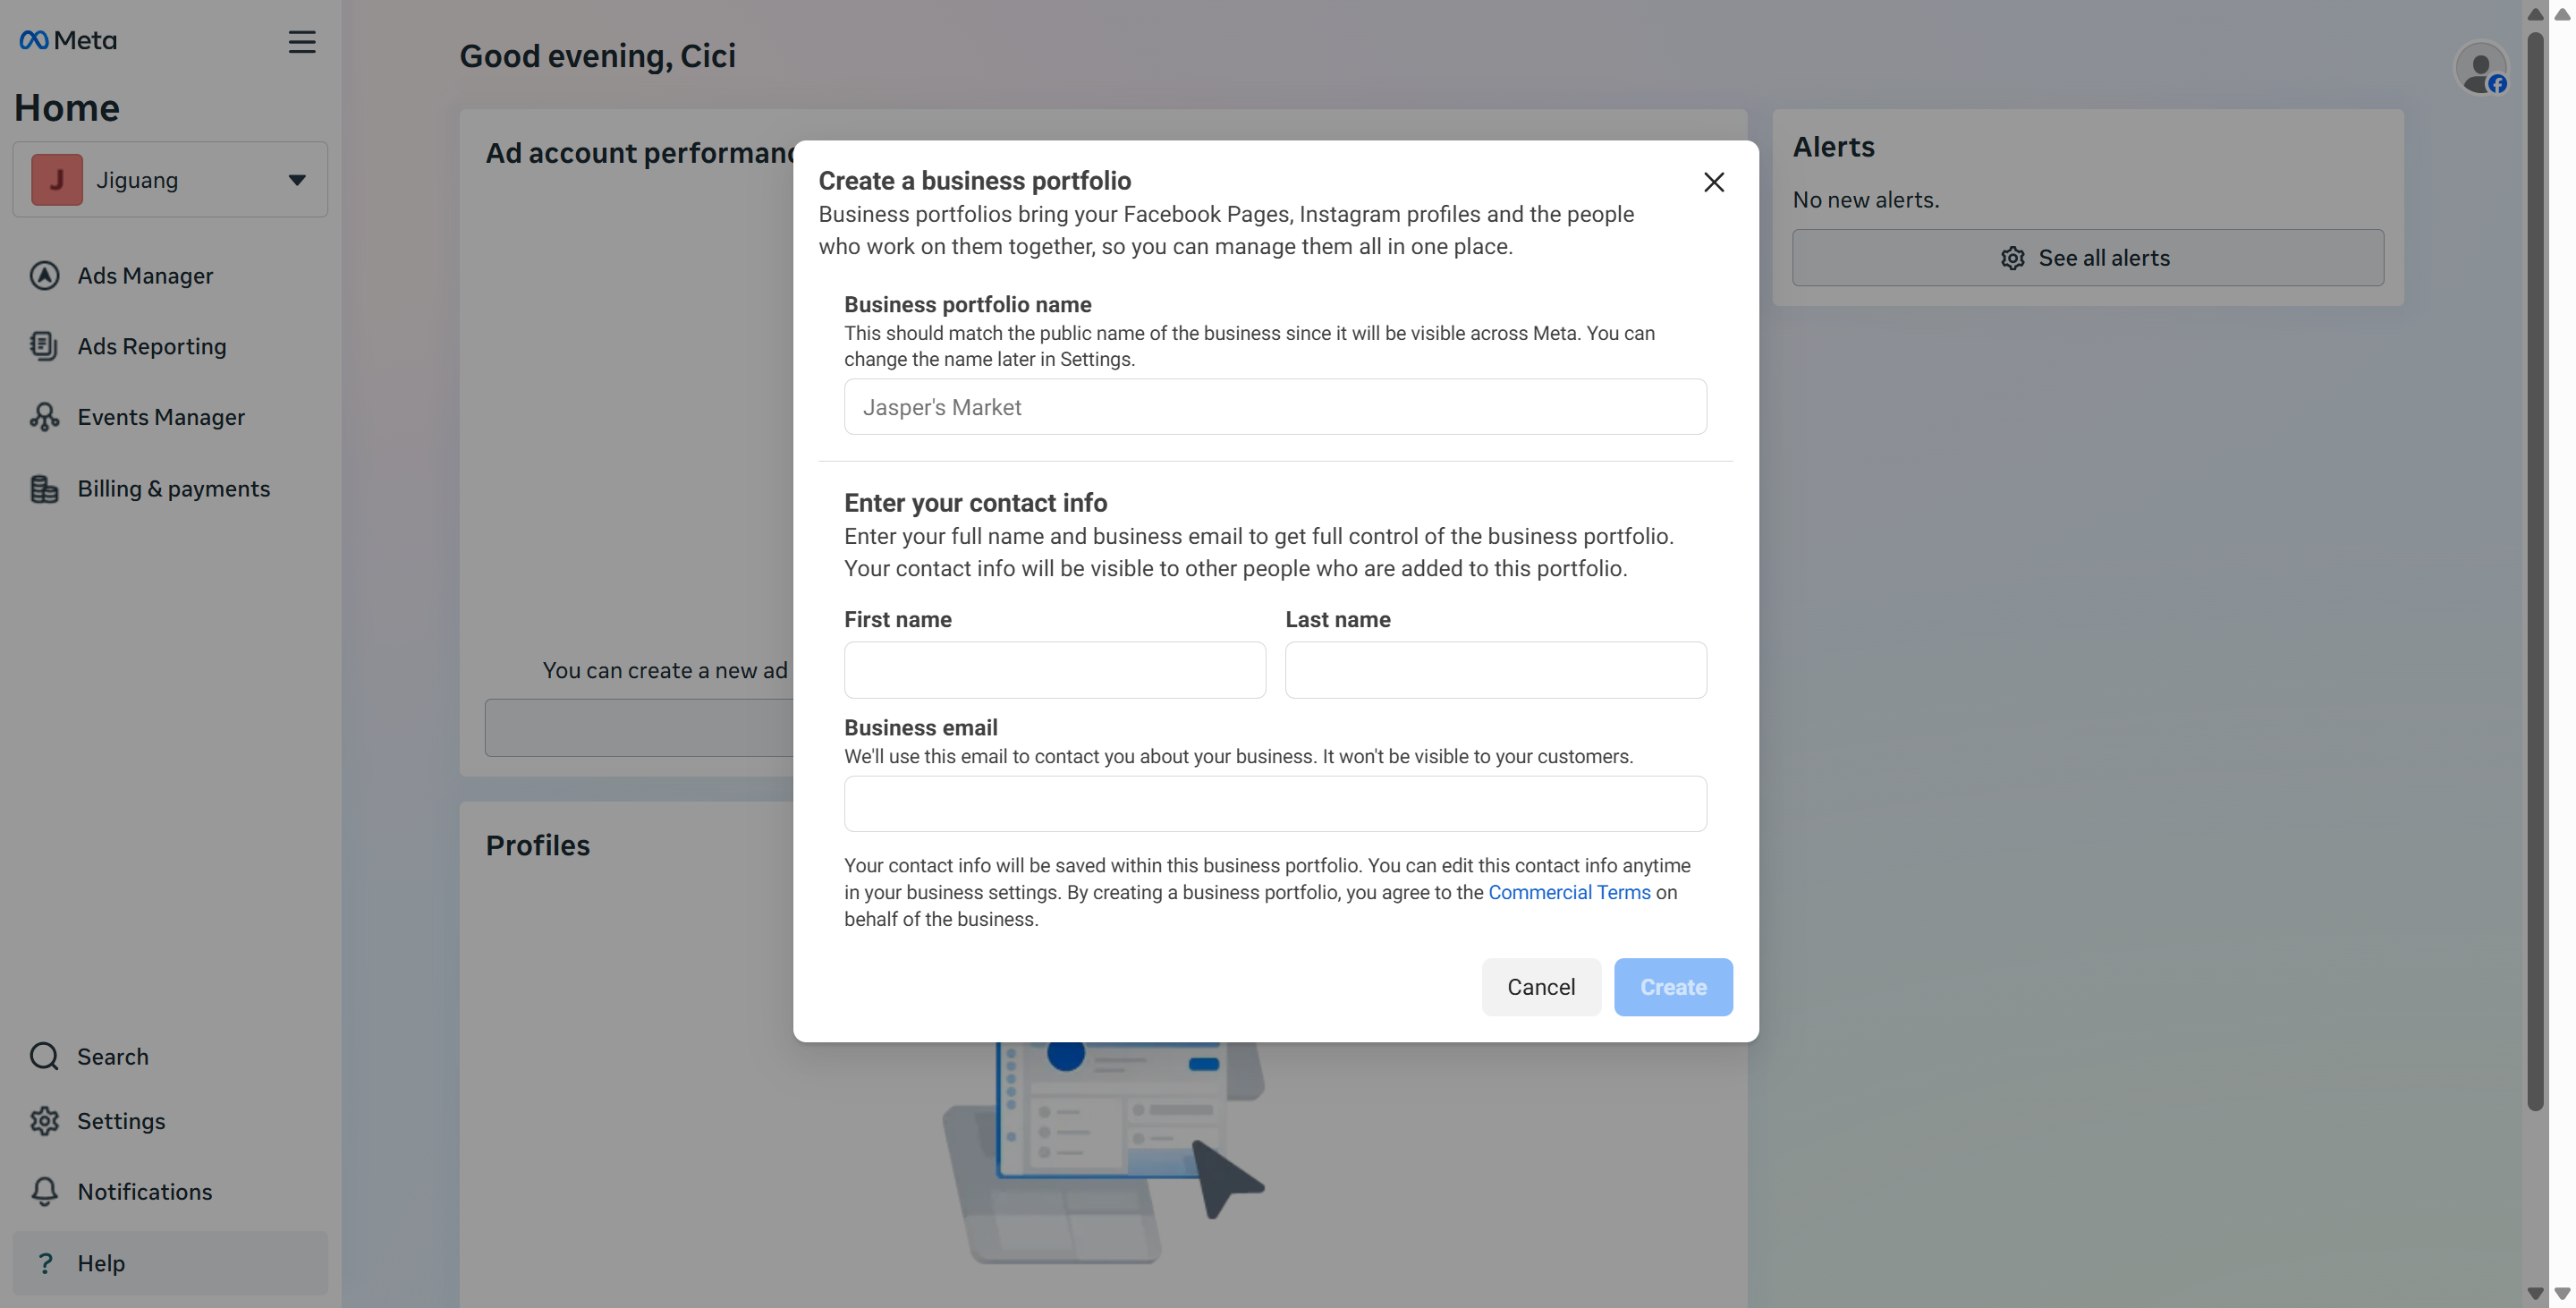
Create a professional WhatsApp Business account that includes your company name, profile, and contact information. Log in to the Meta Business Platform, then click the "Create Business Portfolio" button in the drop-down menu under "Home."
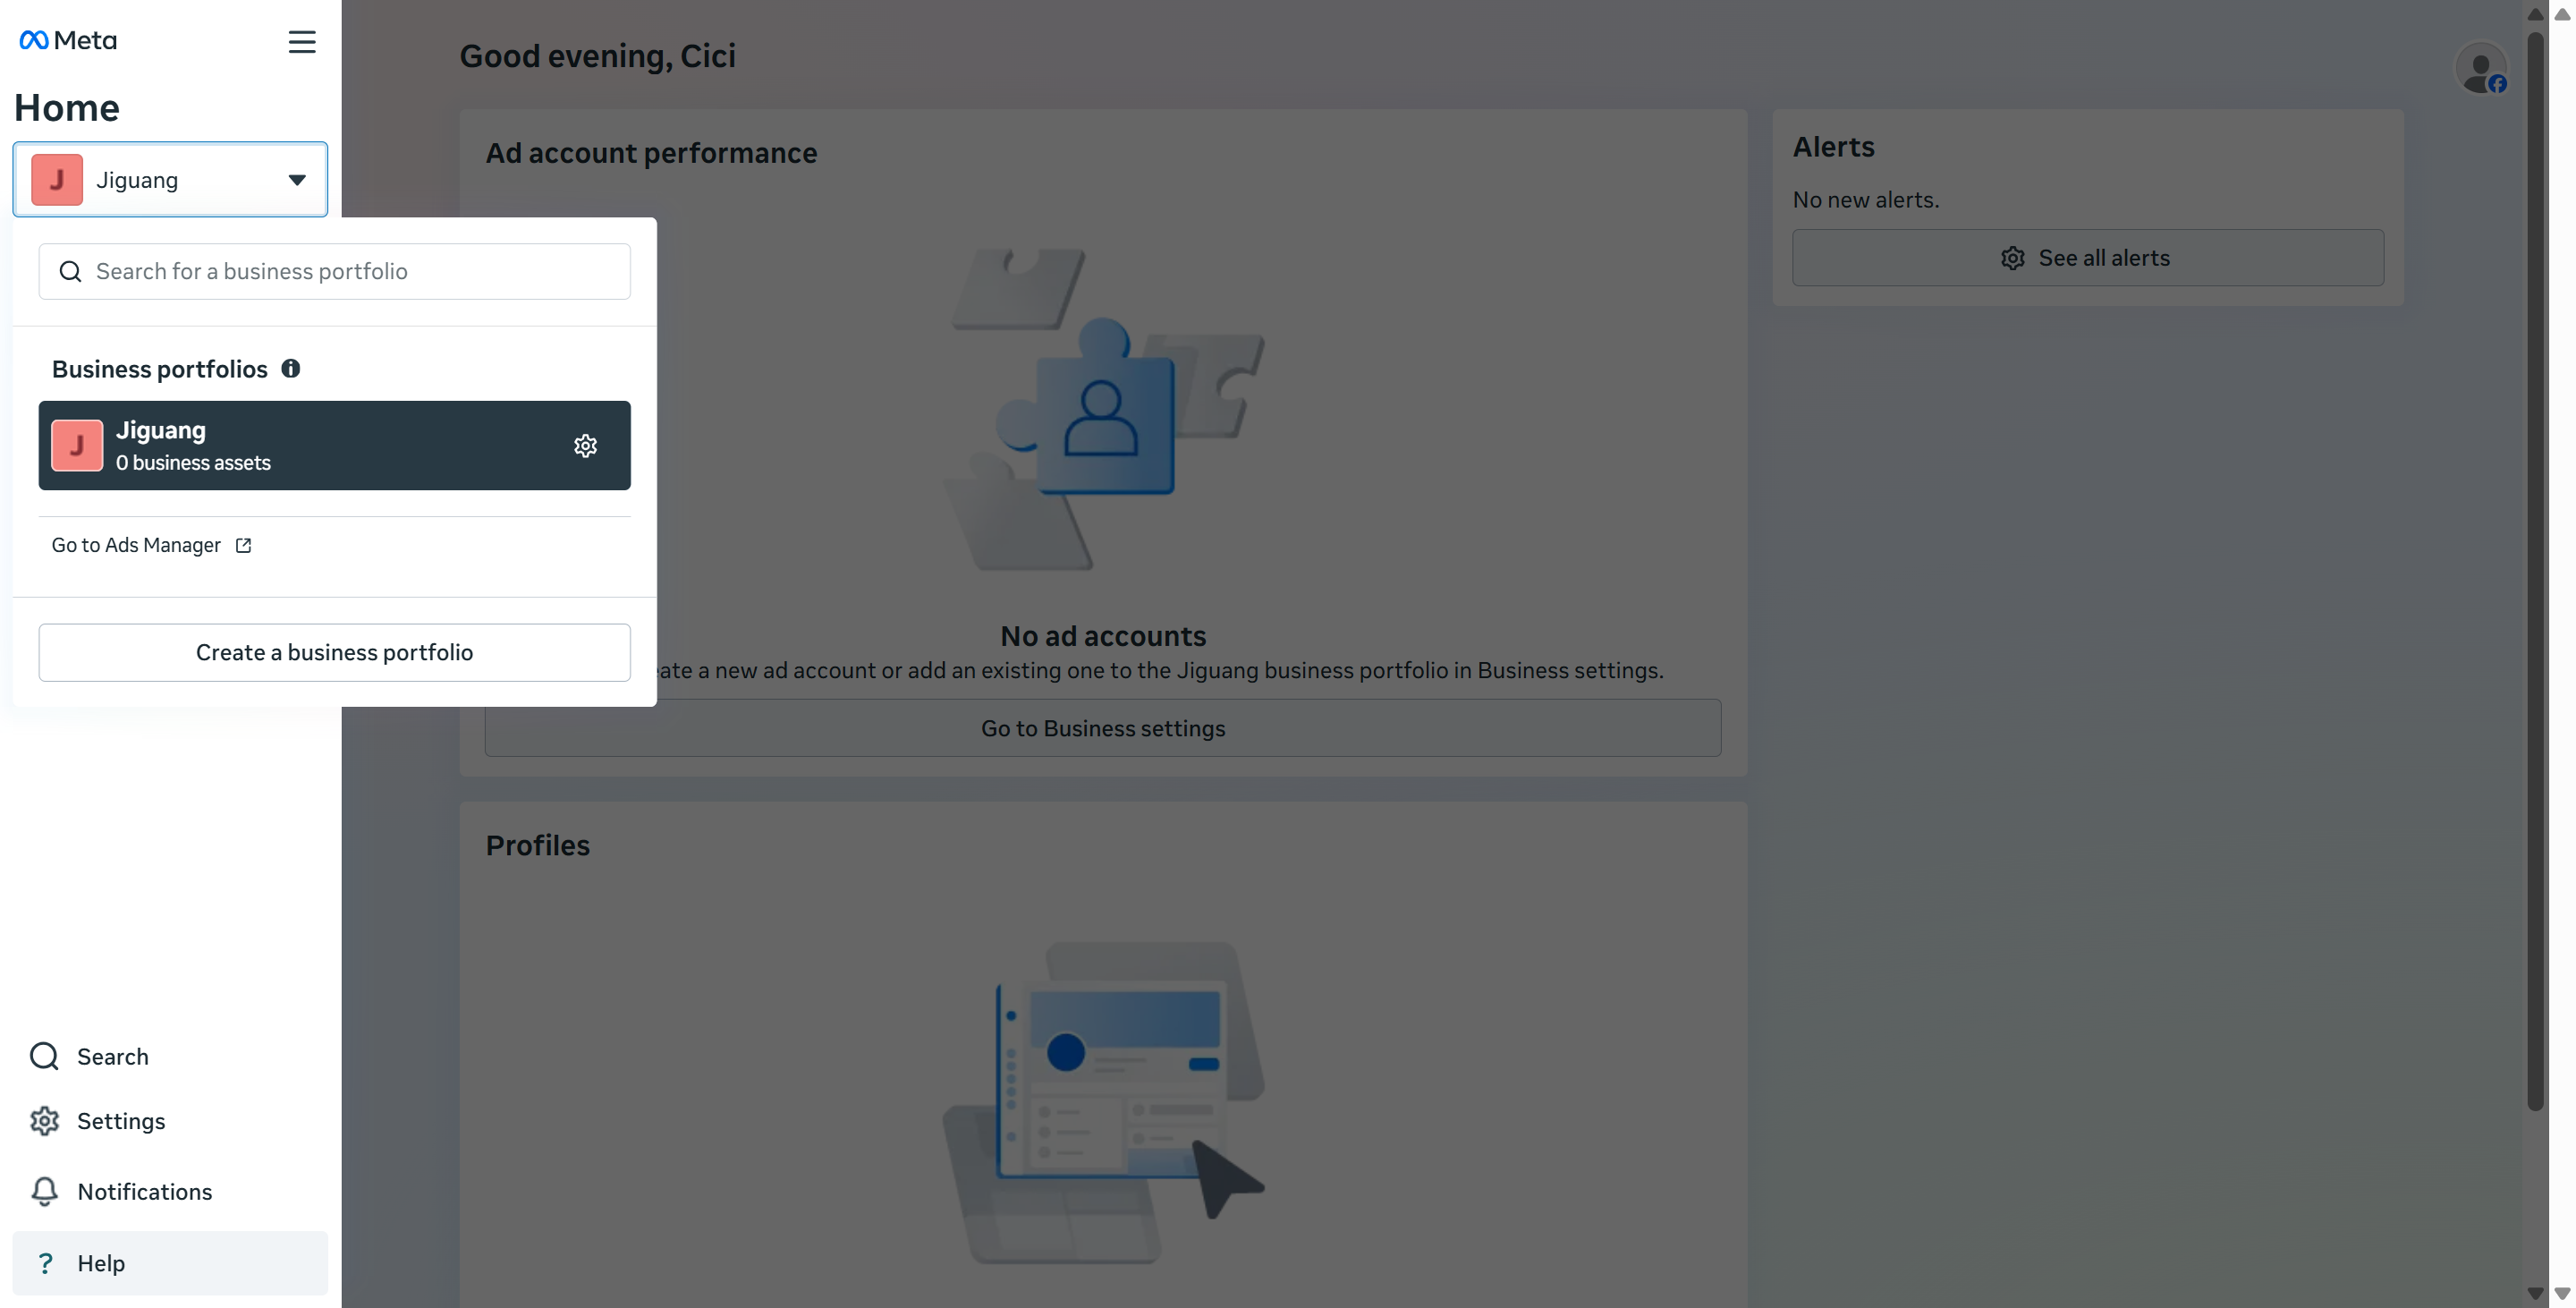
Fill in all required information as shown on the page, then complete the setup.
- Set up the app
Log in to your Meta Developer account and click the "Create App" button. Fill in the required settings. In the options, select "Other," then on the next page, choose "Business" as the app type.

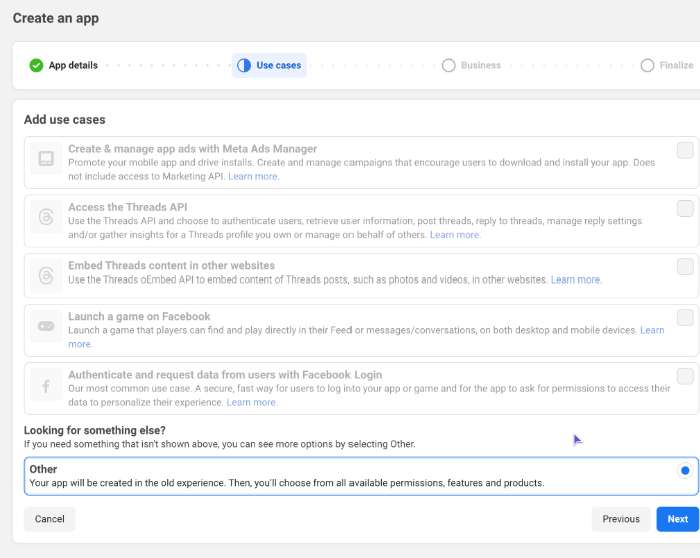
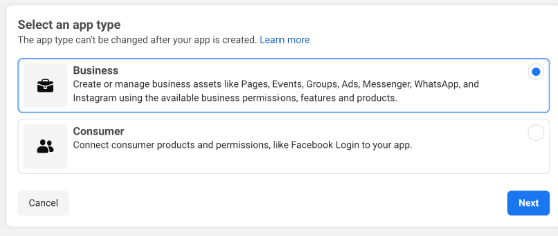
Enter your contact email address and select the business portfolio you just created from the drop-down menu.
Add the WhatsApp App
After the app is created, the page will redirect to the app dashboard. Select "Add Product," then choose "WhatsApp" from the list of available products. Then click "Set up."
Note: Before proceeding, first verify your business information through Meta. You must submit verification documents to obtain full API access.
Get a Permanent WhatsApp Cloud Token
Create a system user and generate a permanent token to ensure secure and uninterrupted access.
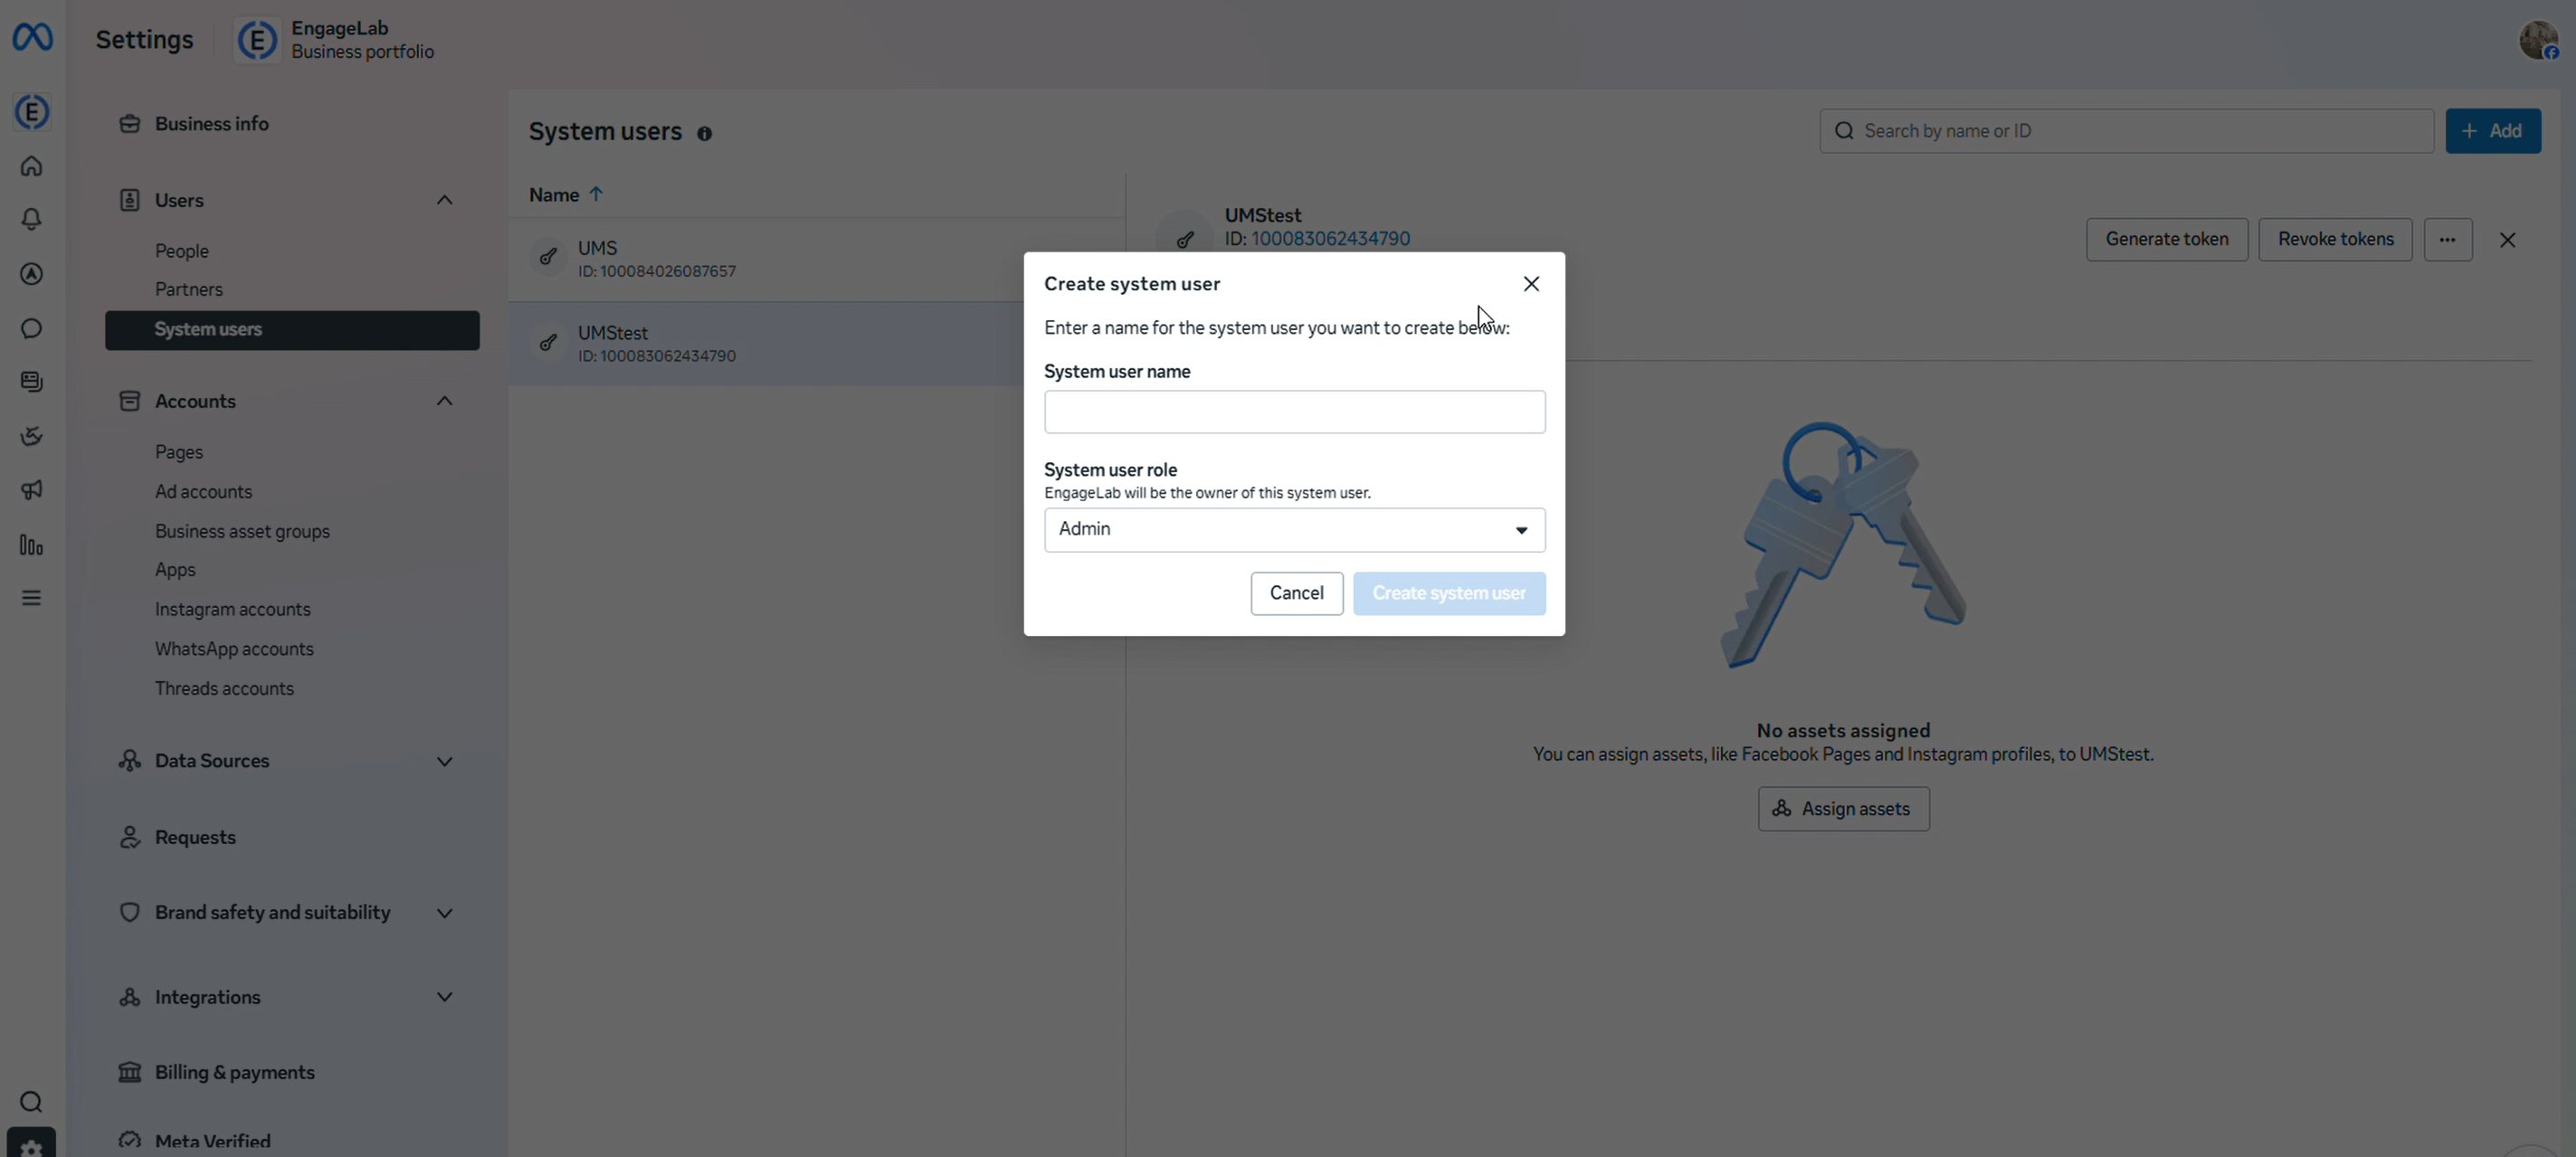
Log in to your Facebook Developer account, select the WhatsApp app, click "Set up," and go to Business Manager. Select "Users" > "System Users" and create an admin system user.
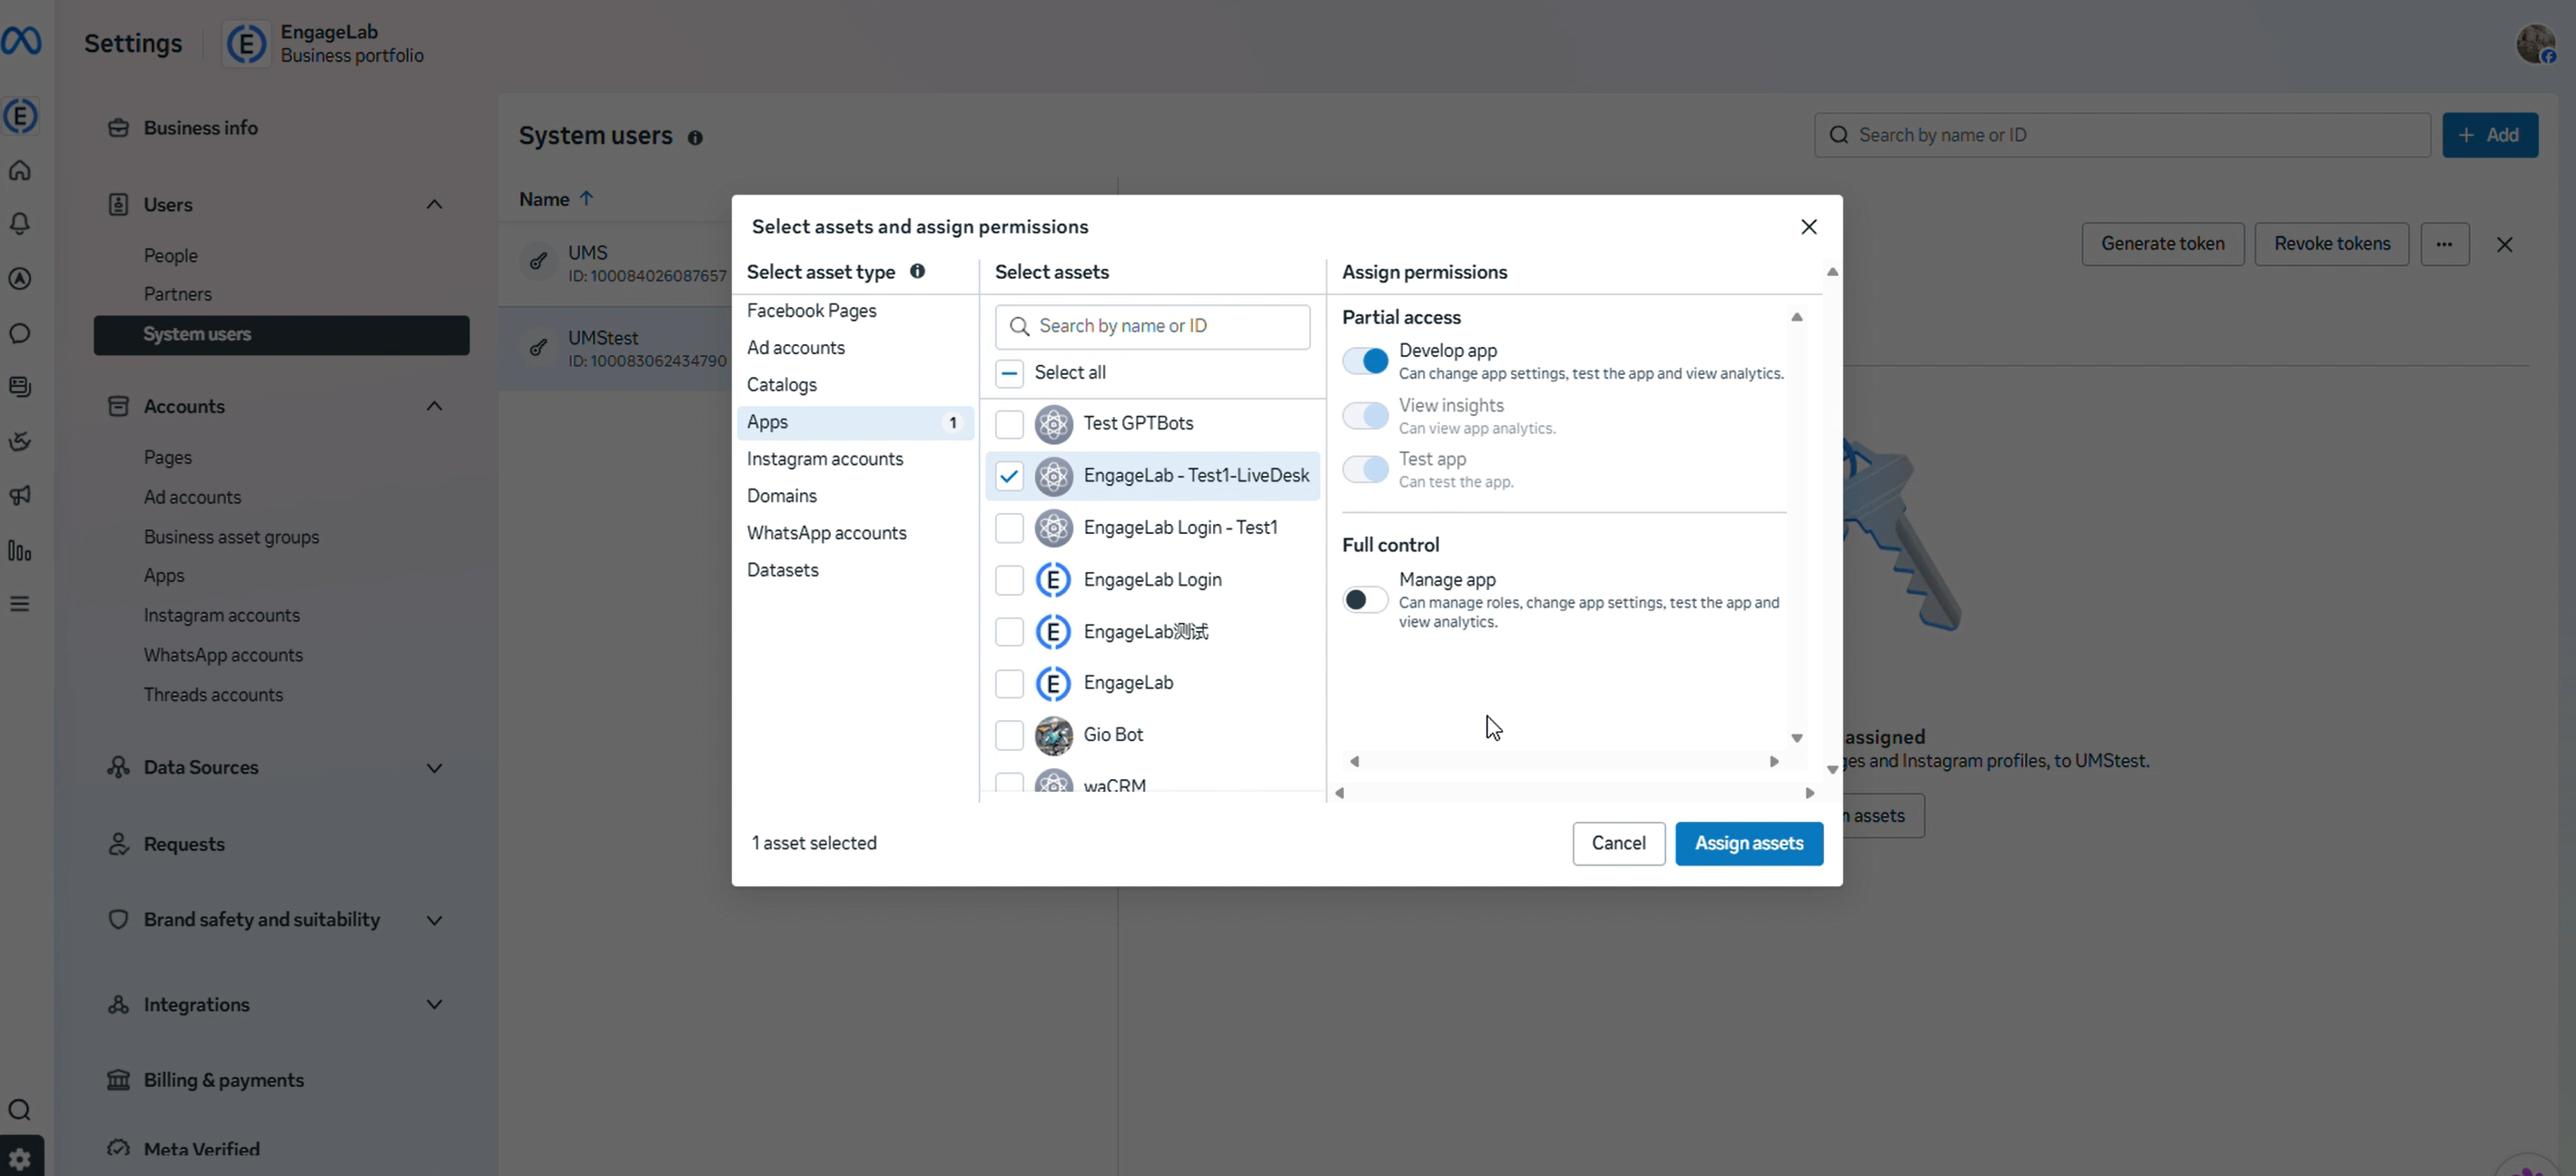
After creation, click the "Add Assets and Assign Permissions" button, select your app name, choose the app created in the previous step in the pop-up window, and complete the setup.
Return to the system user page, select the newly created system user from the list, and click the "Generate New Token" button.
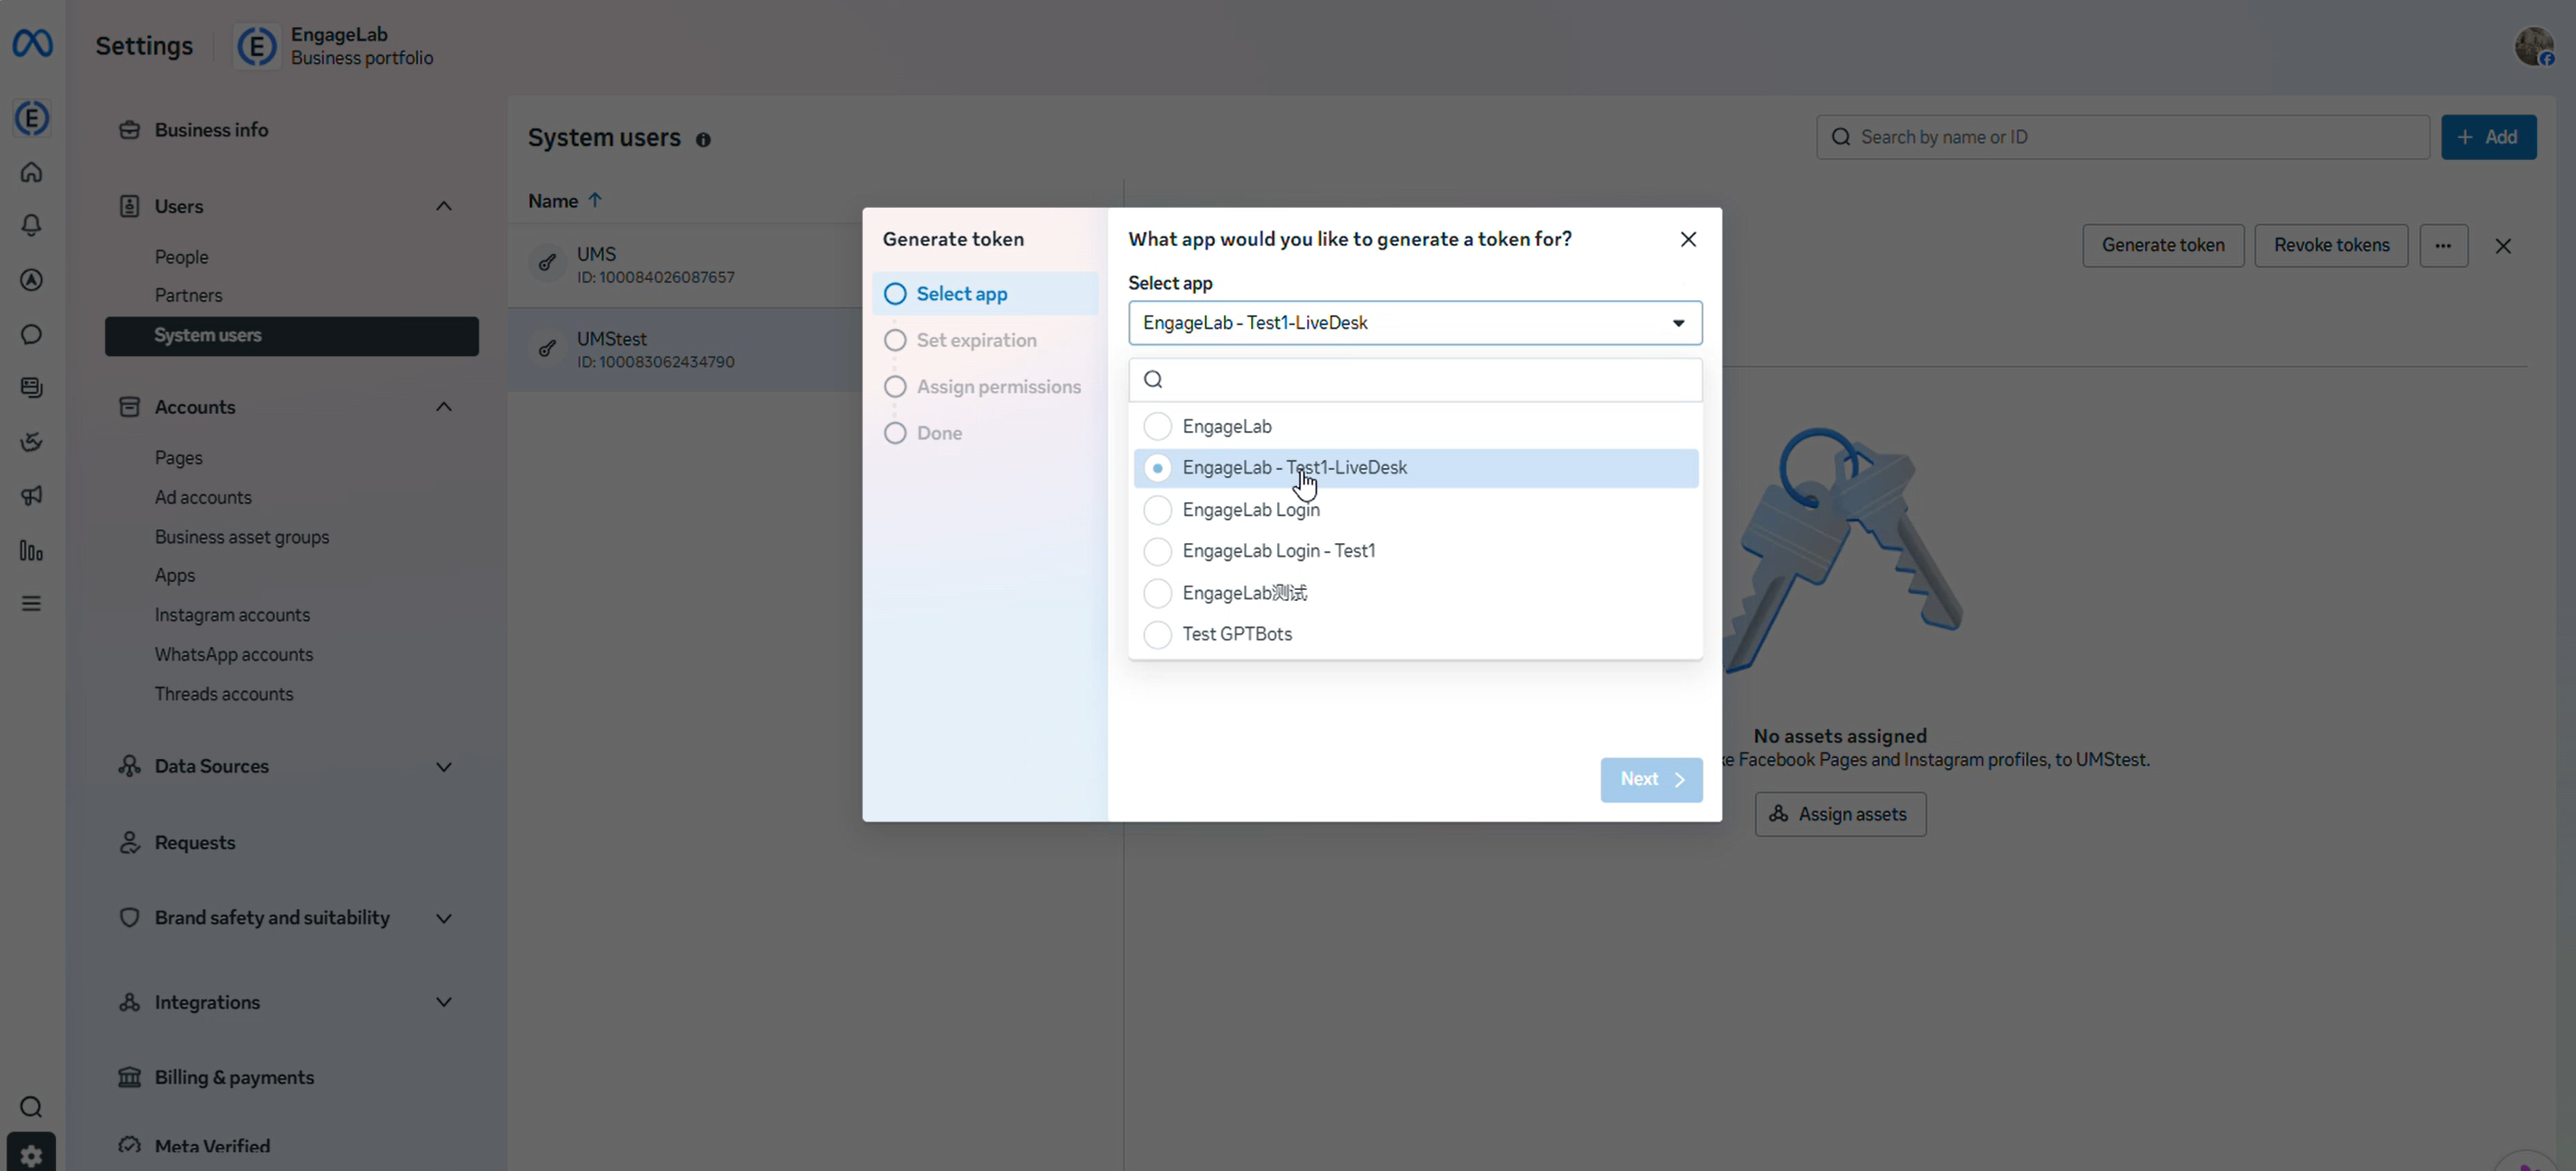
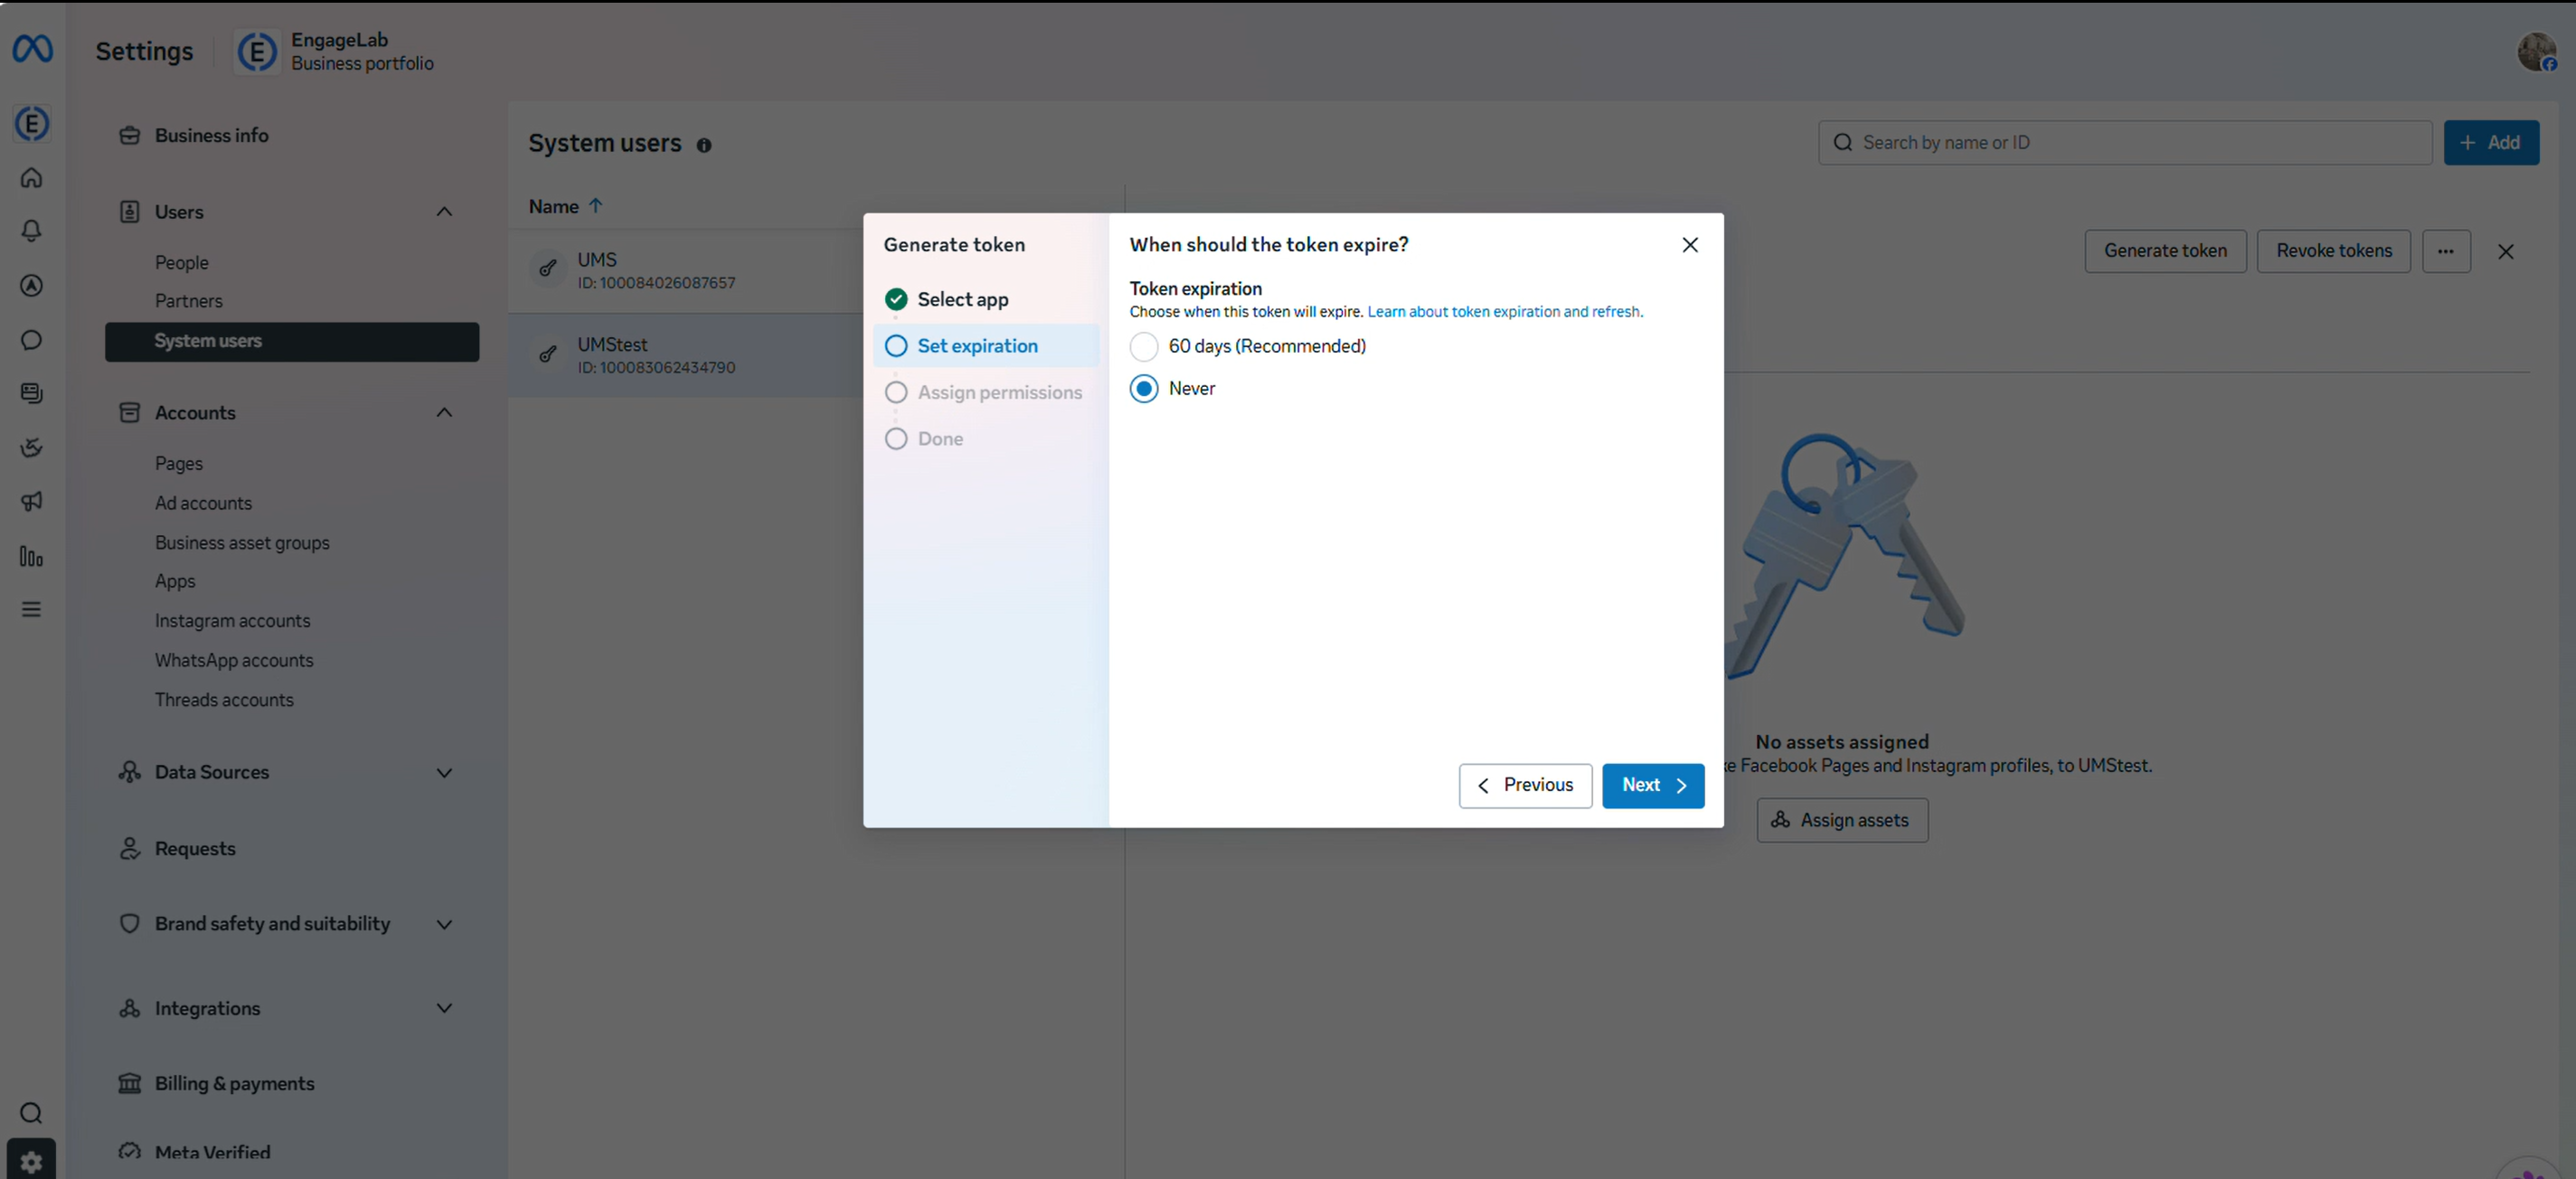
Select the created app from the drop-down menu and check the following three permission levels:
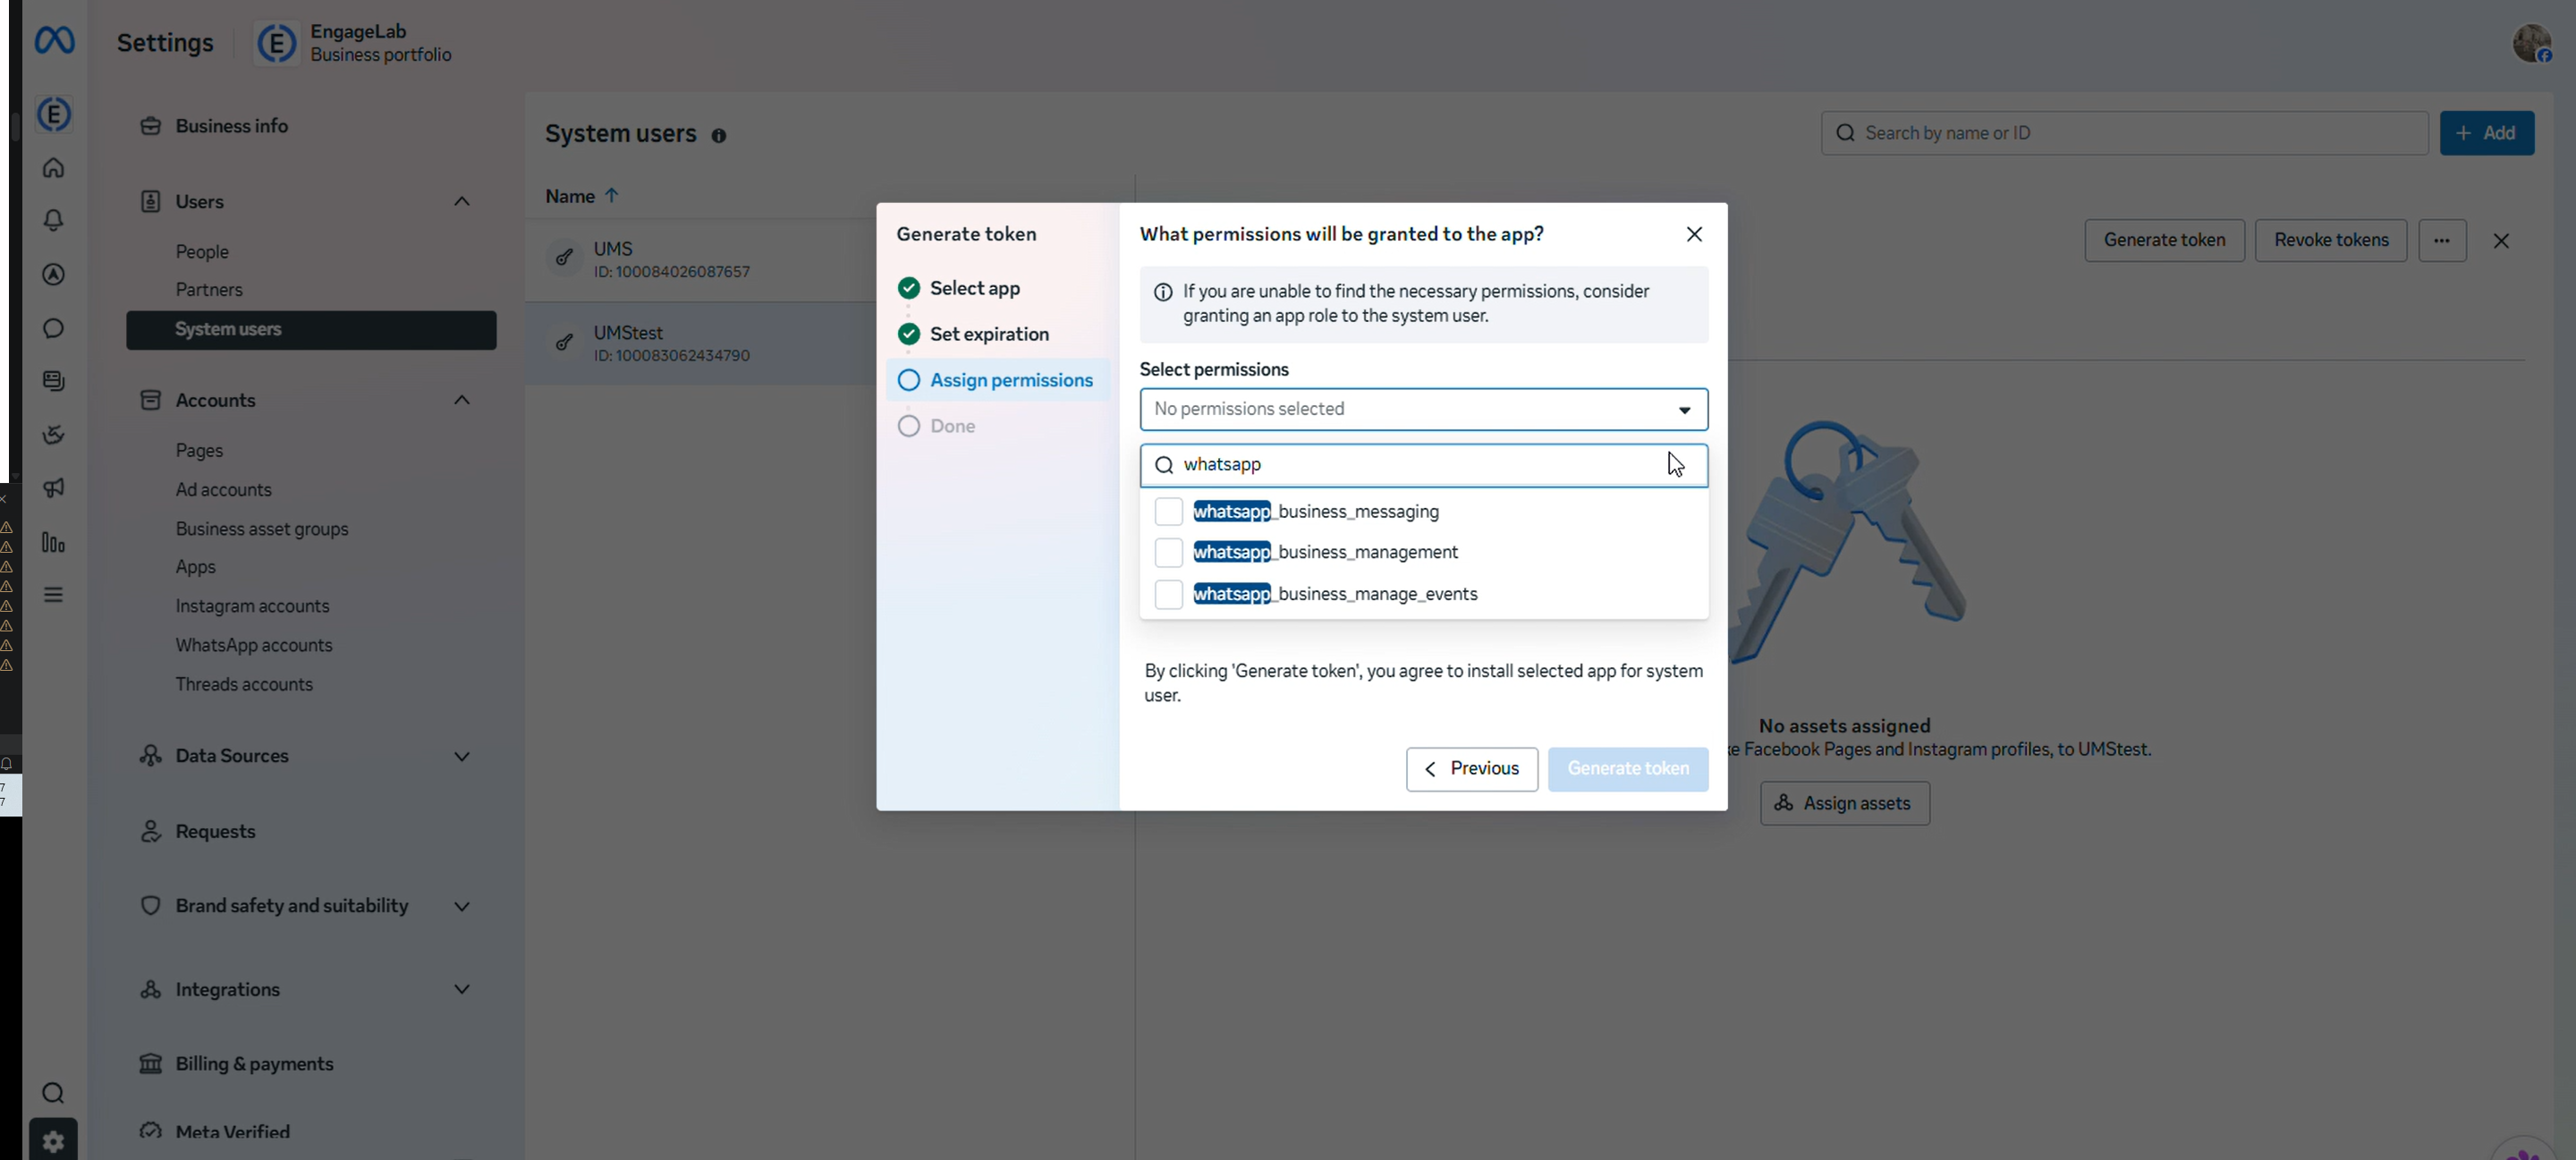
whatsapp_business_manage_eventswhatsapp_business_managementwhatsapp_business_messaging
After setup is complete, a token will be generated. Copy and save this token.
Set Up the WhatsApp Cloud API
Go to the Facebook Developer platform. If you need to create a new Meta Business account, select "Create Business Account" from the drop-down menu. If you already have a business account, simply select it from the available options. In WhatsApp > API Setup, paste the permanent token generated in the previous step. Select the prepared phone number.
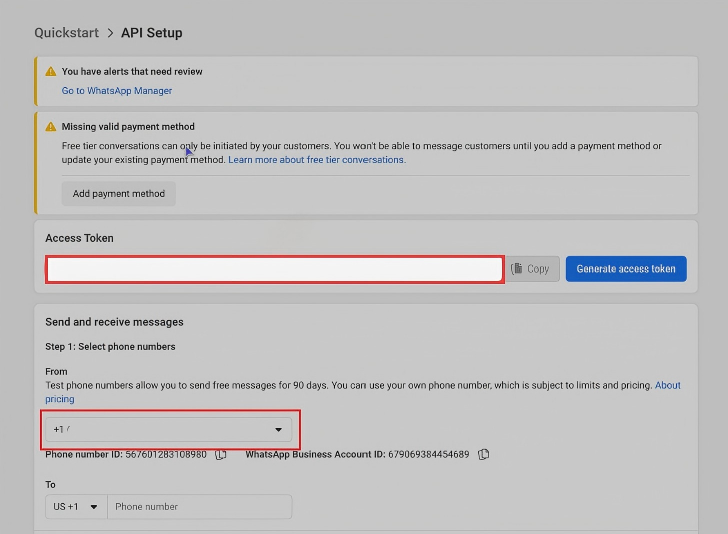
Note: Meta requires a verified phone number to set up the WhatsApp API. You can verify your number using a one-time password (OTP).
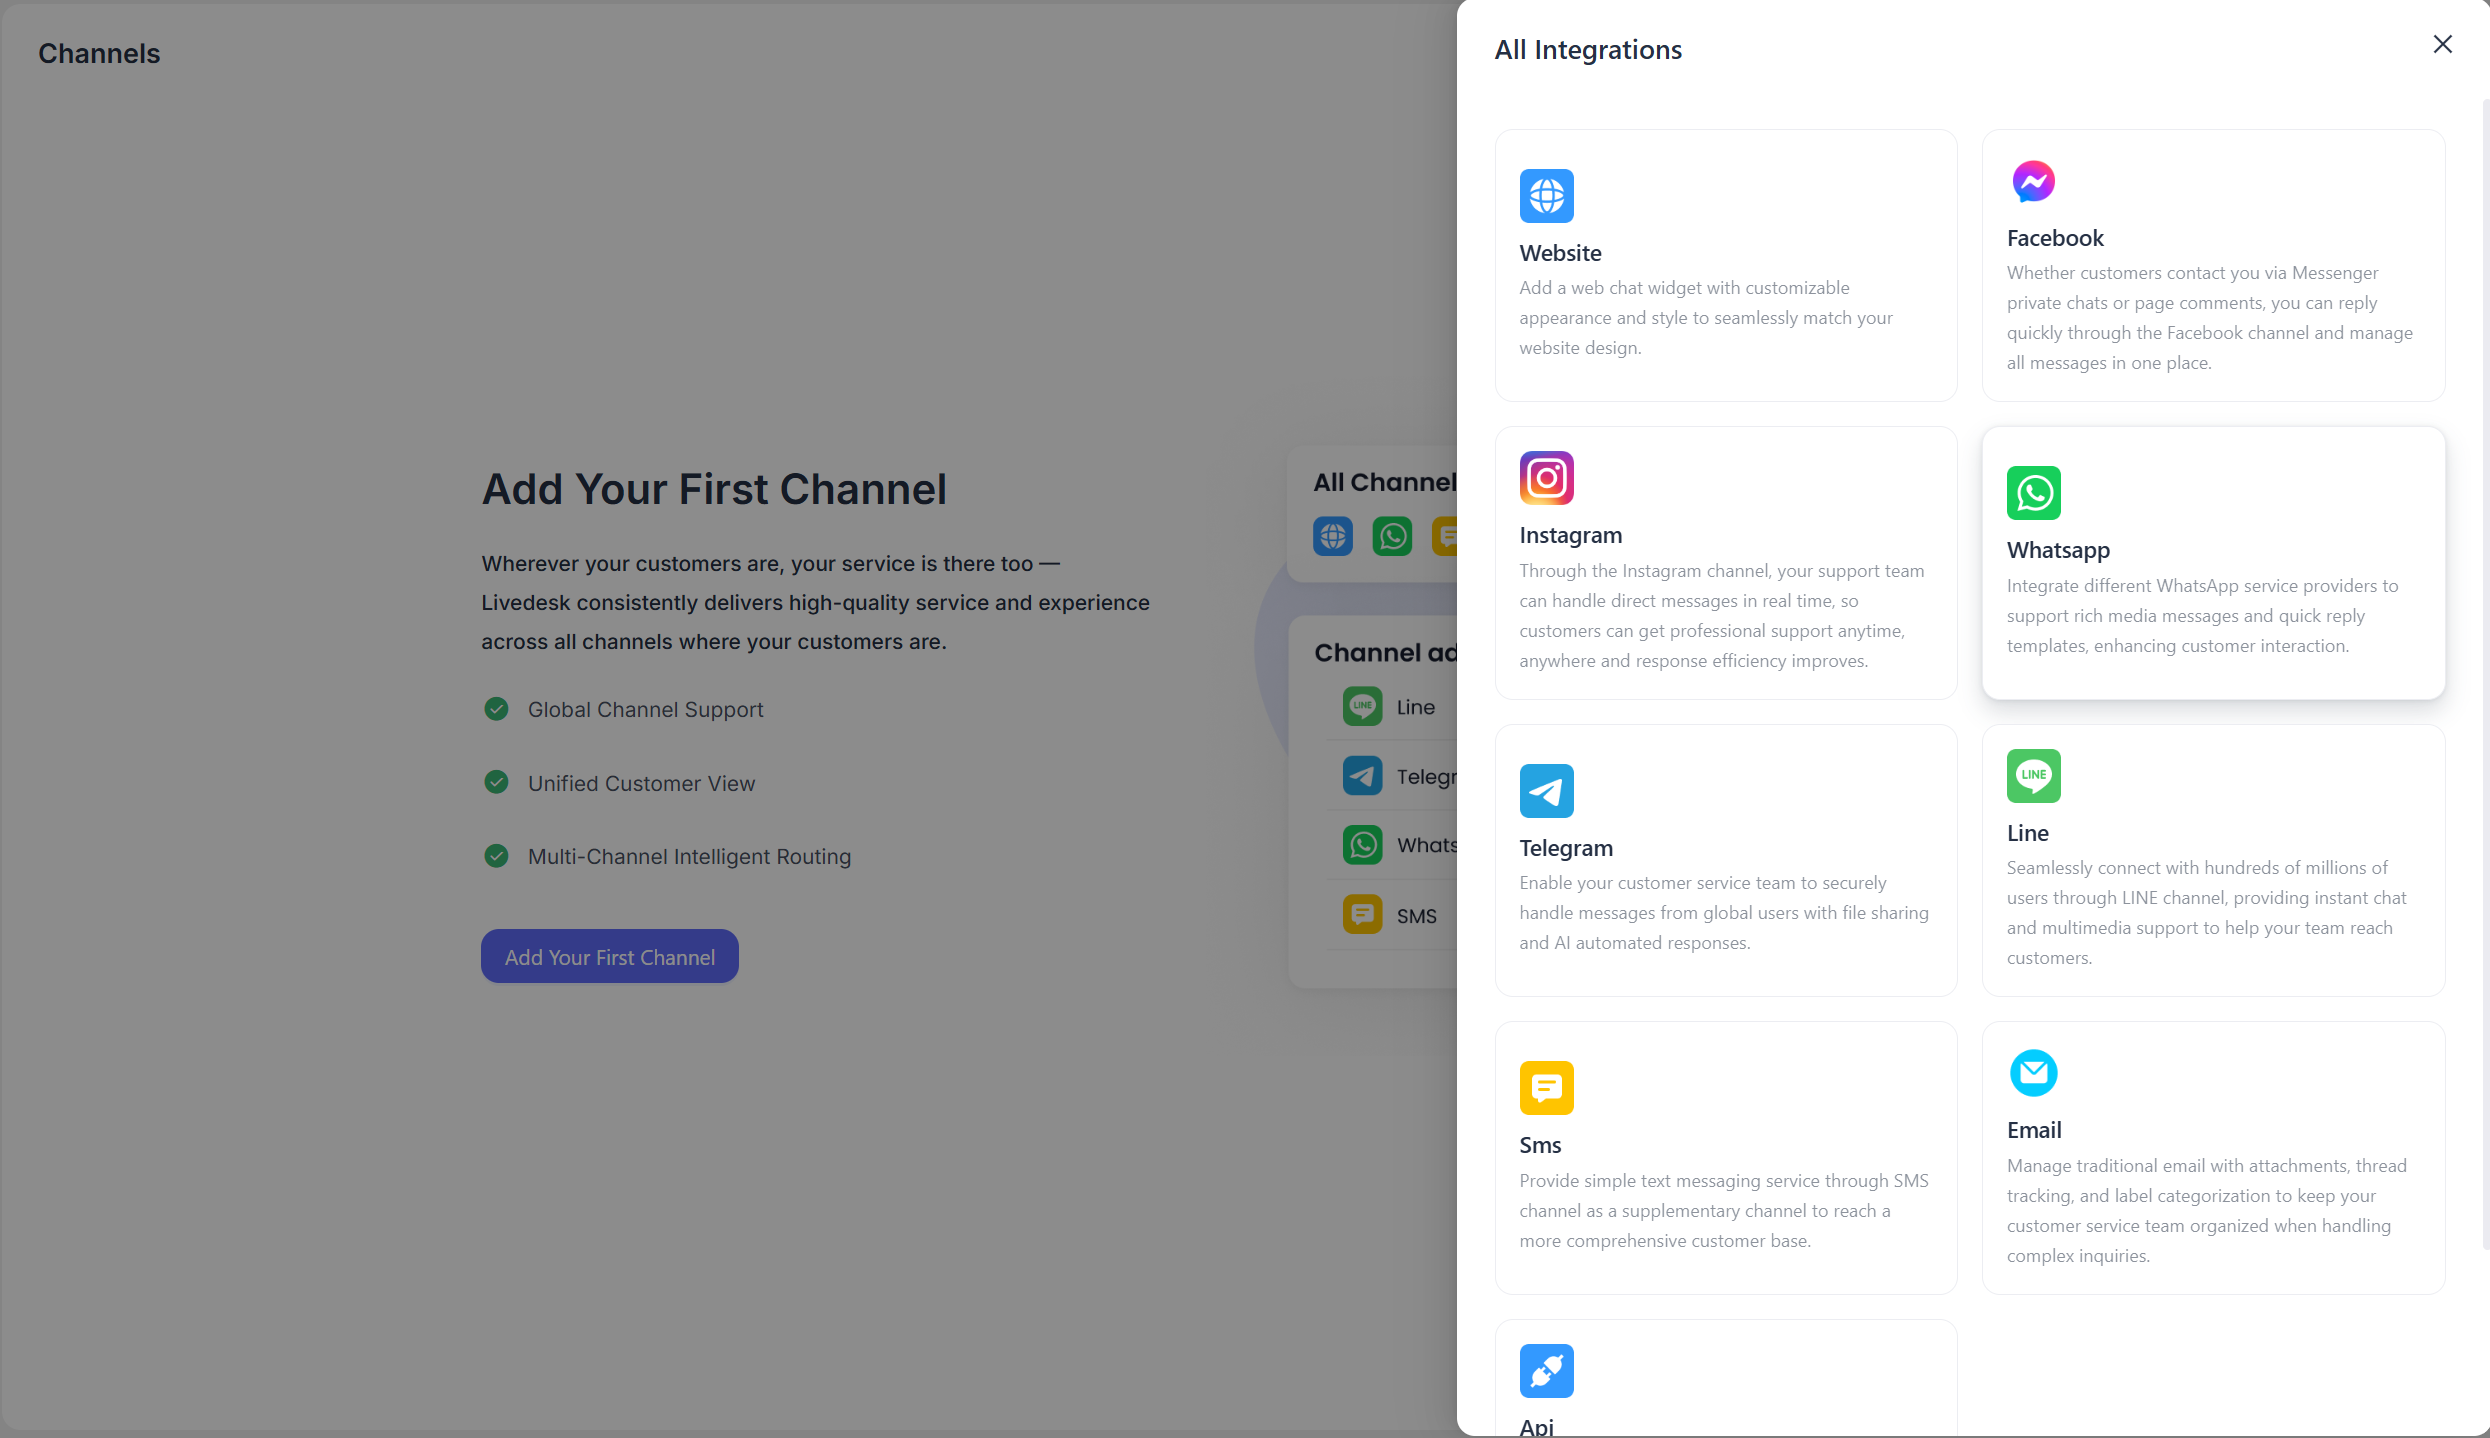
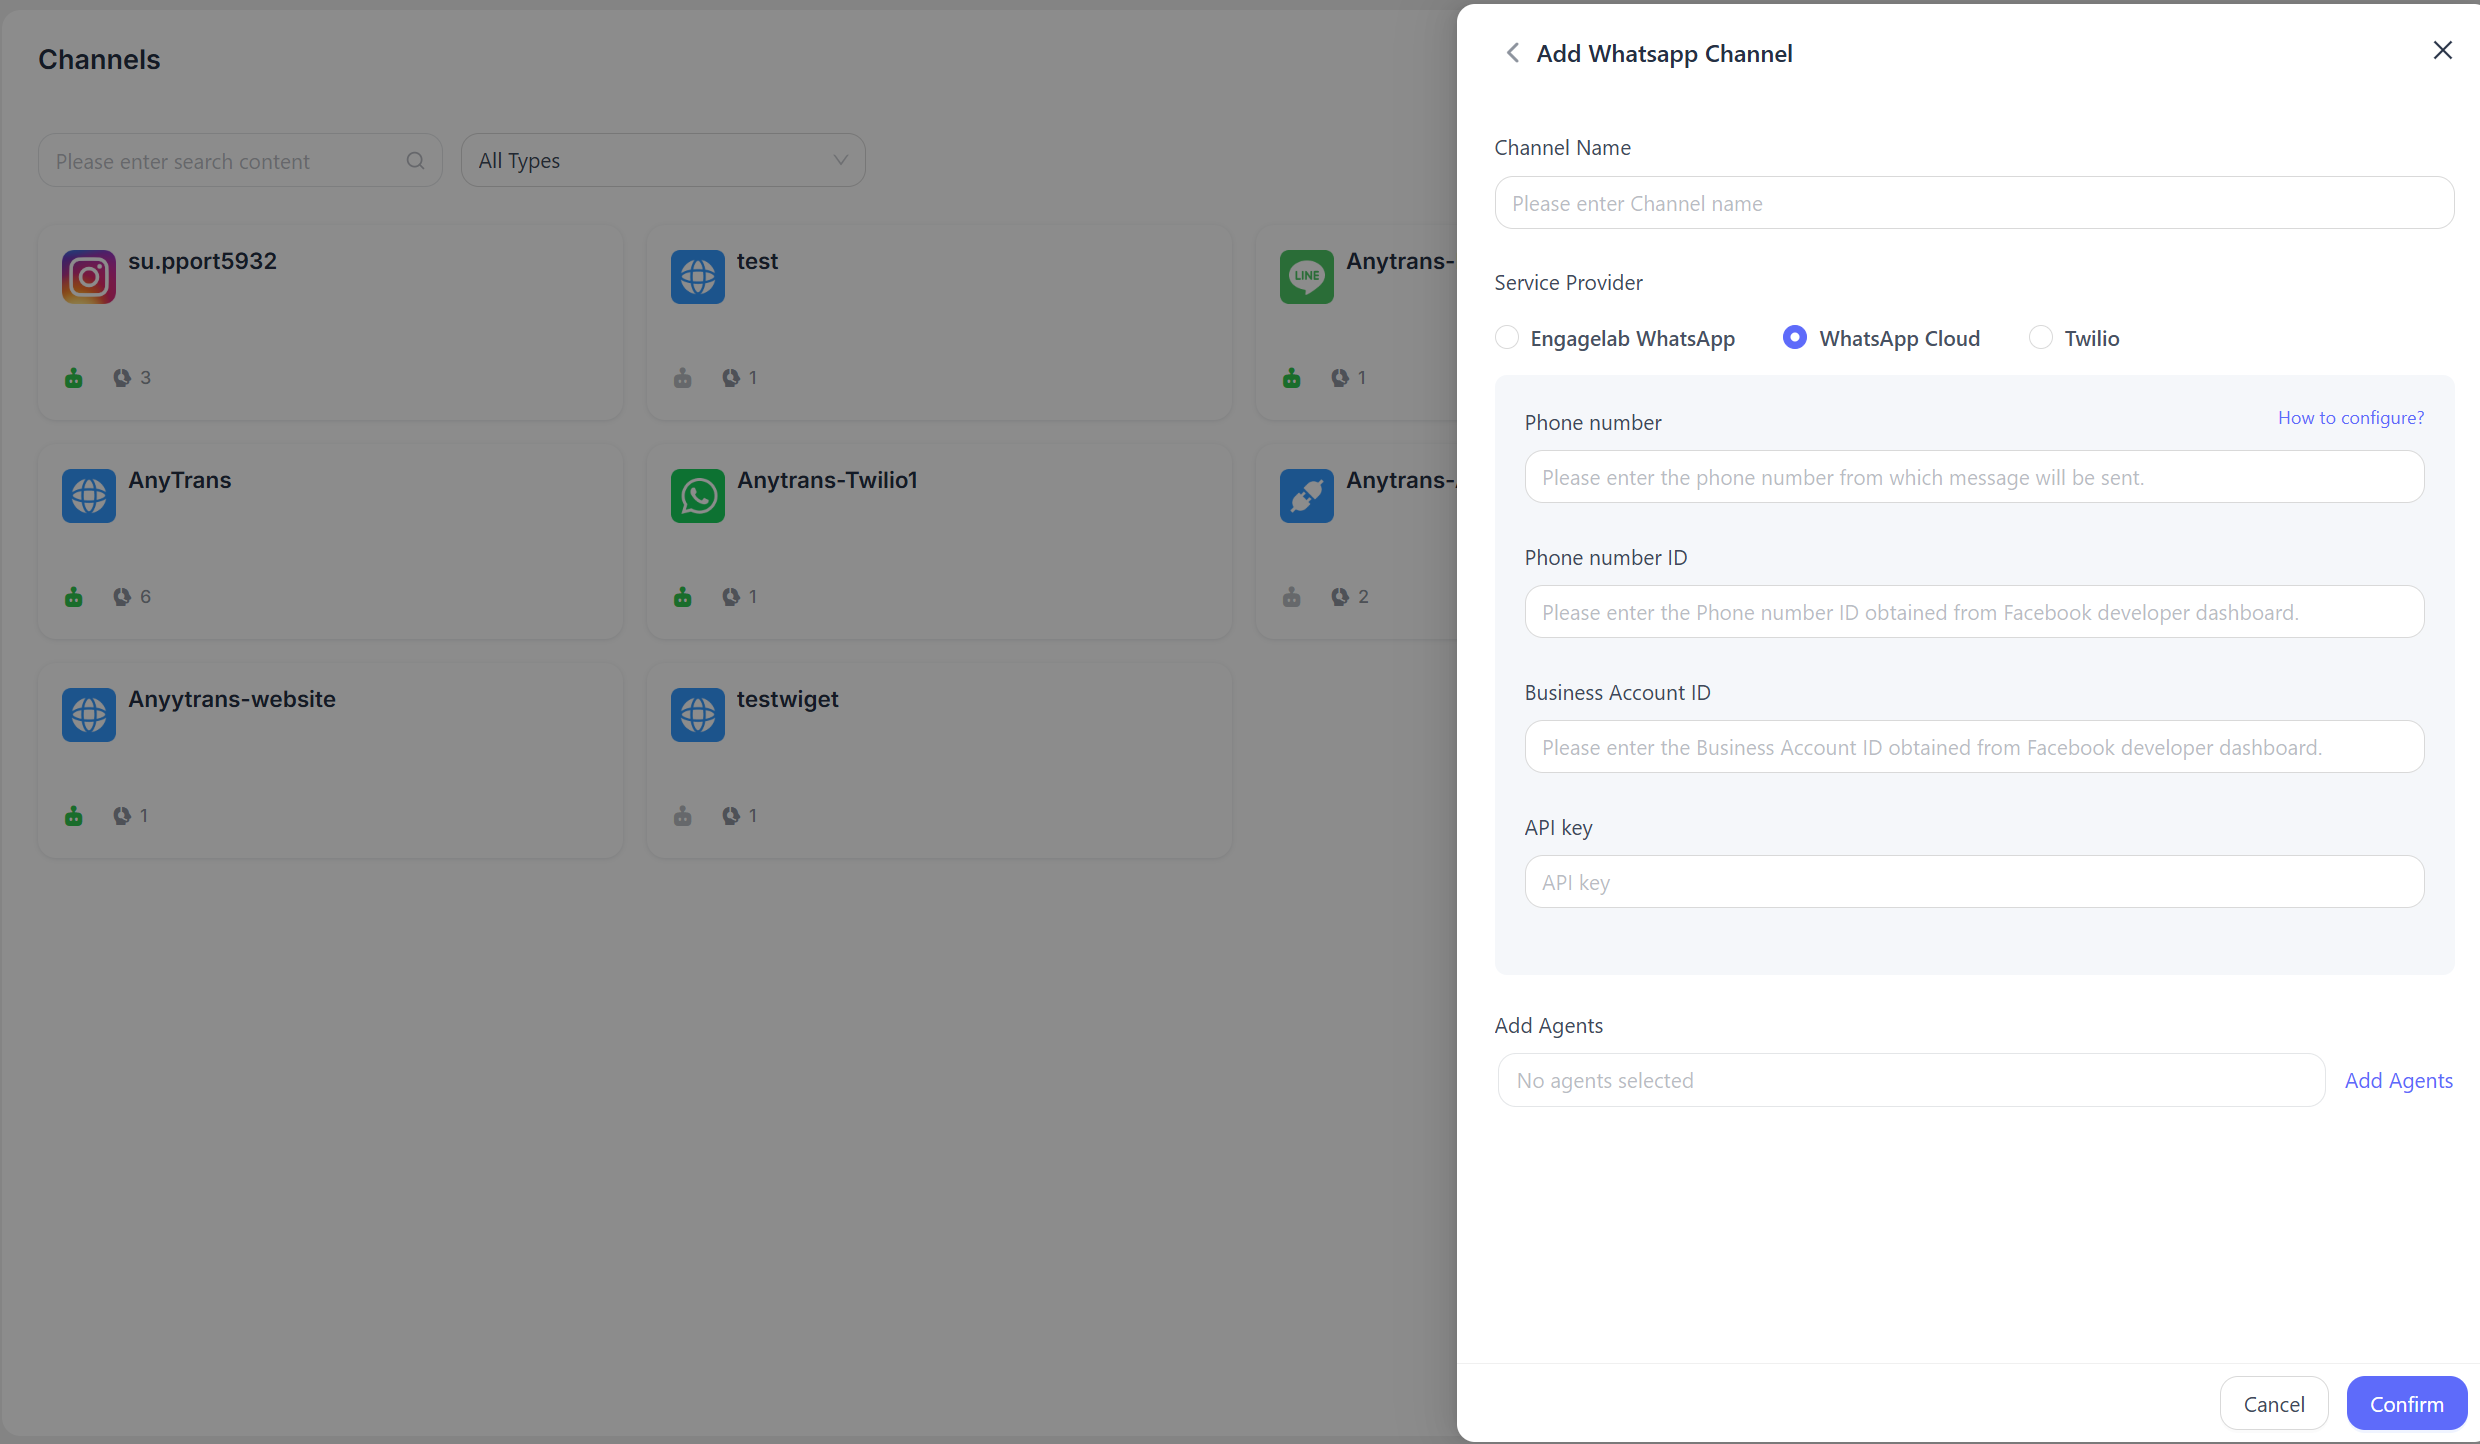
Add a Channel in LiveDesk
From the API Setup page in the Facebook Developer console from the previous step, copy the WhatsApp Phone Number ID and Business Account ID. Fill in the configuration information as prompted on the page, then click "Confirm" to complete the setup.
- Phone Number
Enter the phone number obtained above.
- Business Account ID
The Business Account ID obtained from the Facebook Developer console.
- Phone Number ID
The Phone Number ID obtained from the Facebook Developer console.
- API Key
Enter the permanent token generated in the previous step.
After creation is complete, the page will redirect back and display the corresponding webhook URL and webhook verification token.
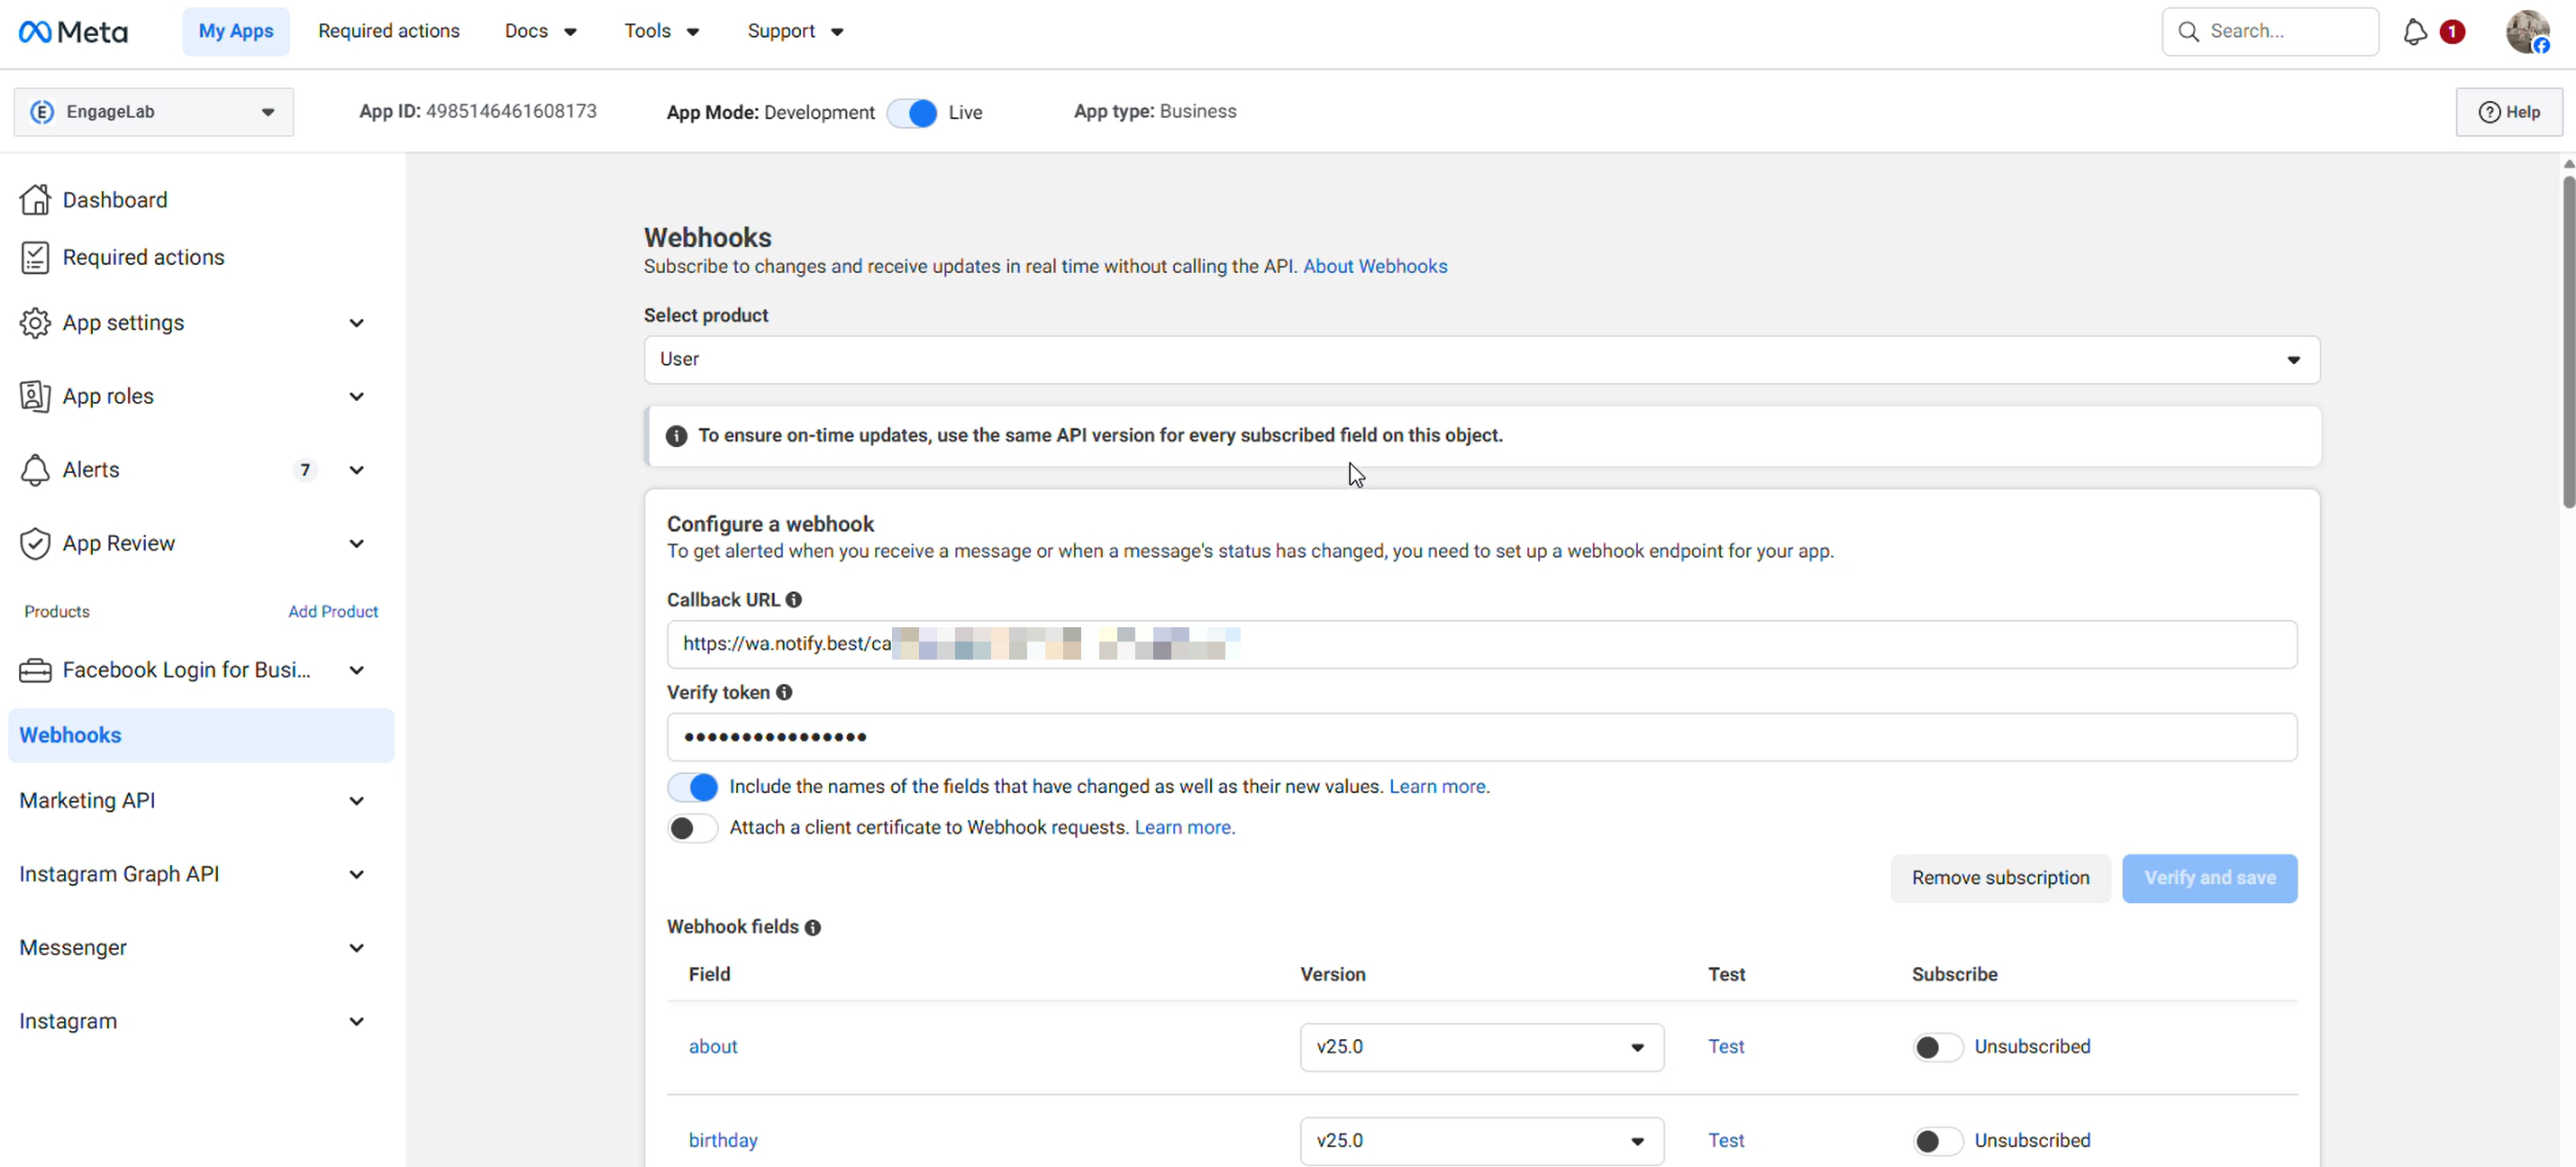
Set Up Webhook
You need to set up a WhatsApp webhook to receive customer messages sent to the business number. Log in to your Facebook Developer account, go to WhatsApp > Configuration, paste your LiveDesk webhook URL and verification token into the corresponding fields, and then click "Verify and Save." Set webhook permissions by subscribing to messages.
Detailed Settings
After the channel is created, you can configure detailed settings within the corresponding channel.
Integration
- Webhook URL
The webhook URL generated after the channel is created is used for sending and receiving message push events. Fill it in under the corresponding Twilio console settings.
- Webhook Token
The webhook token corresponding to the WhatsApp account.
- Business Account ID
The WhatsApp Business Account ID entered when creating the channel.
- API Key
The API key information corresponding to WhatsApp.

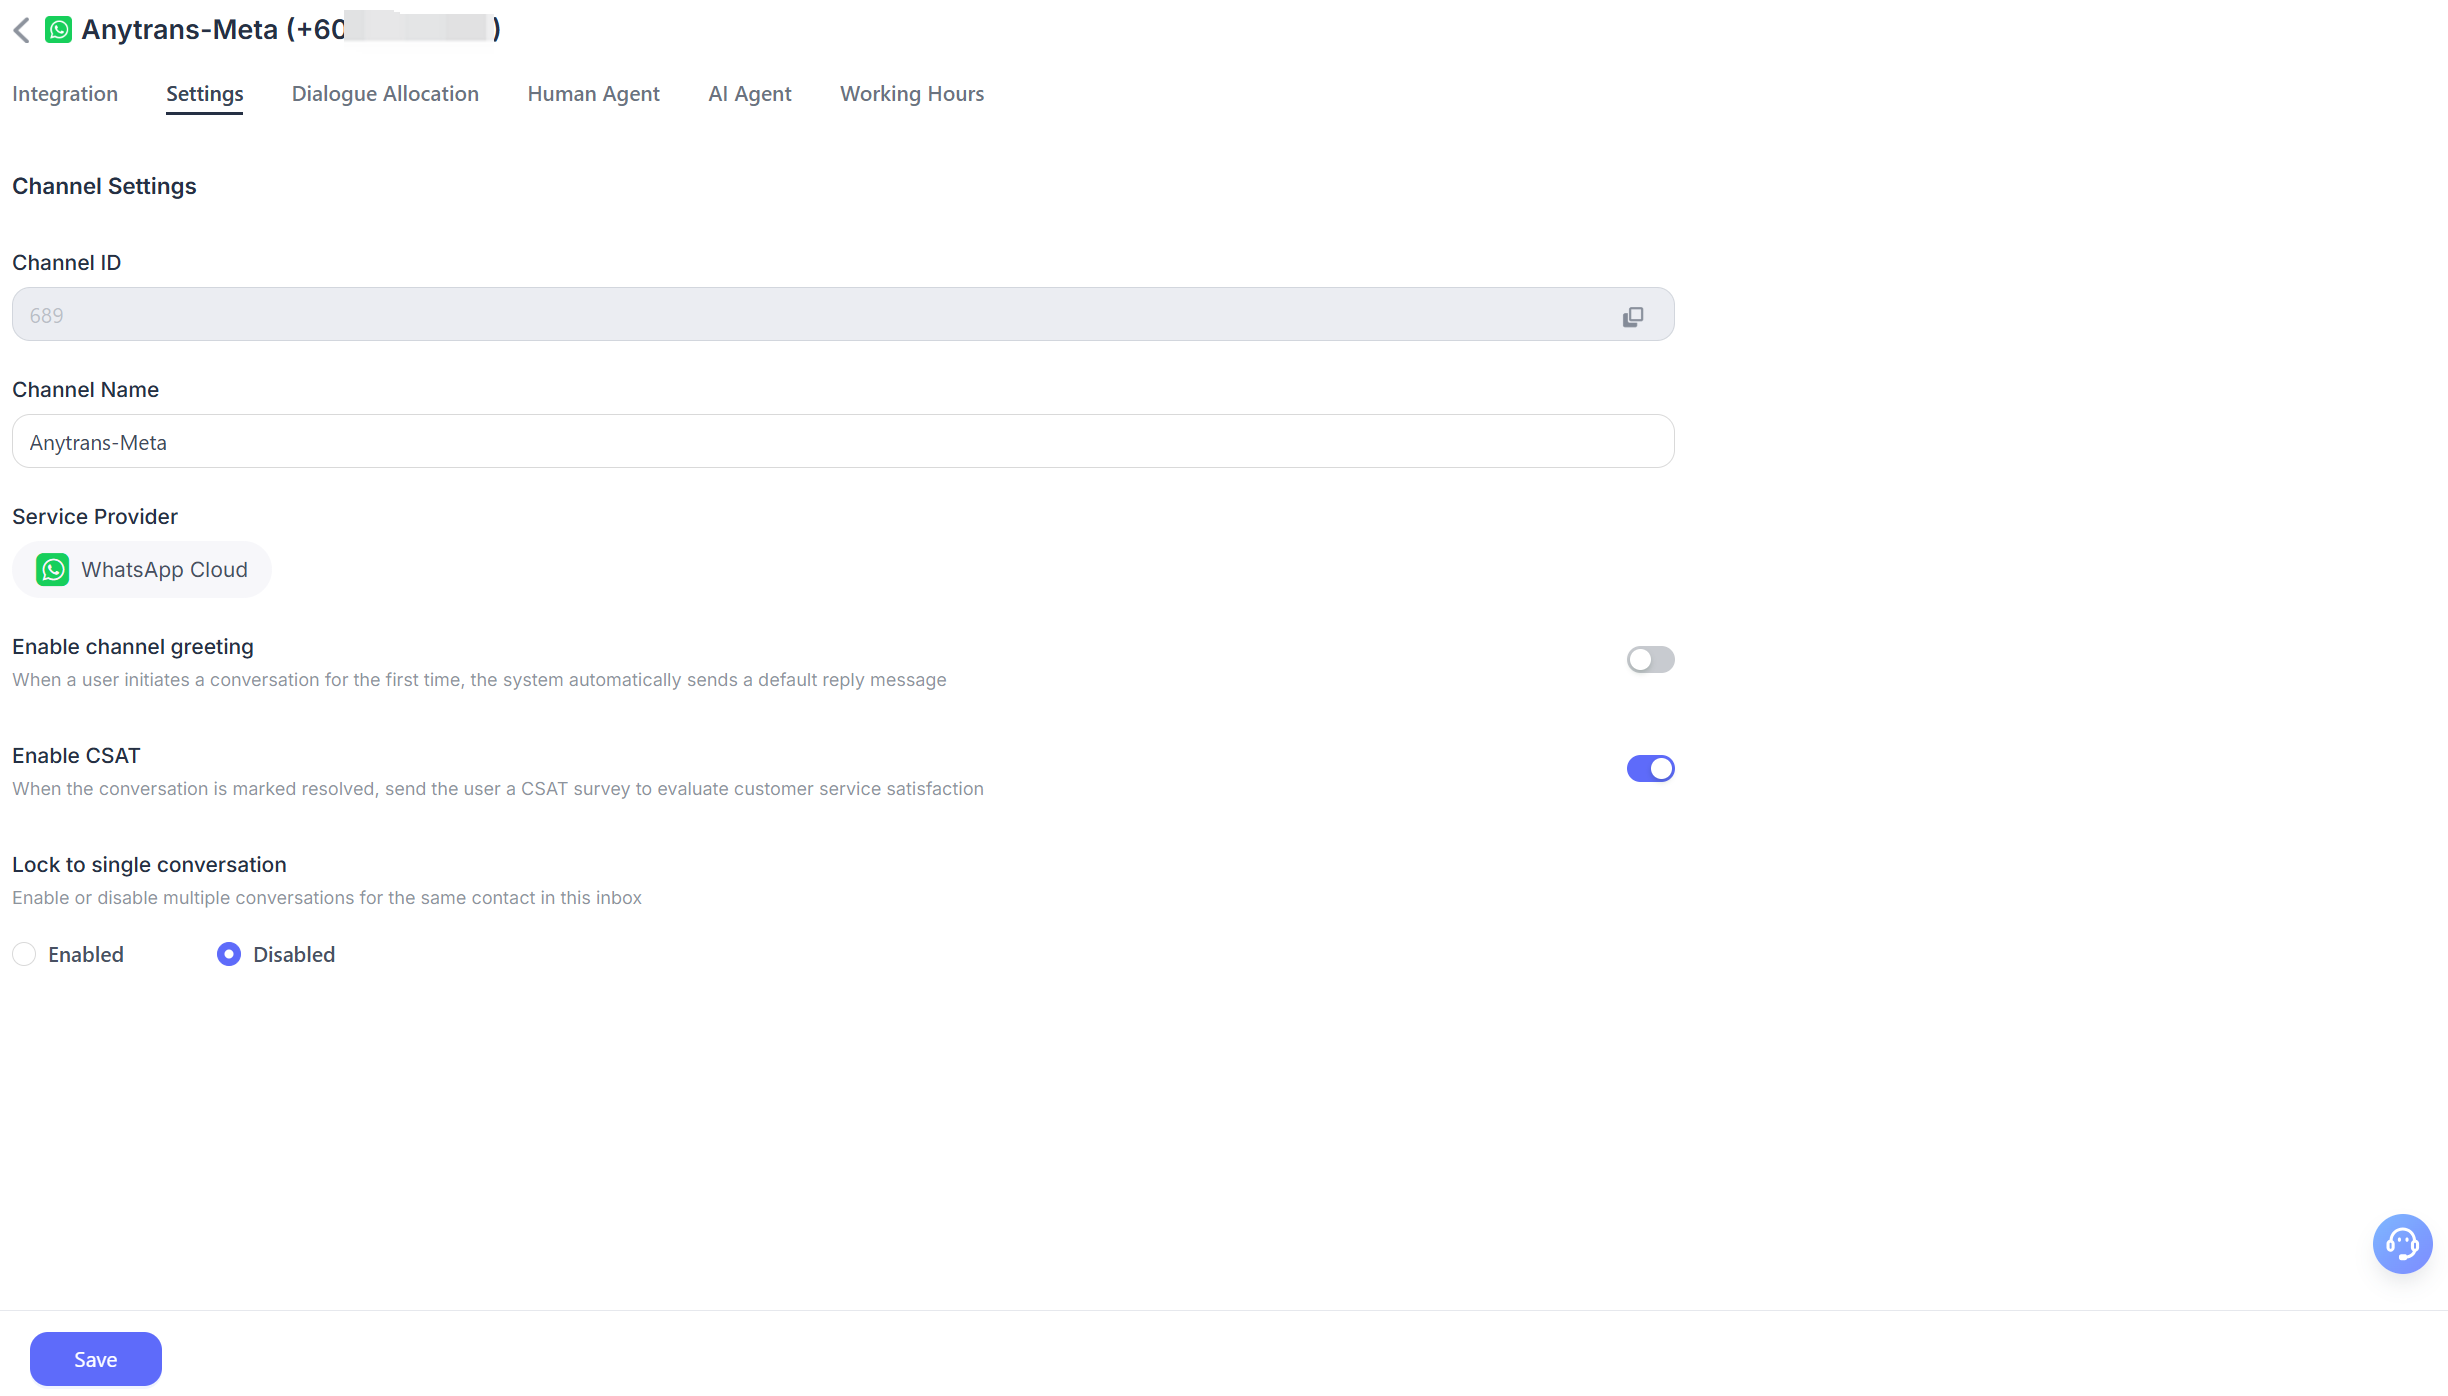
Settings
- Set Channel Greeting Message
Disabled by default. Enter a custom greeting message that will be sent automatically to customers when they start a conversation.
- Enable CSAT
After this feature is enabled, a customer satisfaction survey will automatically start each time an issue is resolved. CSAT scores can be viewed later in the reporting section.
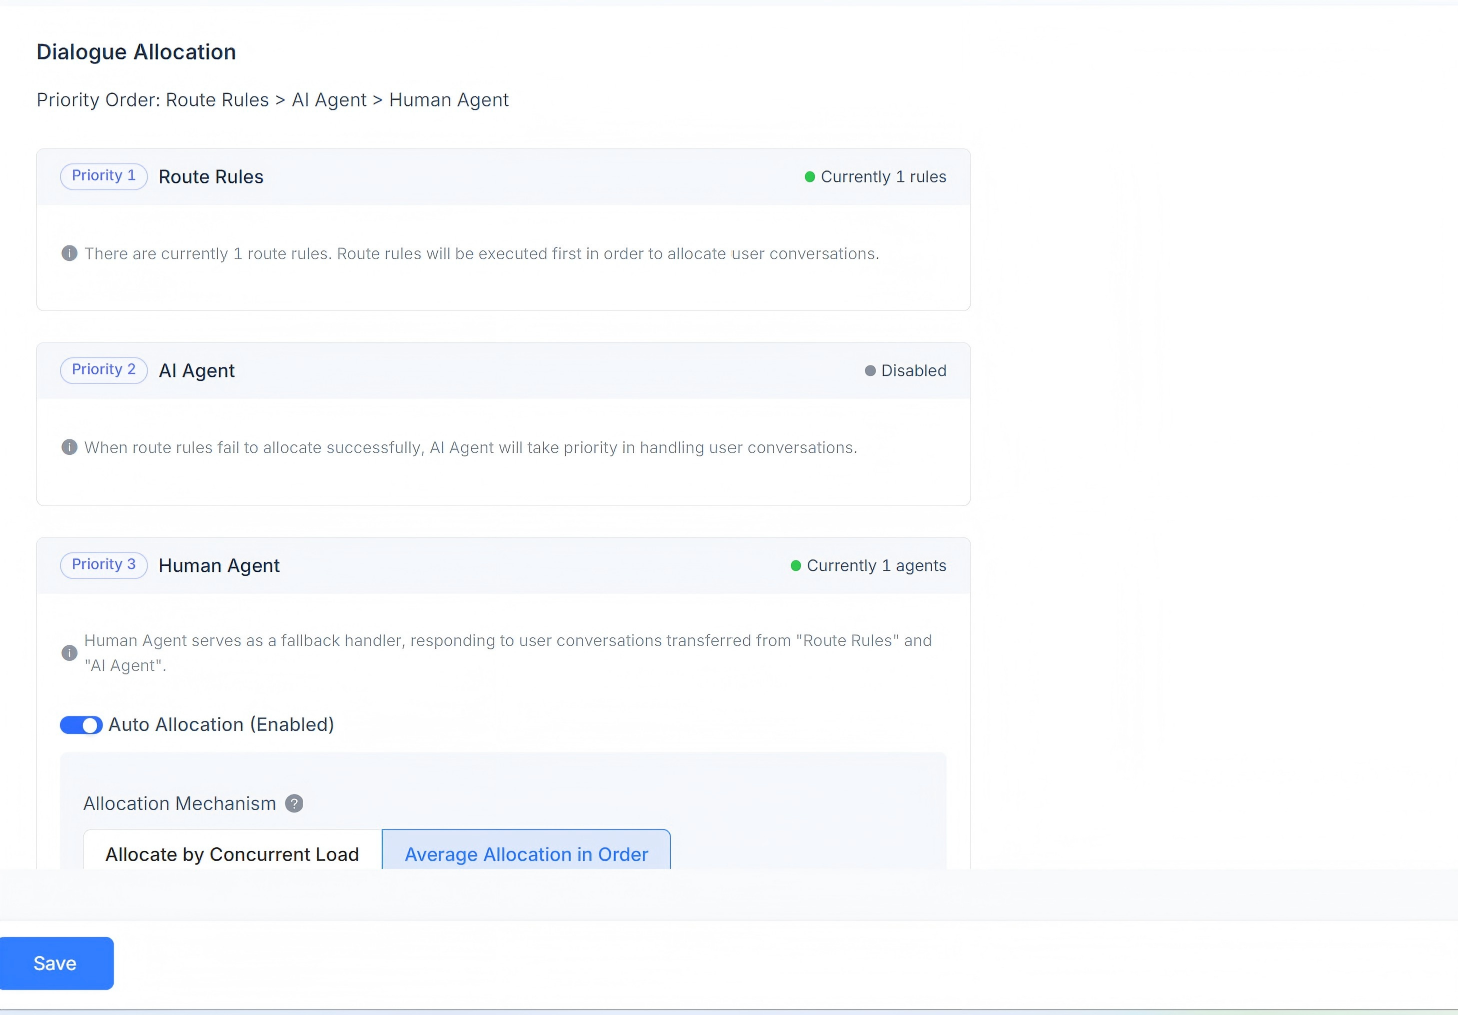
Conversation Assignment
Displays the conversation assignment rules for the current channel. Supports routing rules, AI Agent, and Human Agent responses. Conversation assignment priority order: routing rules > AI Agent > Human Agent.
When routing rules exist, the system first determines whether the conditions of the routing rules are met. If multiple routing rules exist at the same time, they are evaluated in order, and assignment is performed according to the first matching rule.
If the current scenario does not meet the routing rule requirements, it will be assigned to the AI Agent first.
If no AI Agent exists, it will be assigned to the corresponding Human Agent. Automatic assignment is supported, including assignment by concurrent workload, sequential round-robin distribution, and custom agent workload distribution.
- Workload-based assignment mechanism
Assignment is based on the defined workload quantity, with priority given to agents with lower concurrent workloads.
- Sequential round-robin assignment mechanism
Regardless of each agent's workload settings, conversations are assigned evenly to each agent in sequence.
- Custom agent workload assignment mechanism
Set a custom workload value for each agent individually, with priority given to agents with lower concurrent workloads.
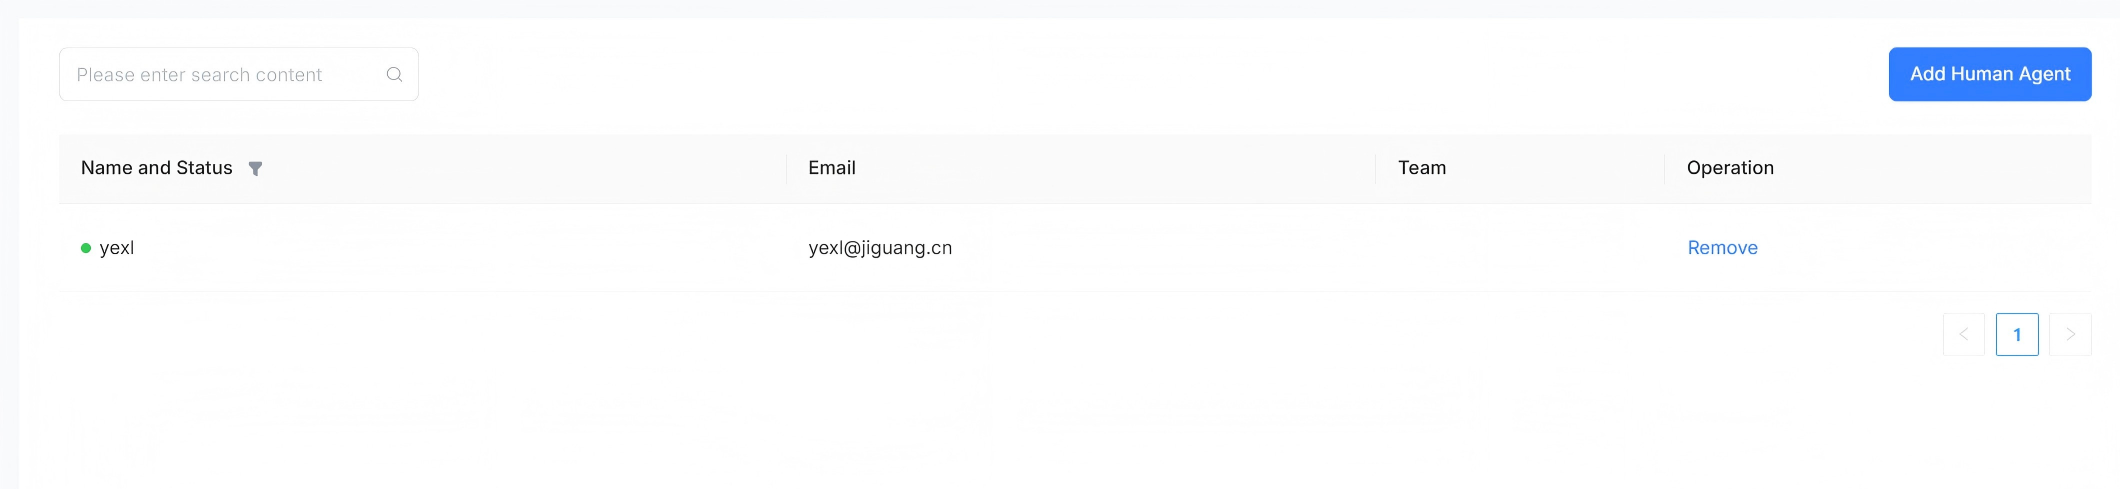
Human Agent
Supports configuring the human agents who handle conversation messages for this channel. Agents can be added or removed.
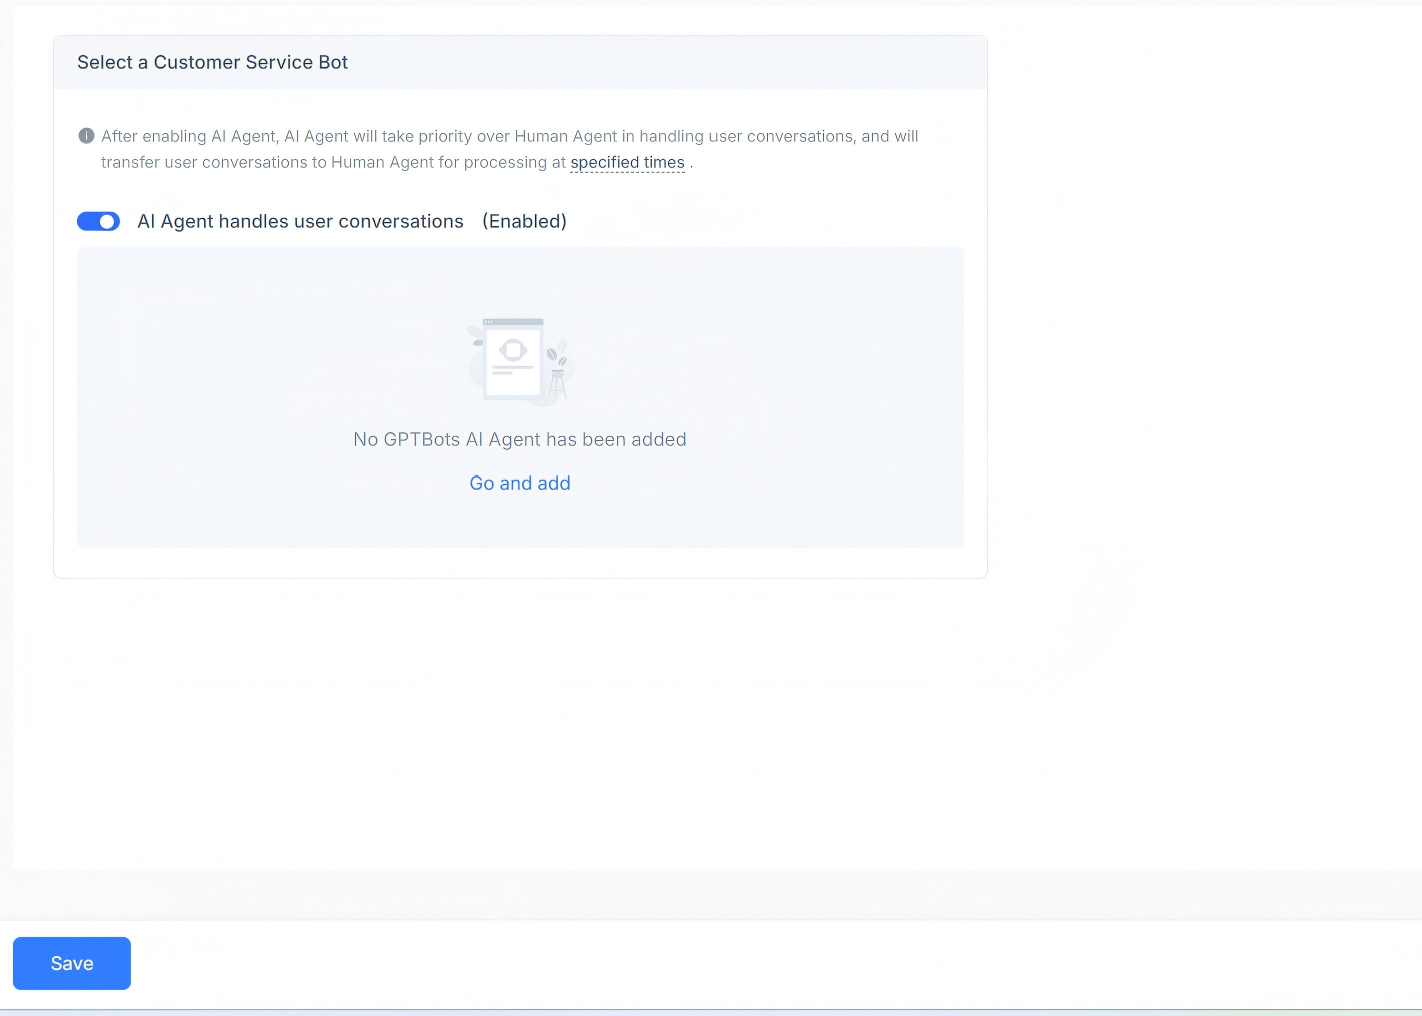
AI Agent
Supports configuring the AI agents who handle conversation messages for this channel. You can enable or disable them, and GPT AI Agent is supported.
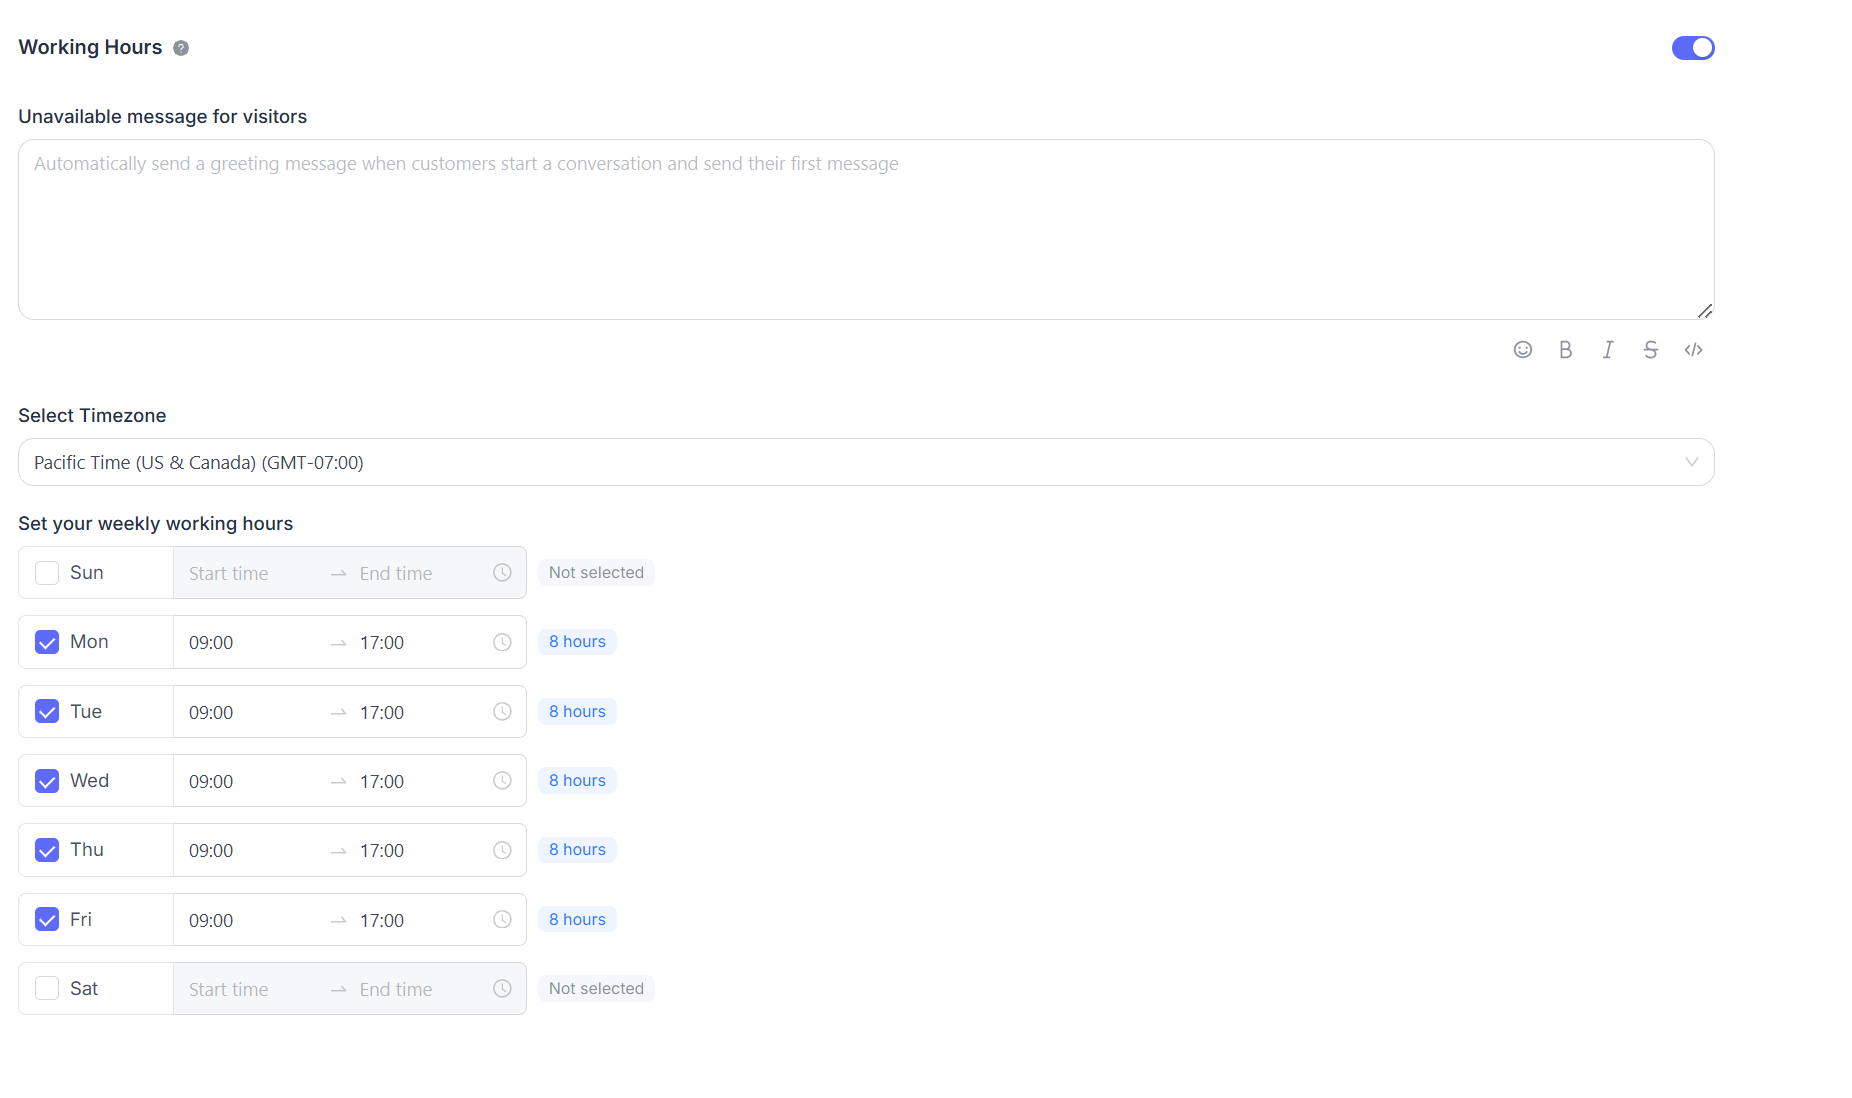
Business Hours
You can configure the team's business hours.

If business hours are clearly defined, select the "Enable business availability for this inbox (enabled)" checkbox. After selecting this option, the corresponding parameter settings will appear below. You can set an unavailable message for visitors outside business hours. You can choose business hour ranges and the corresponding time zone for each day.