LINE
LiveDesk supports adding a LINE channel so you can communicate with users. With this feature, you can:
- Automatically receive messages from LINE and assign them to the corresponding team or agent.
- View detailed profile information for the user who sent the message.
- View, manage, and reply to all messages in the conversation or ticket list.
Below, we will introduce how to add a LINE channel.
Preparations
Register an account
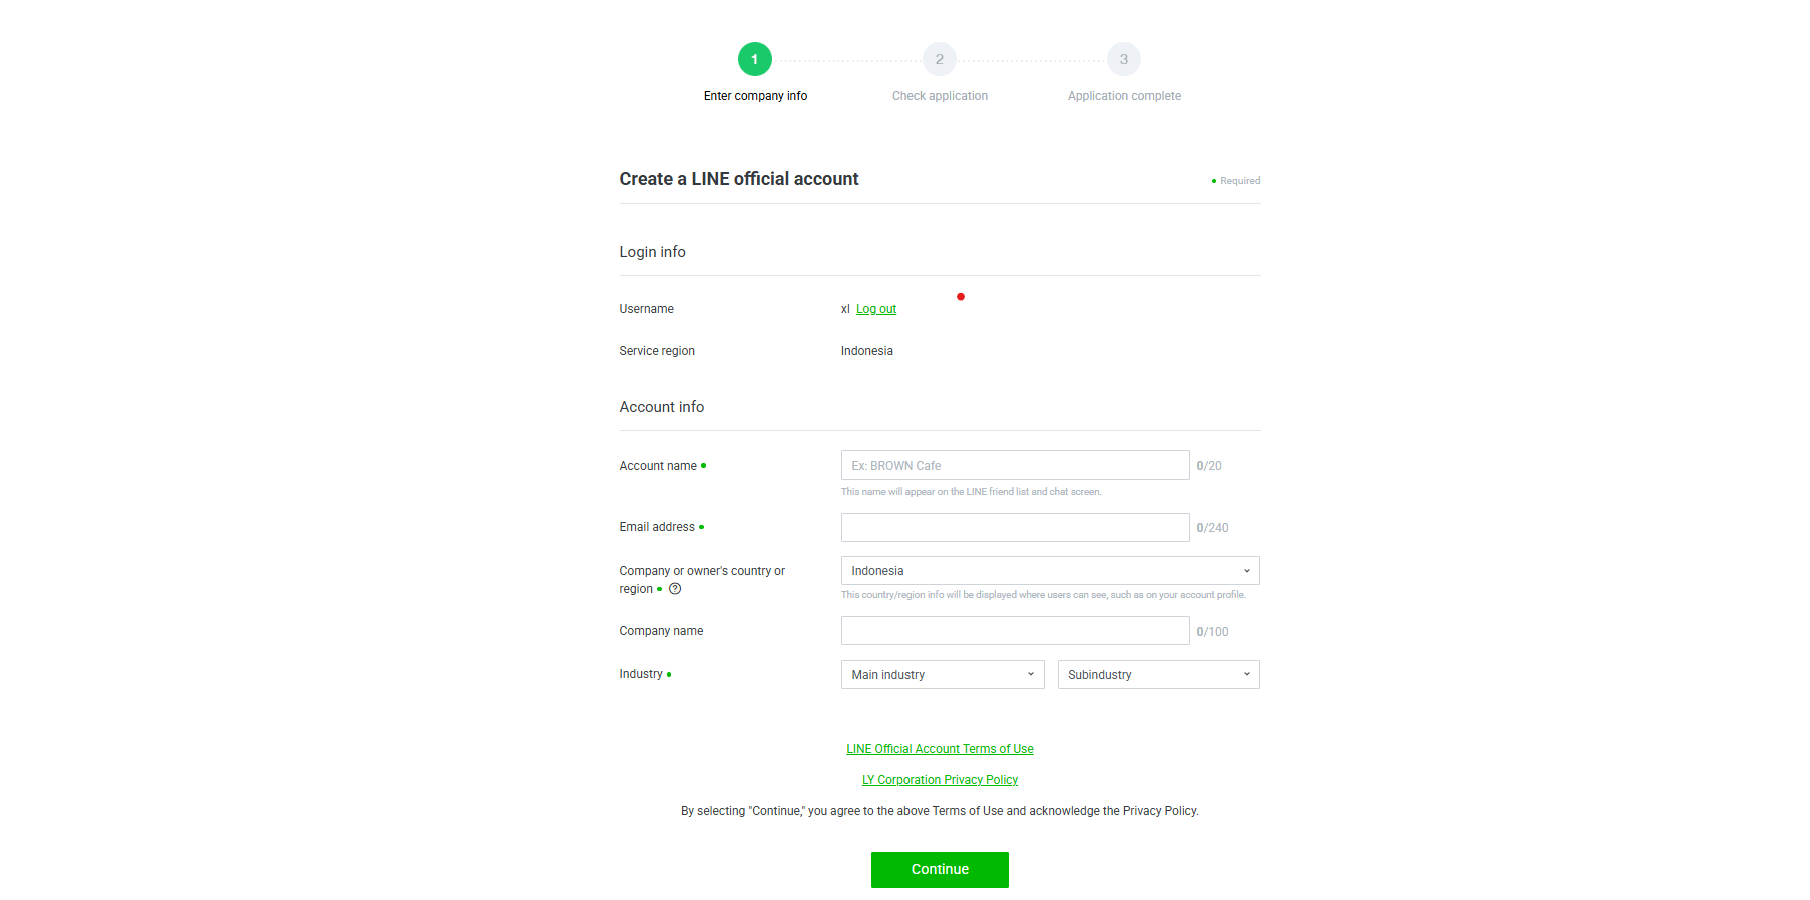
LiveDesk creates a LINE channel based on an official LINE account and API, which are used to send and receive messages through the LINE channel. Therefore, before adding a channel, you need to apply for a LINE account.
Create a Messaging API Channel
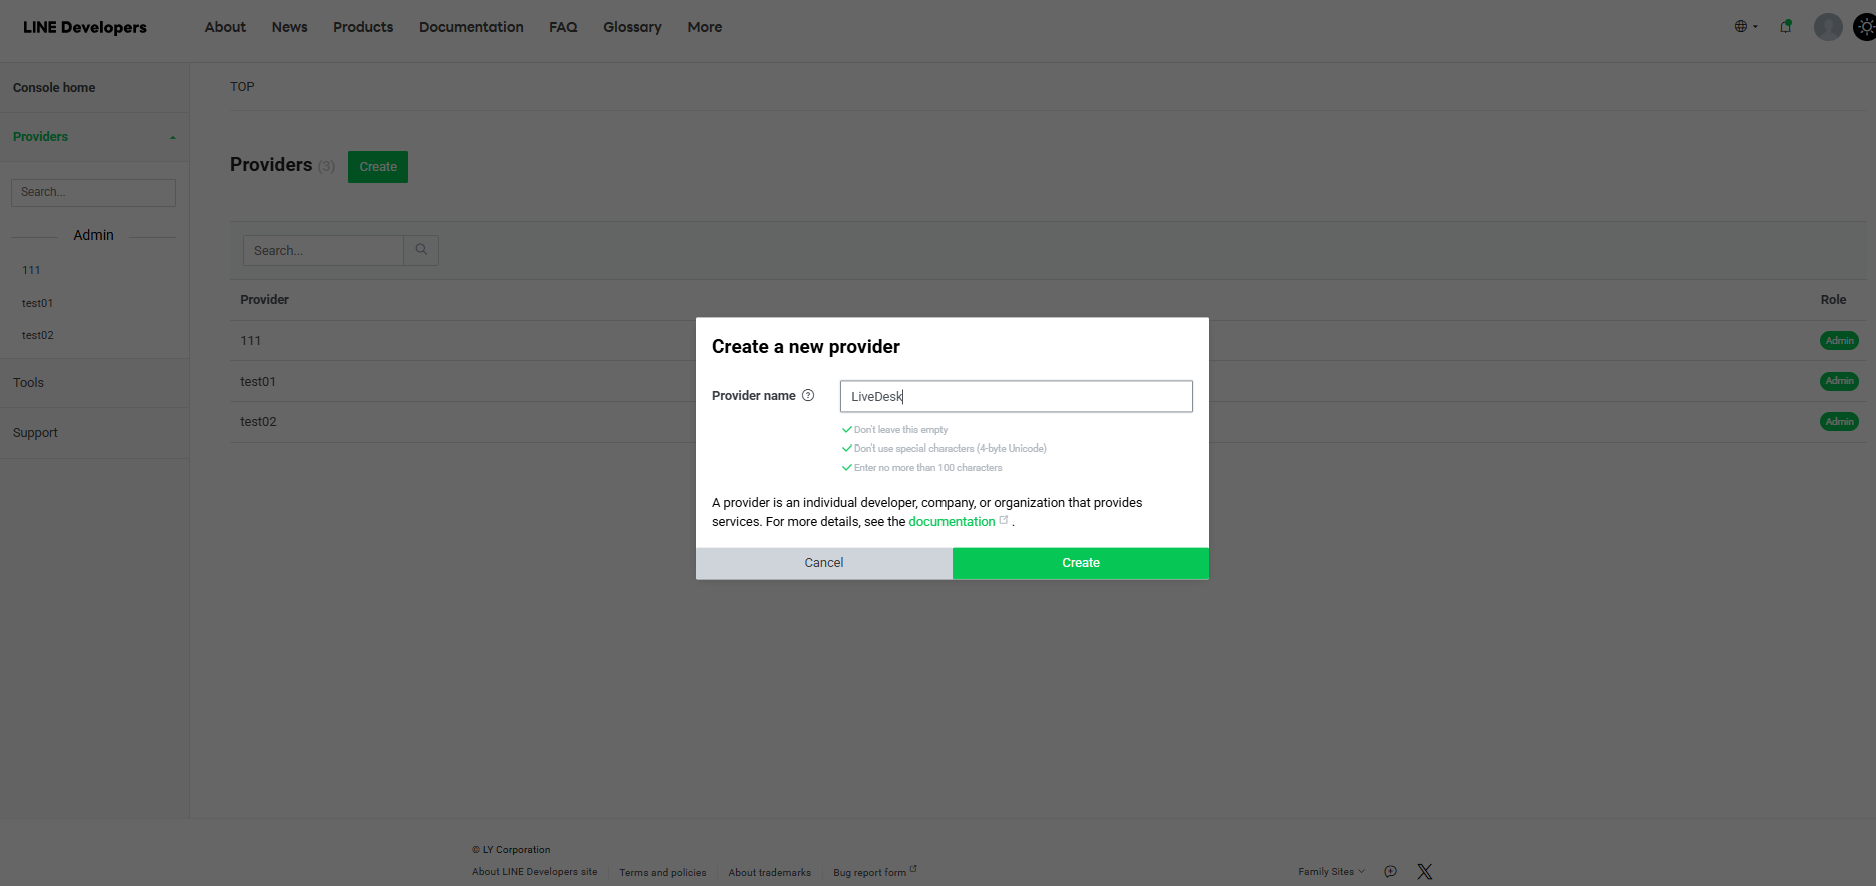
- Create a Provider
Log in to the LINE Console and enter the console interface. Create a Provider or specify one within an existing Provider.
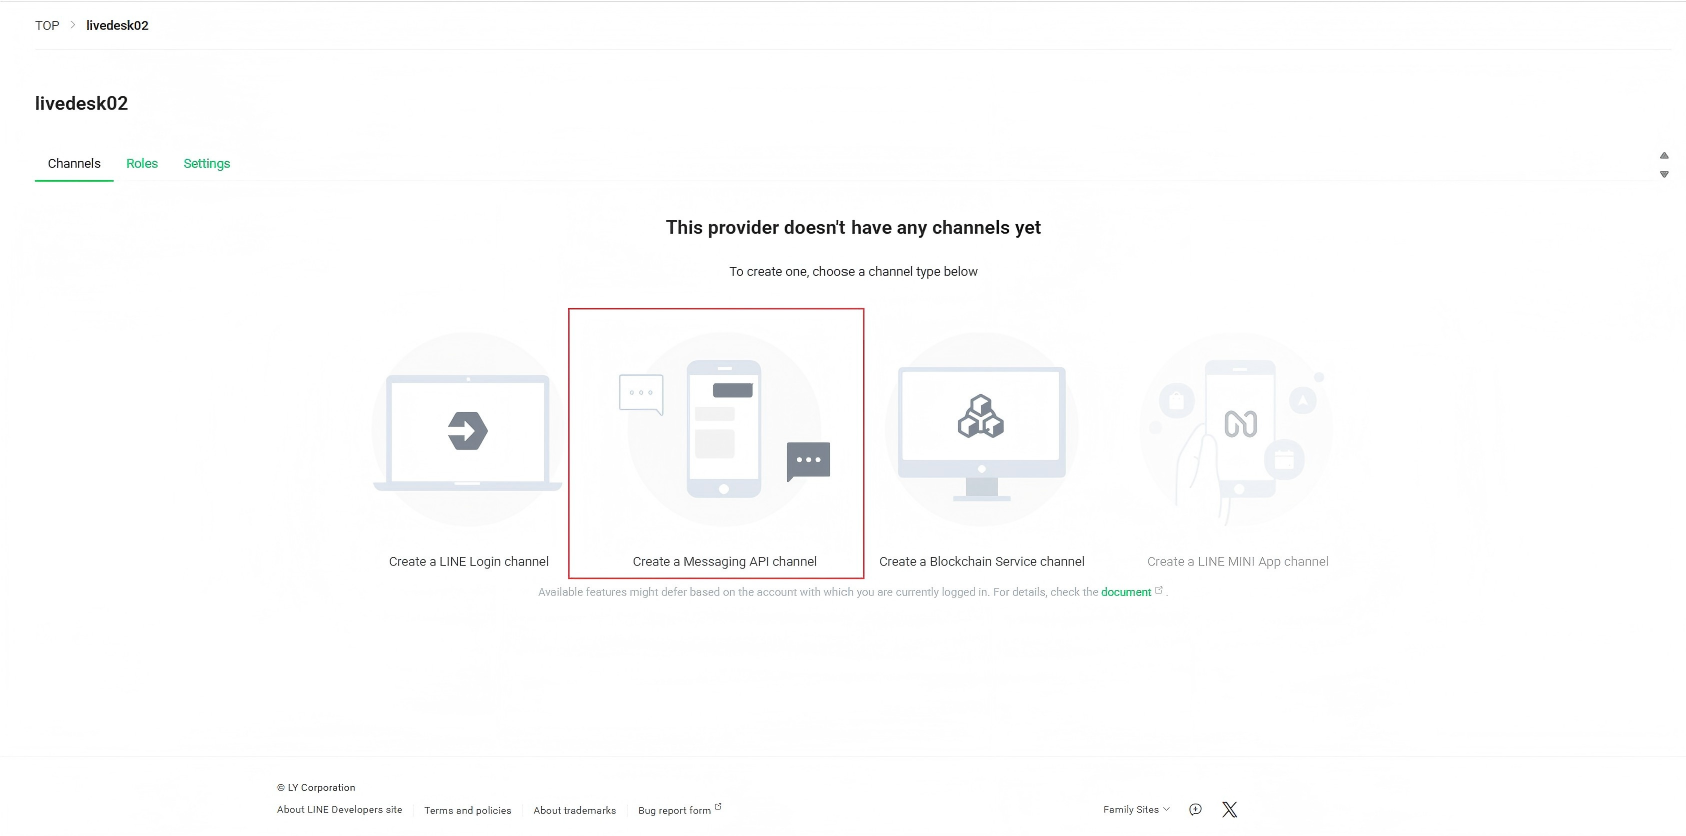
- Configure the Channel
After creating a Provider, go to the page where the Channels tab is displayed by default. If no channel has been configured yet, you need to create one first: click "Create a Messaging API channel." Follow the platform instructions to complete channel creation, then enter the channel page. If you do not have an official account, follow the instructions to enter the required information and you will be redirected to create the corresponding official LINE account.
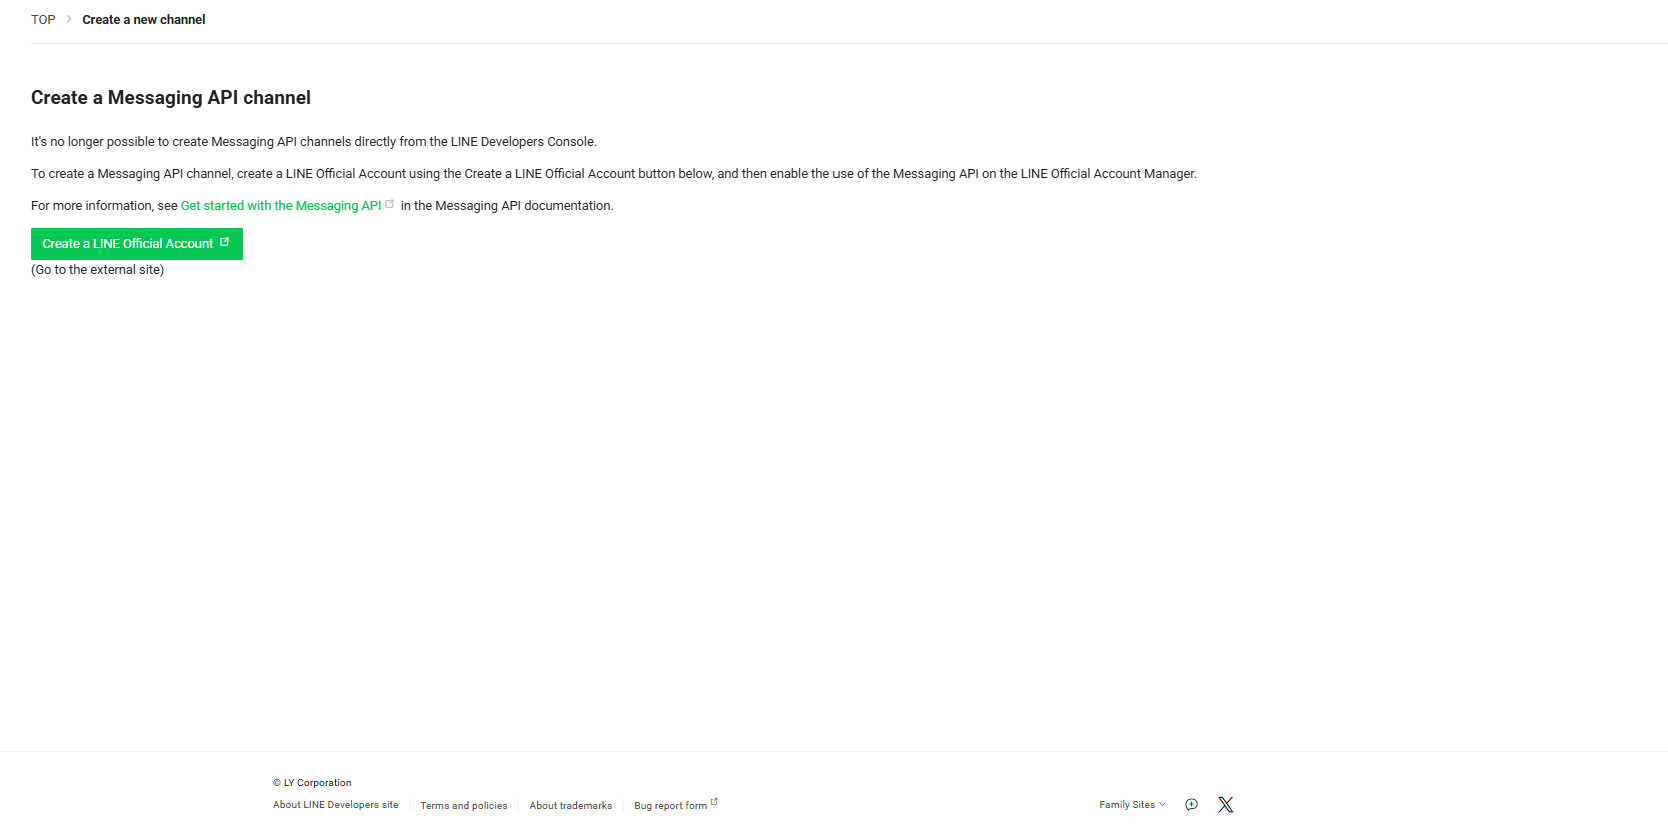
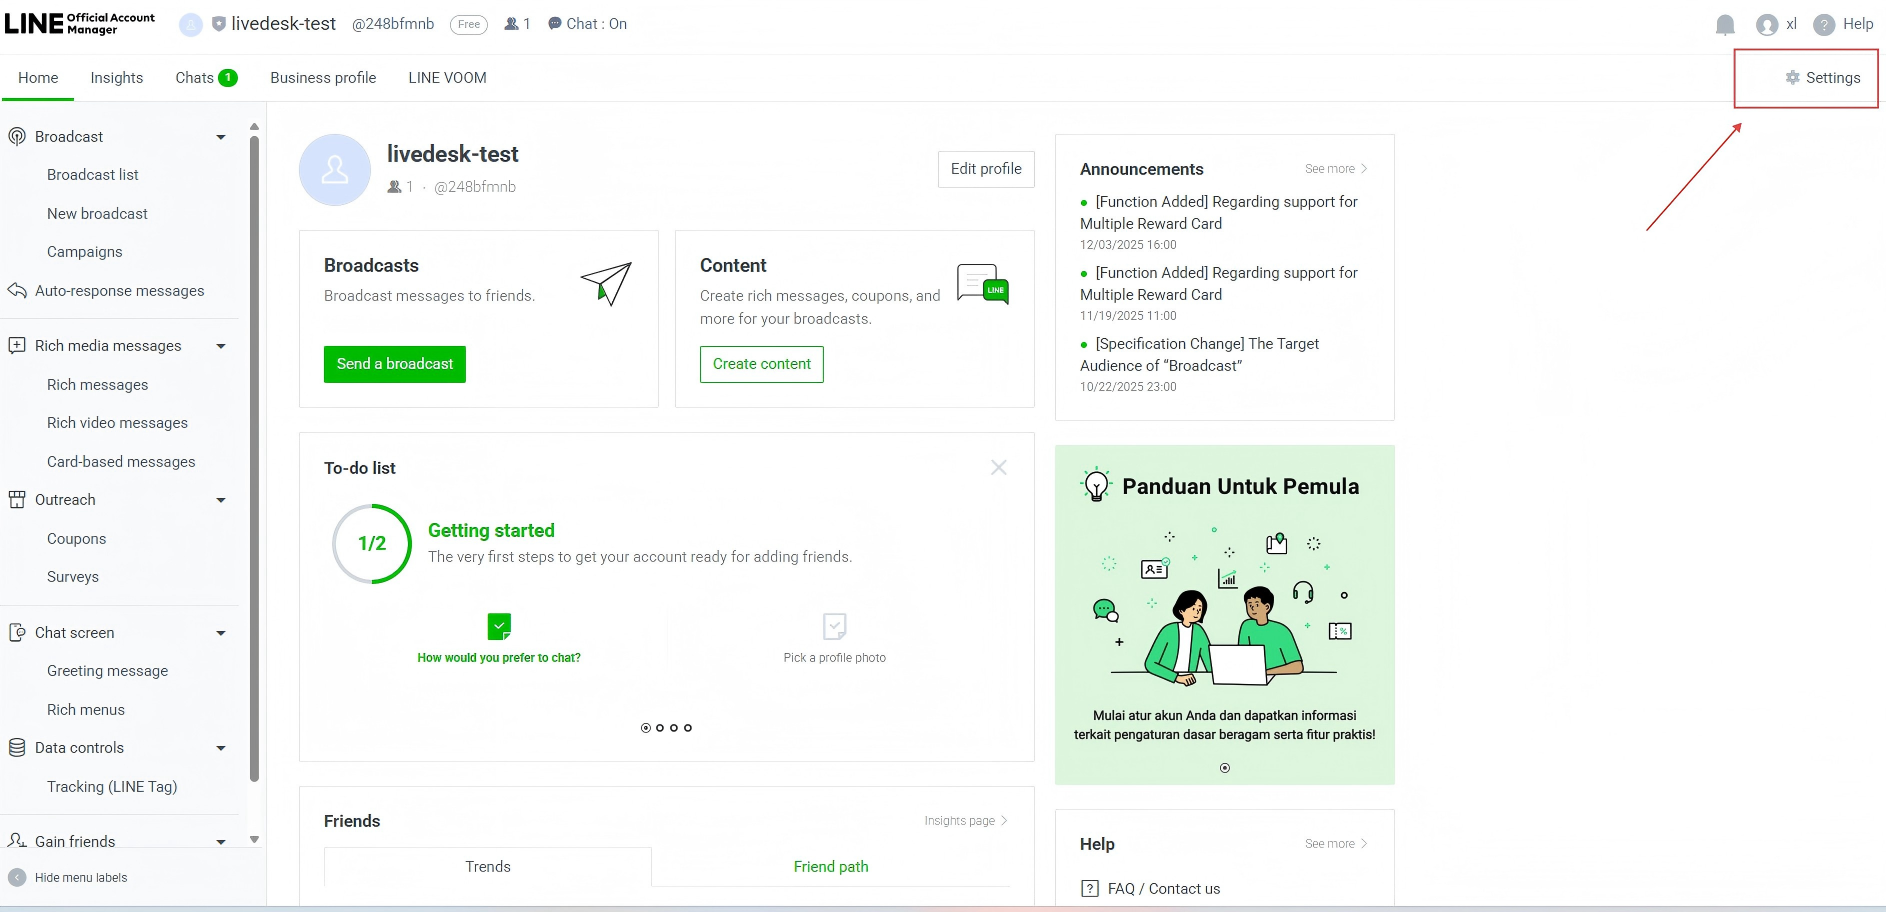
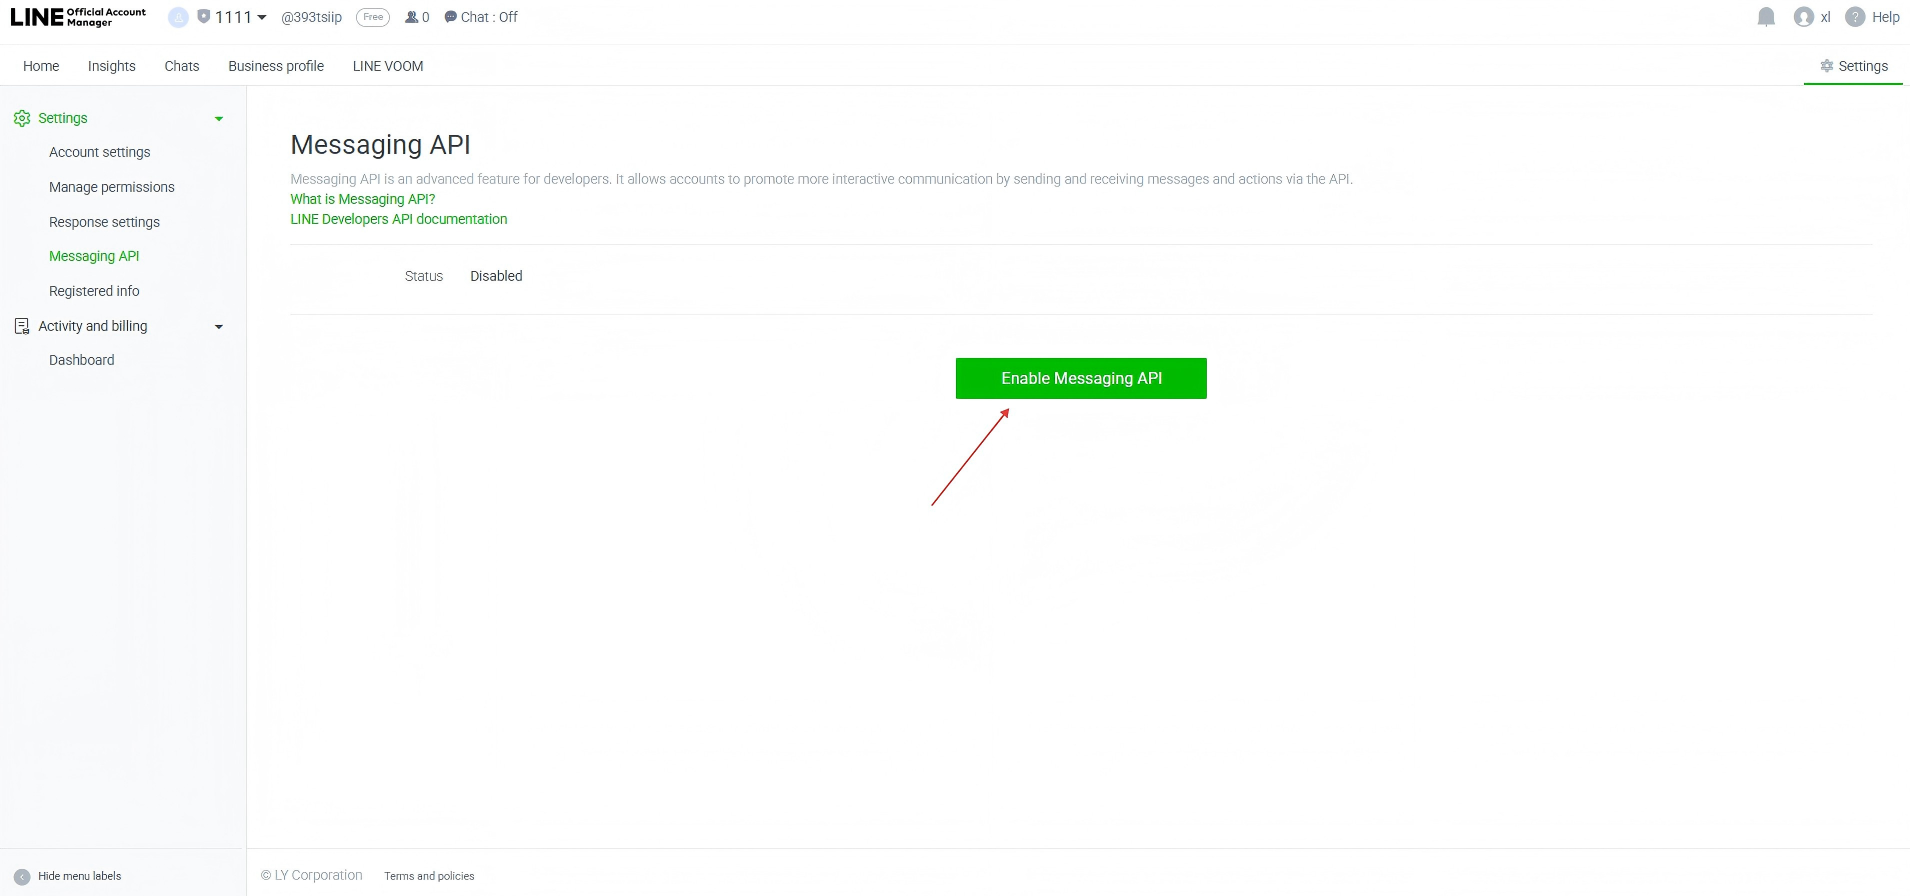
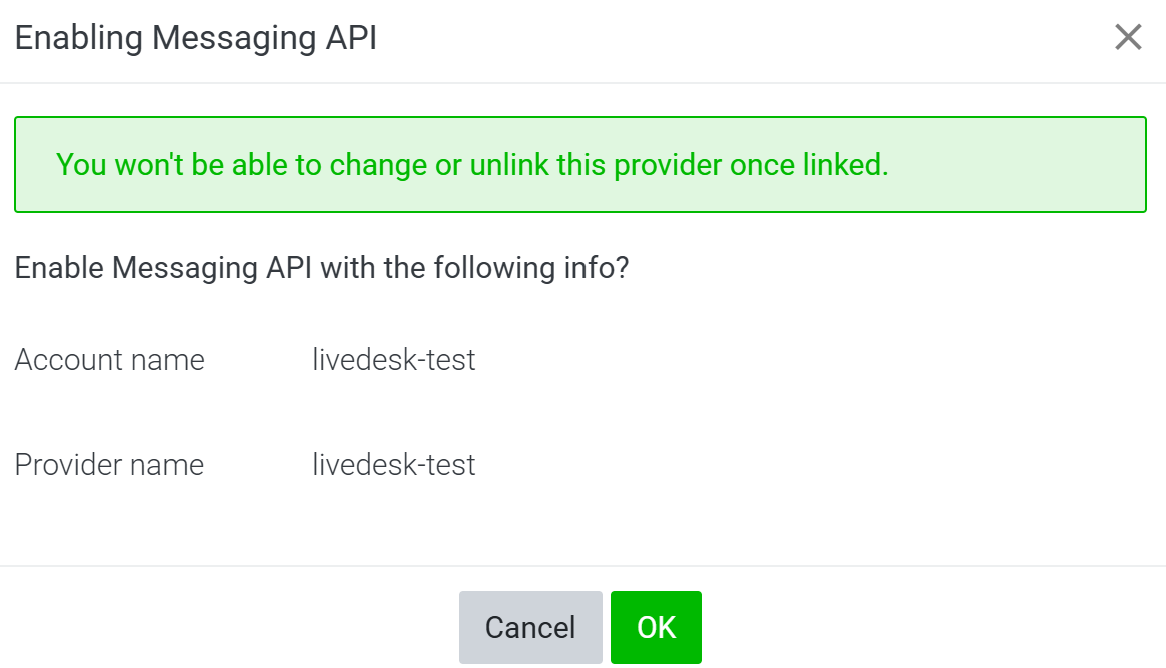
After creation is complete, you will enter the LINE Official Account Manager. Select Setting --> Messaging API, then select "Enable Messaging API" to enable the Messaging API. After enabling it, specify the Provider bound to this API channel, then click Confirm to complete the setup.
- Obtain the token and other configuration information
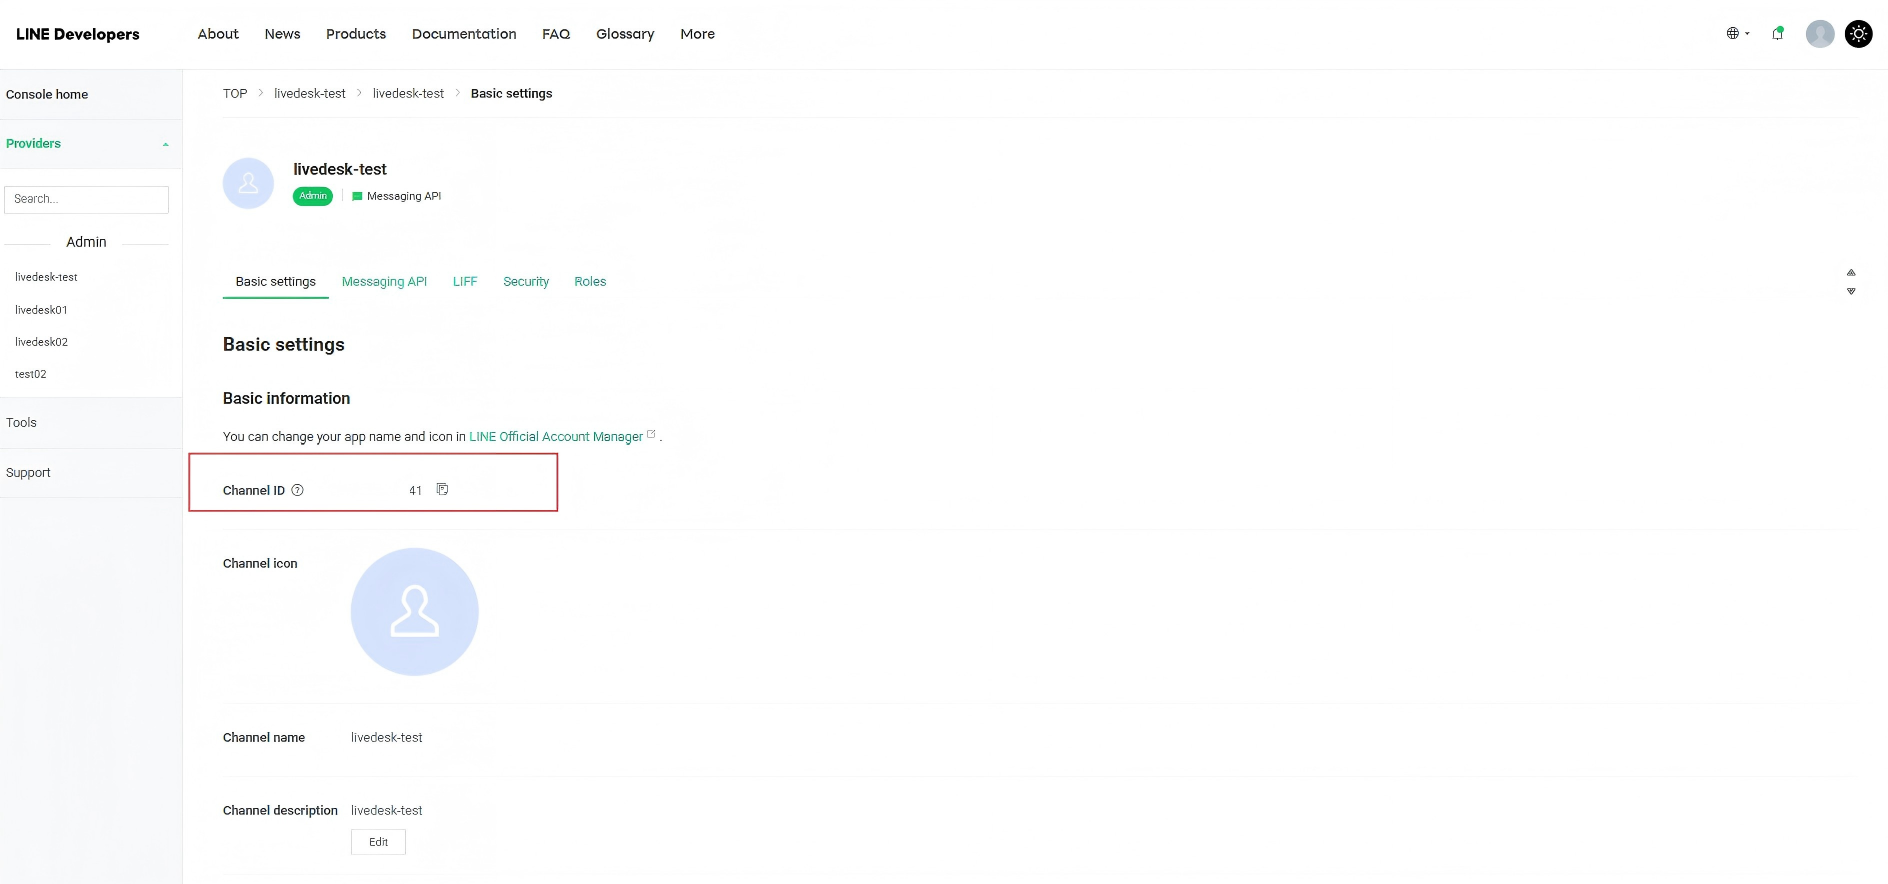
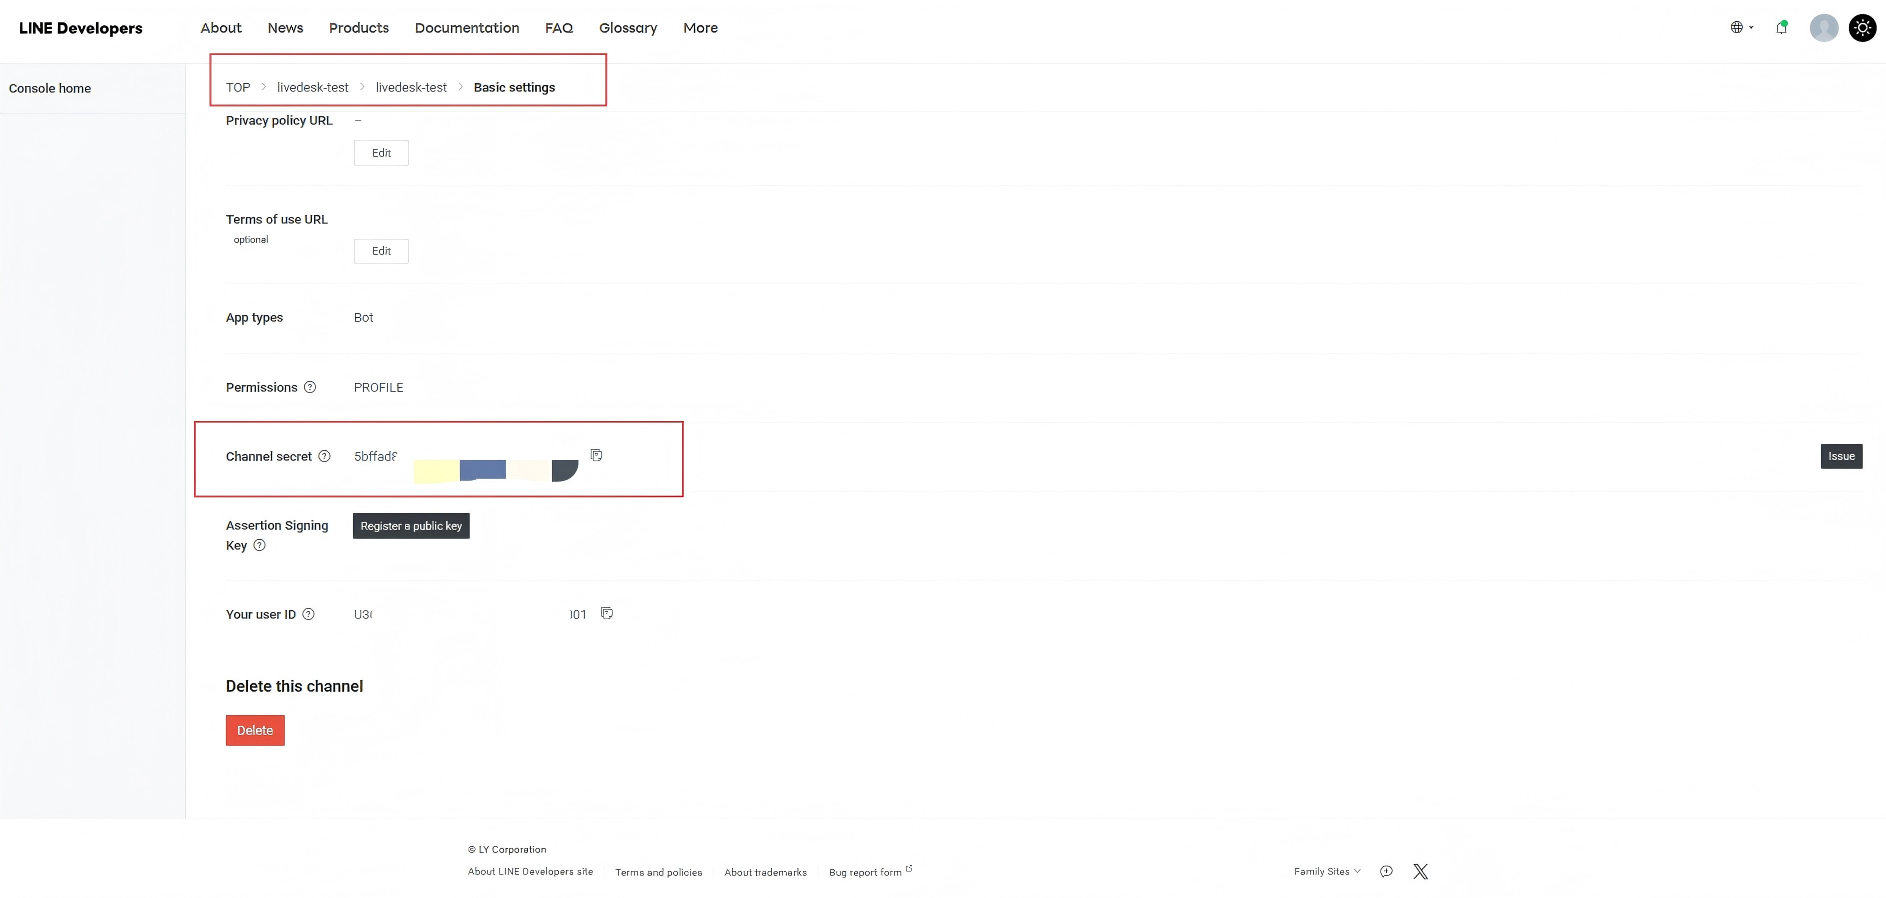
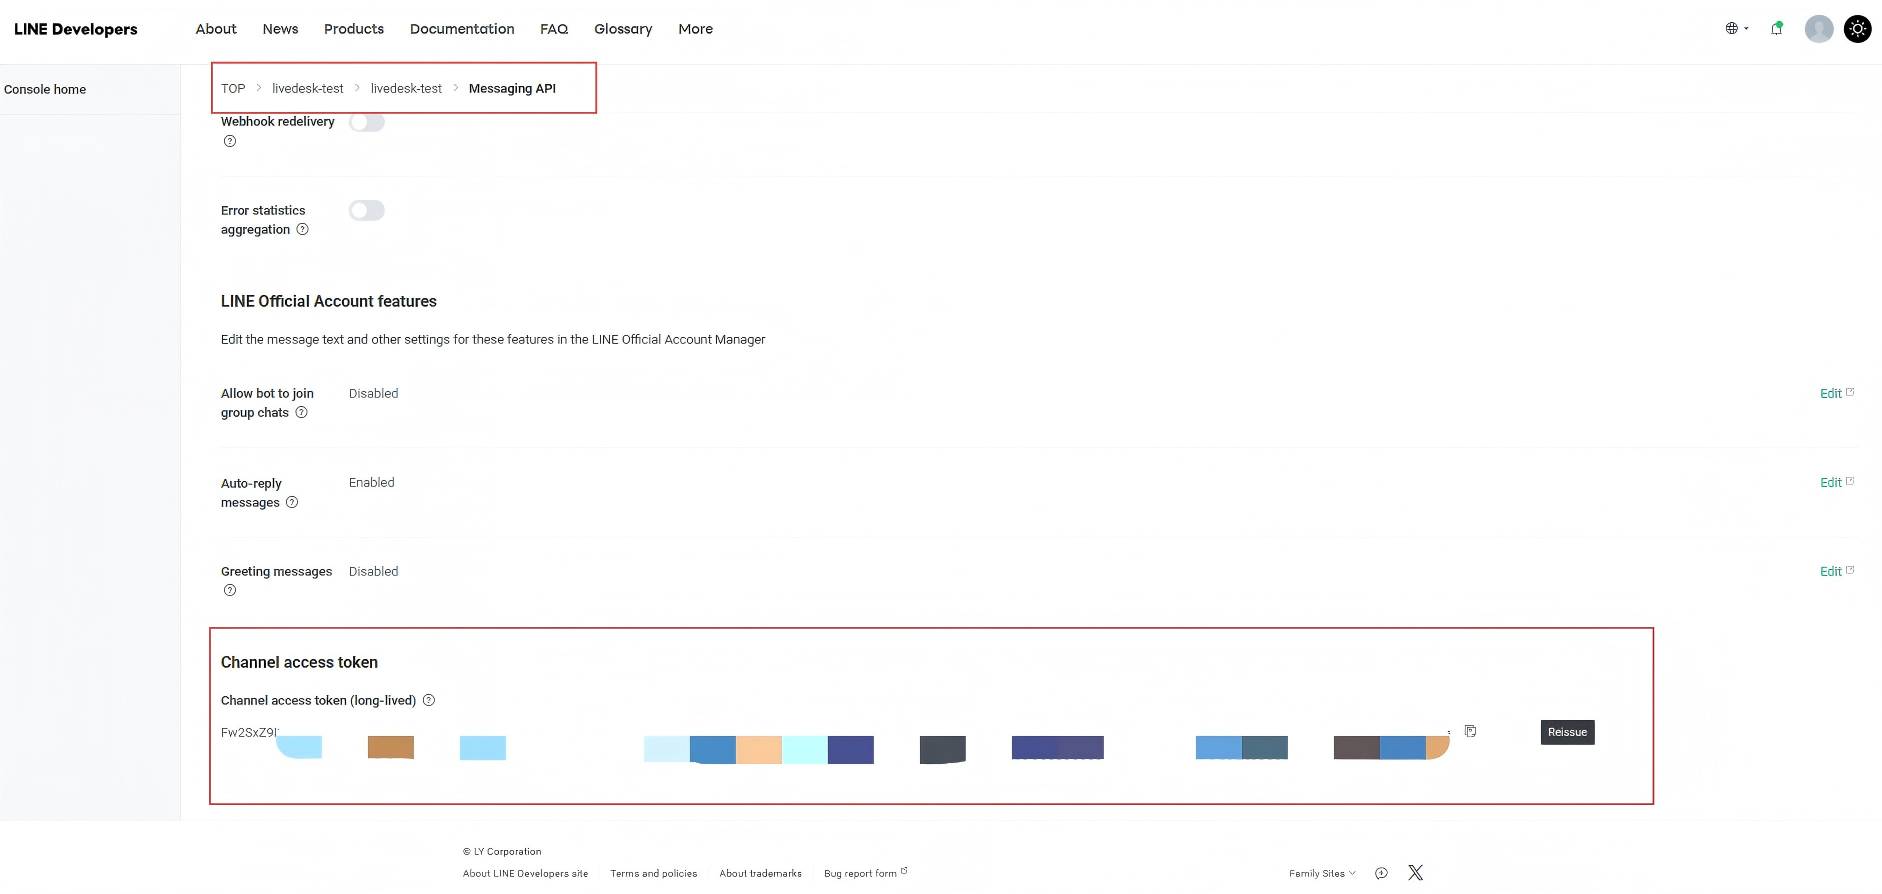
After completing the above configuration, return to the LINE Developers Platform, select the channel configured in the previous step, and on the page you can view the Channel ID, Channel Secret, and Channel access token required later to create the channel in LiveDesk under Basic Setting. Copy and save them for later use during configuration.
"Add Channel" - "LINE"
Enter configuration information
Fill in the configuration information according to the interface prompts, then click "Confirm" when finished.
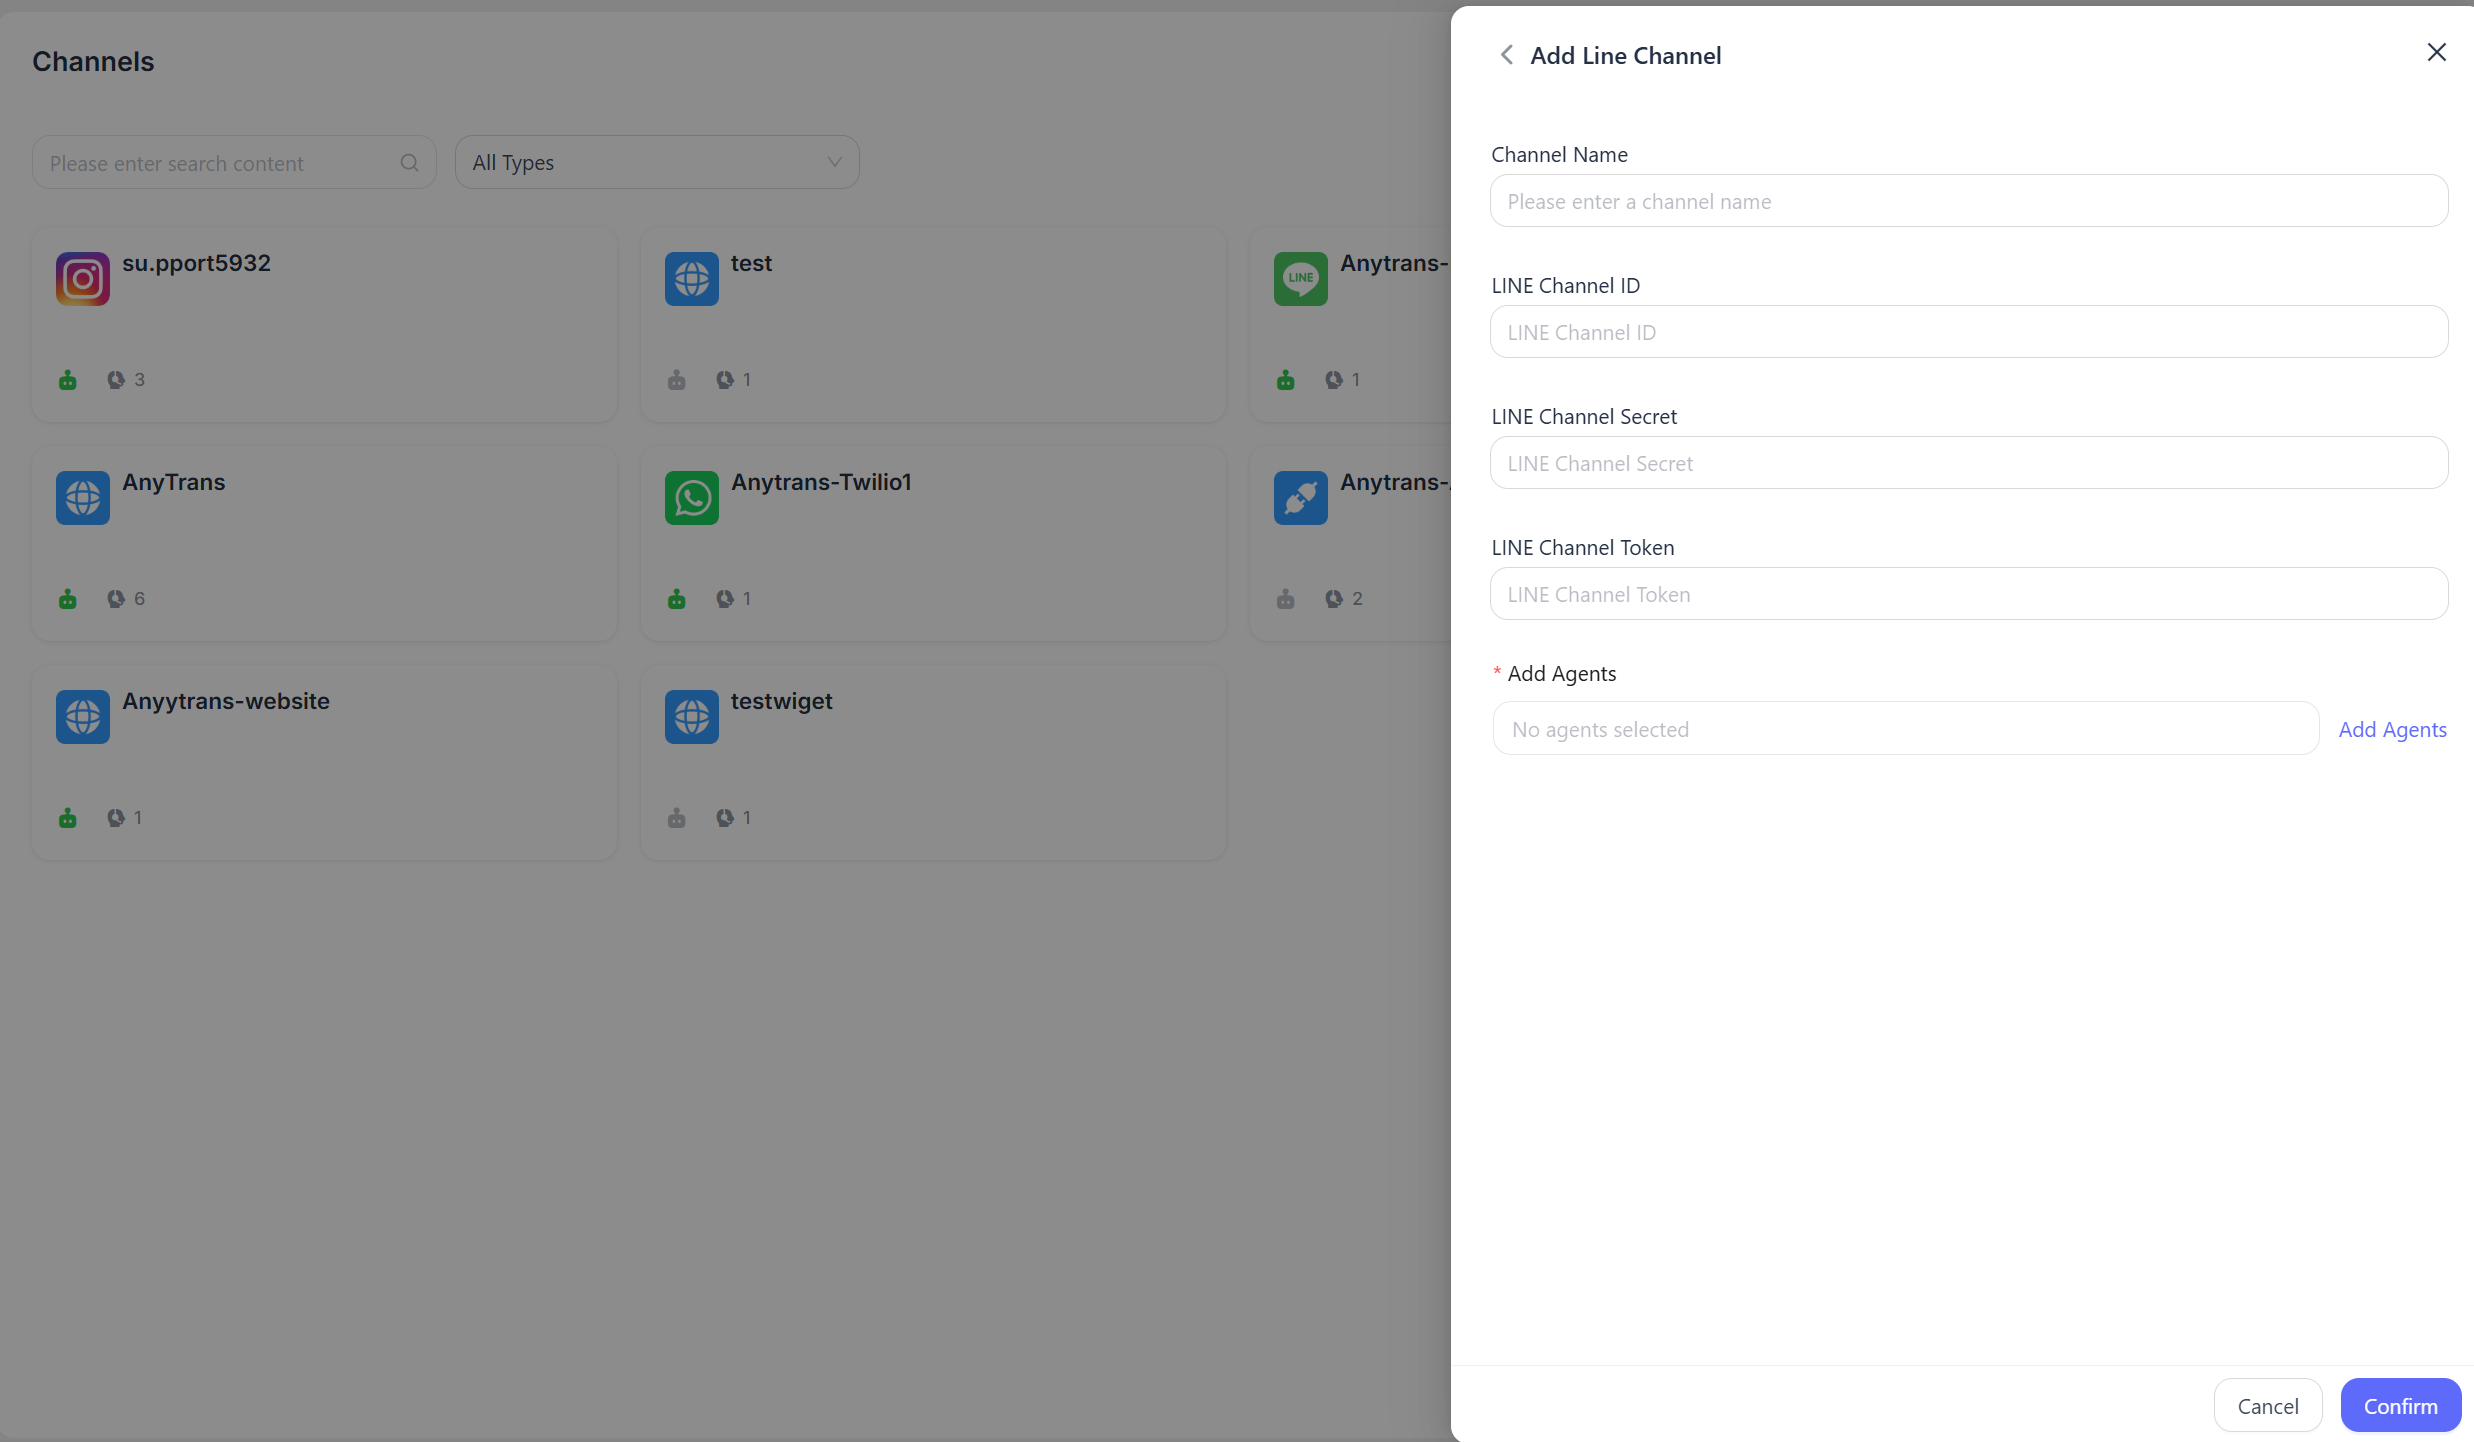
- Channel name: Enter the channel name.
- LINE Channel ID: Enter the LINE channel ID used to receive messages.
- LINE Channel Password: Enter the password for the LINE channel.
- LINE Channel Token: Enter the access token for the LINE channel.
Set the callback address
You need to set and verify the callback address webhook URL for messages in LINE. After completing channel creation in LiveDesk, you can view the generated webhook address for this channel in the configuration and copy it.
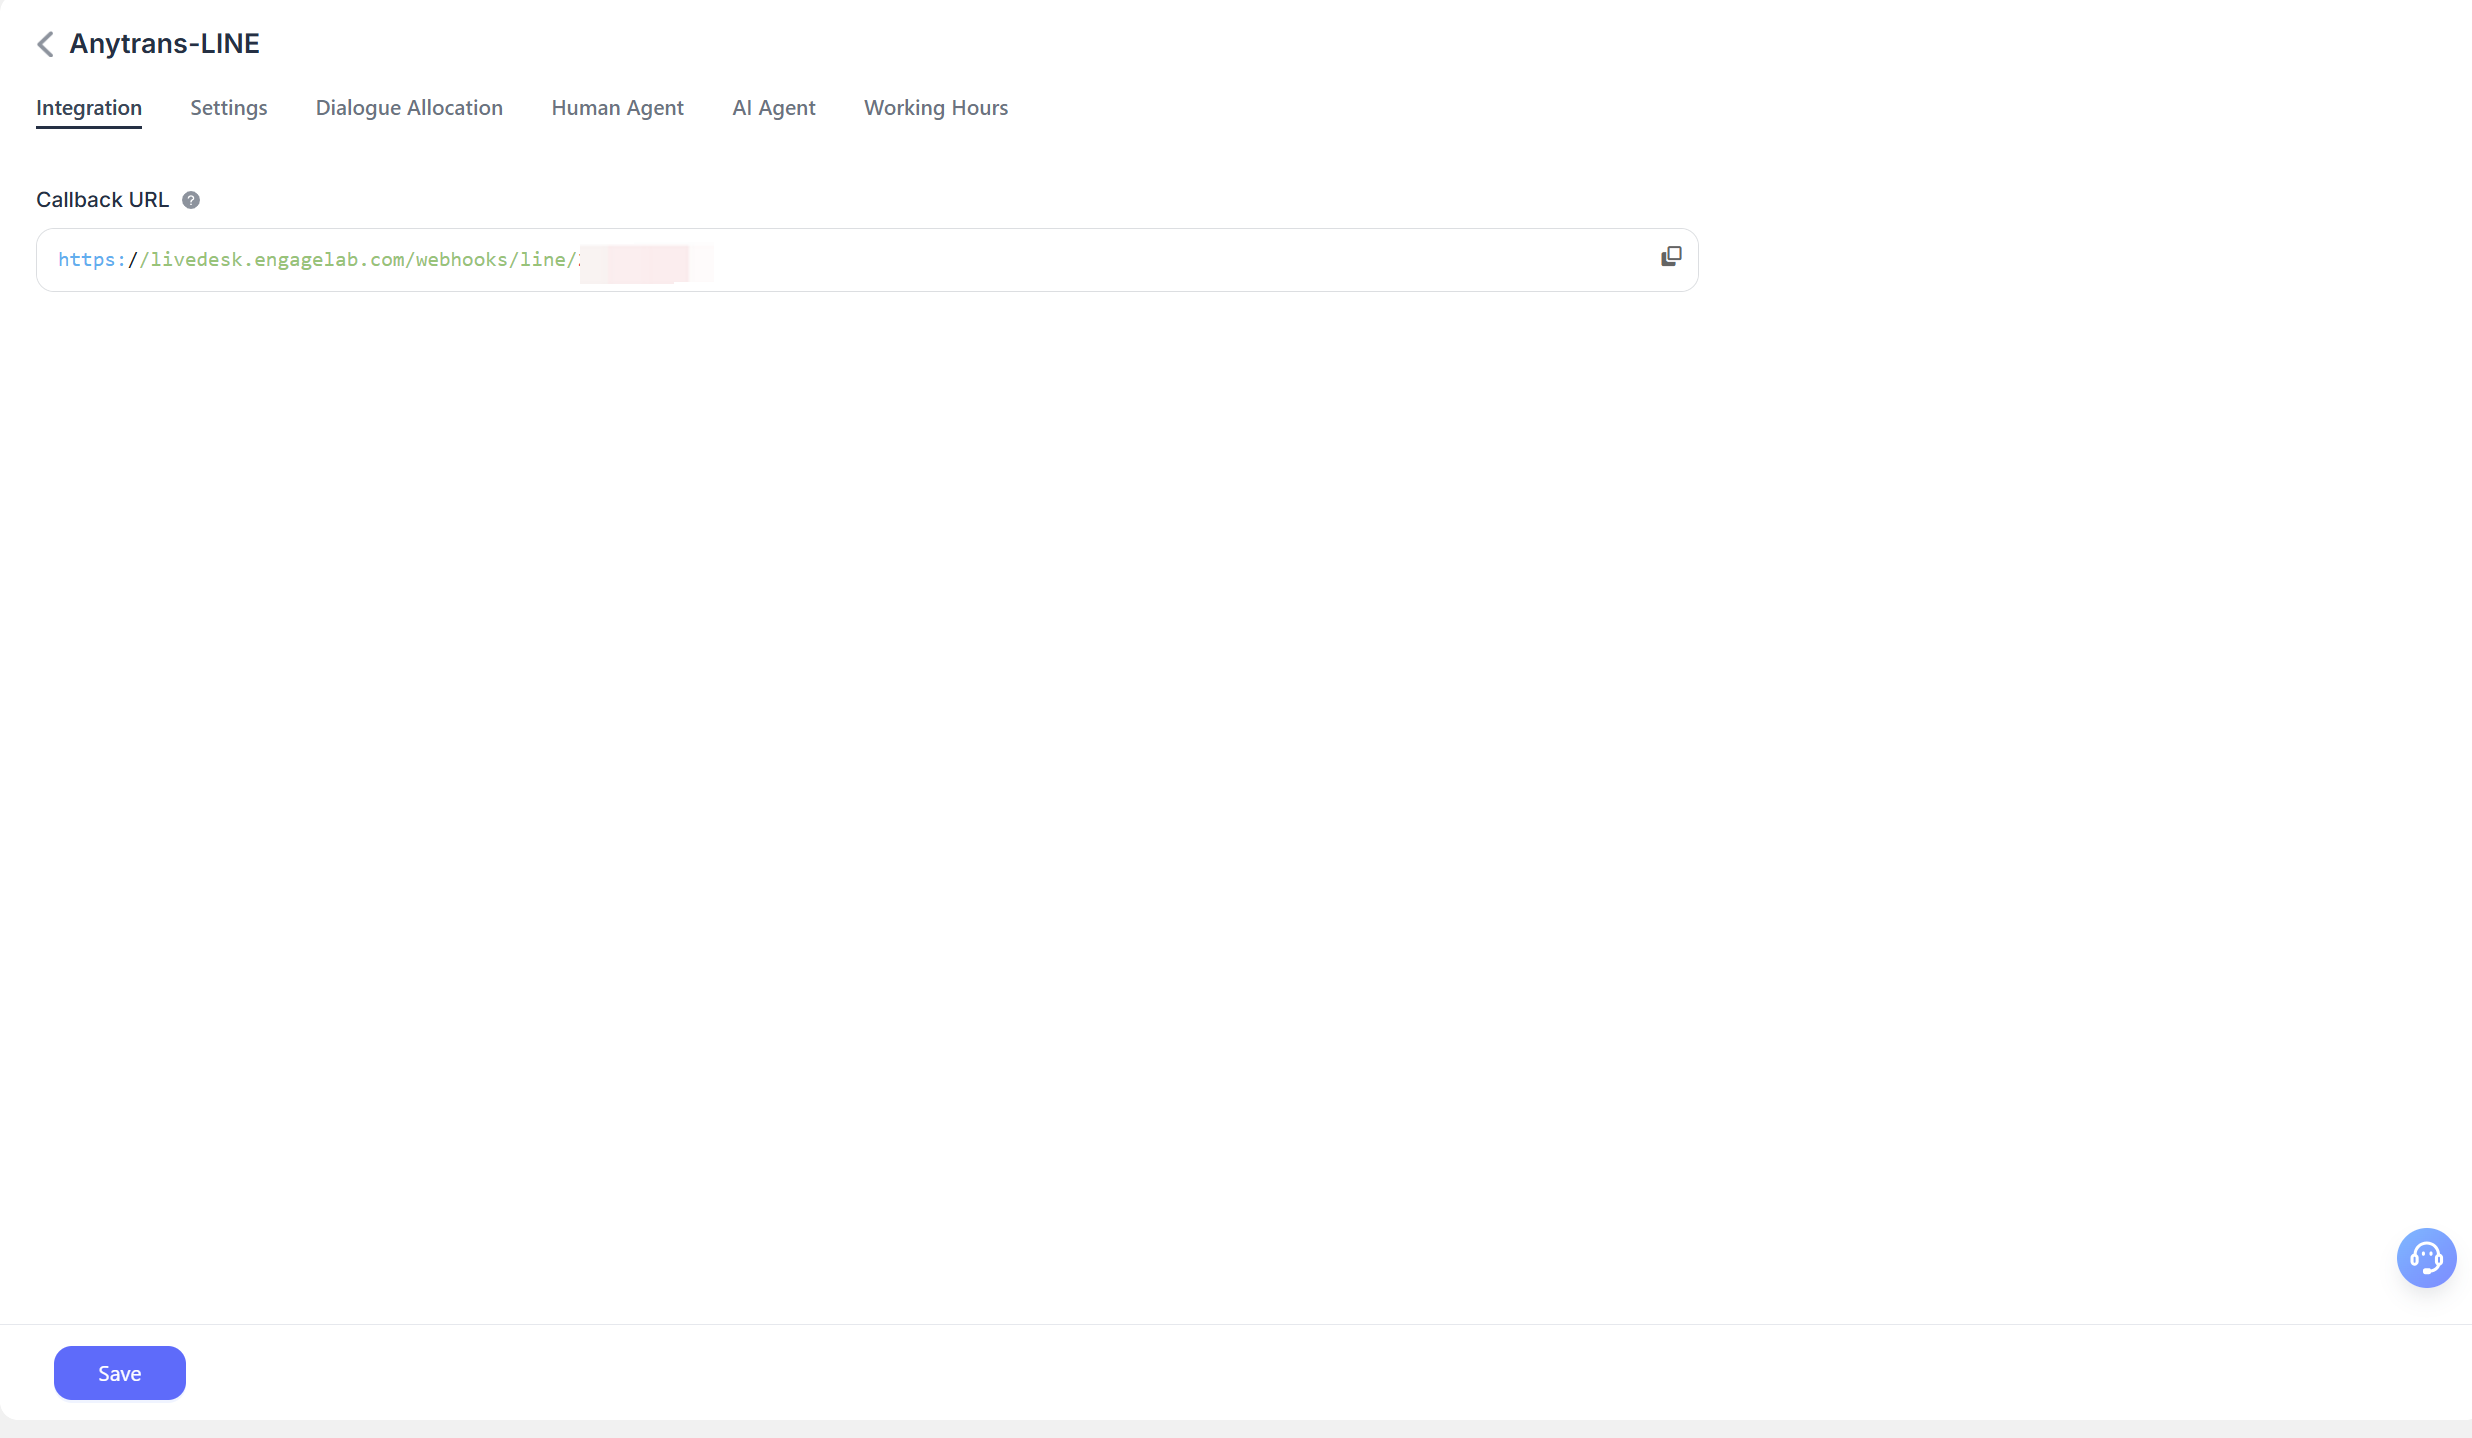
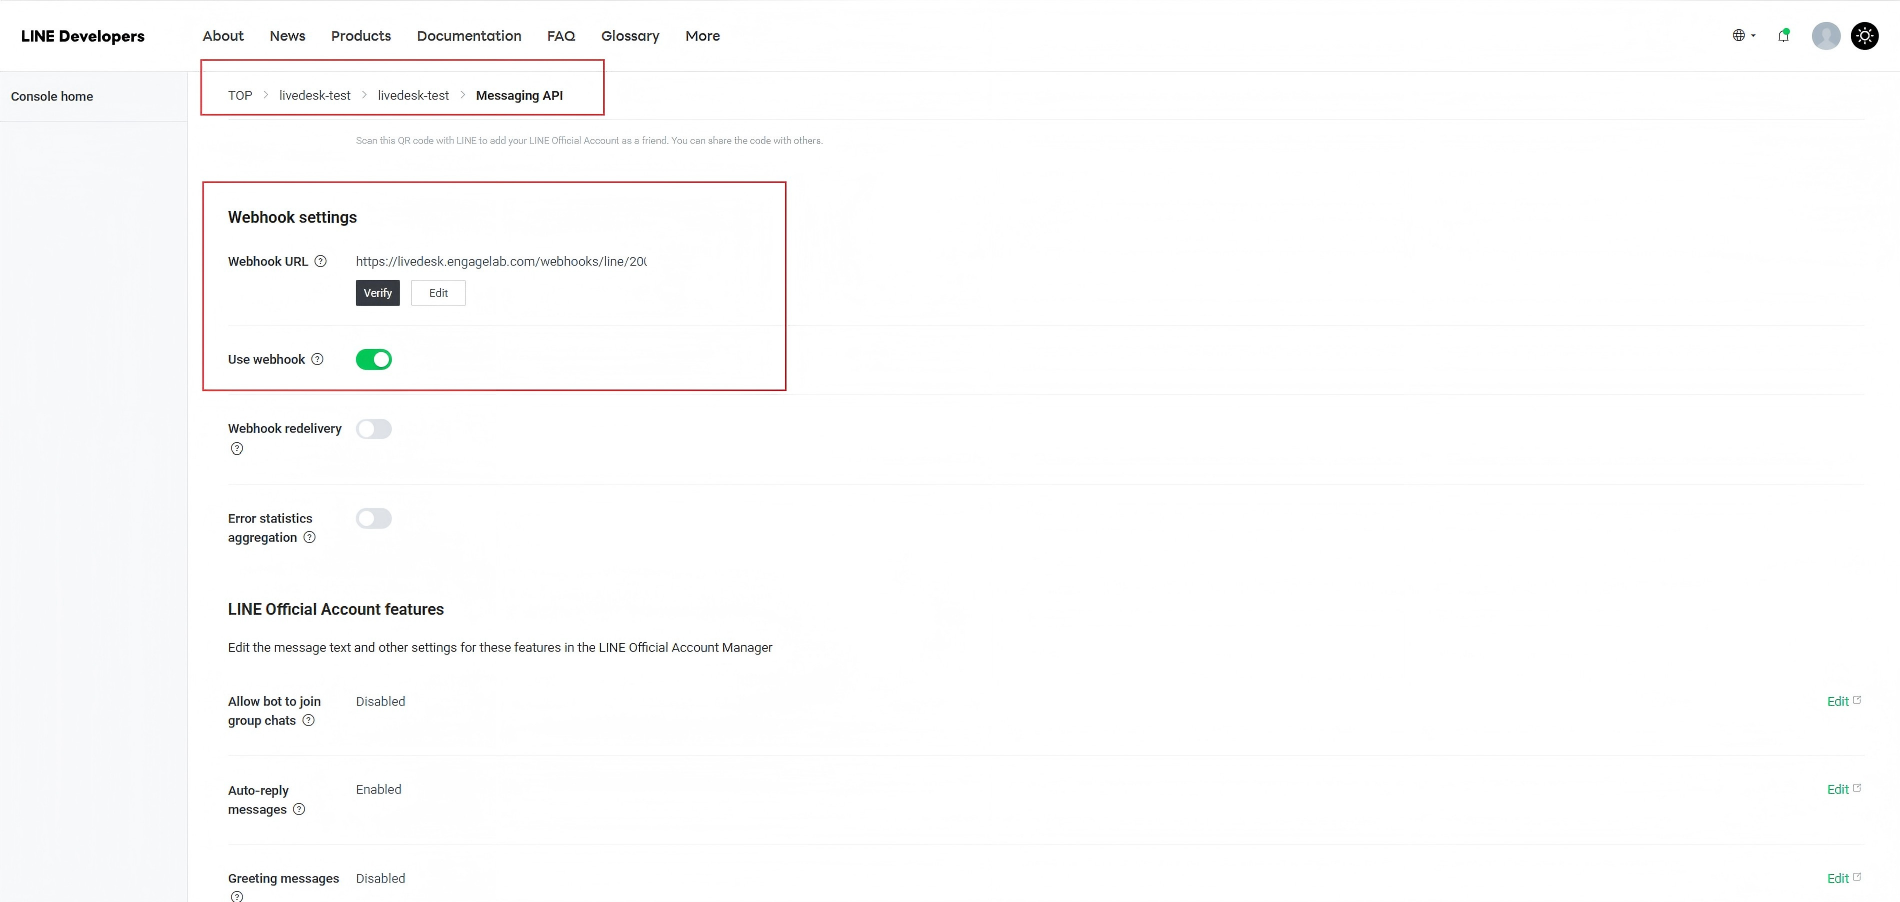
Open the LINE Developers Platform, select the corresponding Provider that needs to be configured, open the Messaging API settings page, and paste the address copied in the previous step into the Webhook URL field.
Detailed settings
After the channel is created, you can configure detailed settings for the corresponding channel.
Settings
Set channel greeting message
Disabled by default. Enter a custom greeting message, which will be automatically sent to the customer when the customer starts a conversation.
Enable CSAT
After enabling this feature, a customer satisfaction survey will be launched automatically each time an issue is resolved. CSAT scores can be viewed later in the reports section.
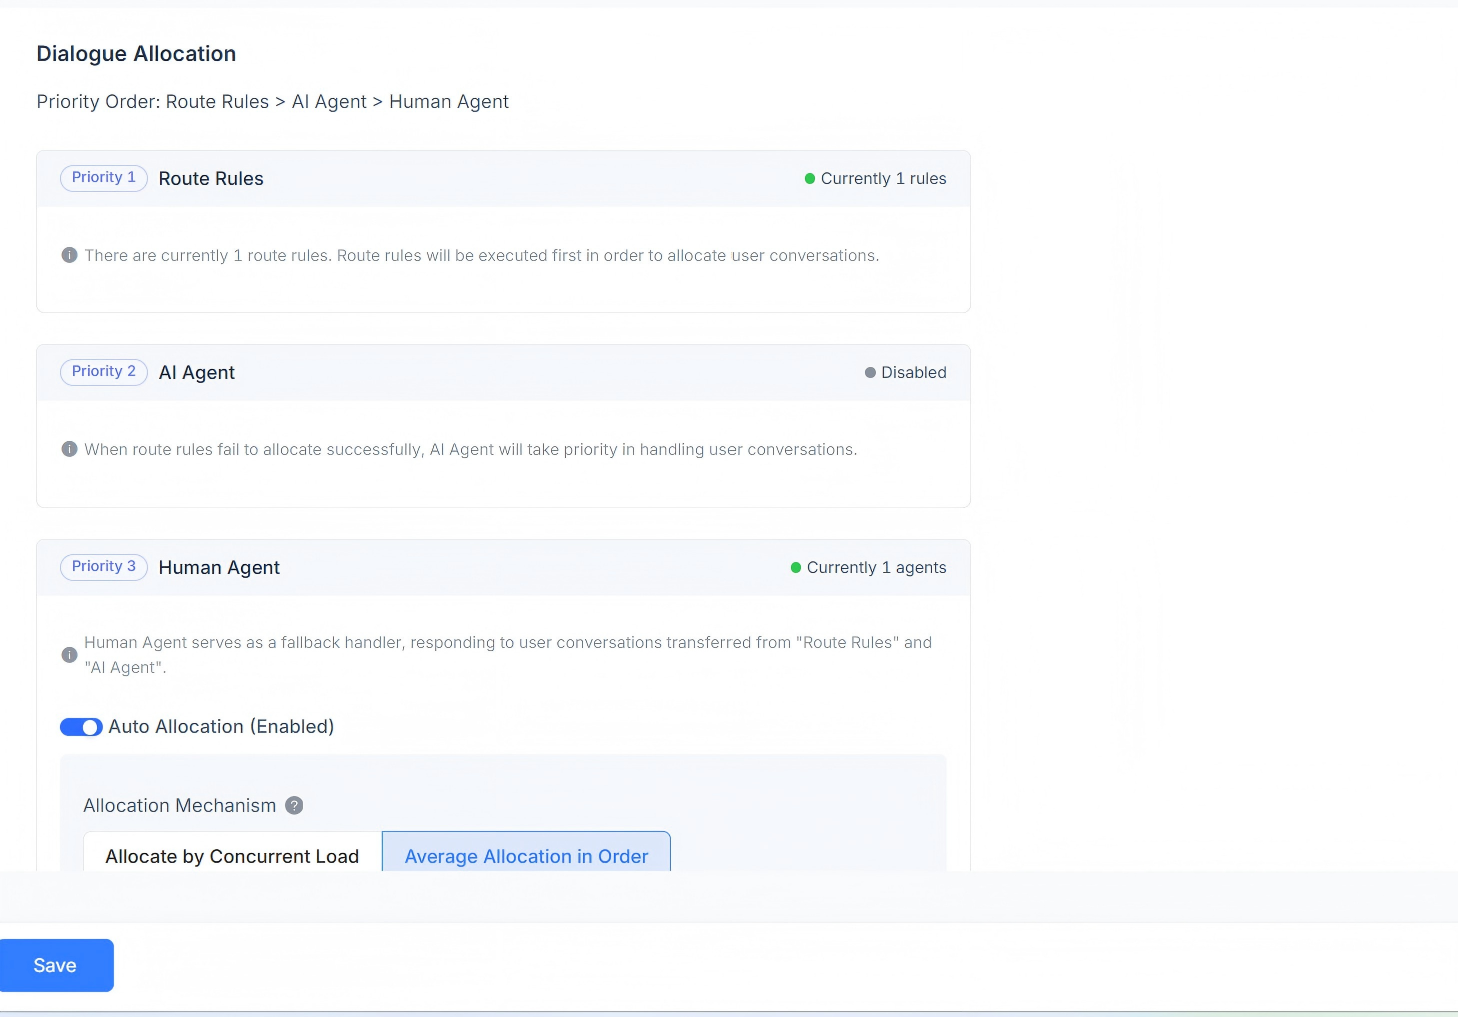
Conversation assignment
Displays the current conversation assignment rules for the channel. Supports routing rules, AI Agent, and Human Agent responses. Conversation assignment priority: routing rules > AI Agent > Human Agent.
When routing rules exist, the system first determines whether the routing rule requirements are met. If multiple routing rules exist at the same time, they are evaluated in order. If a rule matches, the conversation is assigned according to that rule.
If the current scenario does not satisfy the routing rules, the conversation will be assigned to the AI Agent first.
If there is no AI Agent, it will be assigned to the corresponding Human Agent. Automatic assignment is supported, including assignment by concurrent workload, sequential round-robin assignment, and assignment based on custom agent workload.
Assignment by workload
Conversations are assigned according to the defined workload quantity, with priority given to agents with lower concurrent workloads.
Sequential round-robin assignment
Without considering each agent's workload settings, conversations are assigned evenly to each agent in sequence.
Assignment by custom agent workload
Set a custom workload value for each agent individually, with priority given to agents with lower concurrent workloads.
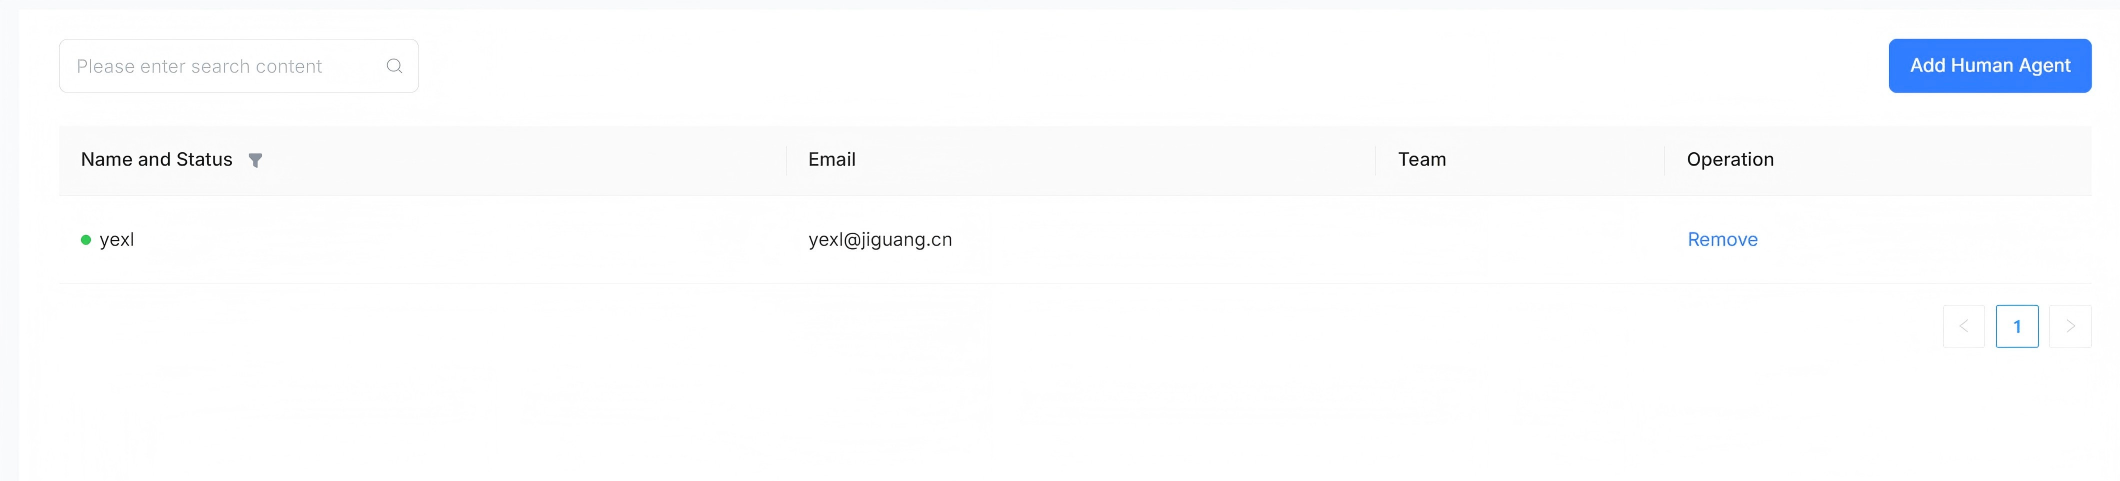
Human Agent
Supports setting human agents to handle conversation messages for this channel. Agents can be added or removed.
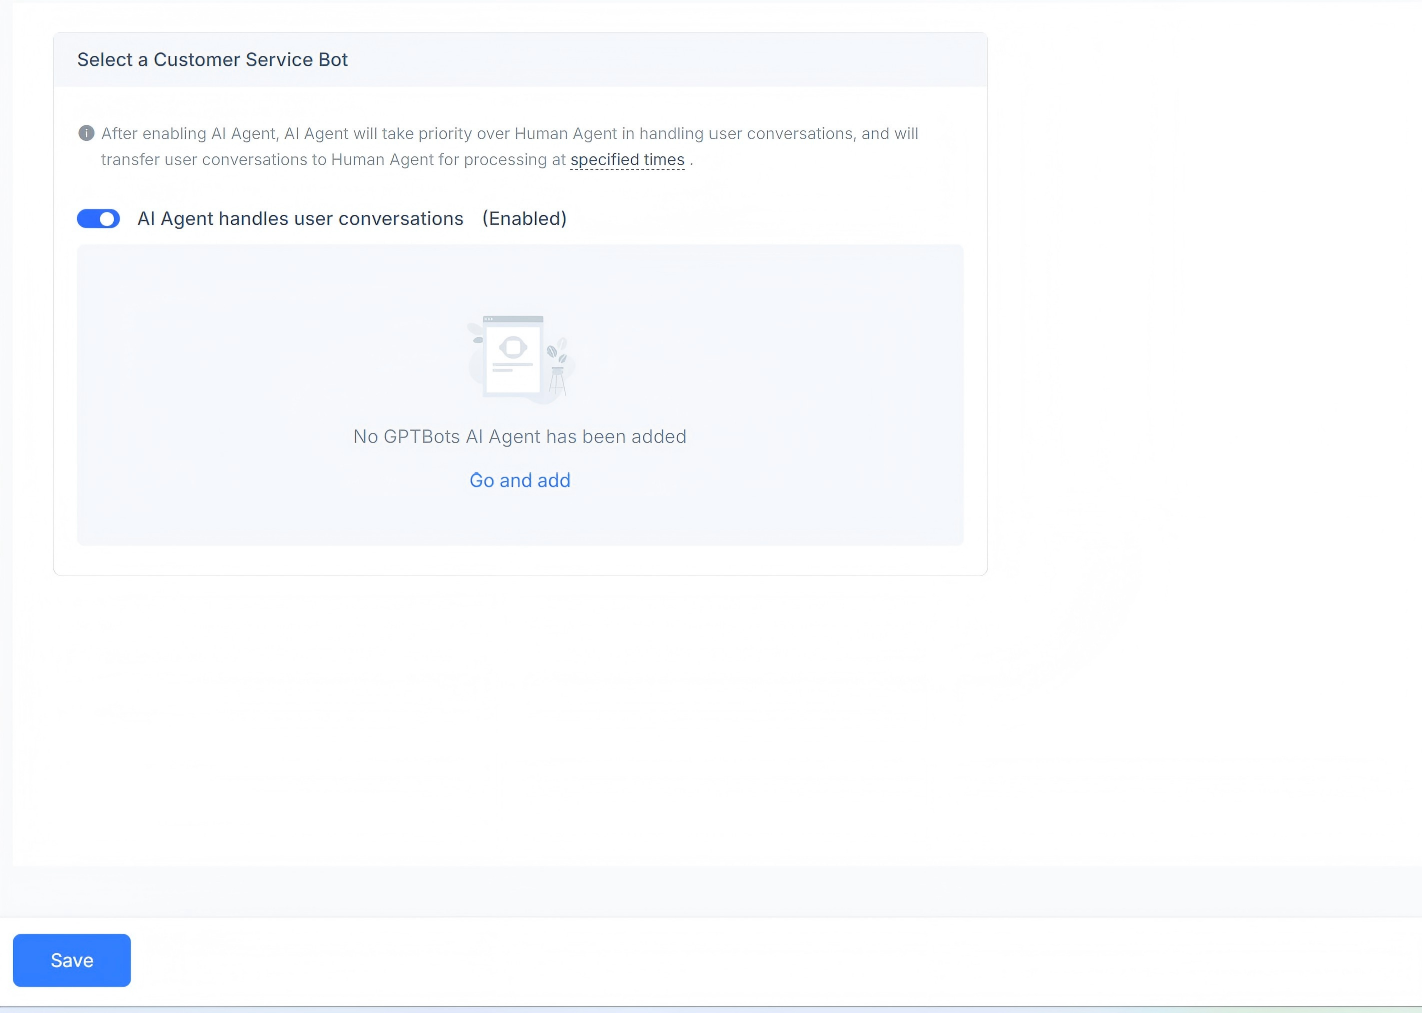
AI Agent
Supports setting AI agents to handle conversation messages for this channel. You can choose to enable or disable usage, and adding a GPT AI Agent is supported.
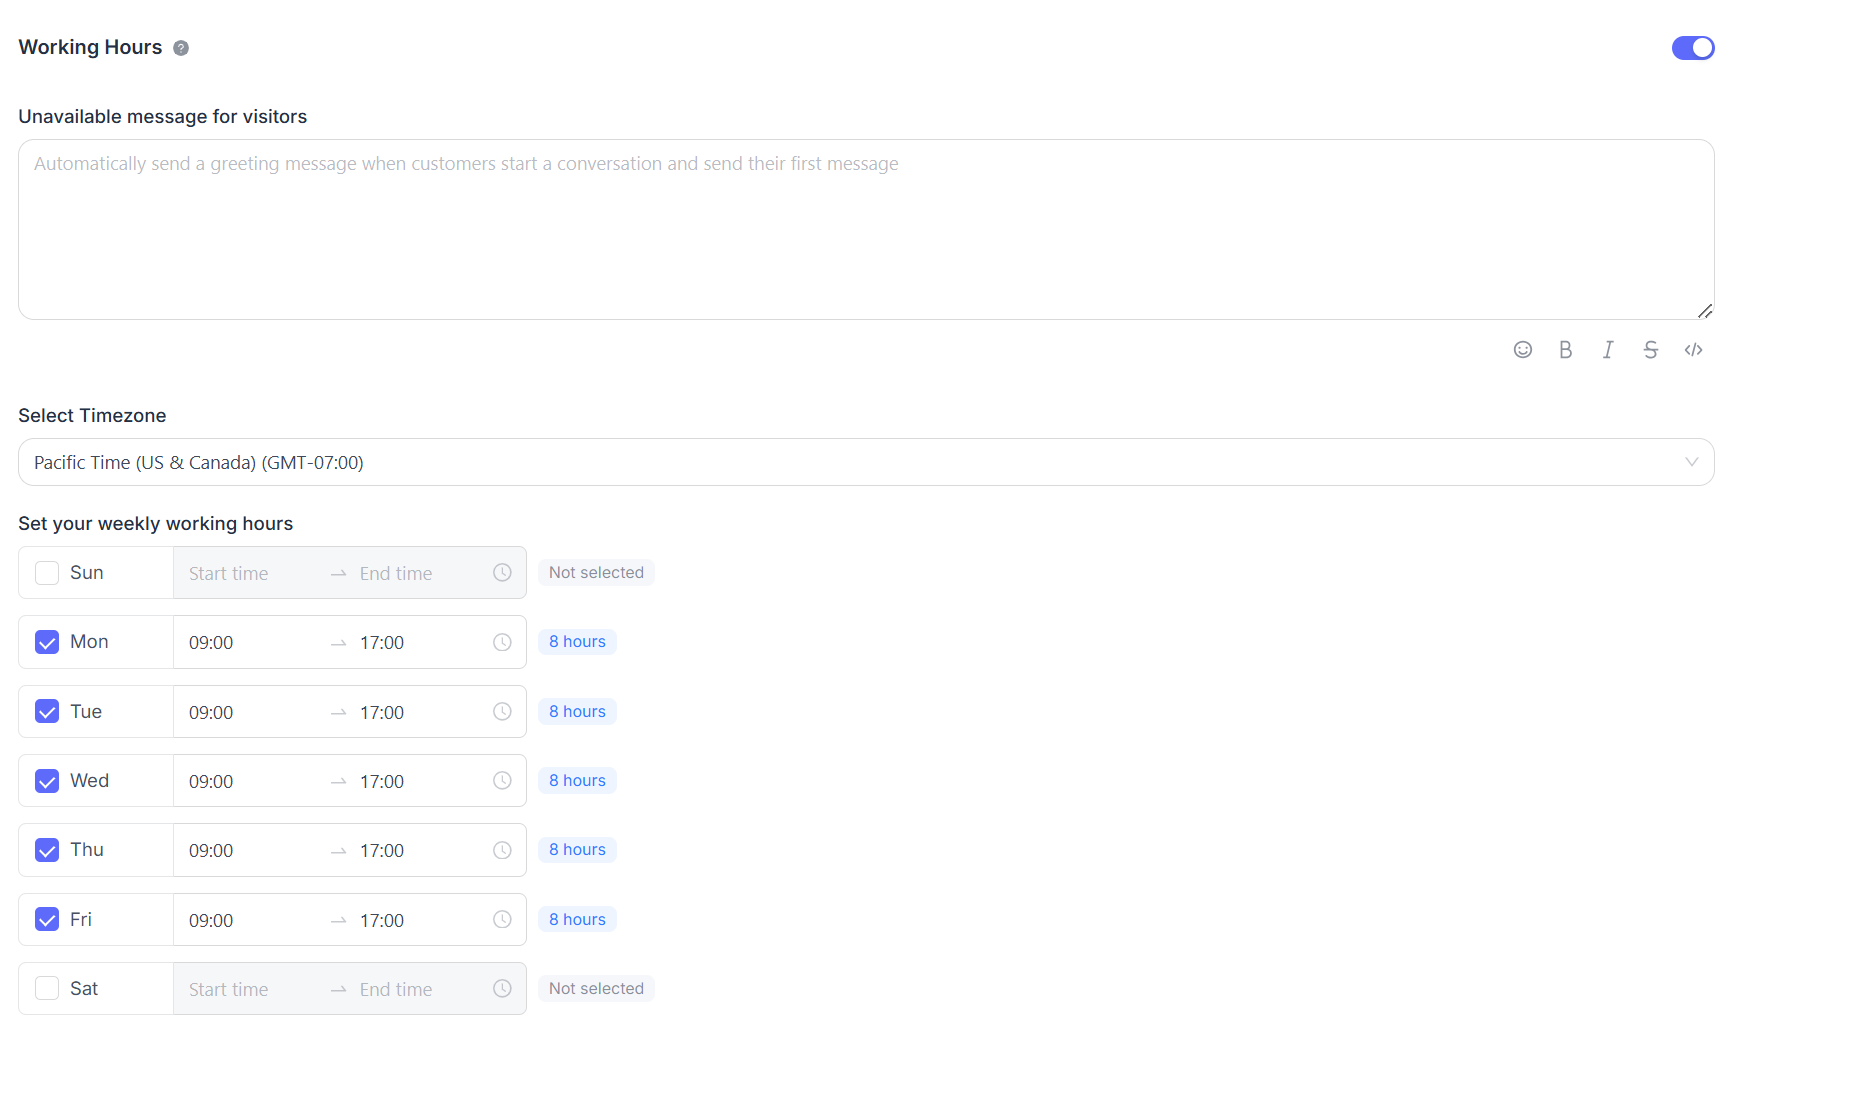
Business hours
You can set the team's business hours.
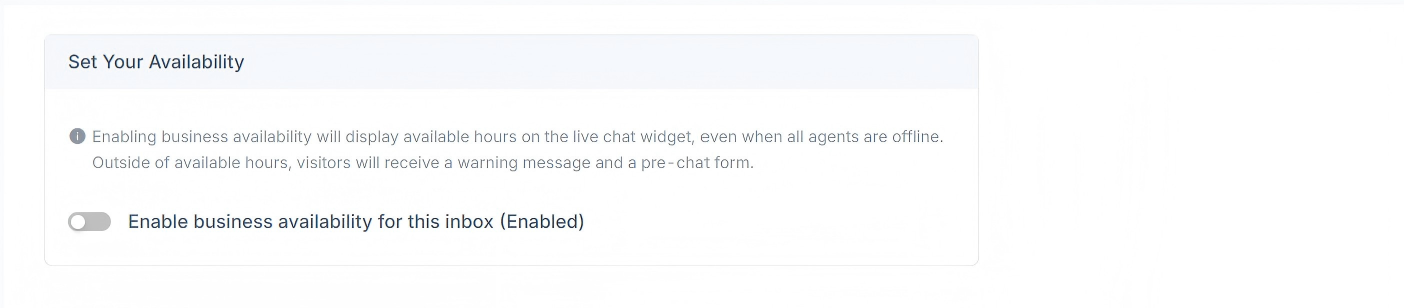
If business hours are clearly defined, select the "Enable business availability for this inbox (enabled)" checkbox. After selecting this checkbox, the corresponding parameter settings will be displayed below. You can set an unavailable message for visitors outside business hours. You can also set business hour ranges for each day and the corresponding time zone.