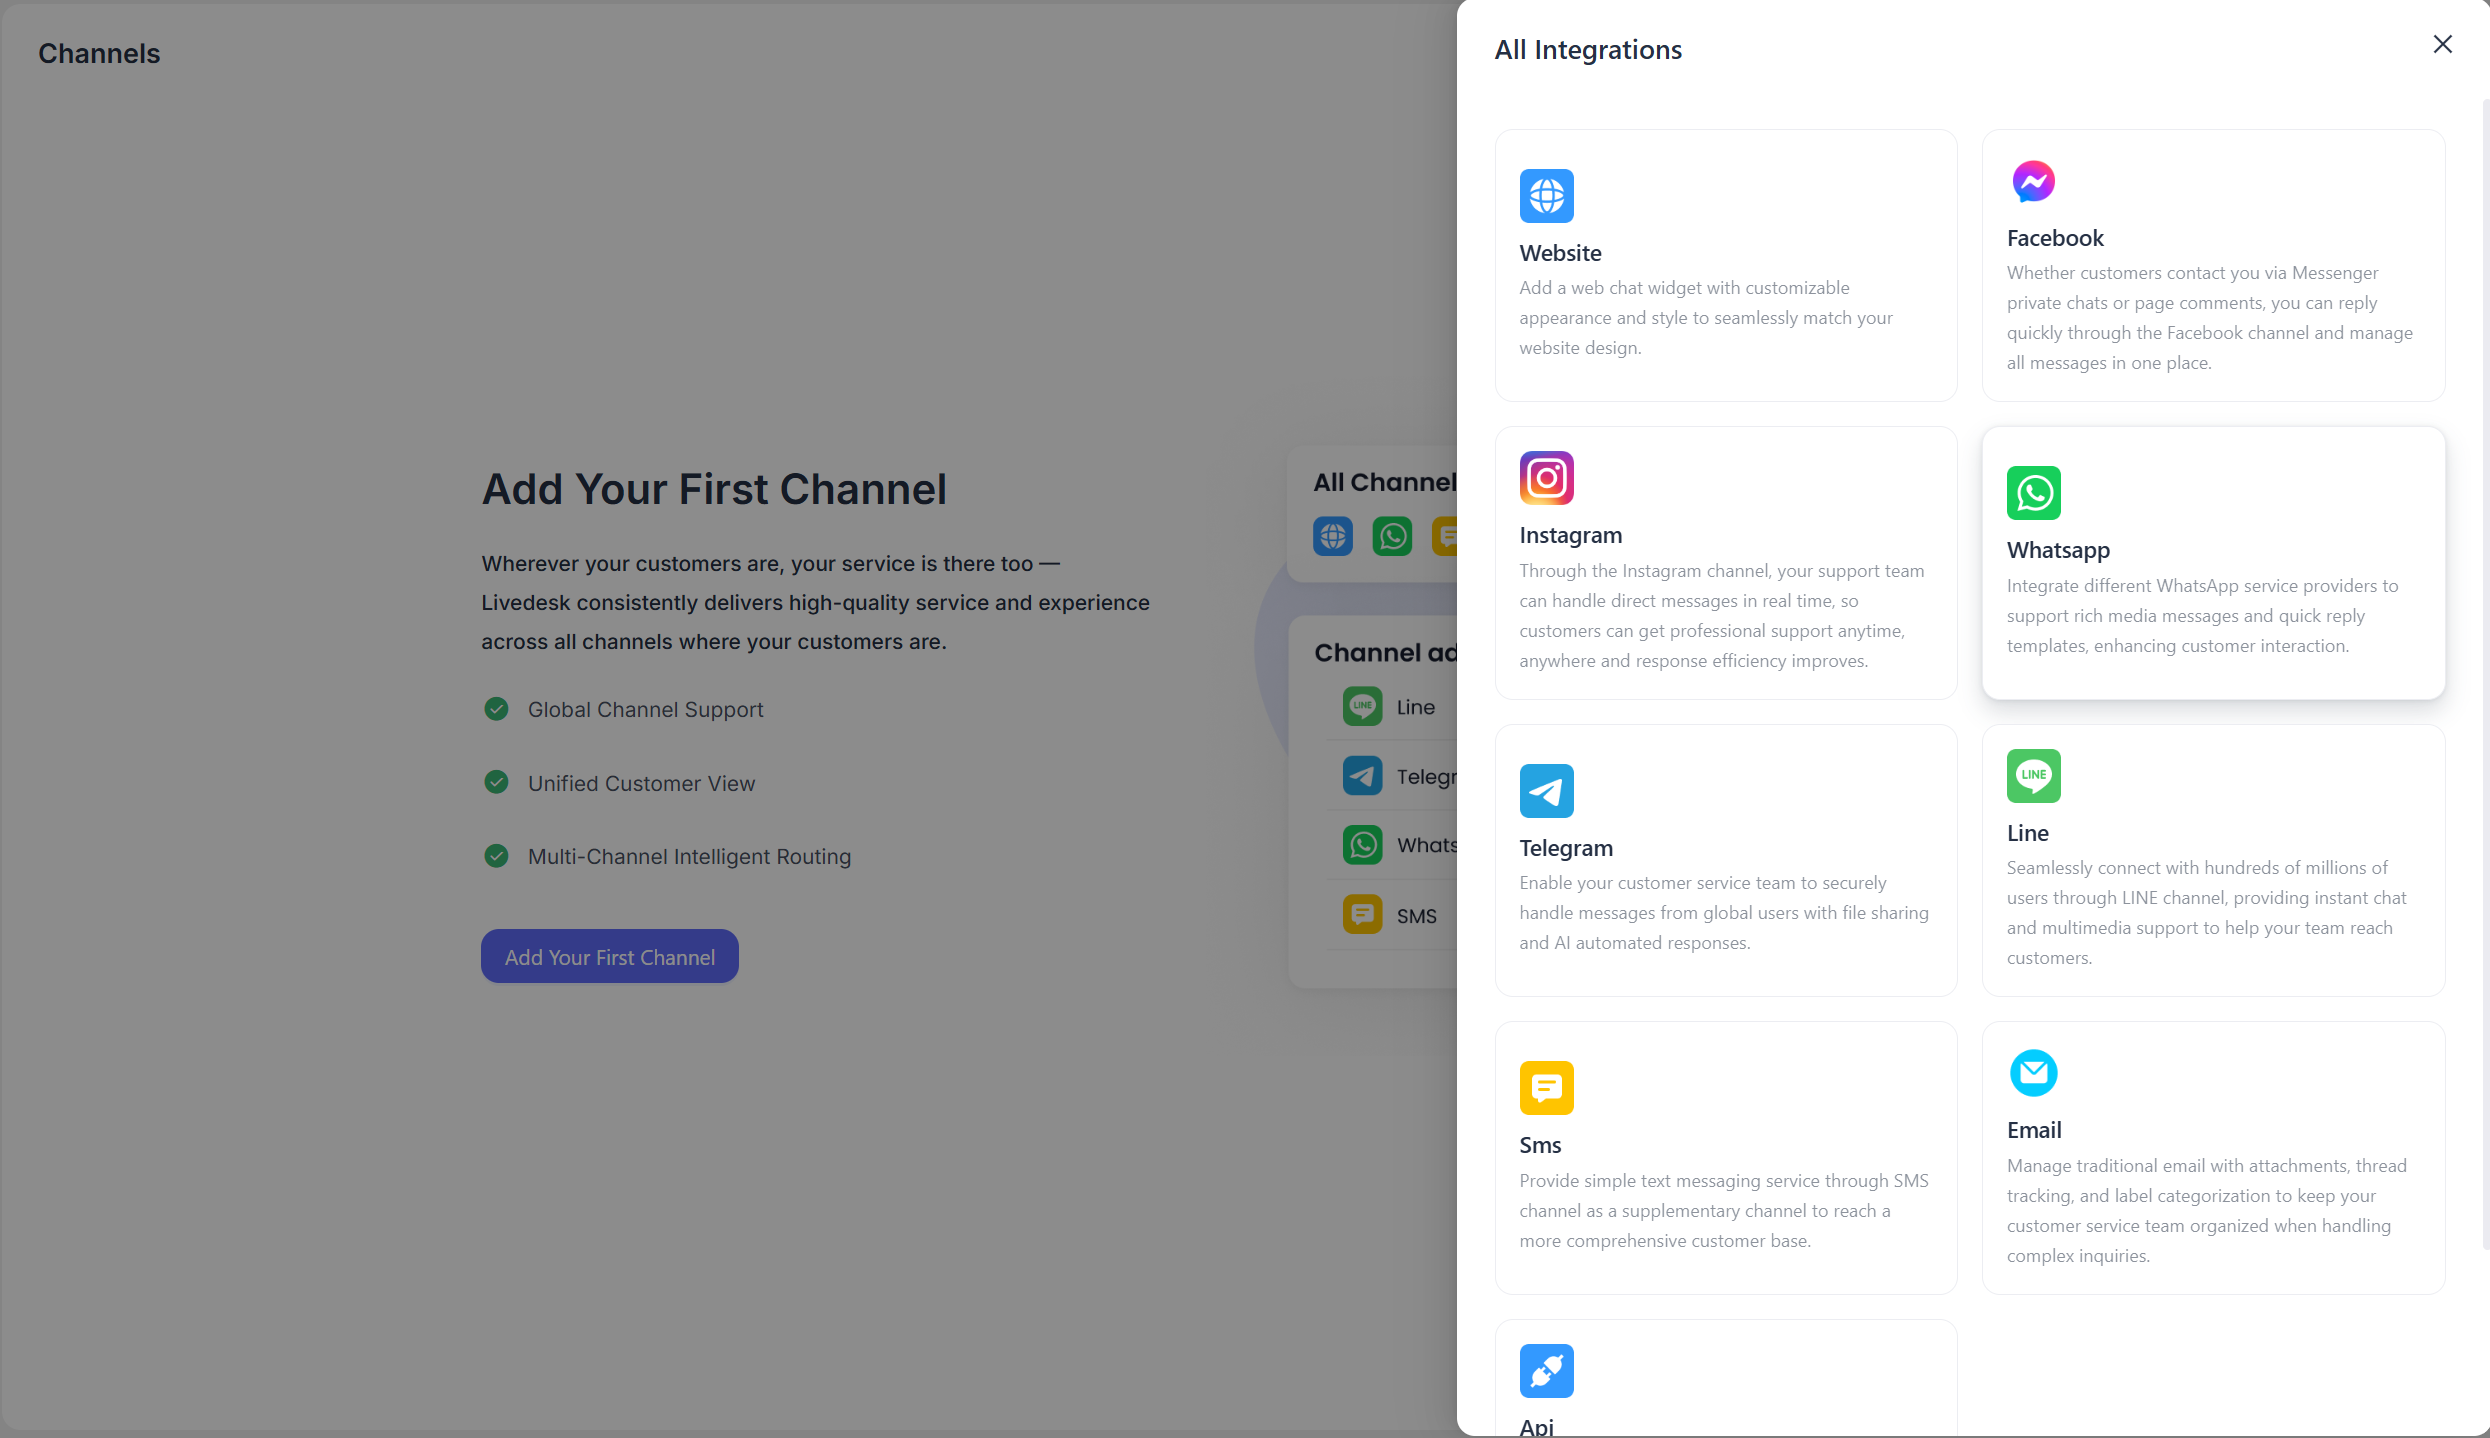
WhatsApp Cloud
WhatsApp Cloud est pris en charge par LiveDesk, ce qui permet aux utilisateurs d’ajouter un canal WhatsApp pour communiquer avec leurs clients. Trois options de fournisseur d’API sont disponibles : WhatsApp Cloud, Twilio et EngageLab WhatsApp. La section suivante explique comment ajouter WhatsApp Cloud.
Prérequis
- Vous avez besoin d’un compte développeur Meta pour configurer l’API WhatsApp. Si vous n’avez pas encore de compte, créez-en un et effectuez la demande requise.
- Un numéro de téléphone valide.
Créer un compte WhatsApp Business
L’API WhatsApp Cloud est disponible pour toutes les entreprises et tous les développeurs indépendants. Comme elle est hébergée sur l’infrastructure cloud de Meta, il n’est plus nécessaire d’utiliser des fournisseurs tiers (Business Solution Providers), tels que Twilio, Zendesk, 360Dialog ou MessageBird, pour héberger l’API WhatsApp Business.
- Configurer un profil d’entreprise
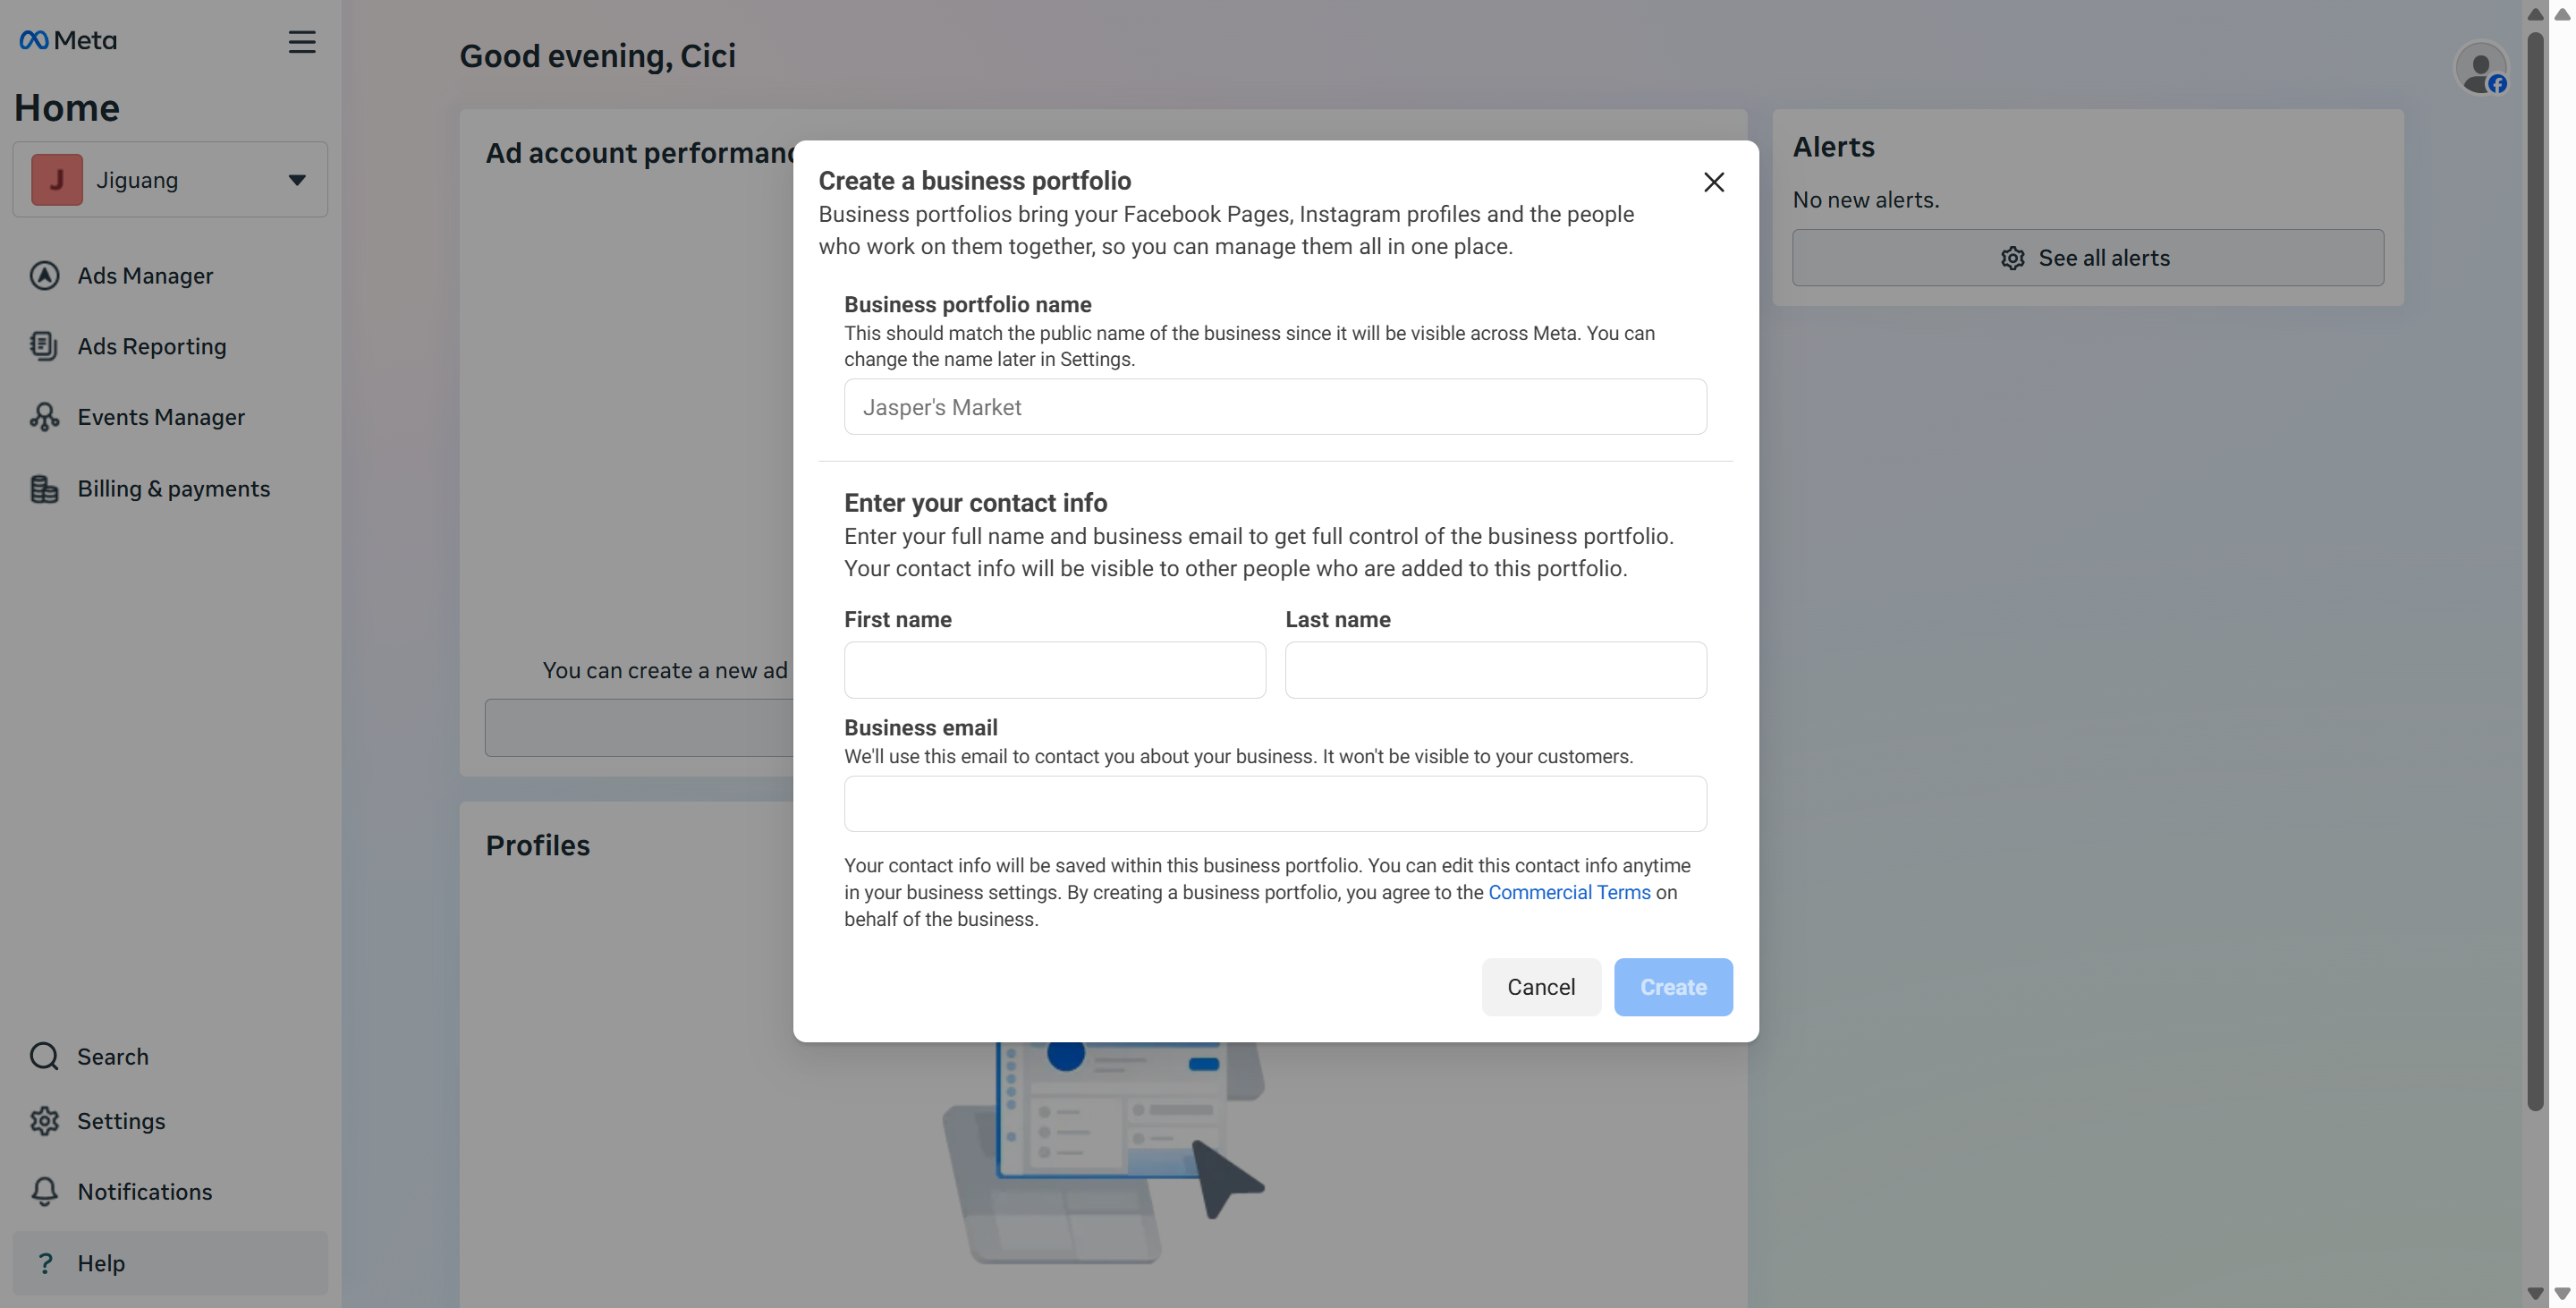
Créez un compte WhatsApp Business professionnel comprenant le nom de votre entreprise, votre profil et vos coordonnées. Connectez-vous à la plateforme Meta Business, puis cliquez sur le bouton "Create Business Portfolio" dans le menu déroulant sous "Home".
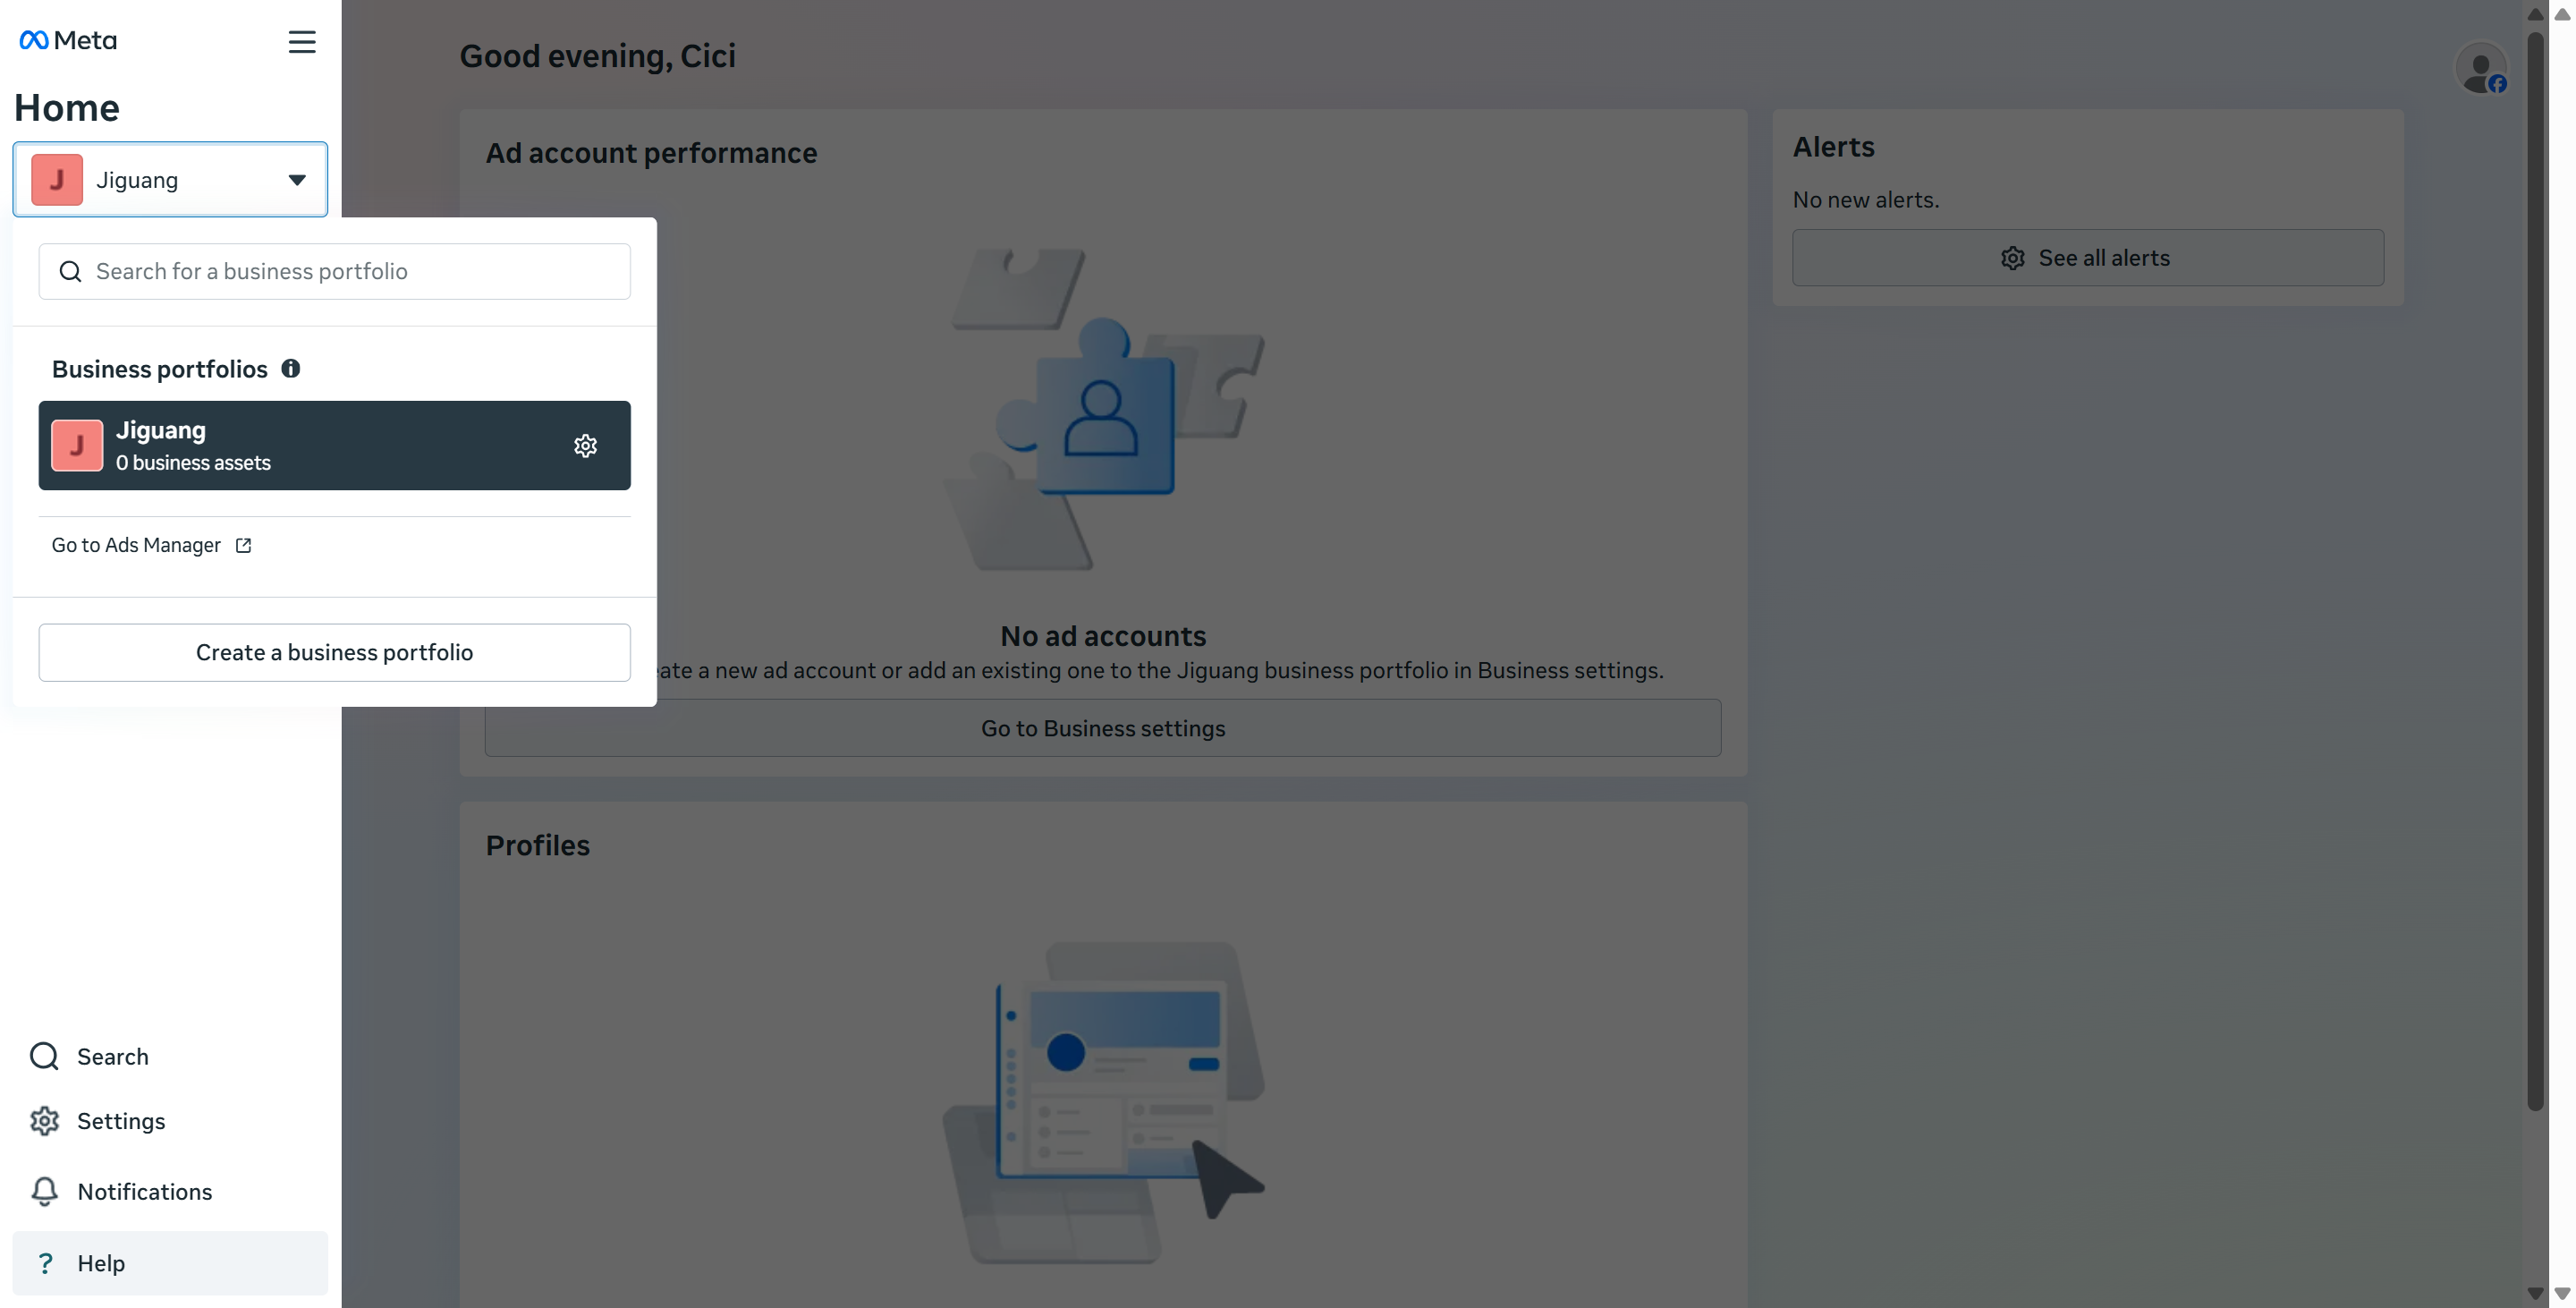
Renseignez toutes les informations requises comme indiqué sur la page, puis terminez la configuration.
- Configurer l’application
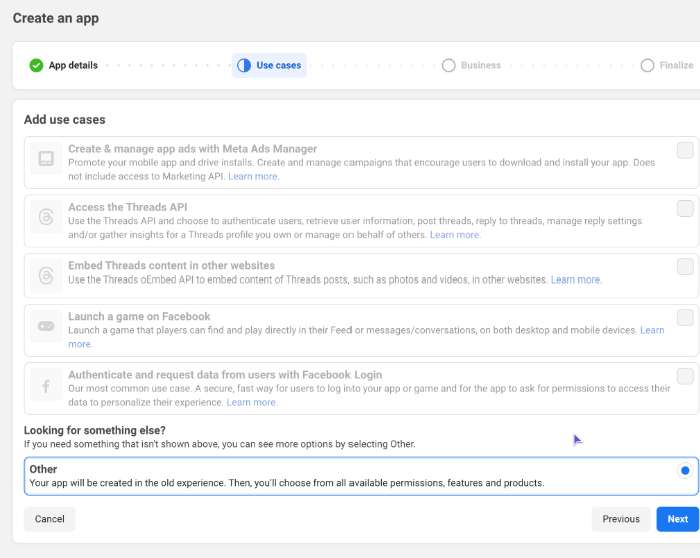
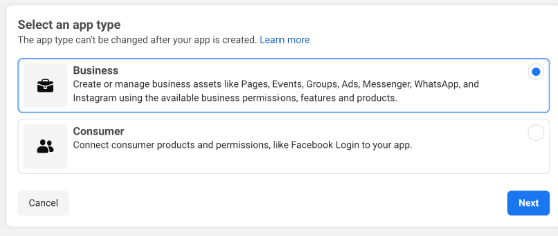
Connectez-vous à votre compte développeur Meta et cliquez sur le bouton "Create App". Renseignez les paramètres requis. Dans les options, sélectionnez "Other", puis, sur la page suivante, choisissez "Business" comme type d’application.

Saisissez votre adresse e-mail de contact et sélectionnez, dans le menu déroulant, le portefeuille d’entreprise que vous venez de créer.
Ajouter l’application WhatsApp
Une fois l’application créée, la page redirige vers le tableau de bord de l’application. Sélectionnez "Add Product", puis choisissez "WhatsApp" dans la liste des produits disponibles. Cliquez ensuite sur "Set up".
Remarque : avant de continuer, vérifiez d’abord les informations de votre entreprise via Meta. Vous devez soumettre des documents de vérification pour obtenir un accès complet à l’API.
Obtenir un jeton WhatsApp Cloud permanent
Créez un utilisateur système et générez un jeton permanent afin de garantir un accès sécurisé et ininterrompu.
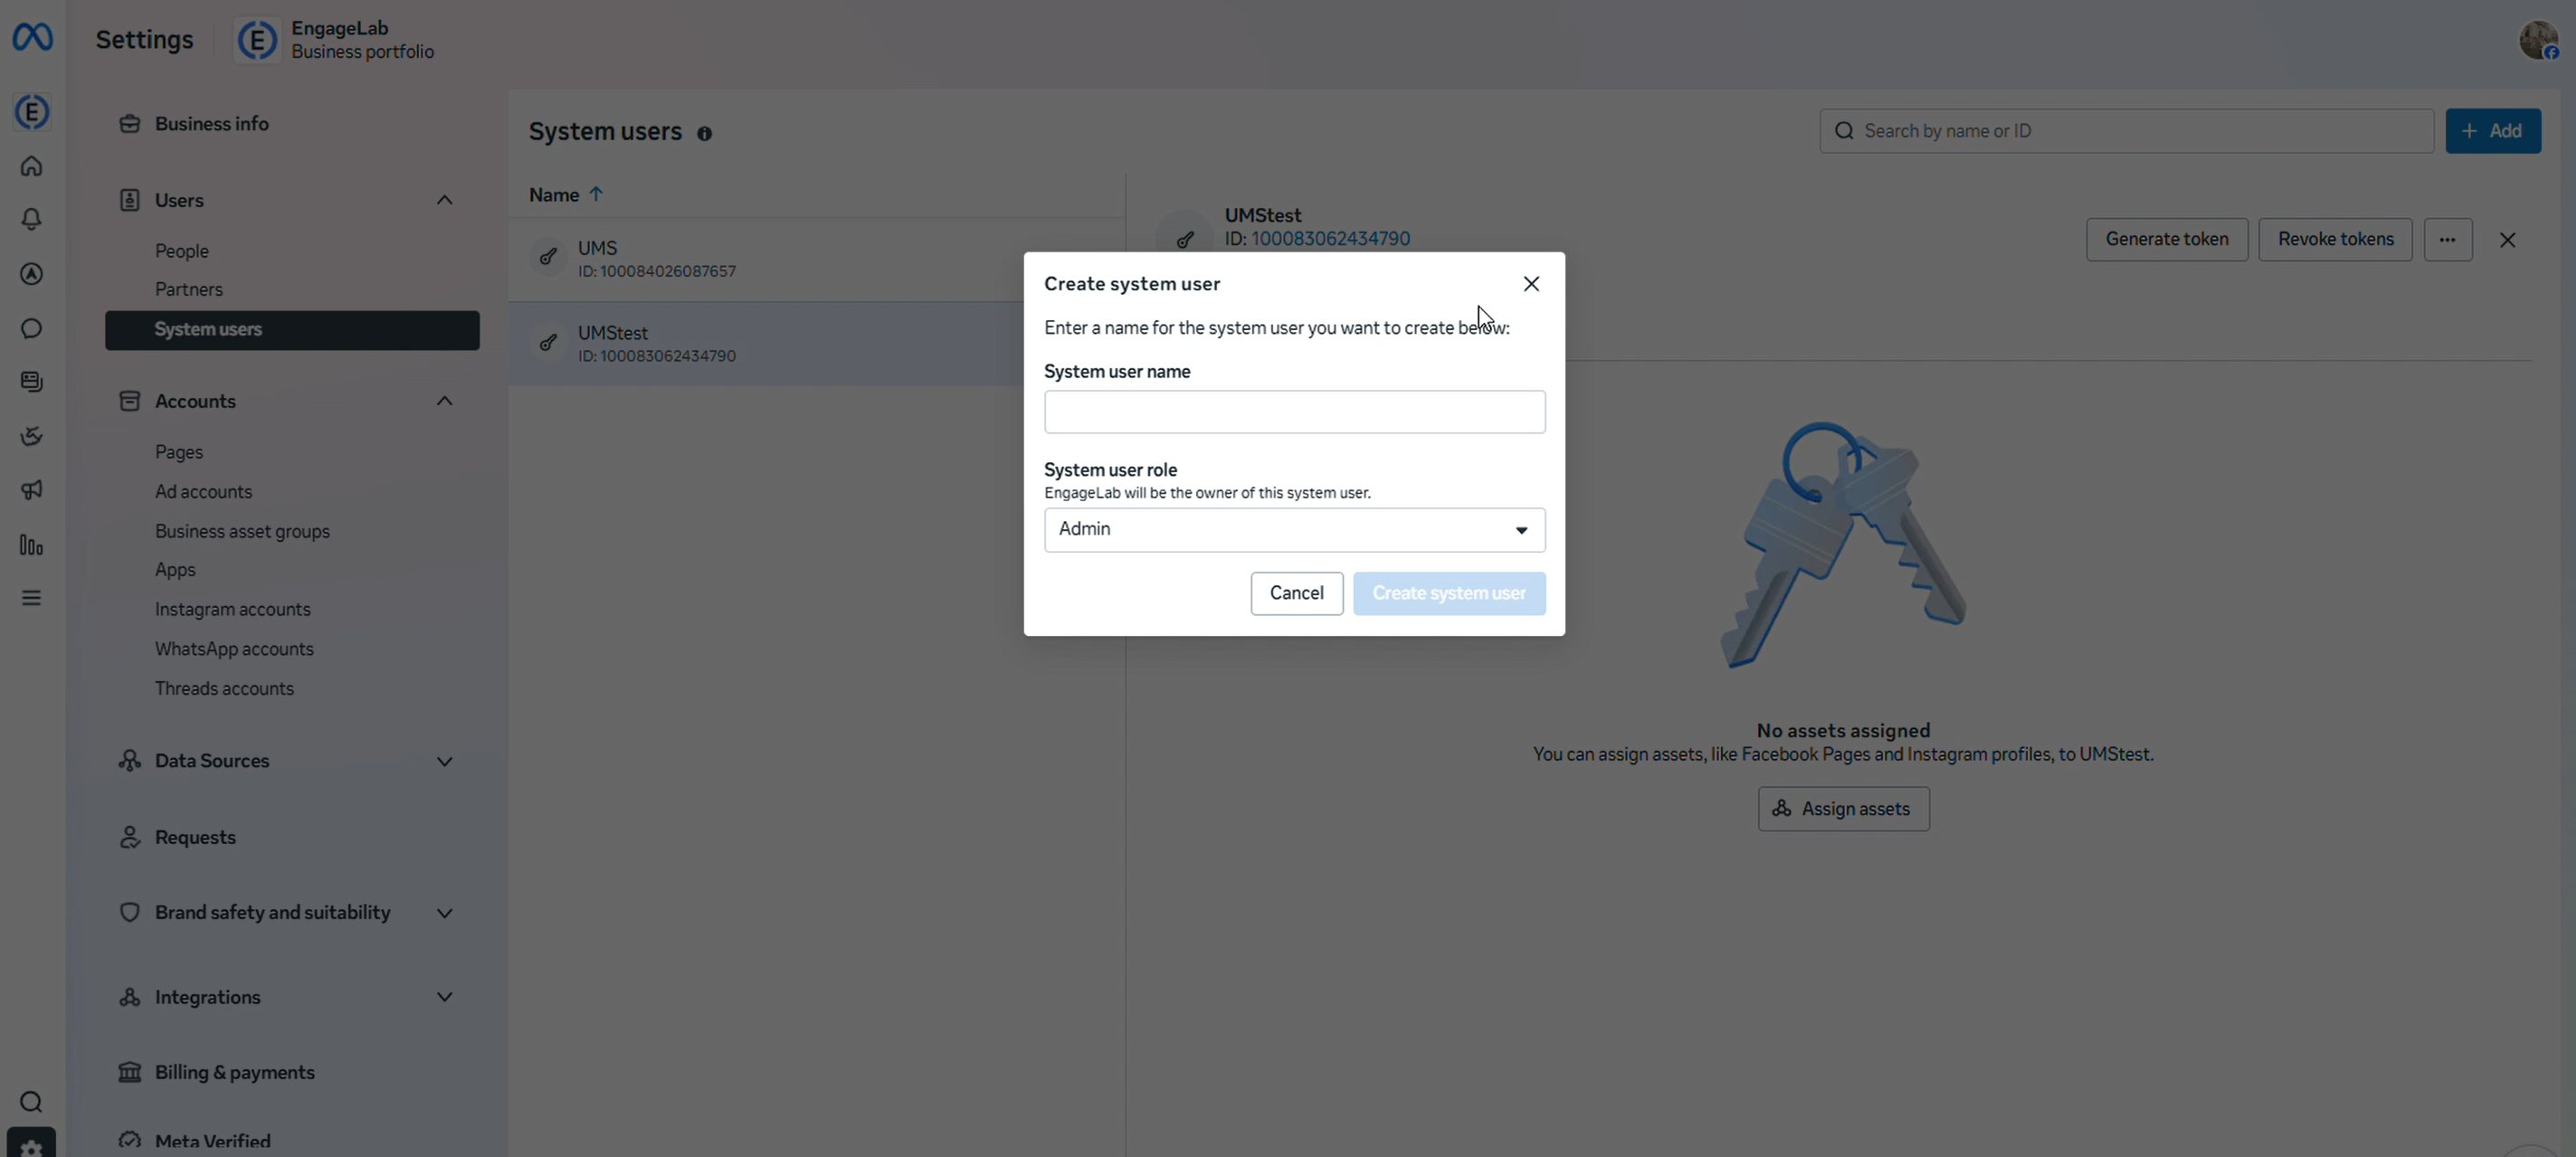
Connectez-vous à votre compte Facebook Developer, sélectionnez l’application WhatsApp, cliquez sur "Set up", puis accédez à Business Manager. Sélectionnez "Users" > "System Users" et créez un utilisateur système administrateur.
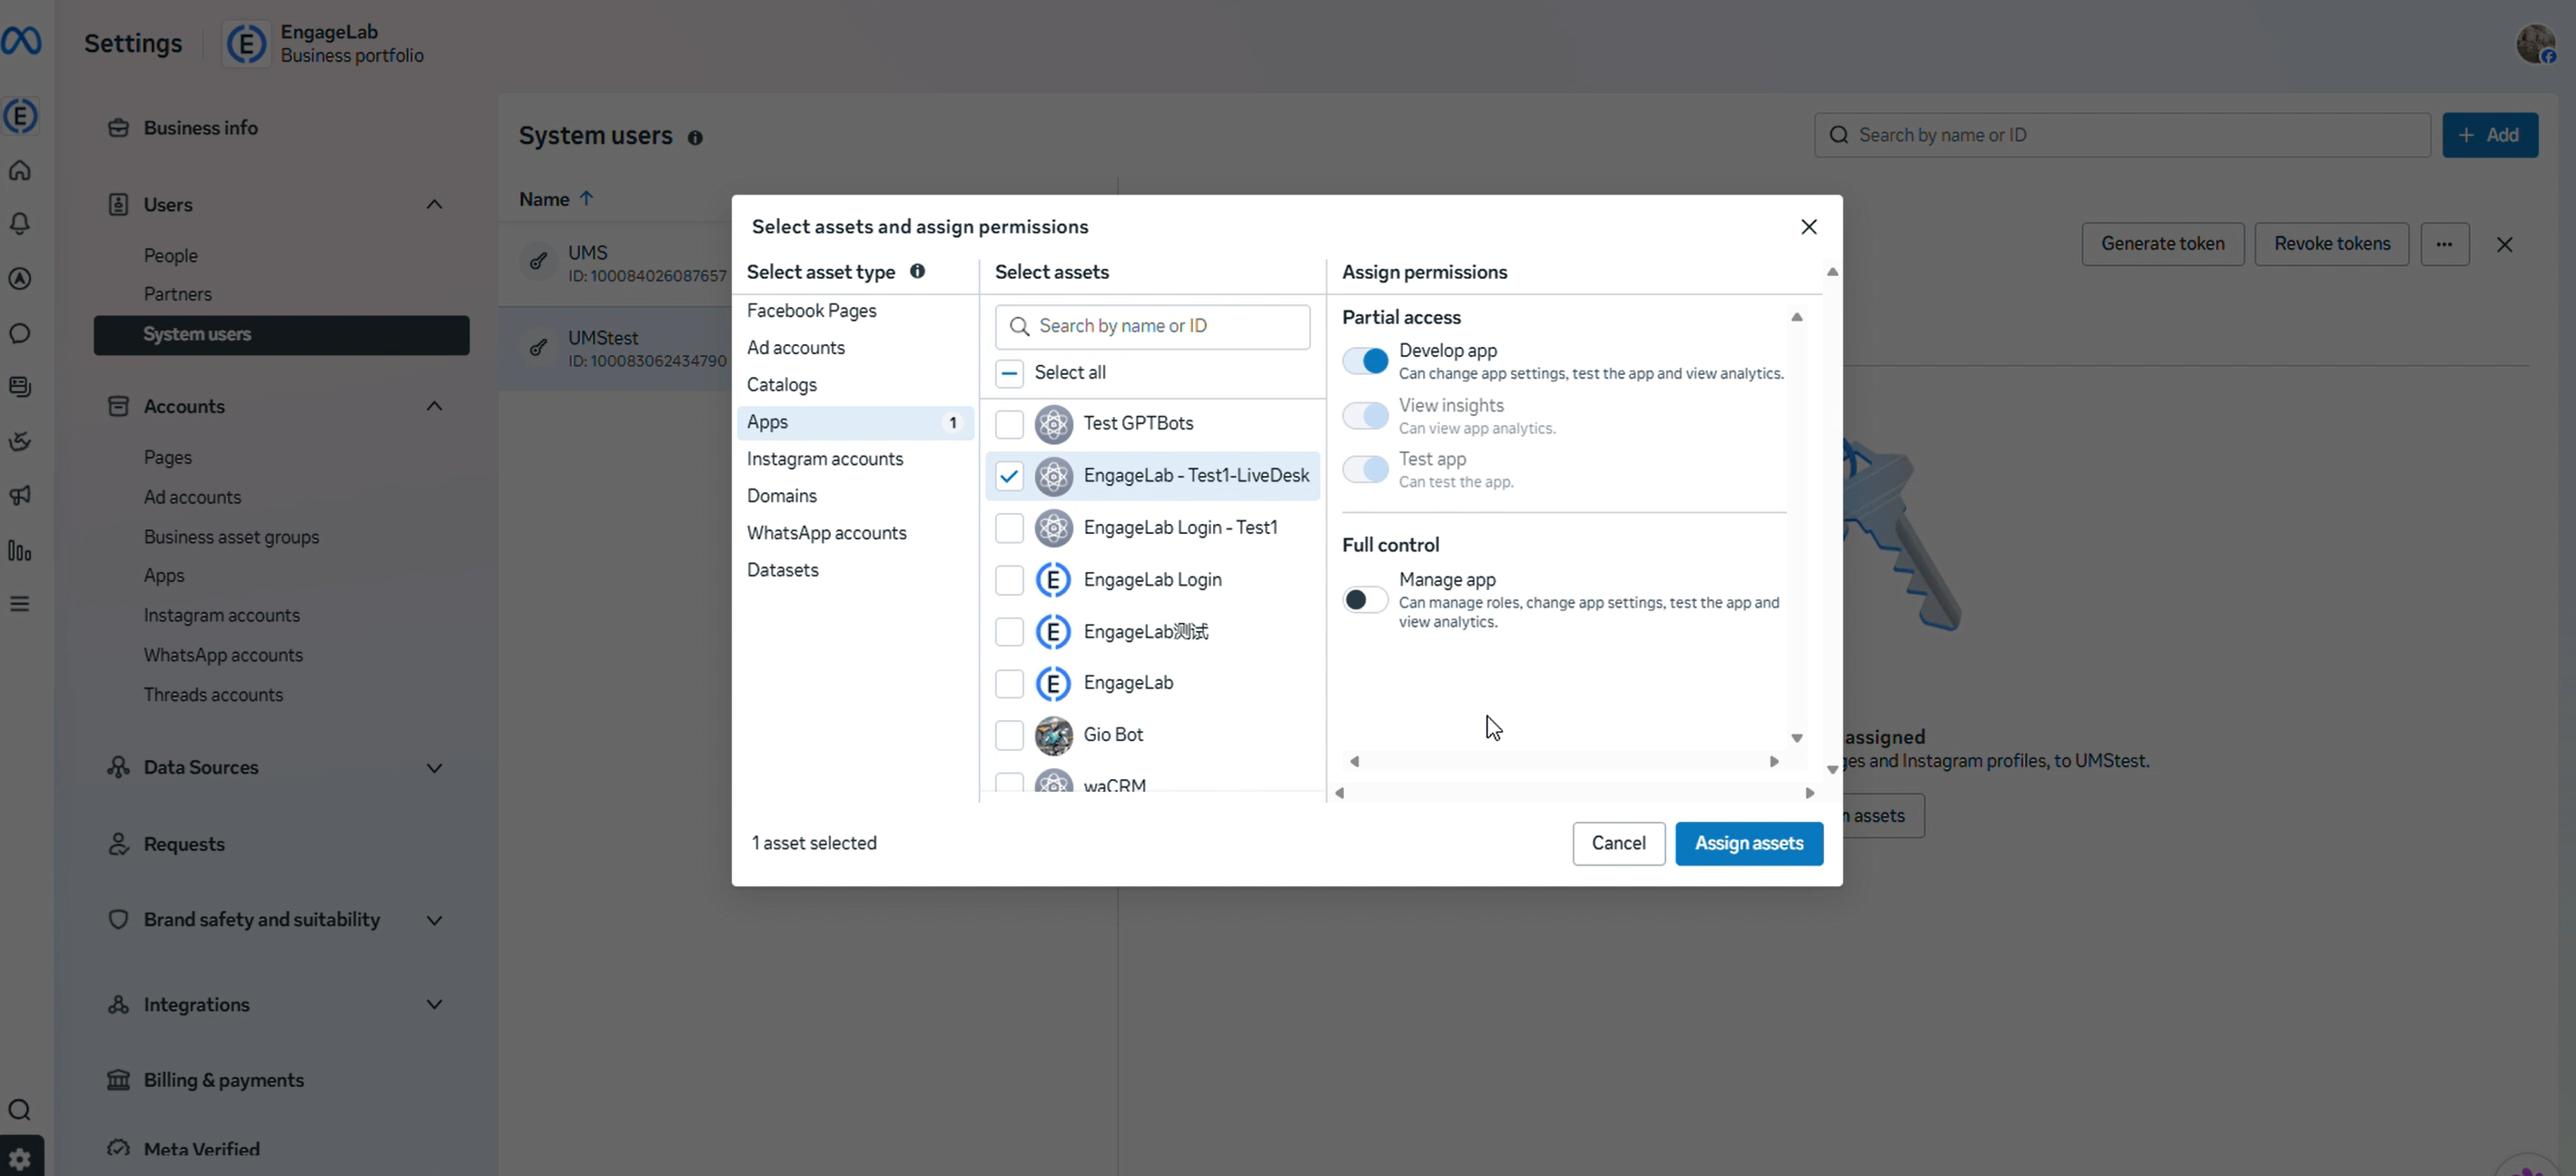
Après la création, cliquez sur le bouton "Add Assets and Assign Permissions", sélectionnez le nom de votre application, choisissez, dans la fenêtre contextuelle, l’application créée à l’étape précédente, puis terminez la configuration.
Revenez à la page des utilisateurs système, sélectionnez dans la liste l’utilisateur système nouvellement créé, puis cliquez sur le bouton "Generate New Token".
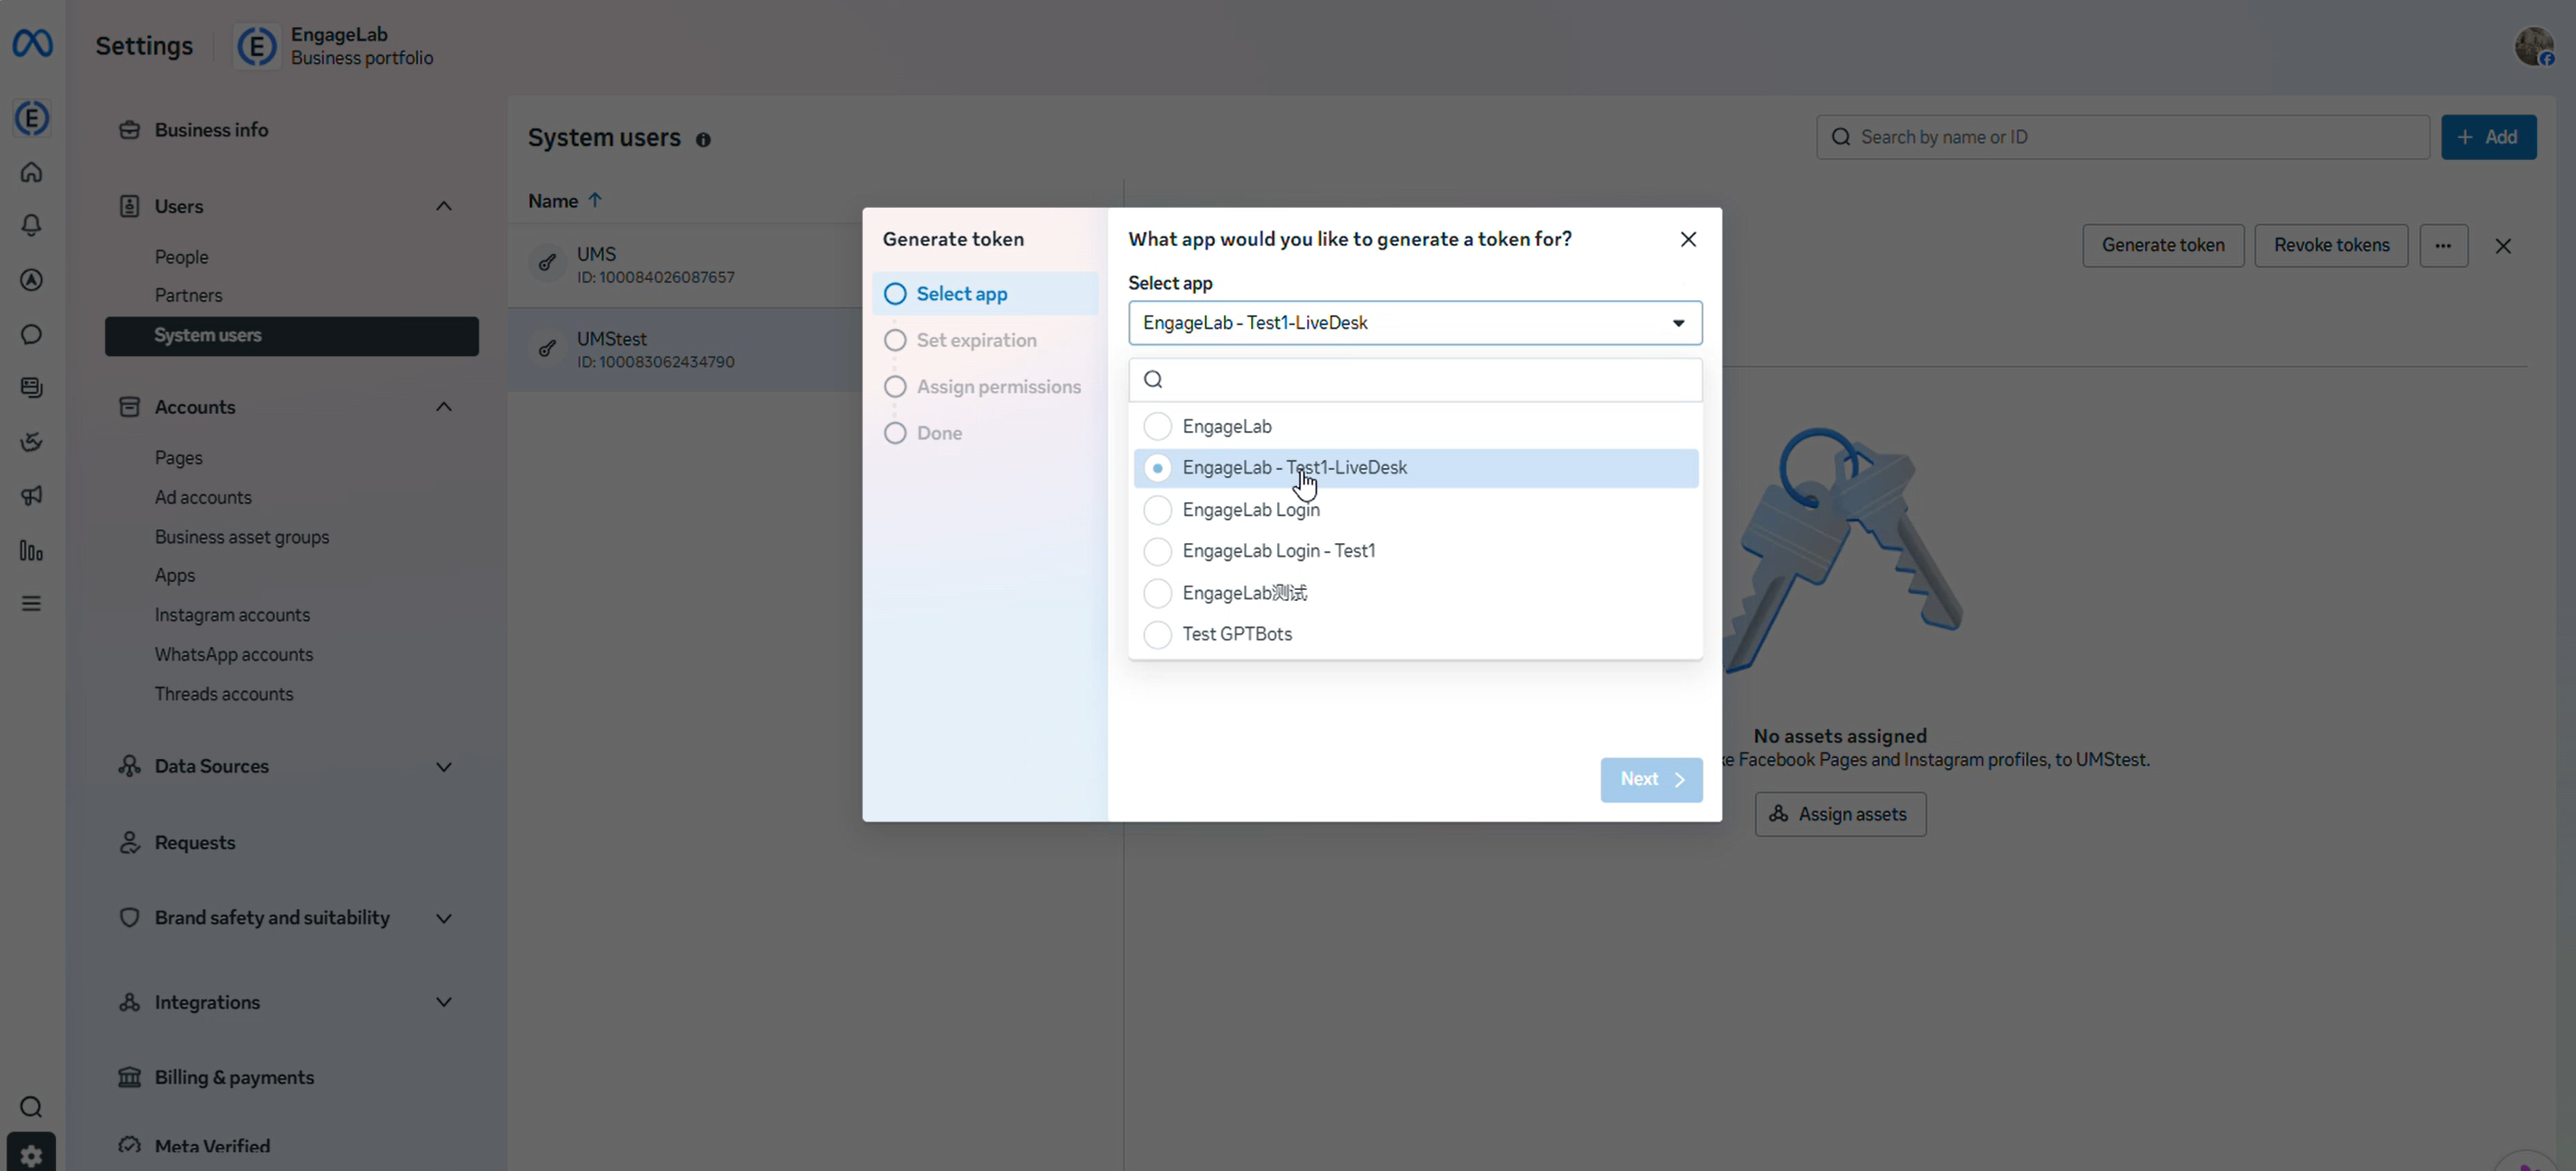
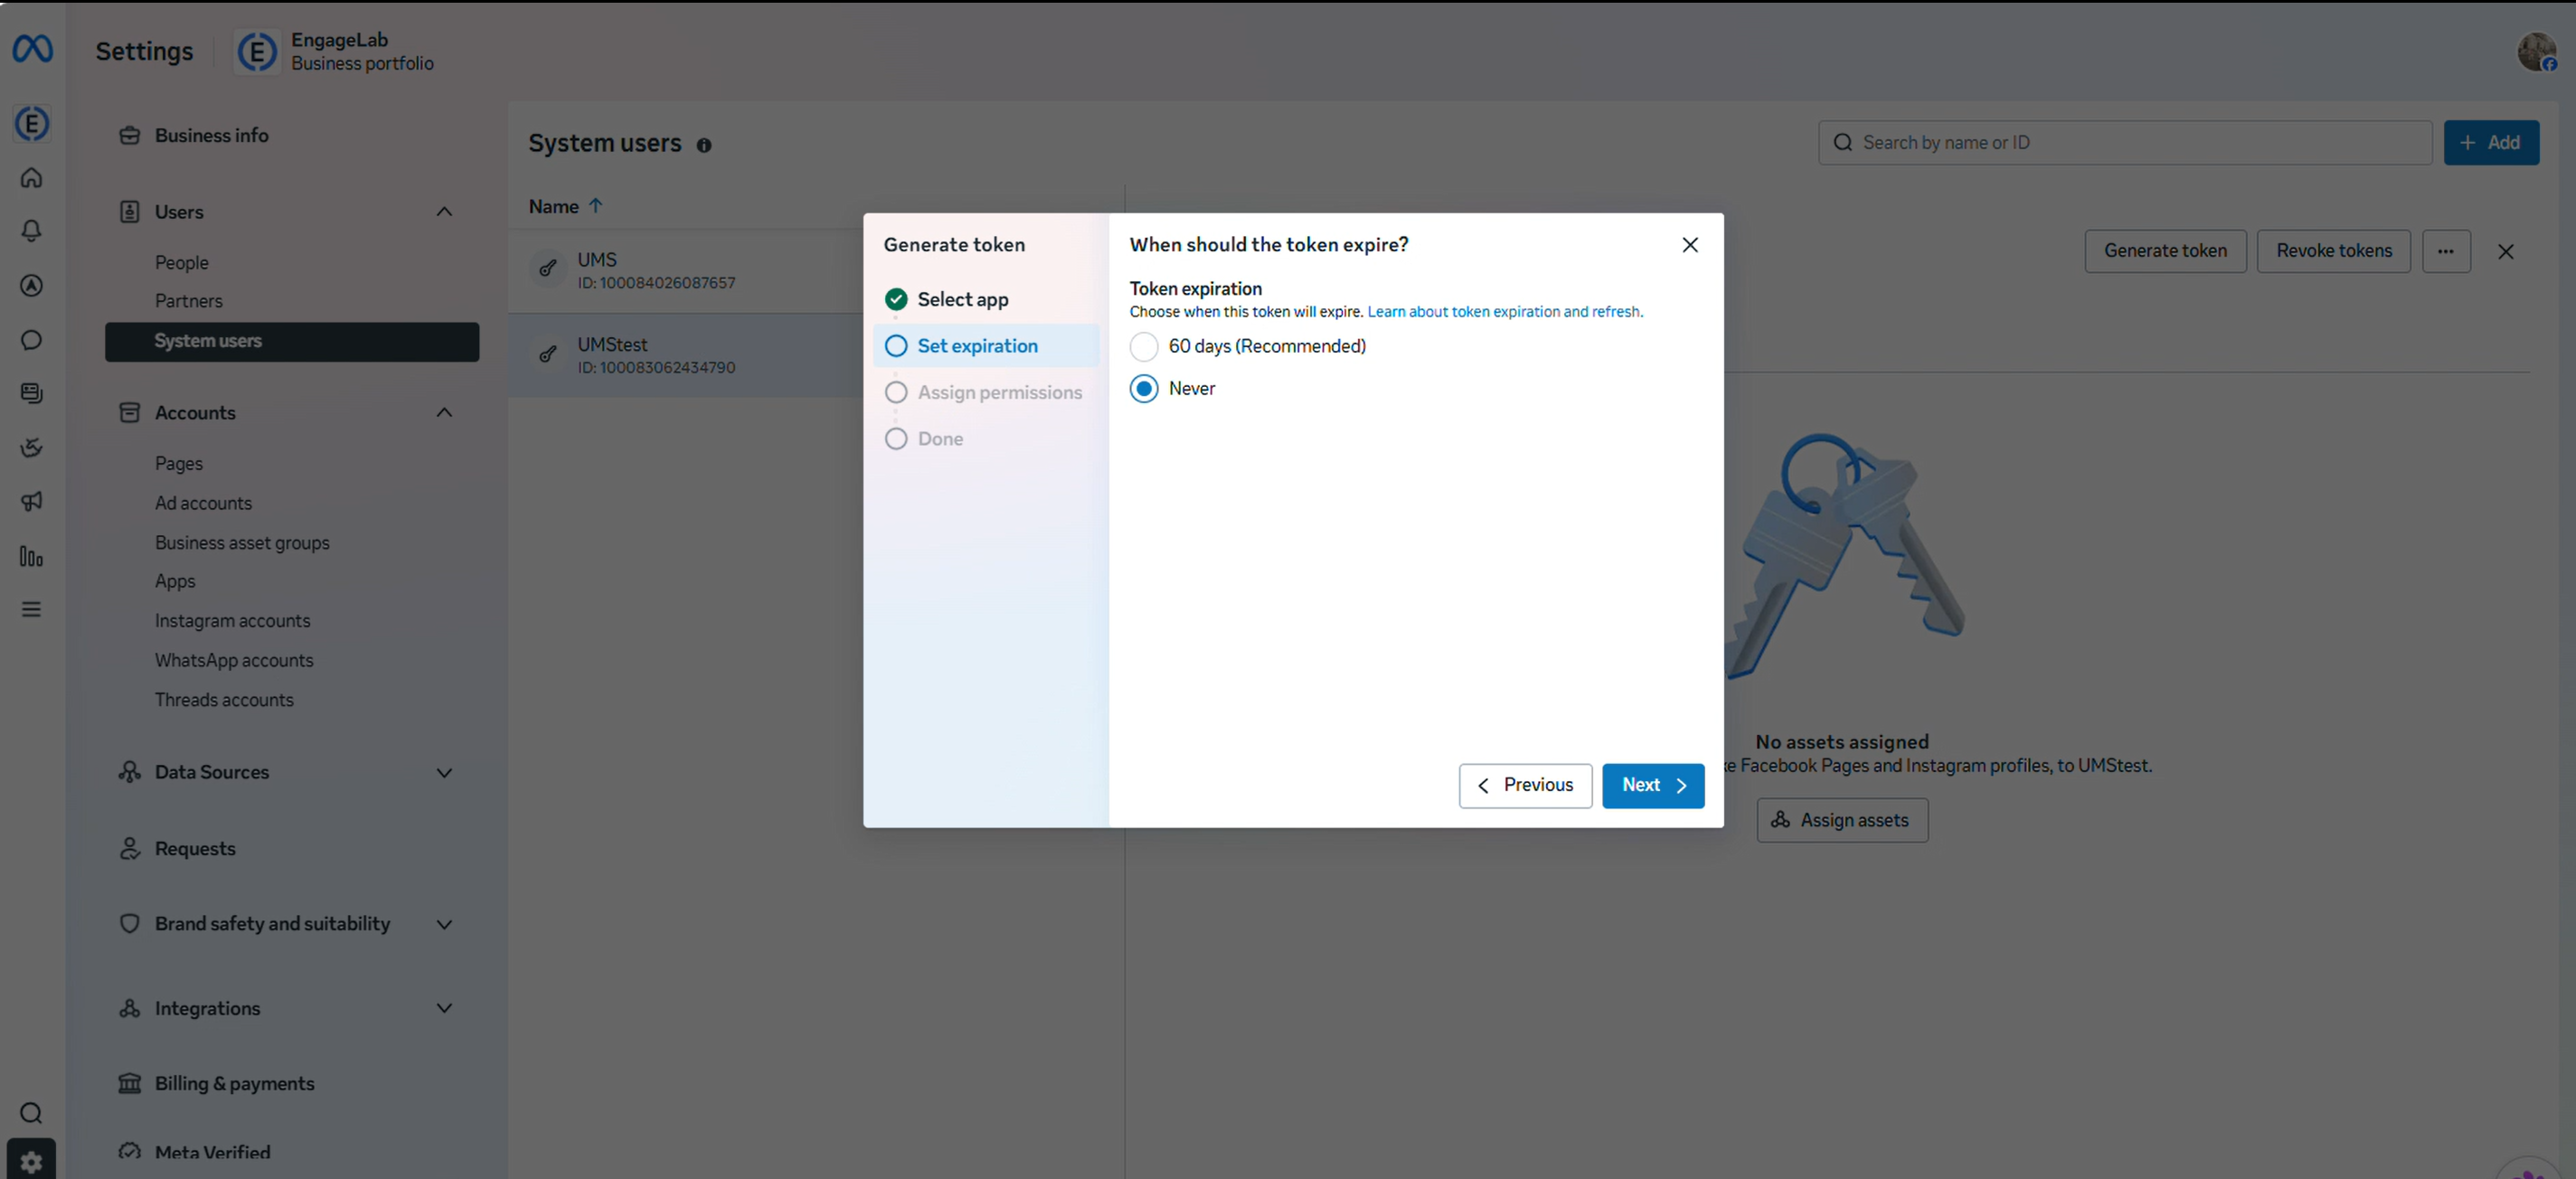
Sélectionnez l’application créée dans le menu déroulant et cochez les trois niveaux d’autorisation suivants :
whatsapp_business_manage_eventswhatsapp_business_managementwhatsapp_business_messaging
Une fois la configuration terminée, un jeton sera généré. Copiez-le et enregistrez-le.
Configurer l’API WhatsApp Cloud
Accédez à la plateforme Facebook Developer. Si vous devez créer un nouveau compte Meta Business, sélectionnez "Create Business Account" dans le menu déroulant. Si vous avez déjà un compte d’entreprise, sélectionnez-le simplement parmi les options disponibles. Dans WhatsApp > API Setup, collez le jeton permanent généré à l’étape précédente. Sélectionnez le numéro de téléphone préparé.
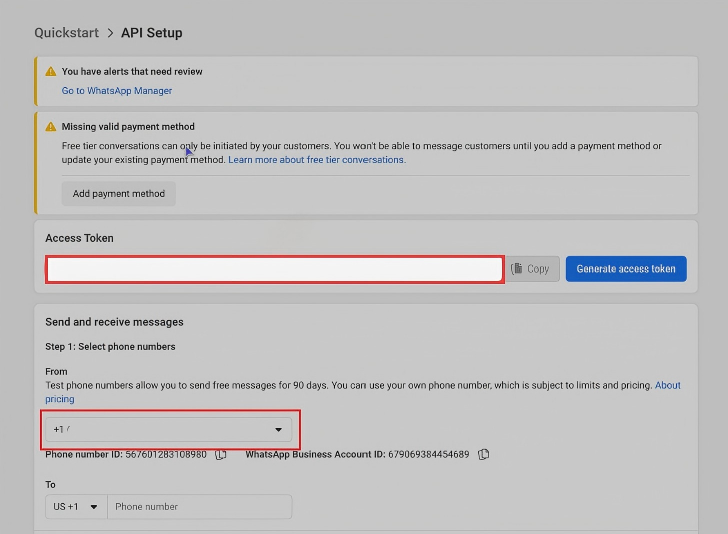
Remarque : Meta exige un numéro de téléphone vérifié pour configurer l’API WhatsApp. Vous pouvez vérifier votre numéro à l’aide d’un mot de passe à usage unique (OTP).
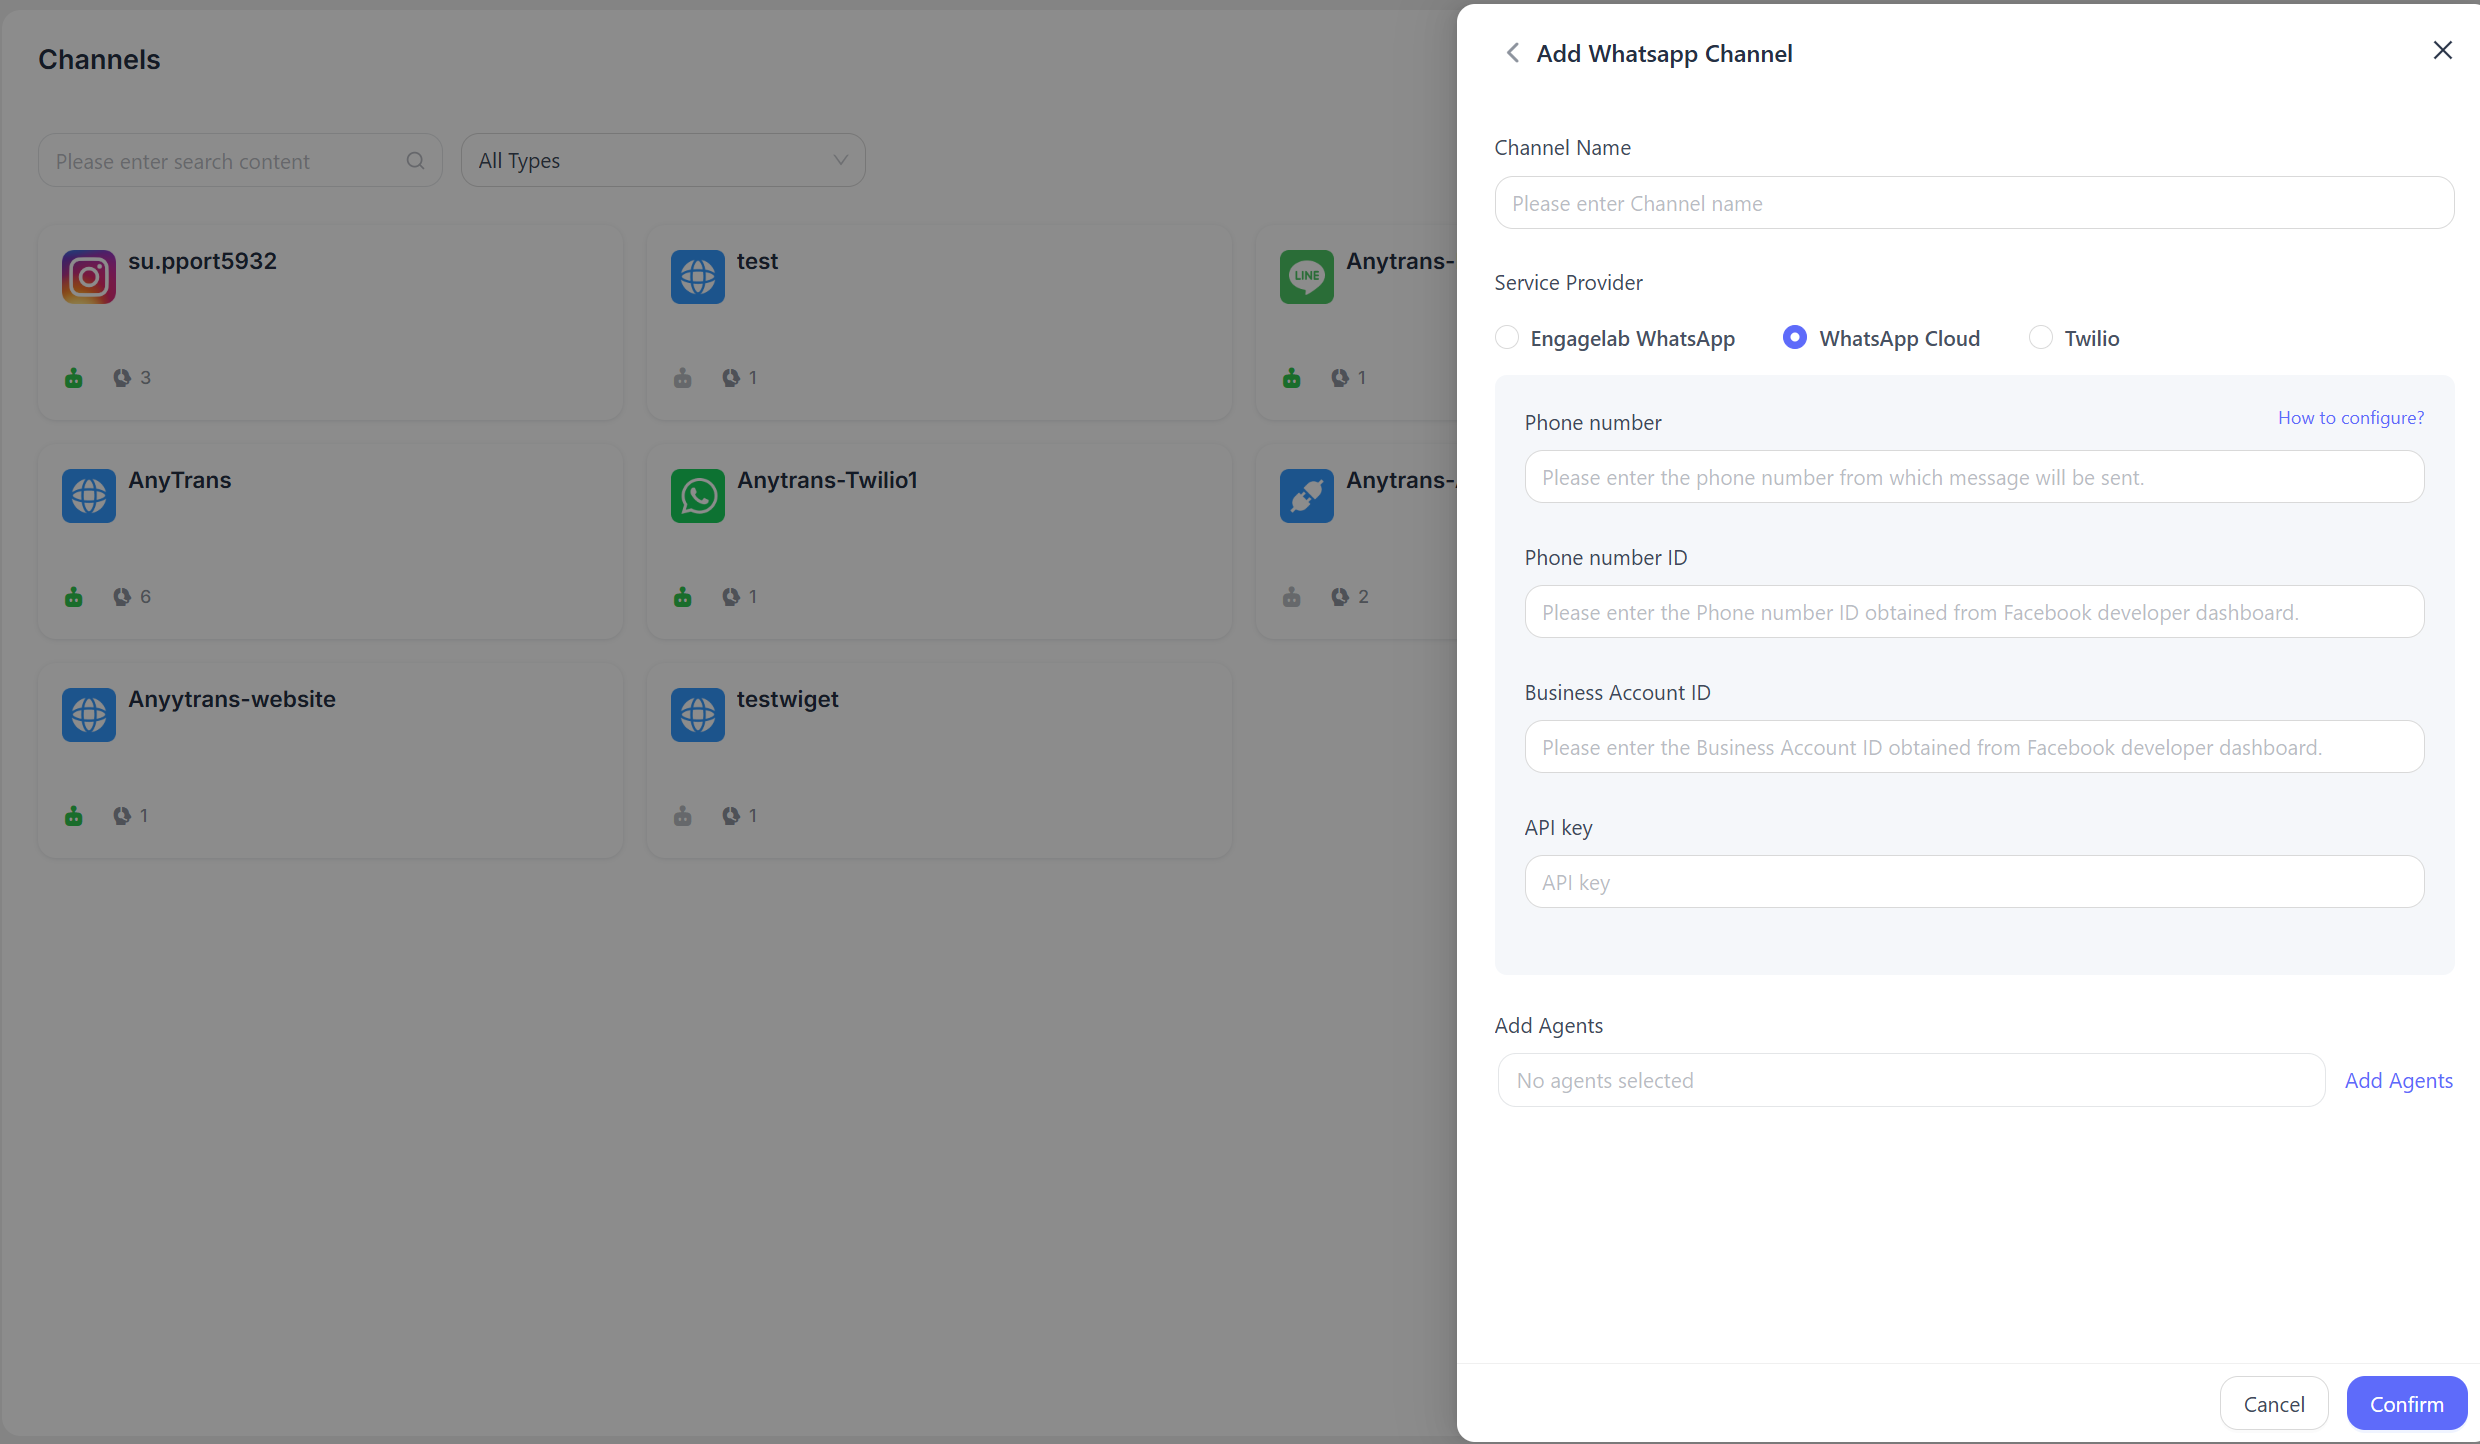
Ajouter un canal dans LiveDesk
Depuis la page API Setup de la console Facebook Developer de l’étape précédente, copiez le WhatsApp Phone Number ID et le Business Account ID. Renseignez les informations de configuration comme demandé sur la page, puis cliquez sur "Confirm" pour terminer la configuration.
- Phone Number
Saisissez le numéro de téléphone obtenu ci-dessus.
- Business Account ID
Le Business Account ID obtenu depuis la console Facebook Developer.
- Phone Number ID
Le Phone Number ID obtenu depuis la console Facebook Developer.
- API Key
Saisissez le jeton permanent généré à l’étape précédente.
Une fois la création terminée, la page redirigera vers l’écran précédent et affichera l’URL du webhook correspondante ainsi que le jeton de vérification du webhook.
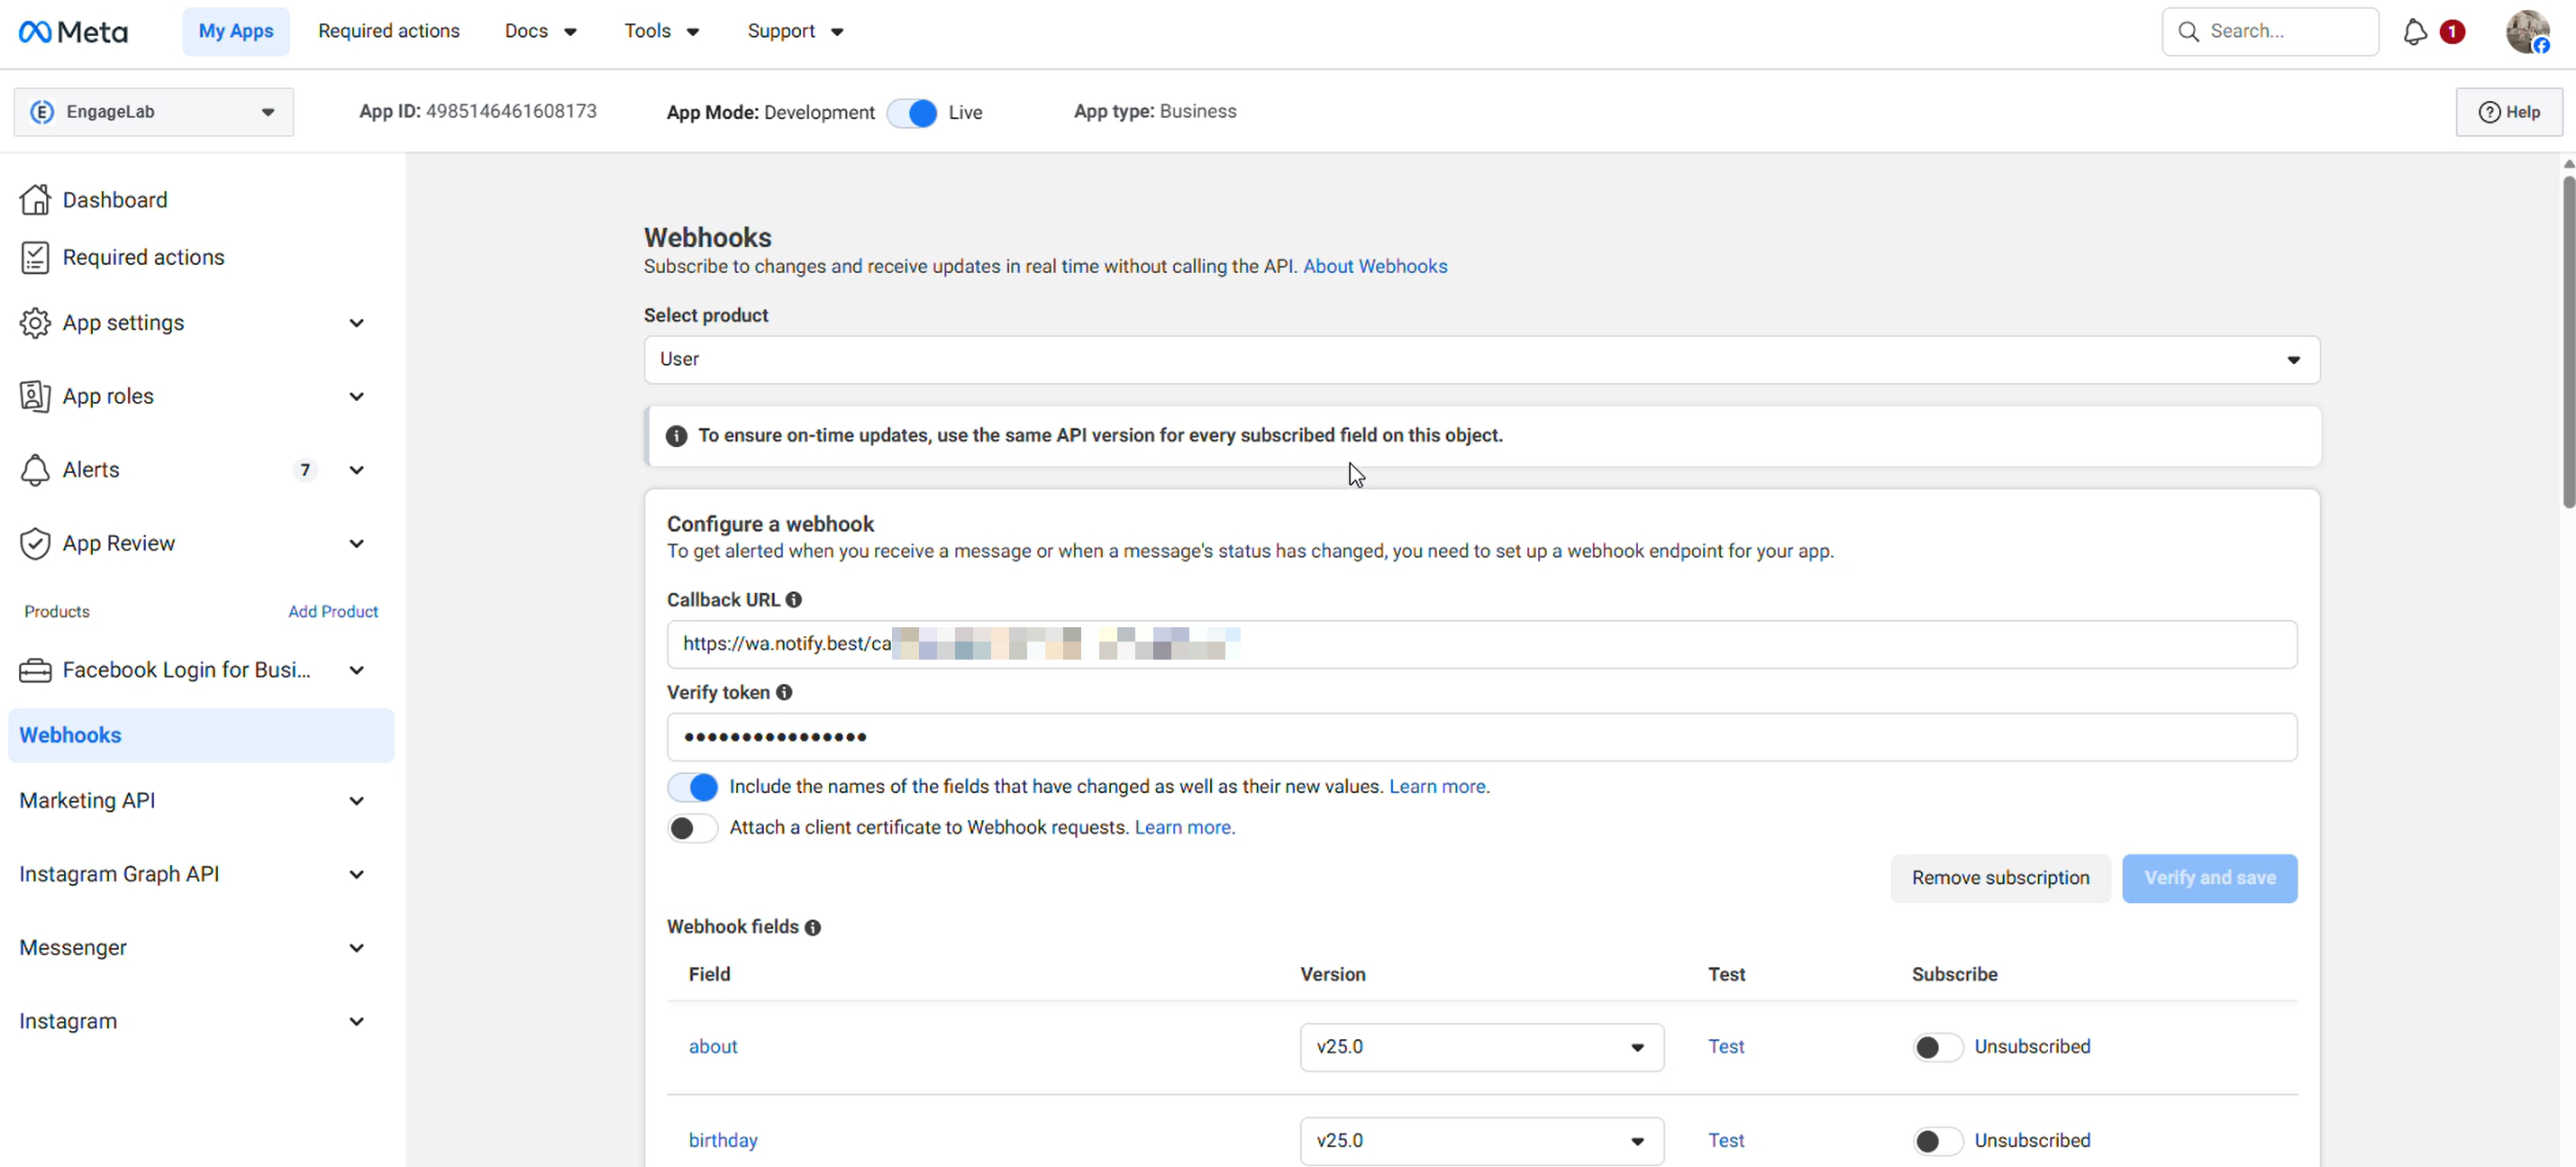
Configurer le webhook
Vous devez configurer un webhook WhatsApp pour recevoir les messages clients envoyés au numéro professionnel. Connectez-vous à votre compte Facebook Developer, accédez à WhatsApp > Configuration, collez l’URL du webhook LiveDesk et le jeton de vérification dans les champs correspondants, puis cliquez sur "Verify and Save". Définissez les autorisations du webhook en vous abonnant aux messages.
Paramètres détaillés
Une fois le canal créé, vous pouvez configurer les paramètres détaillés dans le canal correspondant.
Intégration
- Webhook URL
L’URL du webhook générée après la création du canal est utilisée pour l’envoi et la réception des événements push de messages. Renseignez-la dans les paramètres correspondants de la console Twilio.
- Webhook Token
Le jeton du webhook correspondant au compte WhatsApp.
- Business Account ID
Le WhatsApp Business Account ID saisi lors de la création du canal.
- API Key
Les informations de clé API correspondant à WhatsApp.

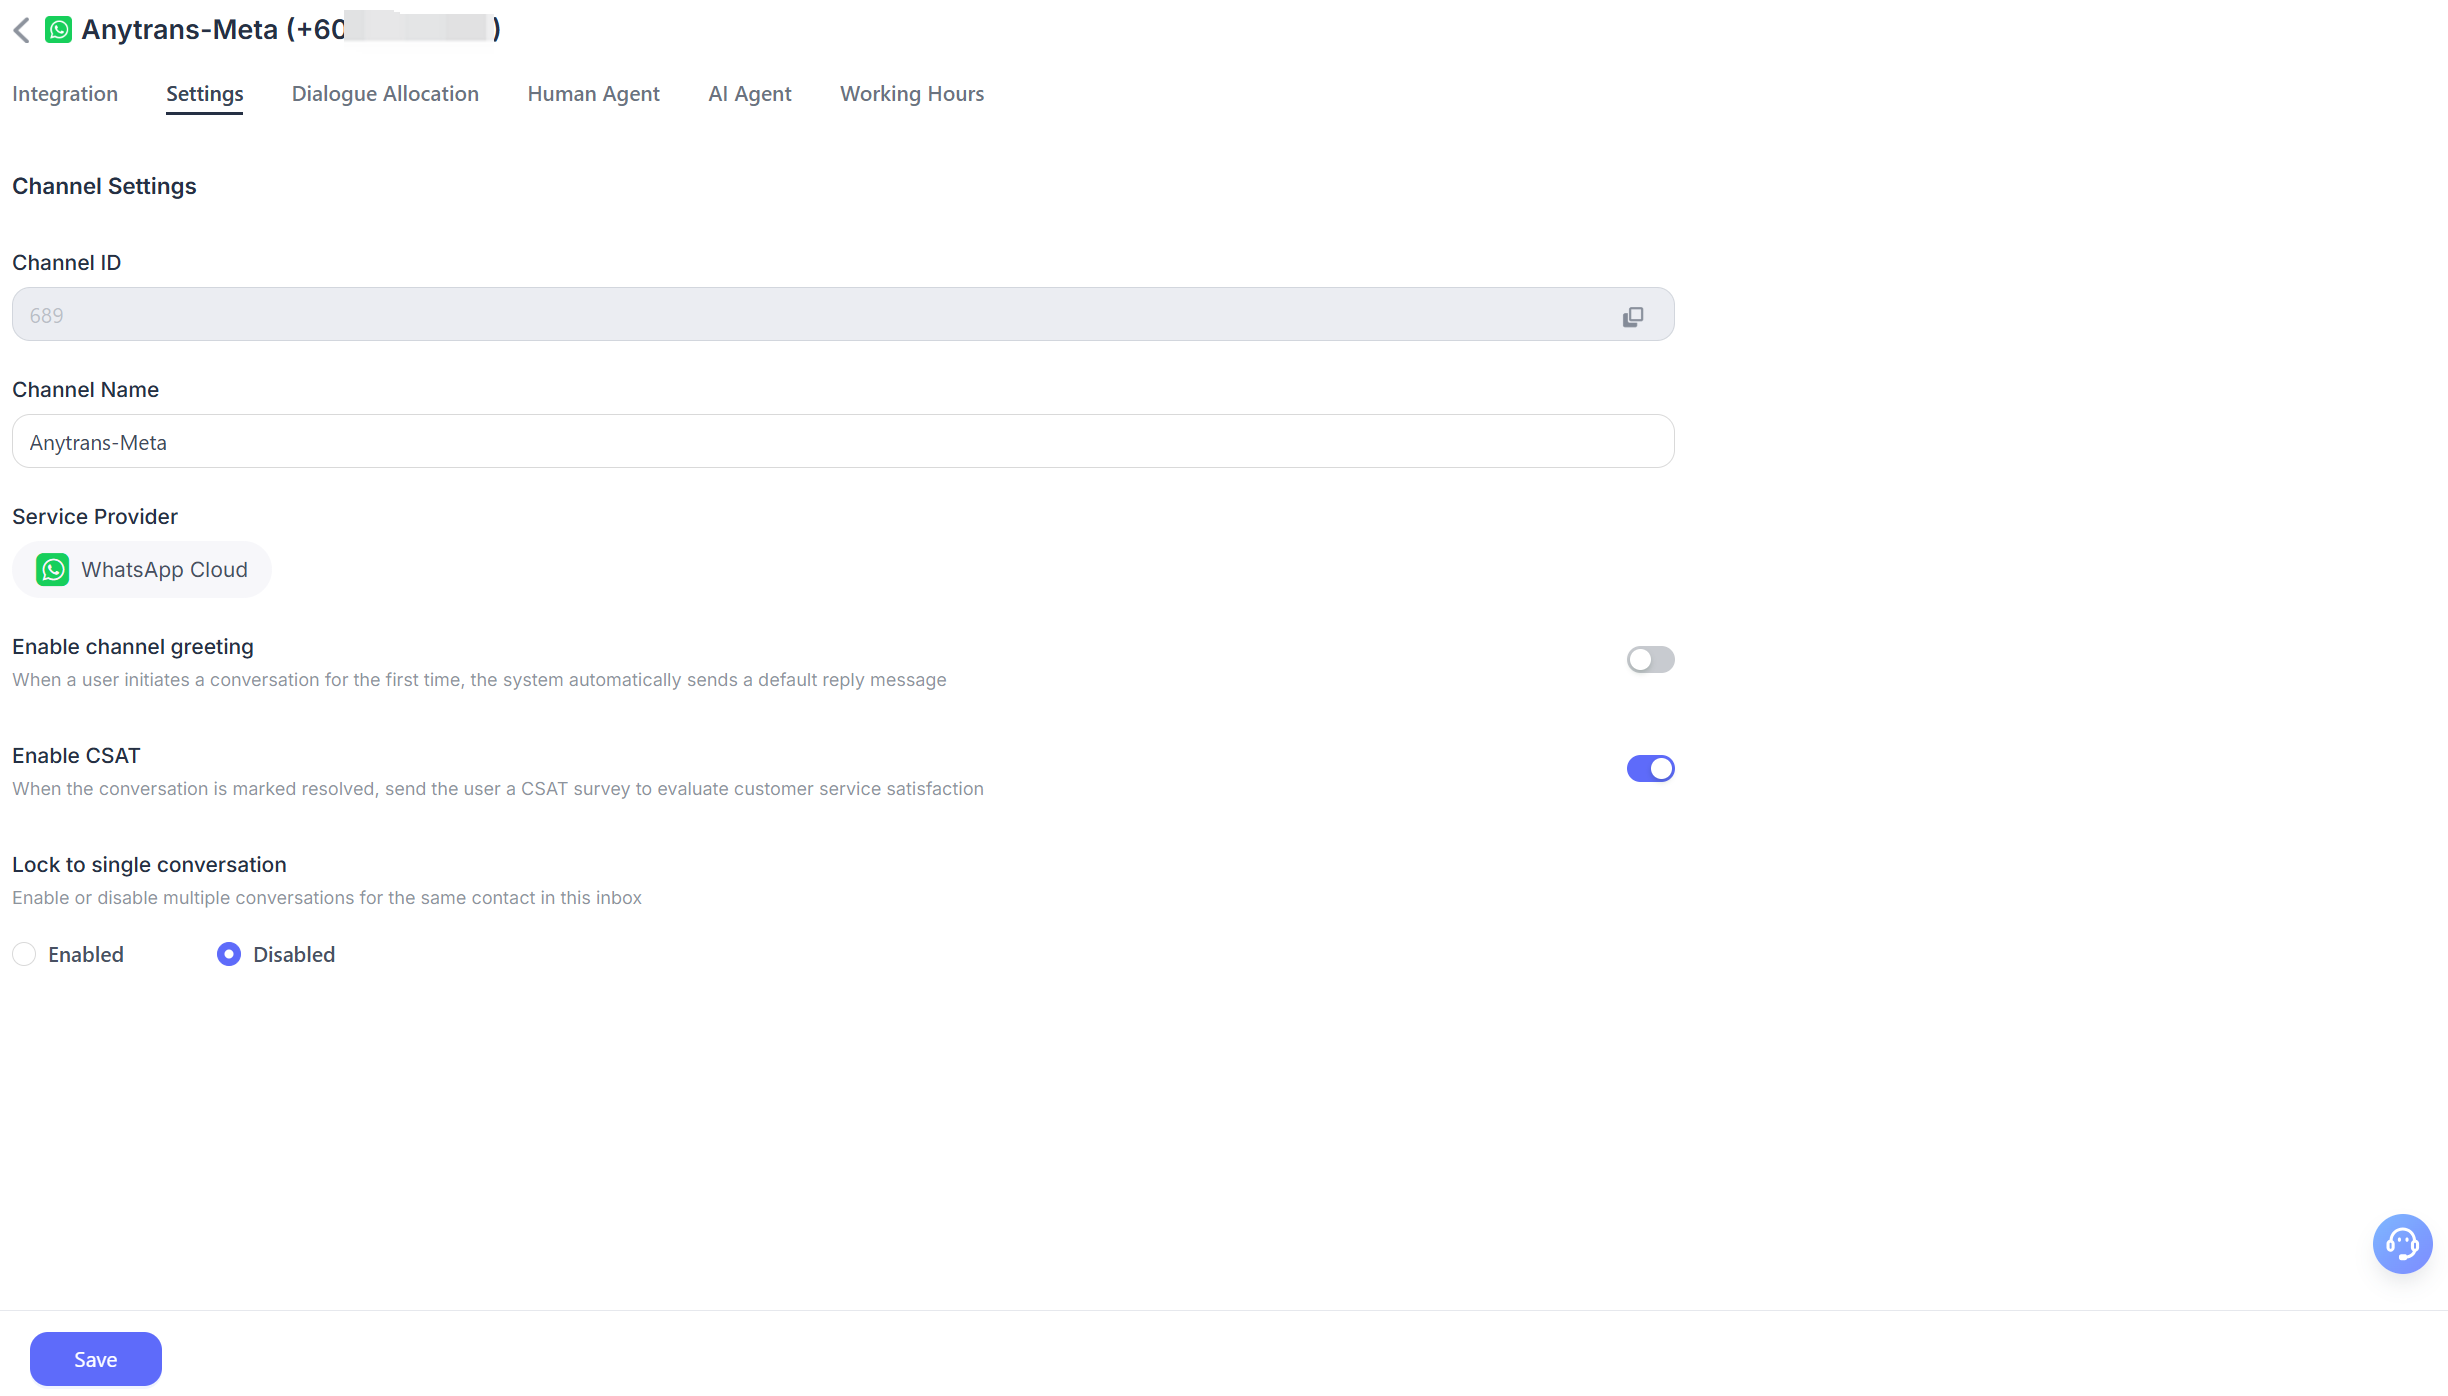
Paramètres
- Définir le message d’accueil du canal
Désactivé par défaut. Saisissez un message d’accueil personnalisé qui sera envoyé automatiquement aux clients lorsqu’ils démarrent une conversation.
- Activer le CSAT
Une fois cette fonctionnalité activée, une enquête de satisfaction client démarrera automatiquement chaque fois qu’un problème sera résolu. Les scores CSAT pourront ensuite être consultés dans la section des rapports.
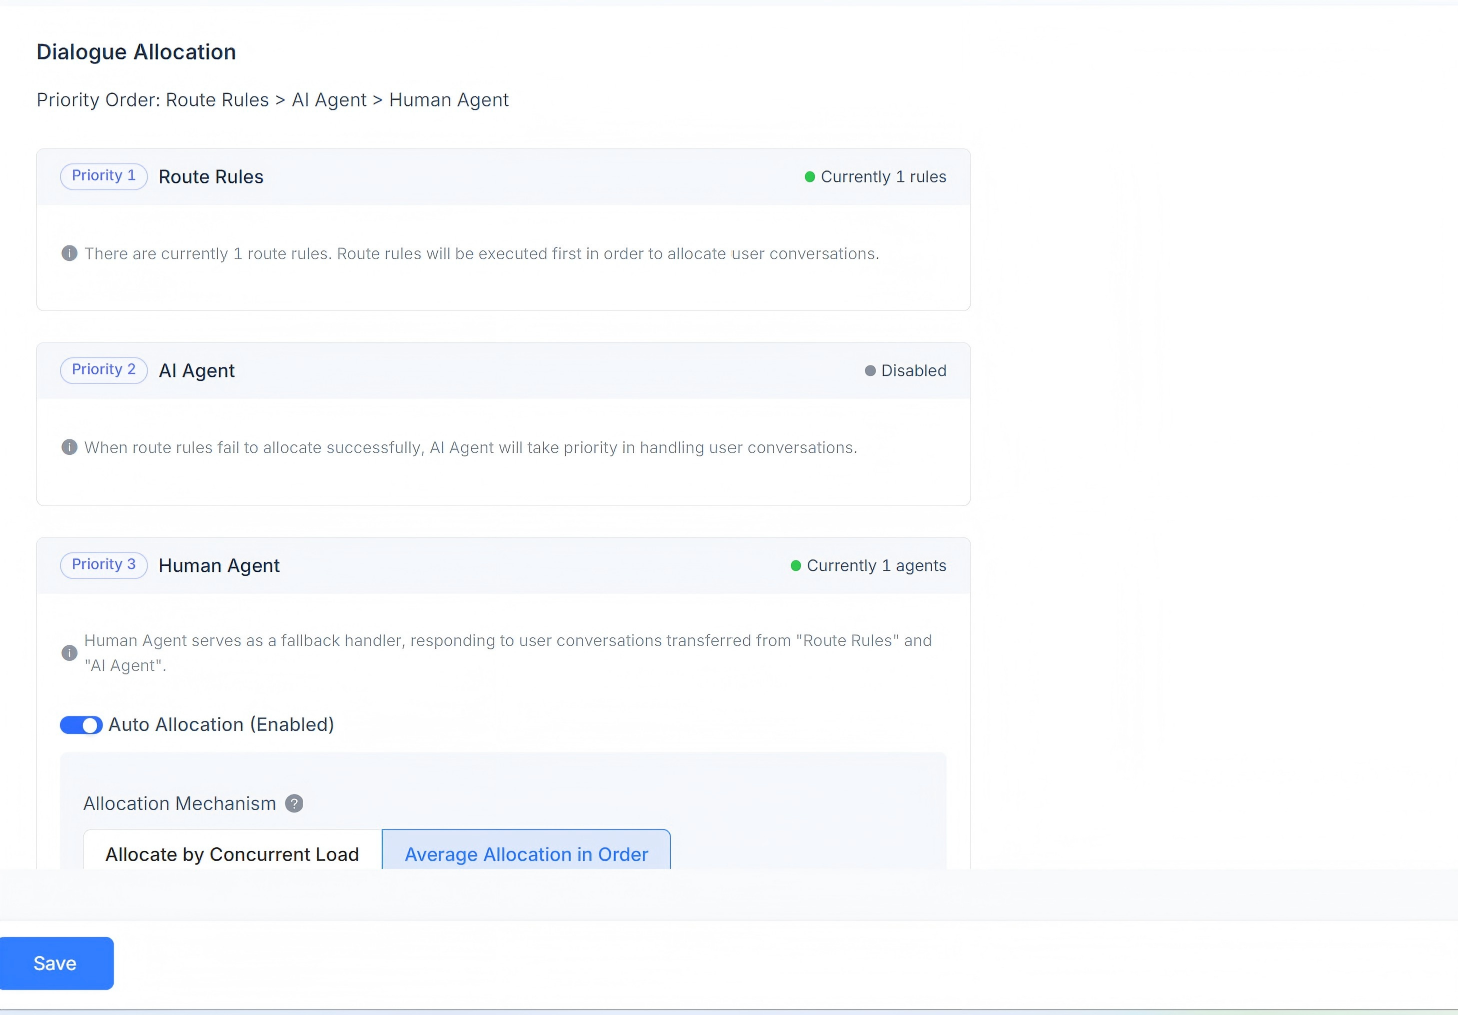
Attribution des conversations
Affiche les règles d’attribution des conversations pour le canal actuel. Prend en charge les règles de routage, l’agent IA et les réponses des agents humains. Ordre de priorité d’attribution des conversations : règles de routage > agent IA > agent humain.
Lorsque des règles de routage existent, le système détermine d’abord si les conditions de ces règles sont remplies. Si plusieurs règles de routage existent en même temps, elles sont évaluées dans l’ordre et l’attribution est effectuée selon la première règle correspondante.
Si le scénario actuel ne répond pas aux exigences des règles de routage, il sera d’abord attribué à l’agent IA.
S’il n’existe aucun agent IA, il sera attribué à l’agent humain correspondant. L’attribution automatique est prise en charge, y compris l’attribution selon la charge de travail simultanée, la distribution séquentielle en round-robin et la distribution personnalisée de la charge de travail des agents.
- Mécanisme d’attribution basé sur la charge de travail
L’attribution est basée sur la charge de travail définie, avec priorité aux agents ayant une charge simultanée plus faible.
- Mécanisme d’attribution séquentielle en round-robin
Indépendamment des paramètres de charge de travail de chaque agent, les conversations sont attribuées équitablement à chaque agent de manière séquentielle.
- Mécanisme d’attribution personnalisé de la charge de travail des agents
Définissez individuellement une valeur de charge de travail personnalisée pour chaque agent, avec priorité aux agents ayant une charge simultanée plus faible.
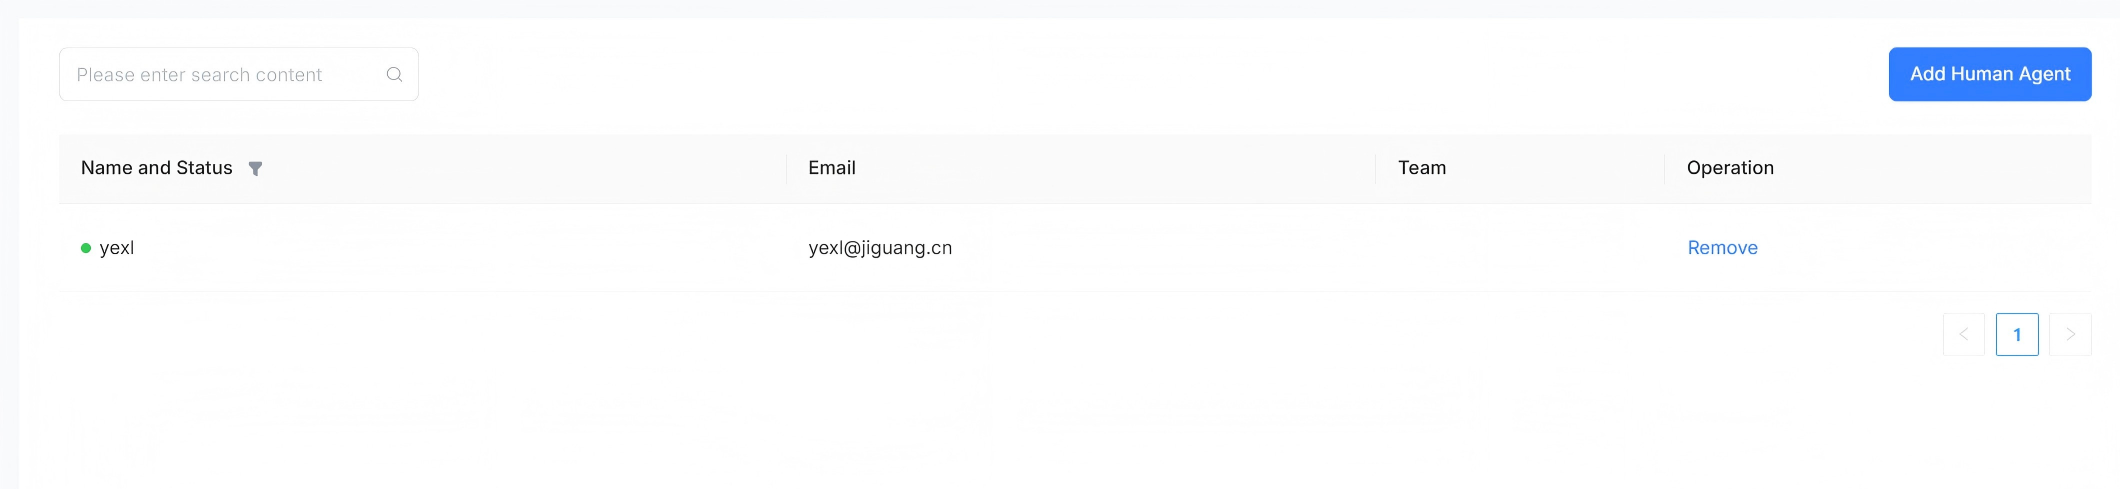
Agent humain
Prend en charge la configuration des agents humains qui traitent les messages de conversation pour ce canal. Les agents peuvent être ajoutés ou supprimés.
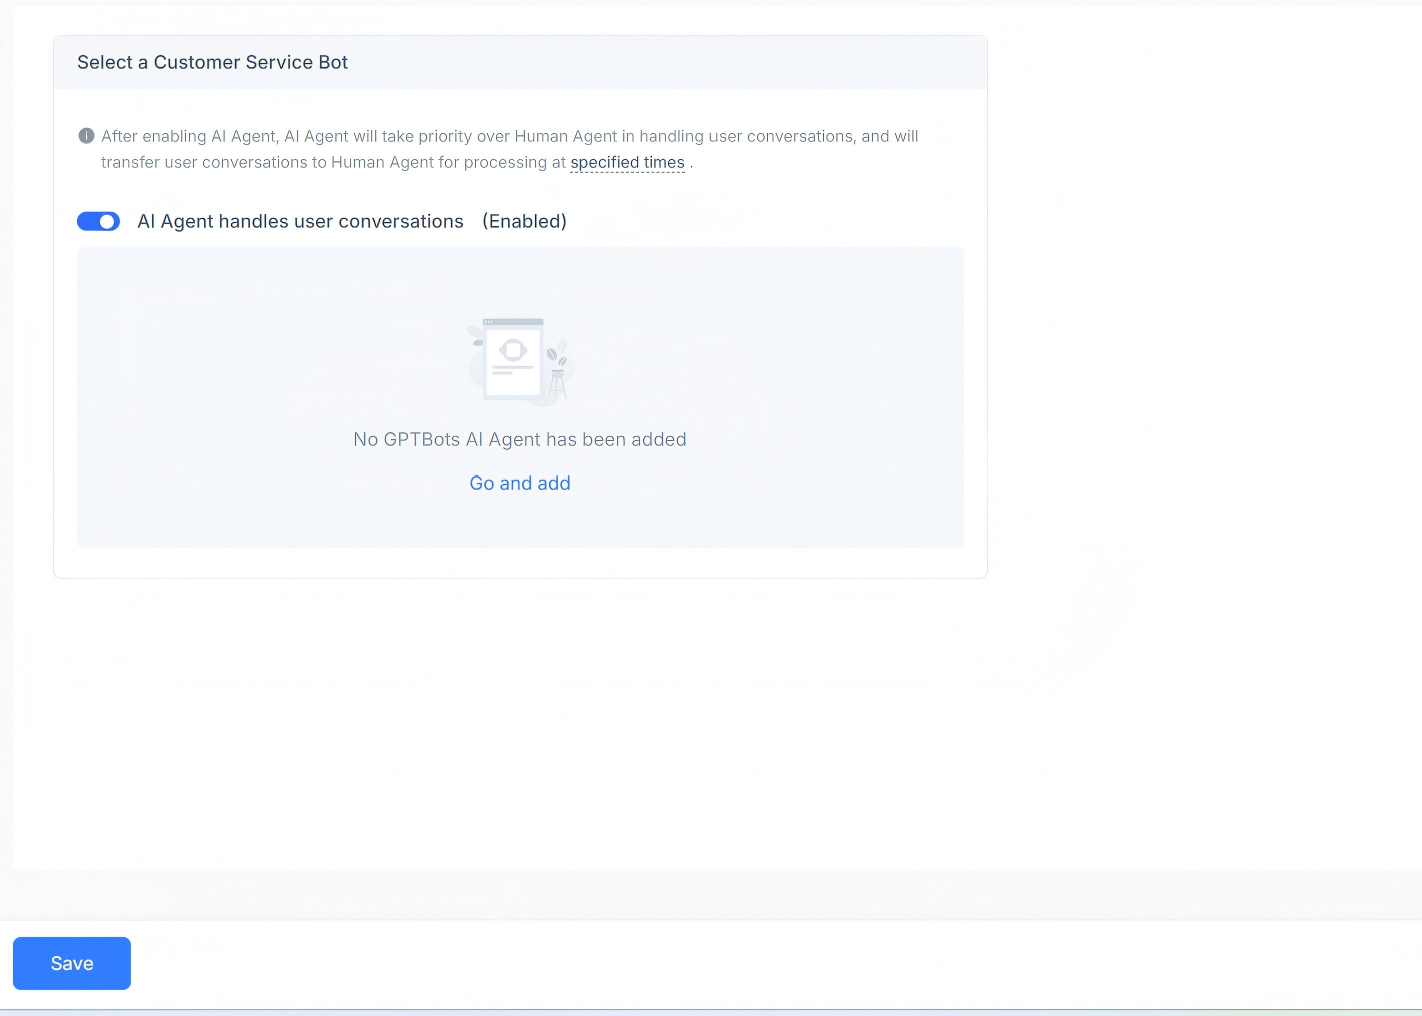
Agent IA
Prend en charge la configuration des agents IA qui traitent les messages de conversation pour ce canal. Vous pouvez les activer ou les désactiver, et l’agent IA GPT est pris en charge.
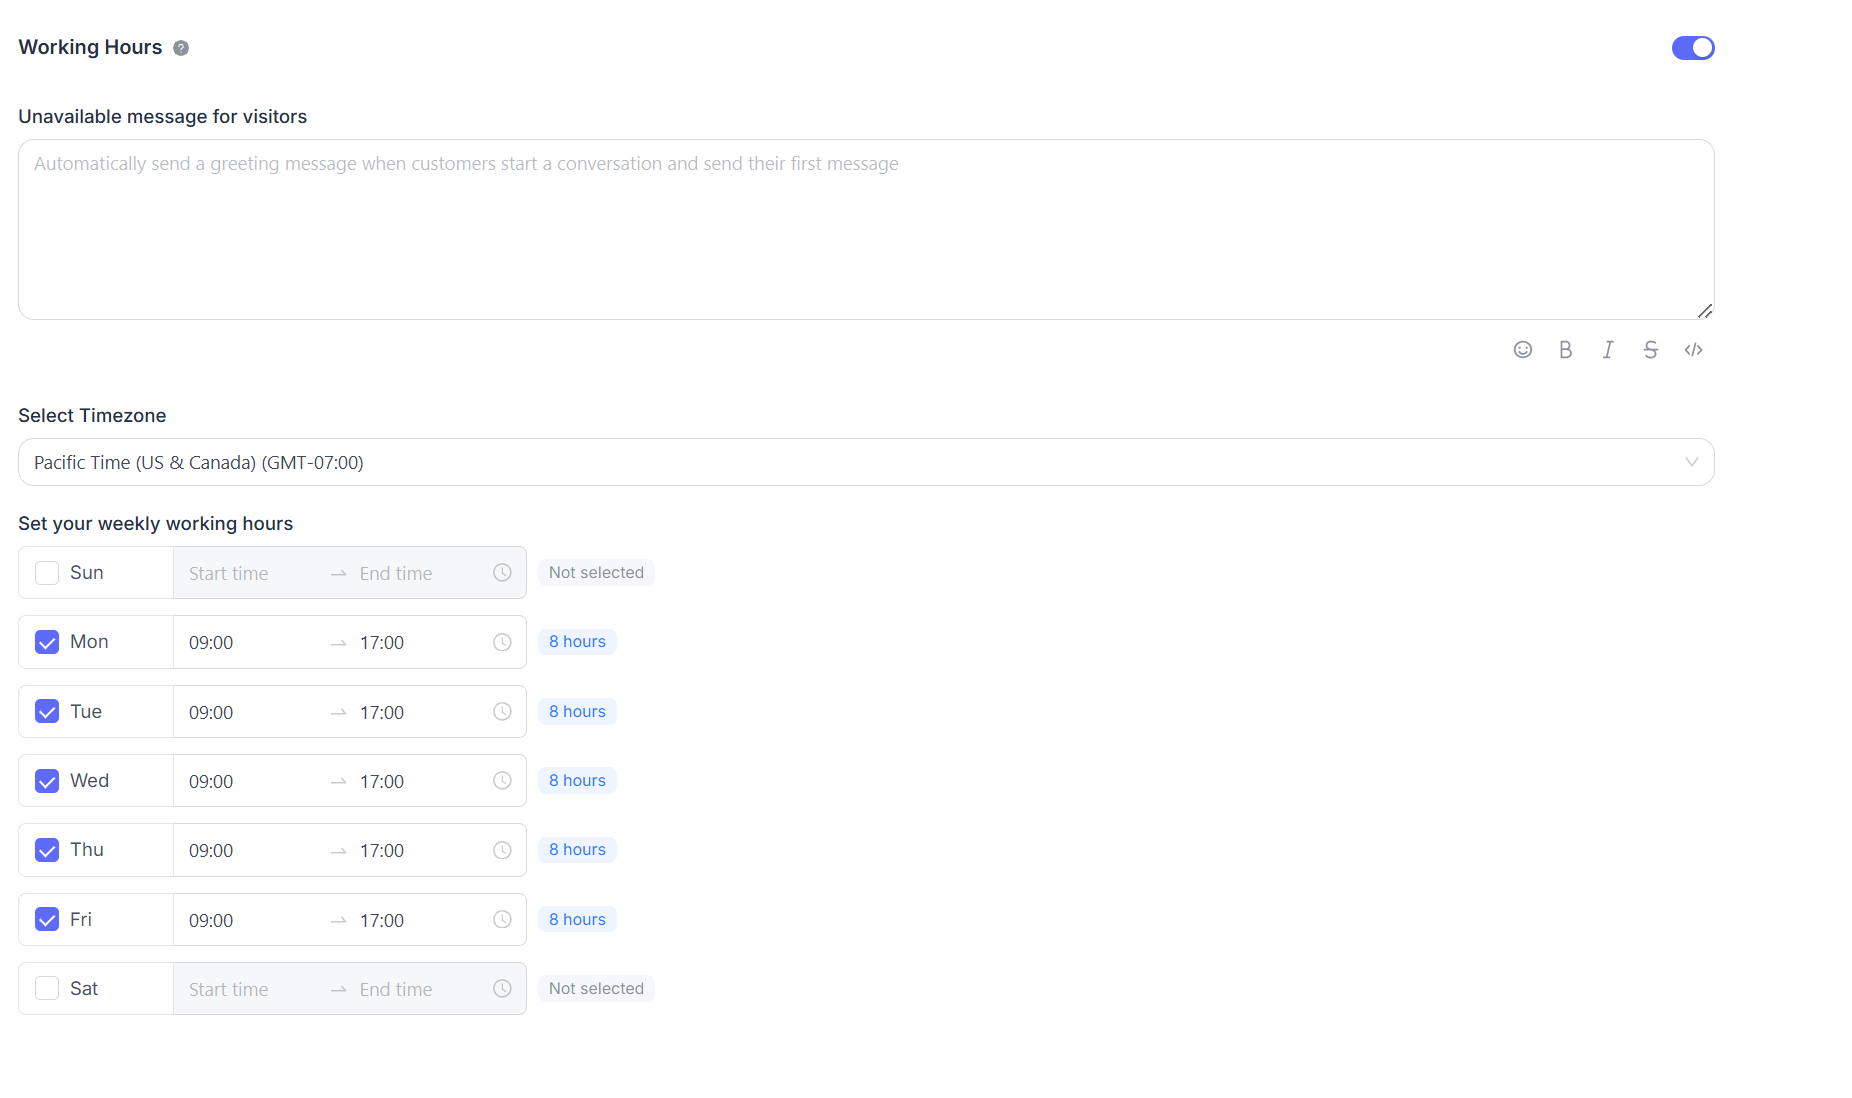
Heures d’ouverture
Vous pouvez configurer les heures d’ouverture de l’équipe.

Si les heures d’ouverture sont clairement définies, cochez la case "Enable business availability for this inbox (enabled)". Après avoir sélectionné cette option, les paramètres correspondants apparaîtront ci-dessous. Vous pouvez définir un message d’indisponibilité pour les visiteurs en dehors des heures d’ouverture. Vous pouvez choisir les plages horaires d’ouverture et le fuseau horaire correspondant pour chaque jour.