EngageLab WhatsApp
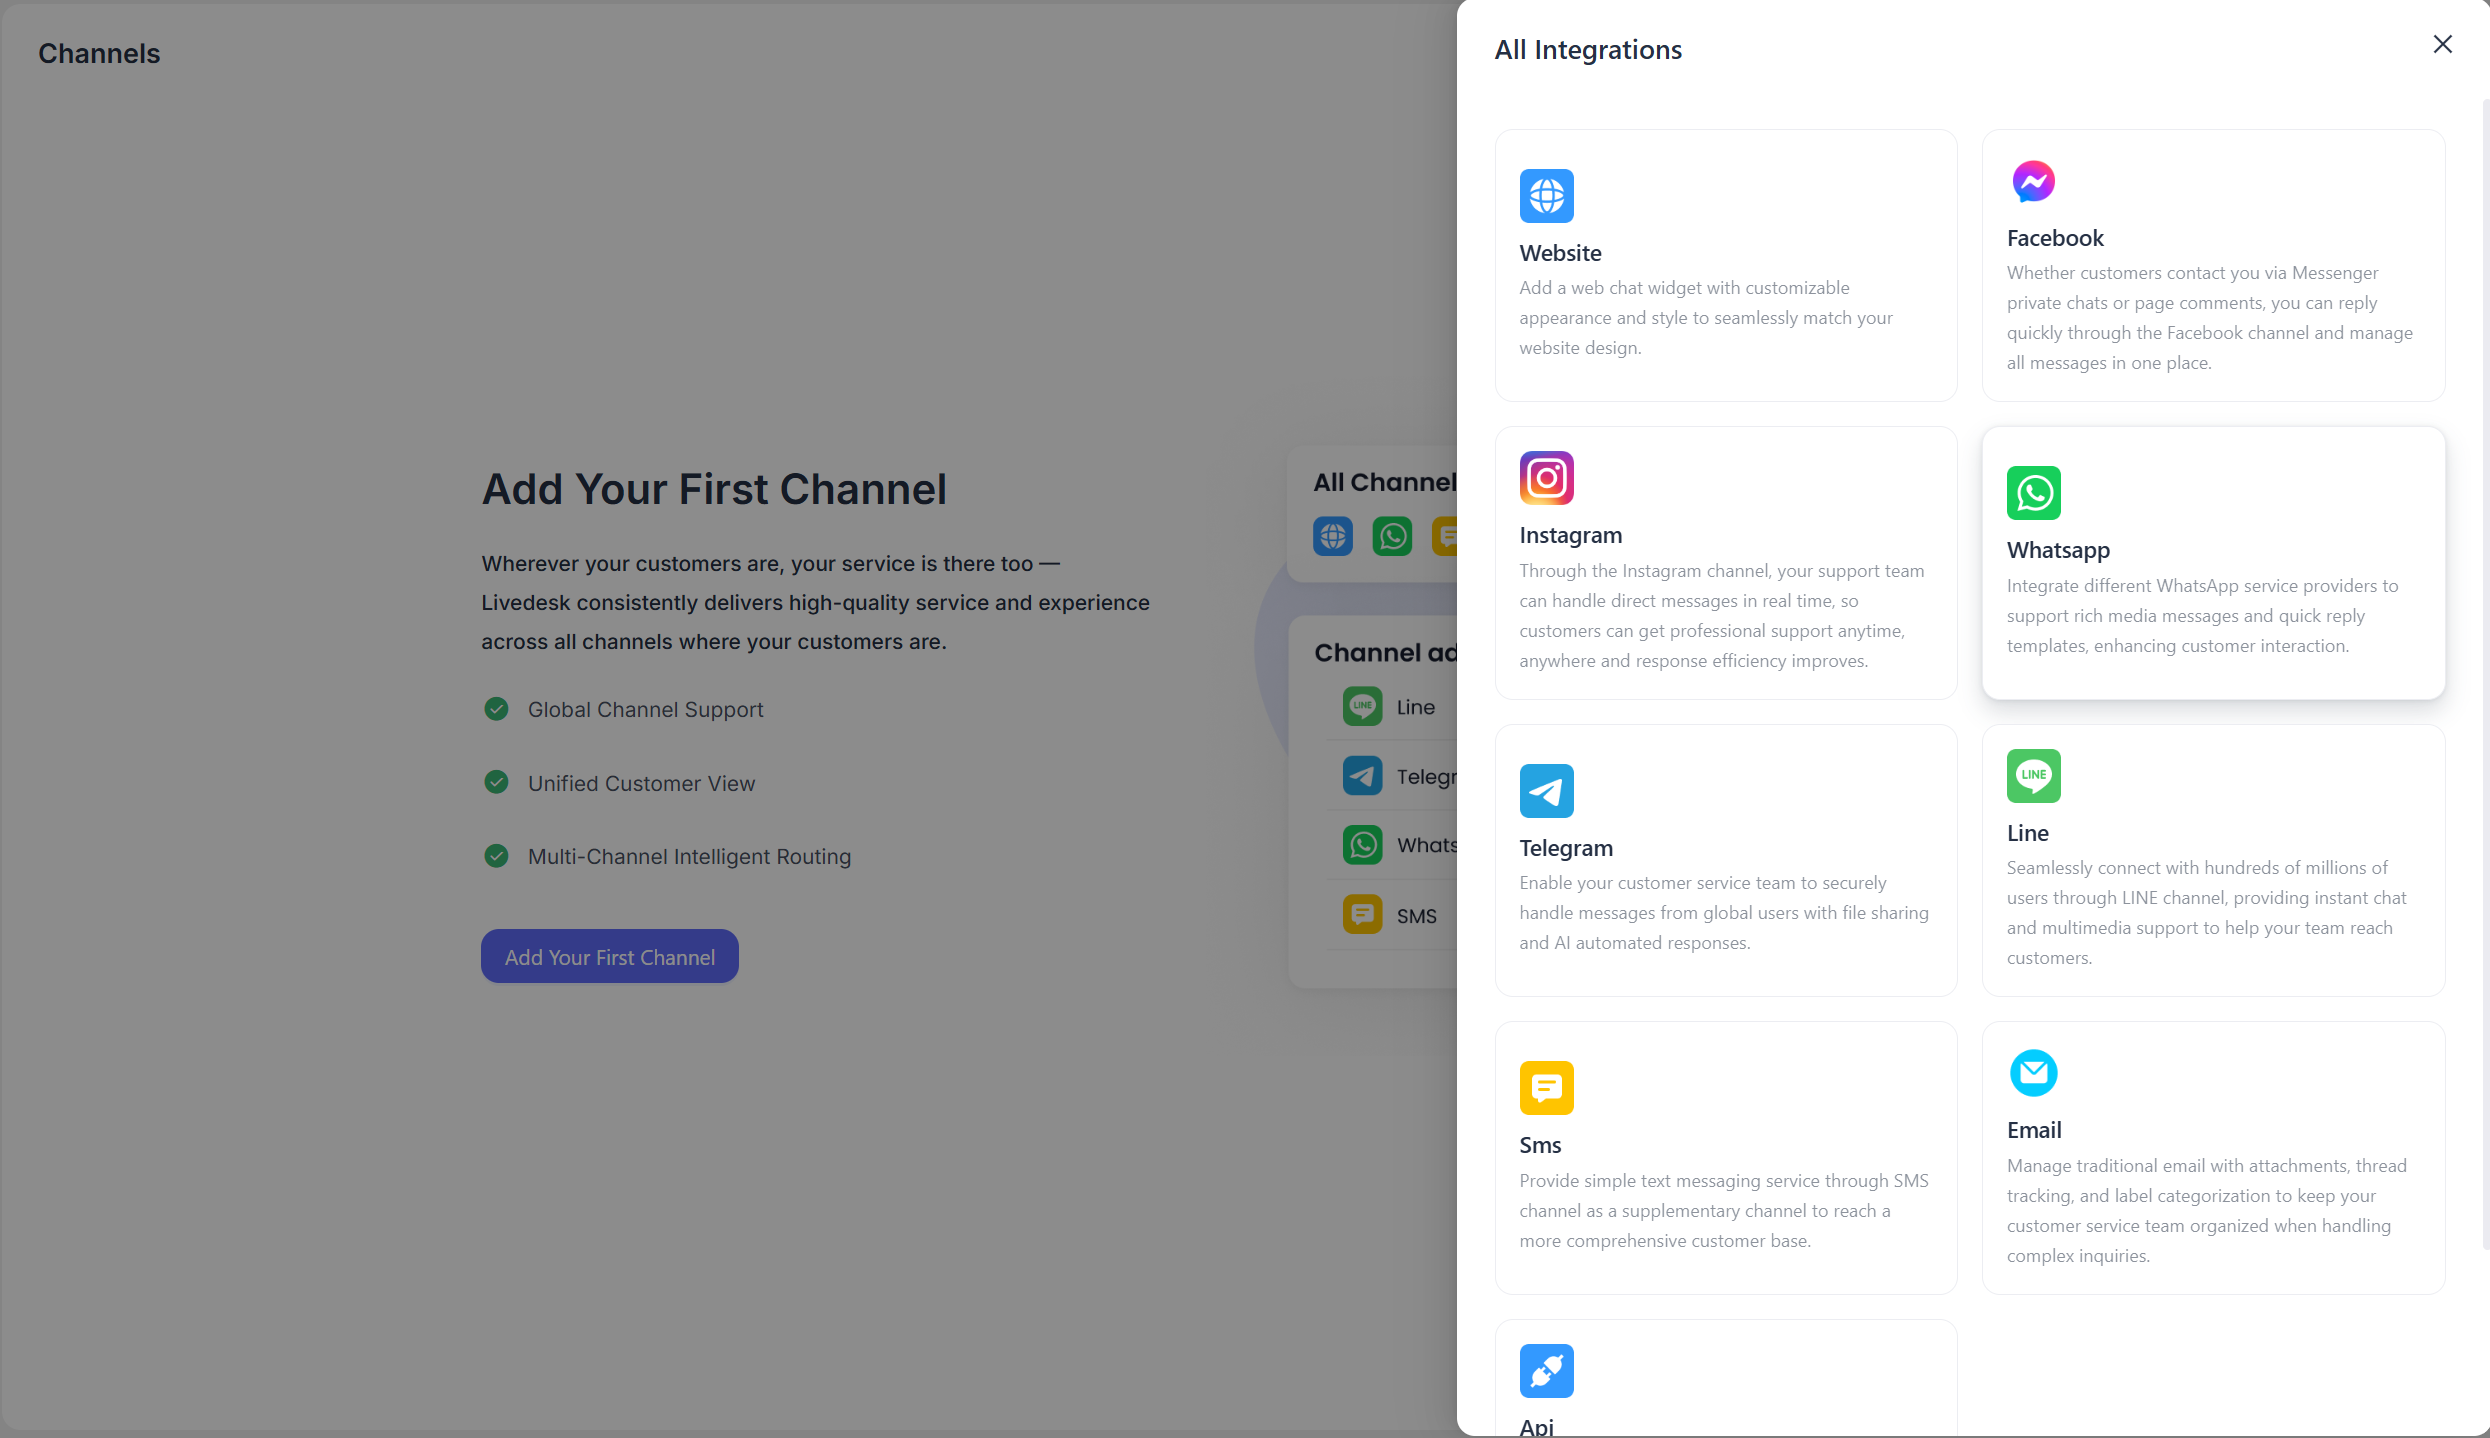
LiveDeskでは、WhatsAppチャネルの追加をサポートしており、ユーザーは顧客とコミュニケーションを取ることができます。利用可能なAPIプロバイダーは、WhatsApp Cloud Service、Twilio、EngageLab WhatsAppの3種類です。以下では、EngageLab WhatsAppを追加する方法について説明します。
前提条件
- WhatsApp APIを設定するには、EngageLab WhatsAppアカウントが必要です。まだアカウントをお持ちでない場合は、Quick Accessガイドに従って作成できます。
- 有効な電話番号が必要です。
- WhatsAppサービスを有効化した後、Overview Guideに従って、ビジネスアカウントの登録、送信者番号の追加、APIキーの作成を行ってください。
LiveDeskでチャネルを追加する
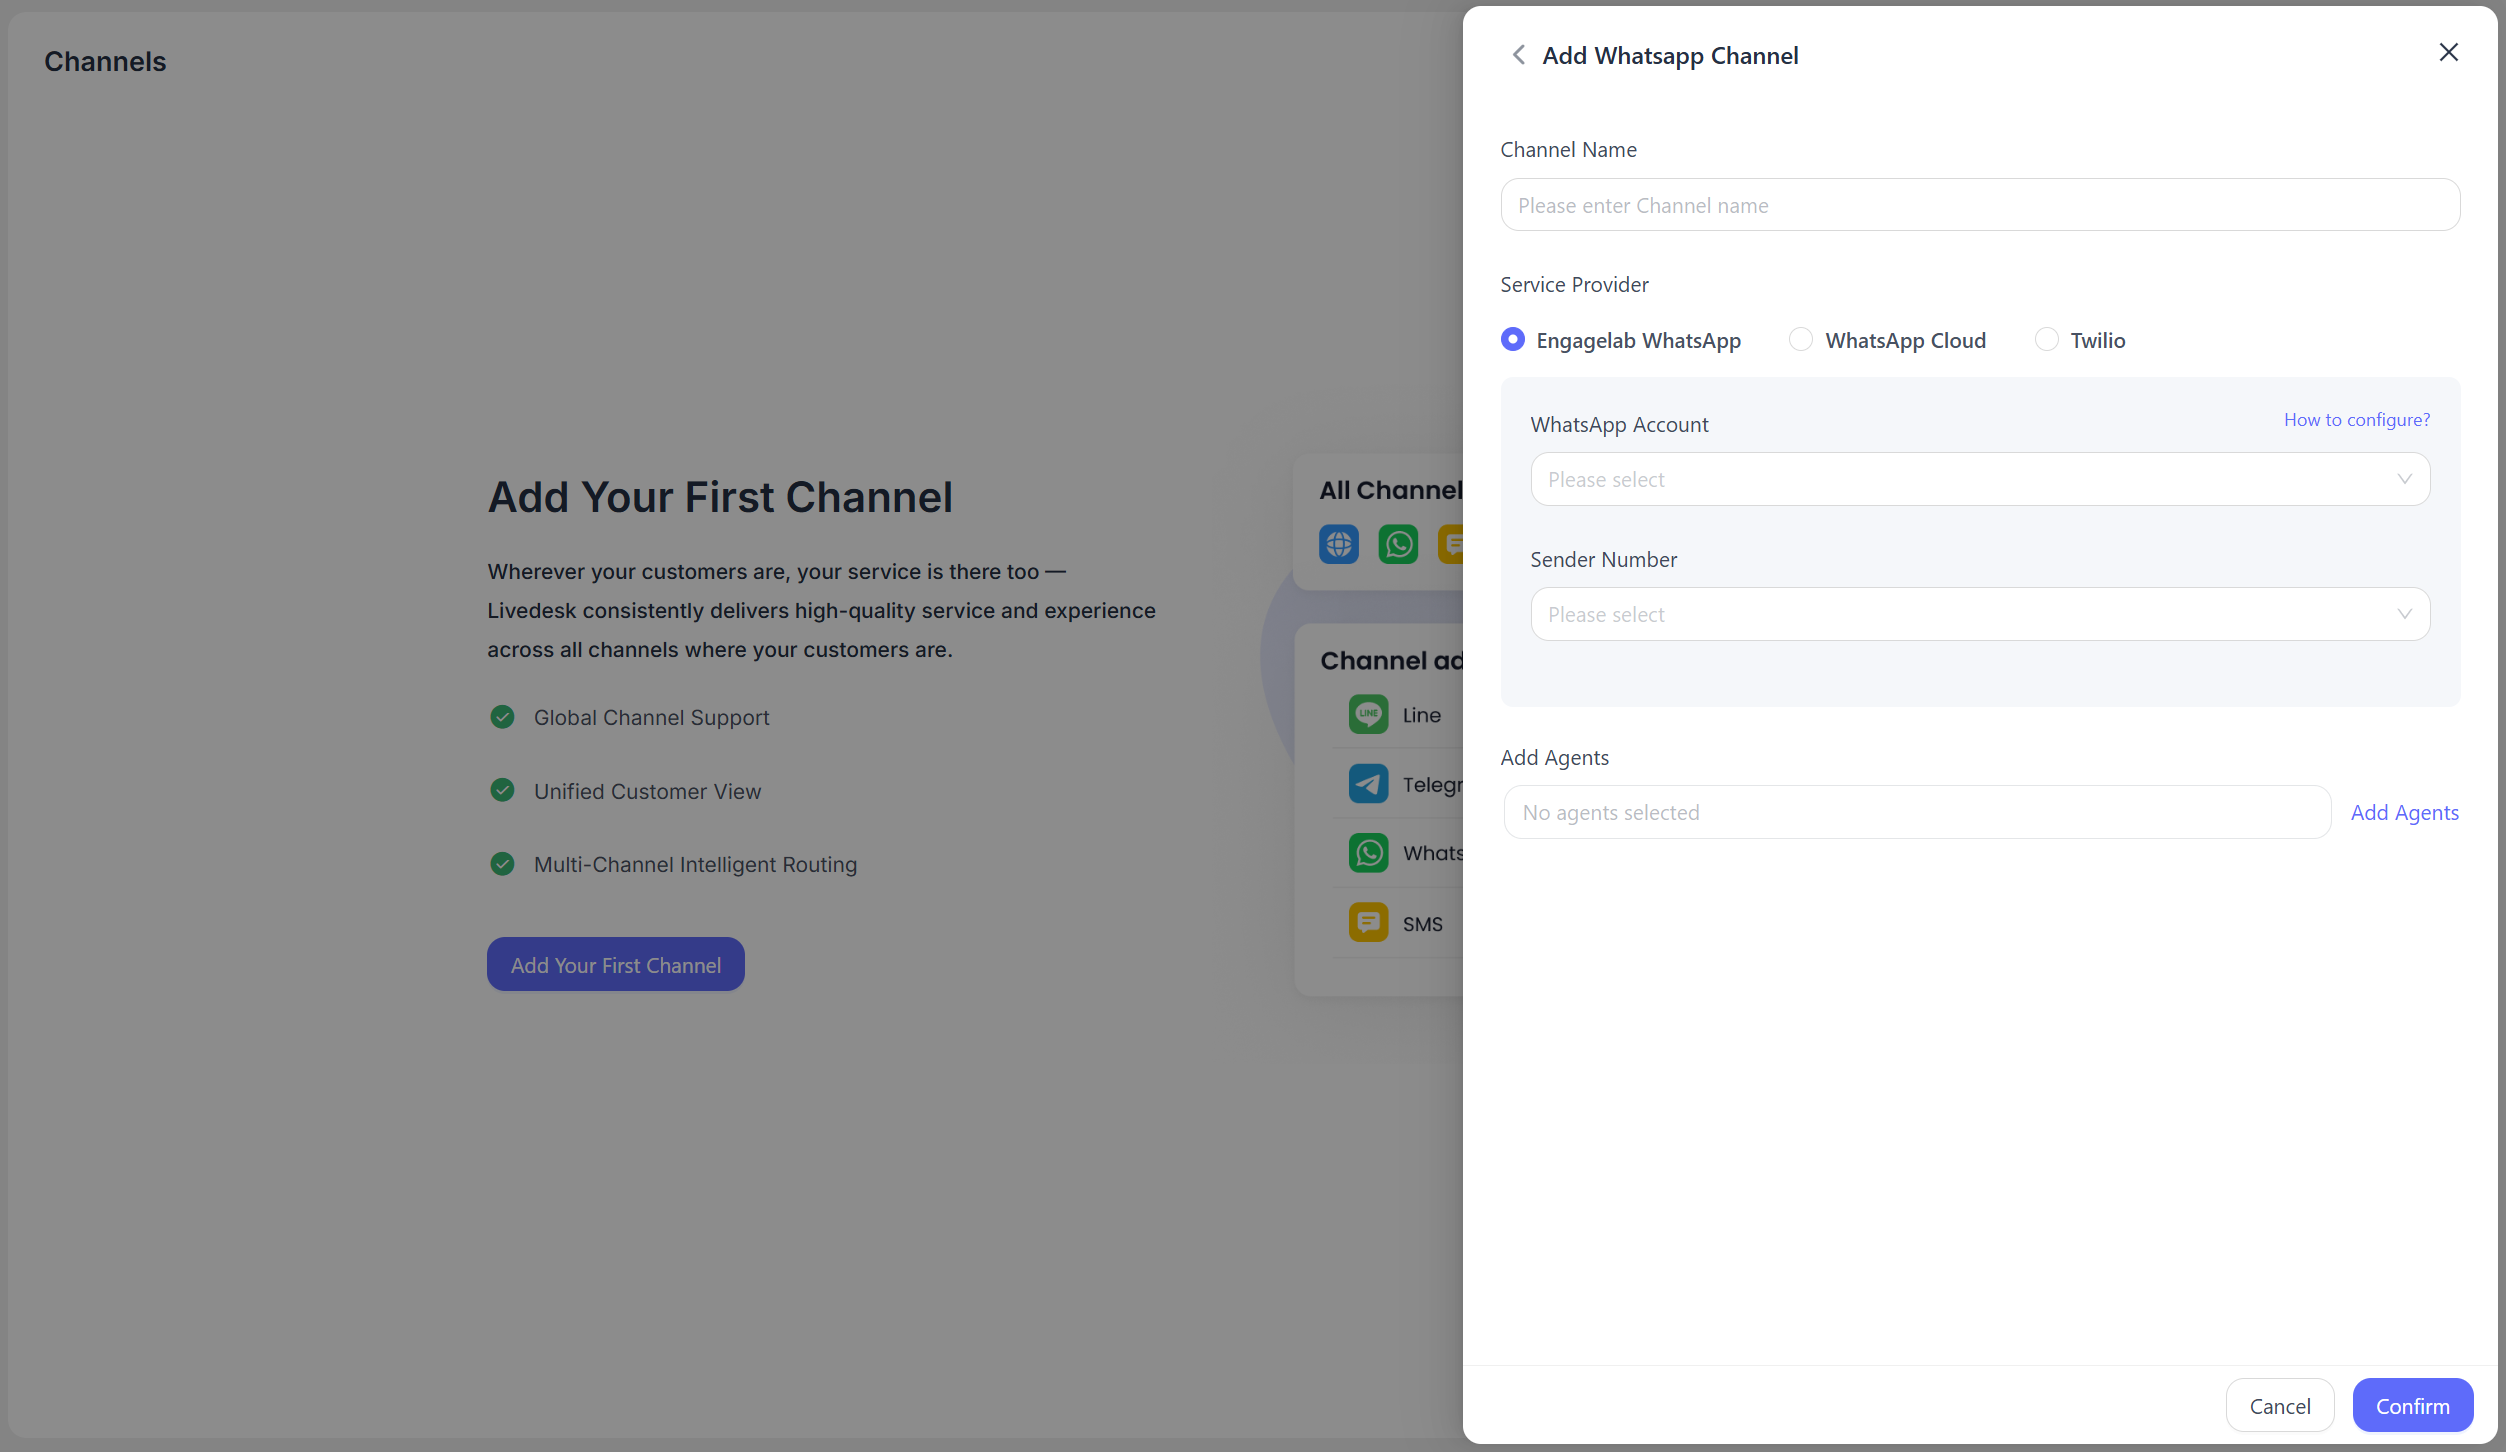
画面の案内に従って設定情報を入力し、完了後に「Confirm」をクリックします。
Channel Name
任意のチャネル名を入力します。
Service Provider
EngageLab WhatsAppを選択します。
WhatsApp Account
ドロップダウンリストから該当するWhatsAppアカウントを選択します。システムは、同一組織内のEngageLab WhatsApp製品に対応するビジネスアカウントIDを読み取ります。現在の組織で対応するEngageLab WhatsApp製品が有効化されていない場合は、案内に従って作成および設定できます。
Sender Number
対応するWhatsAppアカウント配下の送信者番号が表示されます。ドロップダウンリストから1つ選択します。
Add Customer Service Agents
現在のチャネルのメッセージ処理に参加するカスタマーサービス担当者を指定します。
上記の設定情報を入力し、検証が成功すると、EngageLab WhatsAppチャネルが正常に作成されたことを示すメッセージが表示されます。
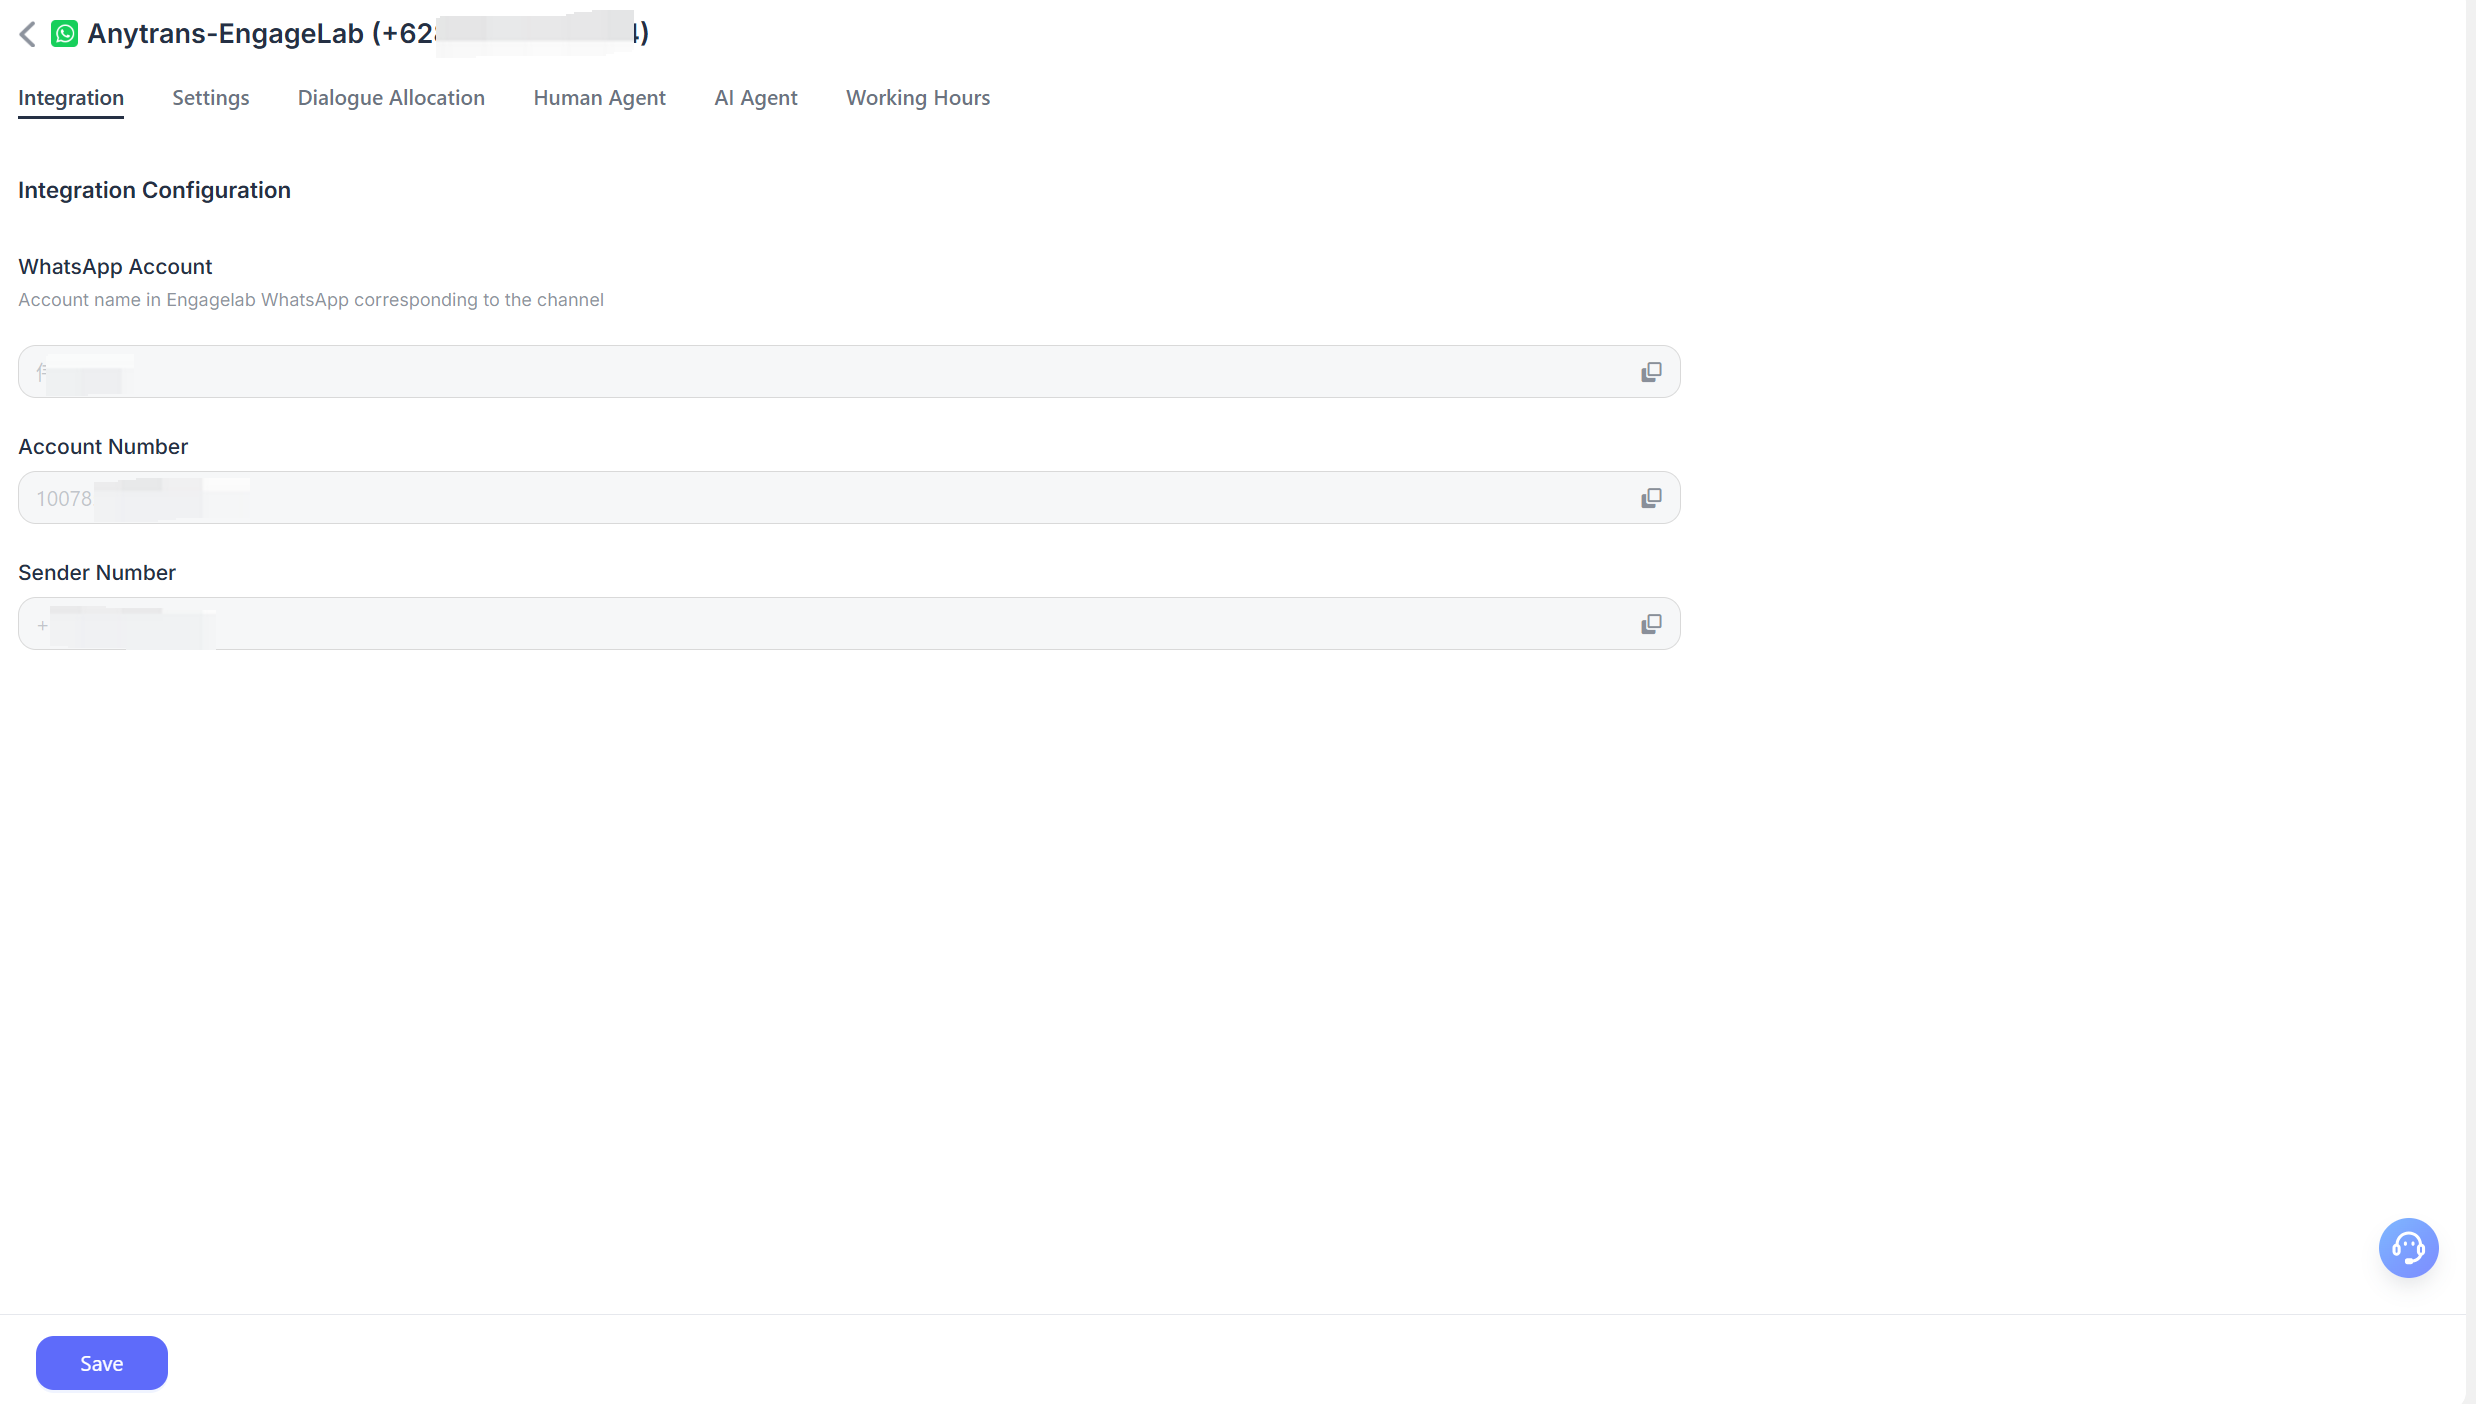
詳細設定
チャネル作成後、対象チャネルの詳細設定を構成できます。
Integration
WhatsApp Account
チャネル作成時に選択したEngageLab WhatsAppビジネスアカウント名が表示されます。コピーは可能ですが、変更はできません。
Account ID
対応するEngageLab WhatsAppビジネスアカウントIDです。
Sender Number
チャネル作成時に選択した送信者番号です。
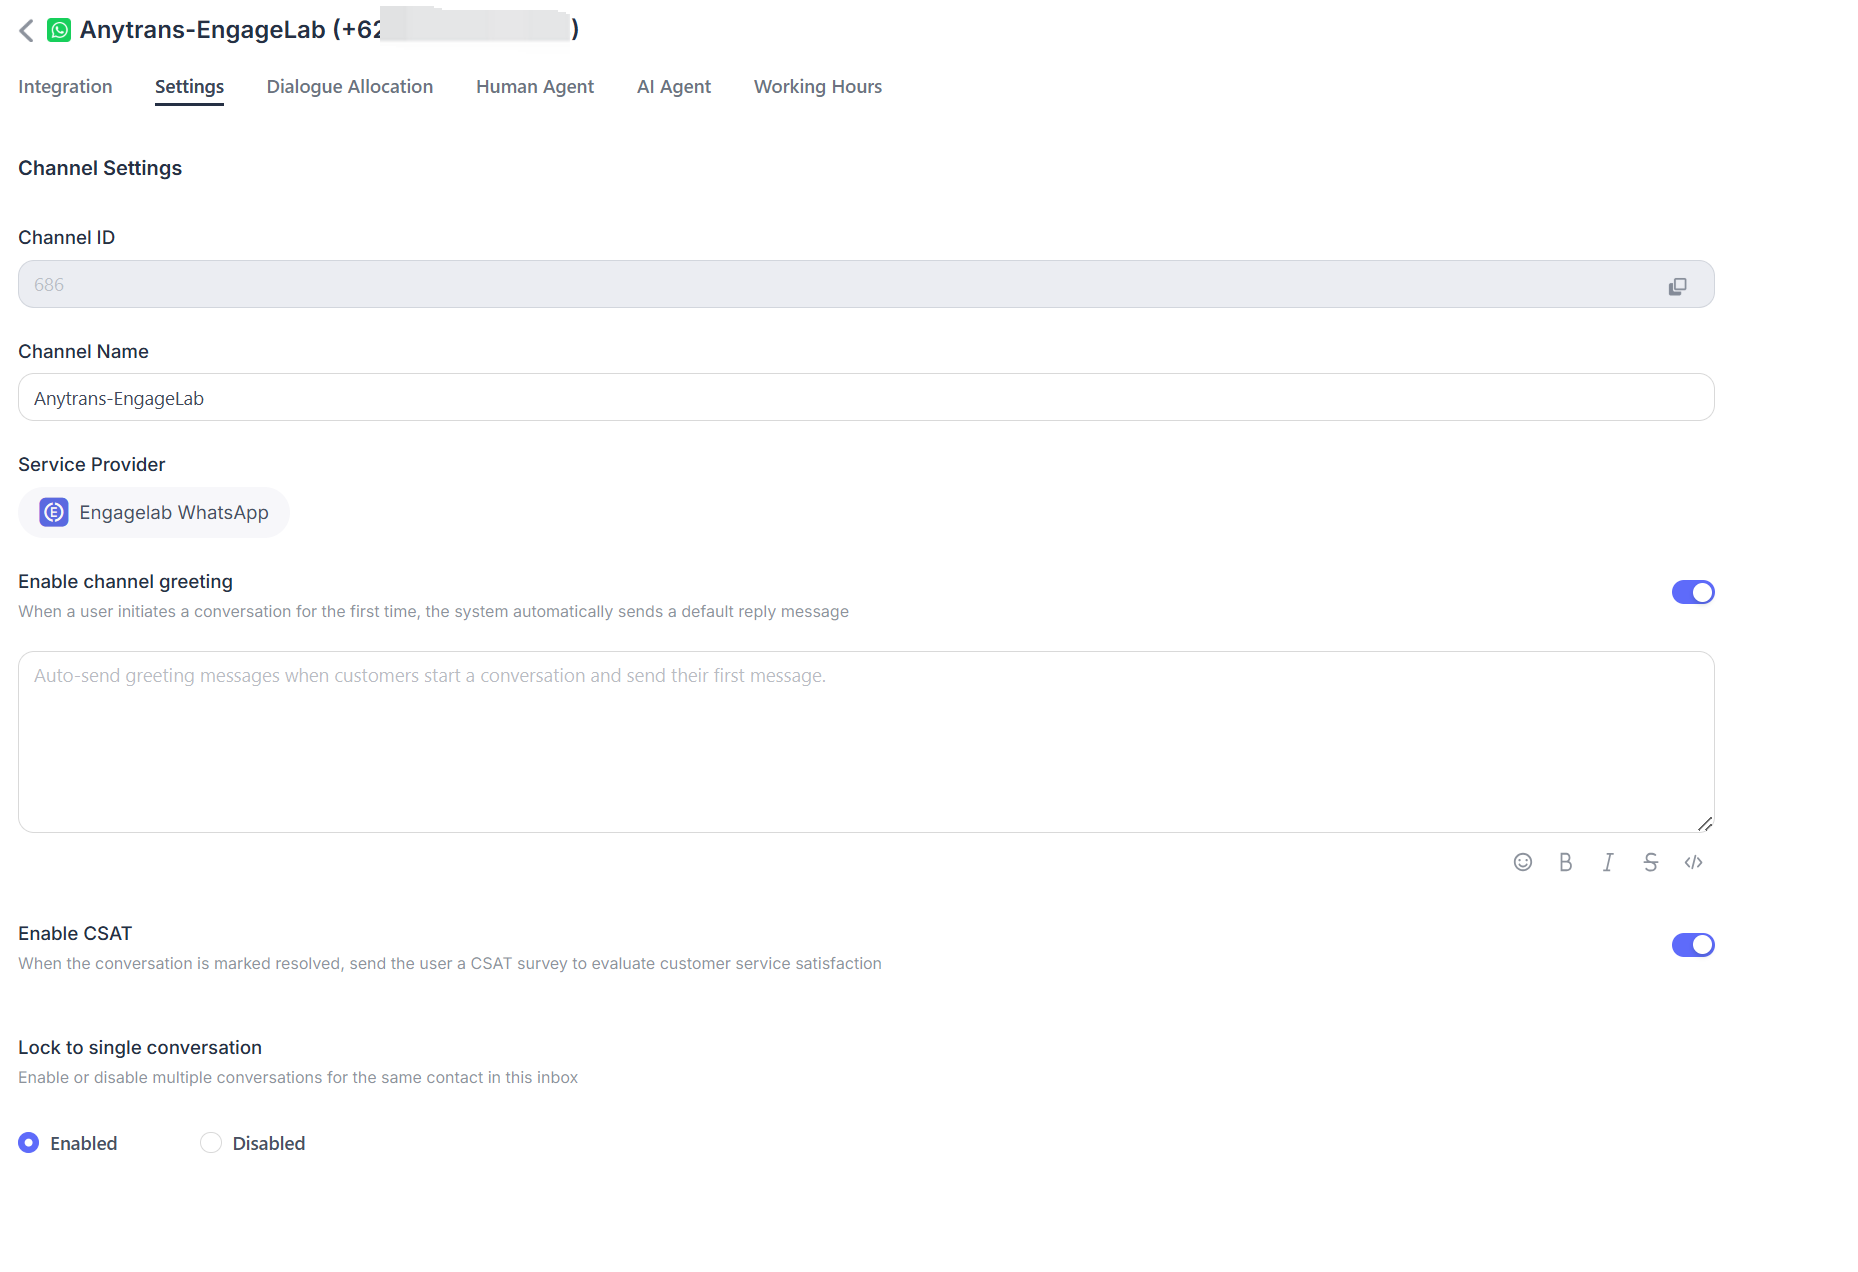
Settings
Set Channel Greeting Message
デフォルトでは無効です。カスタムのあいさつメッセージを入力すると、顧客が会話を開始した際に自動送信されます。
Enable CSAT
この機能を有効にすると、問題が解決されるたびに顧客満足度調査が自動的に開始されます。CSATスコアは後でレポートセクションで確認できます。
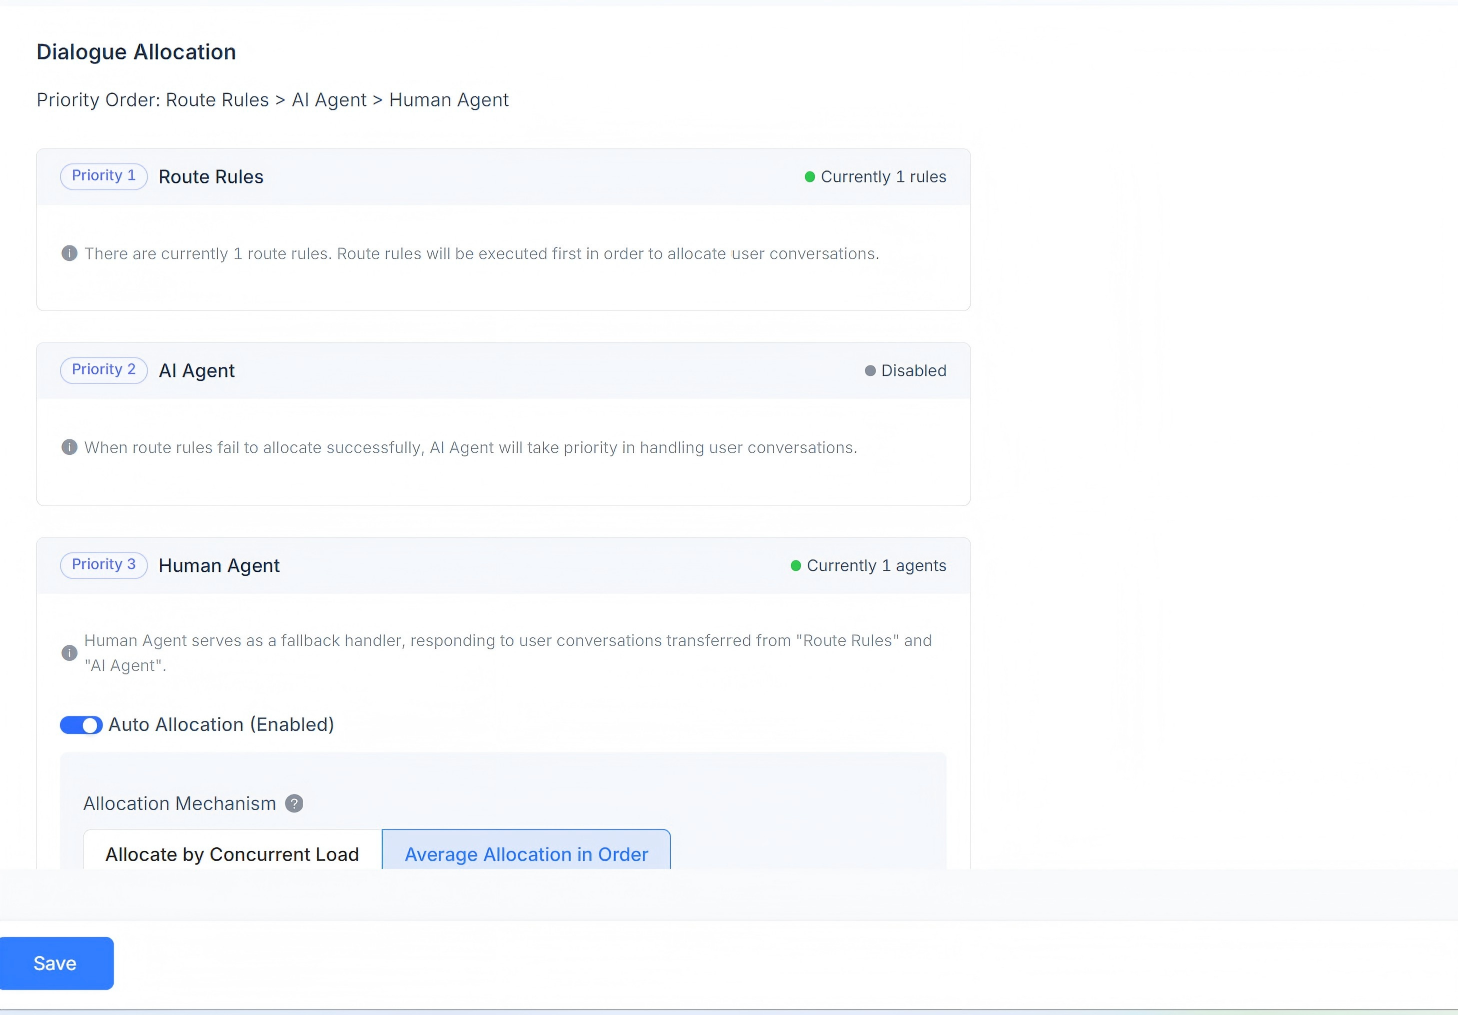
Conversation Assignment
現在のチャネルの会話割り当てルールを表示します。ルーティングルール、AI Agent、およびHuman Agentによる応答をサポートしています。会話割り当ての優先順位は、Routing Rules > AI Agent > Human Agentです。
ルーティングルールが存在する場合、システムはまずルーティングルールの要件を満たしているかどうかを判定します。同時に複数のルーティングルールが存在する場合は、順番に評価され、条件を満たした会話はそのルールに従って割り当てられます。
現在のシナリオがルーティングルールを満たさない場合、会話はまずAI Agentに割り当てられます。
AI Agentが存在しない場合、会話は対応するHuman Agentに割り当てられます。自動割り当てに対応しており、同時負荷ベースの割り当てメカニズムと順次平均割り当てメカニズムの両方を利用できます。
Load-Based Assignment Mechanism
定義された負荷数に基づいて会話が割り当てられ、同時負荷の低いカスタマーサービス担当者が優先されます。
Sequential Average Assignment Mechanism
各カスタマーサービス担当者の負荷設定に関係なく、会話は順番に各担当者へ均等に割り当てられます。
Custom Agent Load Assignment Mechanism
各カスタマーサービス担当者ごとにカスタム負荷値を個別に設定し、同時負荷の低い担当者が優先されます。
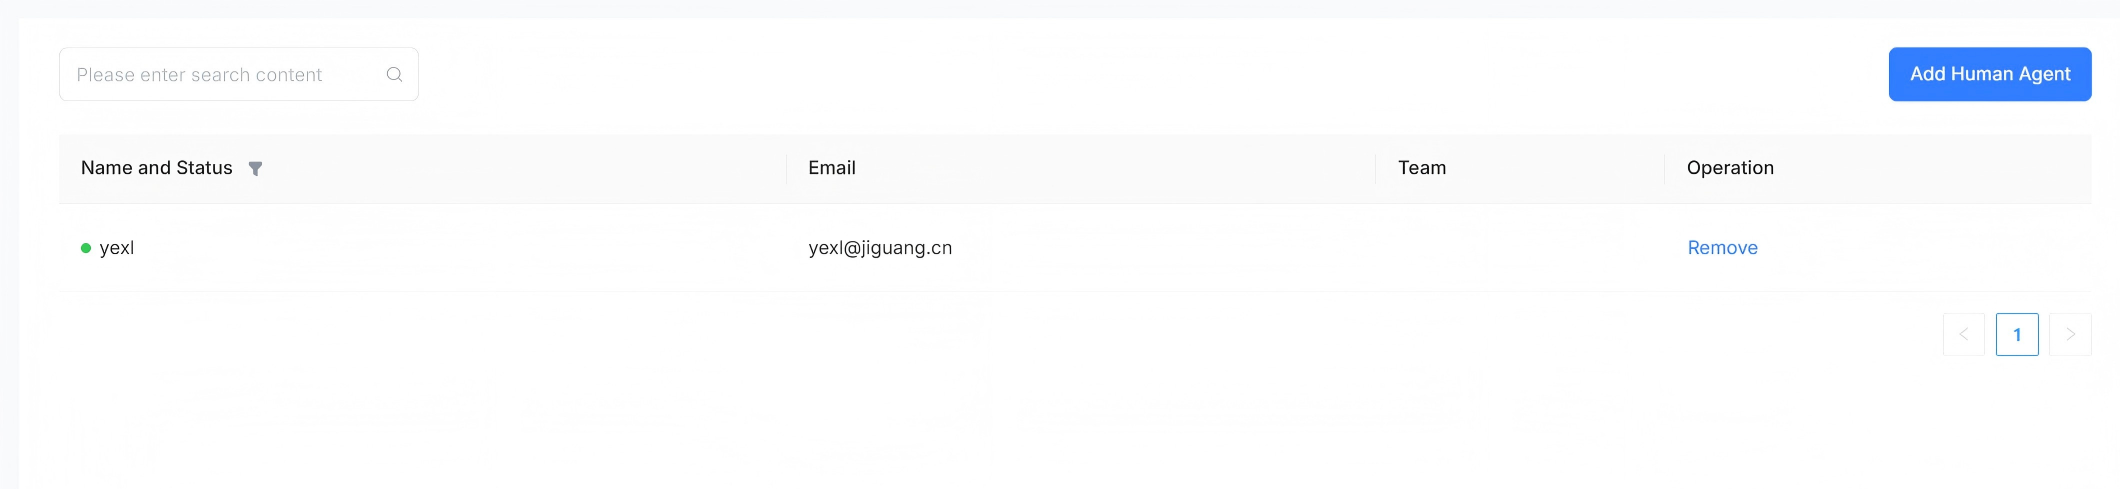
Human Agent
このチャネルの会話メッセージを処理するHuman Agentを設定できます。担当者の追加や削除が可能です。
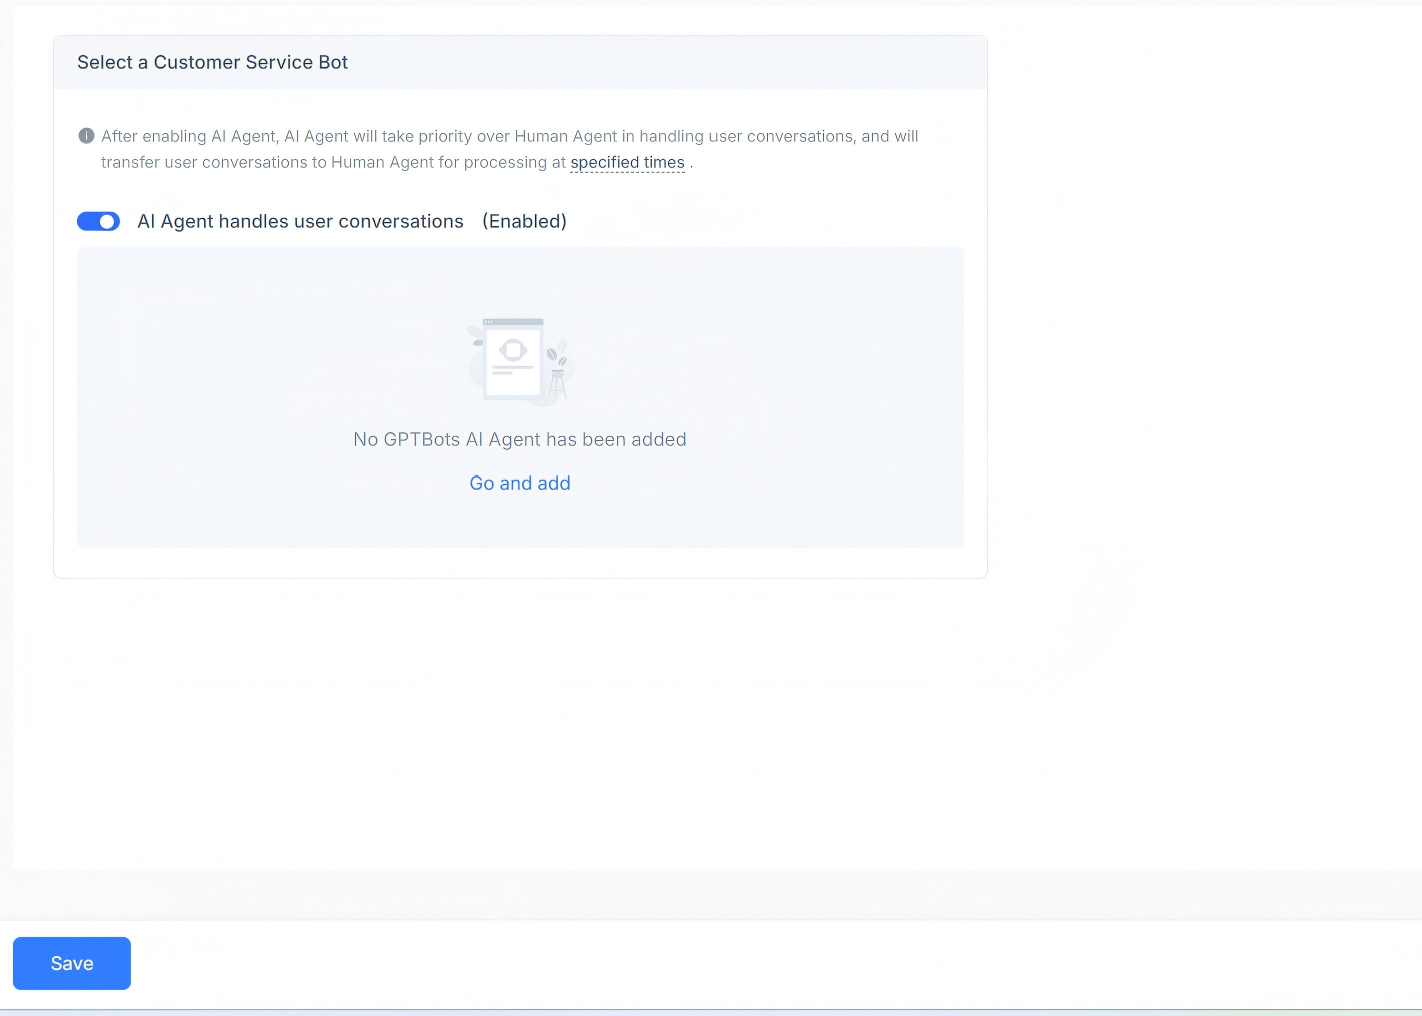
AI Agent
このチャネルの会話メッセージを処理するAI Agentを設定できます。有効化または無効化が可能で、GPT AI Agentを追加できます。
Business Hours
チームの営業時間を設定できます。
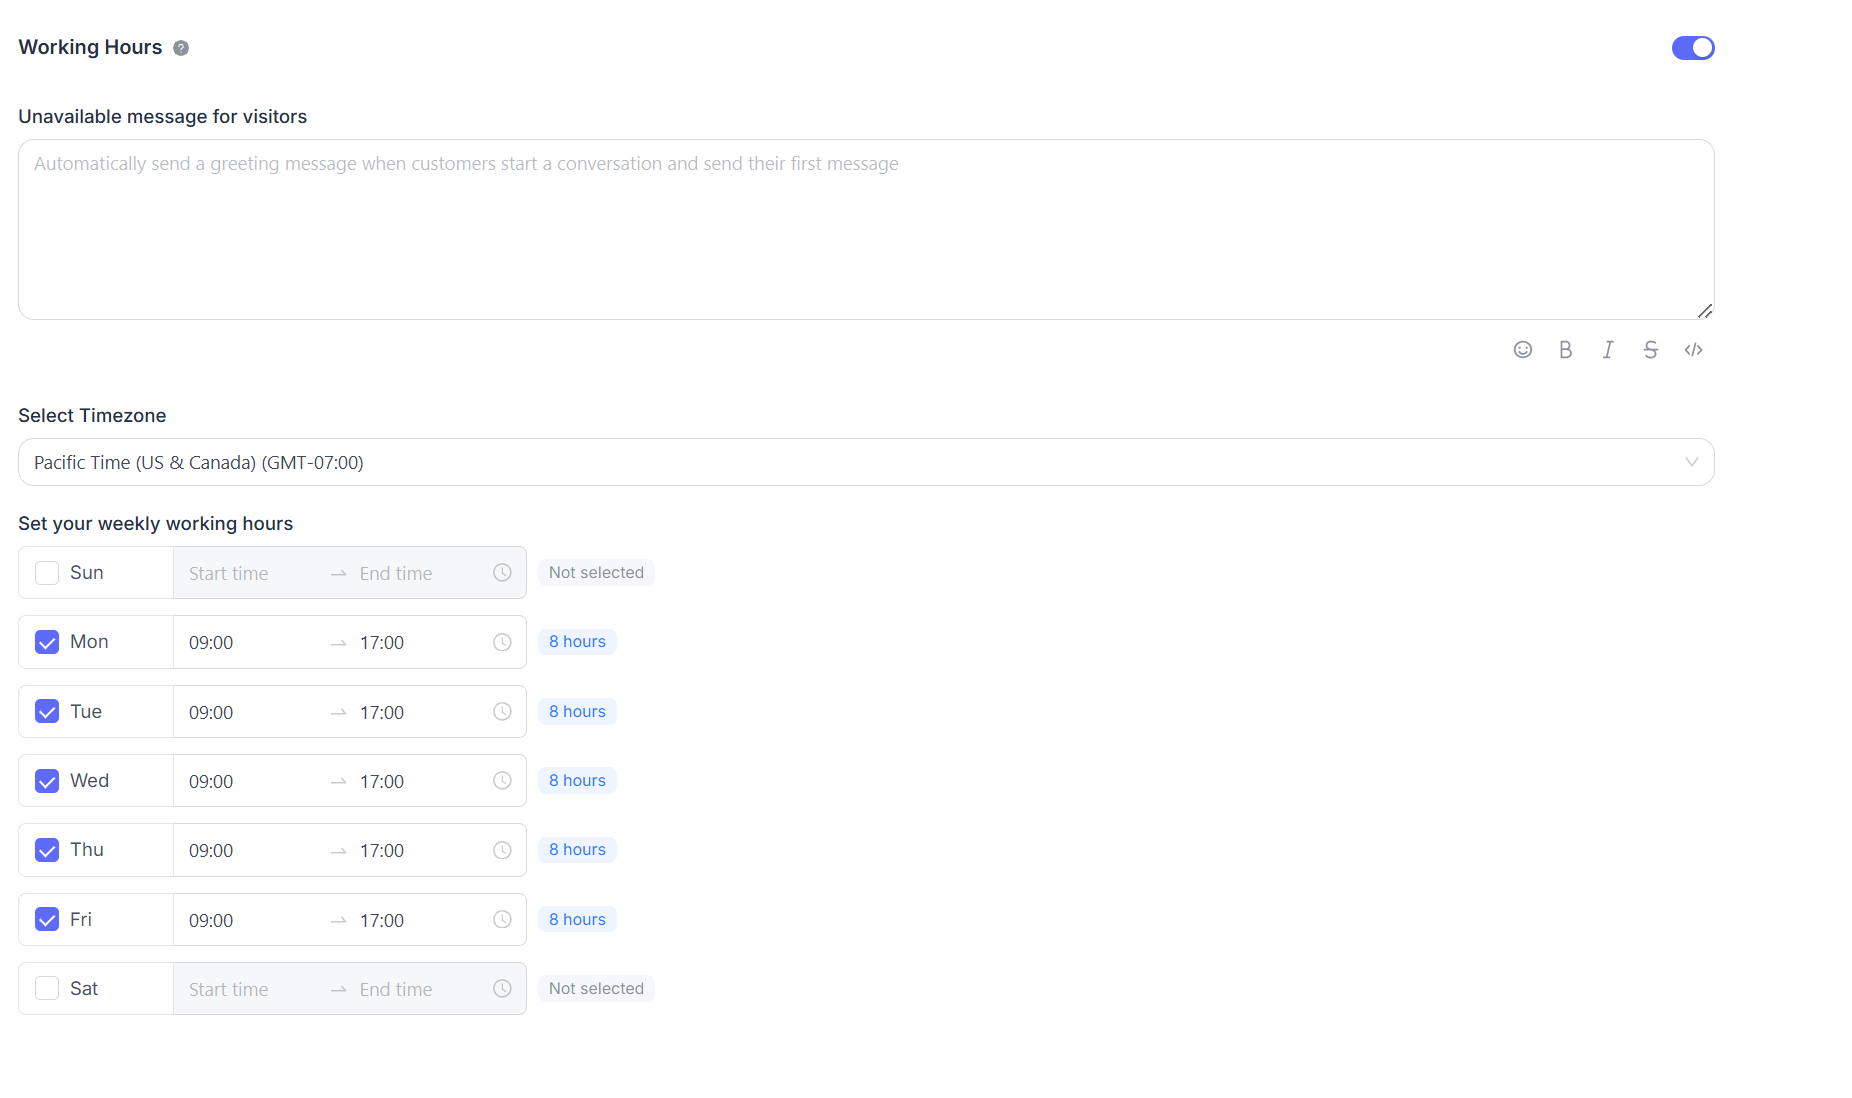
営業時間が明確に定義されている場合は、「Enable business availability for this inbox (enabled)」チェックボックスを選択します。このチェックボックスを選択すると、対応するパラメータ設定が下部に表示されます。営業時間外の訪問者向けに不在メッセージを設定できます。また、各曜日ごとに営業時間帯と対応するタイムゾーンを設定できます。